How I Automated Product Videography with AI (Step by Step n8n Tutorial)
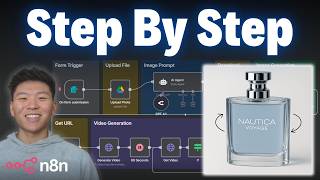
Dr. Violet Howard builds an n8n automation that converts product photos and descriptions into professional marketing videos. A form collects product info, GPT-4 generates an image prompt, OpenAI edits the photo, and Runway's Gen 4 Turbo creates a 10-second spinning 3D video, then emails both to the user.
Chapters
Okay, so all I have to do in this form submission is enter in a picture of a product, enter in the product name, the product description, and my email address. And we'll send this off and we'll see the workflow over here start to fire off. So we're going to upload the photo, we're going to get an image prompt, we're going to download that photo. Now we're creating a professional graphic. So after our image has been generated, we're uploading it to an API to get a public URL so we can feed that URL of the image into Runway to generate a professional video. Now we're gonna wait 30 seconds and then we'll check in to see if the video is done. If it's not done yet, we're gonna come down here and poll, wait 5 more seconds, and then go check in. And we're gonna do this infinitely until our video is actually done. So anyways, it just finished up. It ended up hitting this check 8 times, which indicates I should probably increase the wait time over here. But anyways, let's go look at our finished products. So we just got this new email. Here are the requested marketing materials for your toothpaste. So first, let's look at the video because I think that's more exciting. So let me open up this link. Well, we got a 10-second video. It's spinning, it's 3D. The lighting is changing. This looks awesome. And then of course, it also sends us that image in case we want to use that as well. And one of the steps in the workflow is that it's going to upload your original image to your Google Drive. So here you can see this was the original, and then this was the finished product. So now that you guys have seen a demo, we're going to build this entire workflow step by step. So stick with me because by the end of this video, you'll have this exact system up and running. Okay, so when we're setting up a system where we're creating an image from text and then we're creating a video from that image, The two most important things are gonna be that image prompt and that video prompt. So what we're gonna do is head over to my school community. The link for that will be down in the description. It's a free school community. And then what you're gonna do is either search for the title of this video or click on YouTube resources and find the post associated with this video. And when you click into there, there'll be a doc that will look like this or a PDF, and it will have the two prompts that you'll need in order to run this system. So head over there, get that doc, and then we can hop into the step-by-step, and that way we can start to build this workflow and you guys will have the prompts to plug right in. Cool. So once you have those, let's get started on the workflow. So as you guys know, a workflow always has to start with some sort of trigger. So in this case, we're going to be triggering this workflow with a form submission. So I'm just going to grab the native n8n form on new form event. So we're going to configure what this form is going to look like and what it's going to prompt a user to input. And then whenever someone actually submits a response, that's when the workflow is going to fire off. Okay, so I'm going to leave the authentication as none. The form title, I'm just putting Go to Market. For the form description, I'm gonna say, give us a product photo, title, and description, and we'll get back to you with professional marketing materials. And if you guys are interested in what I just used to dictate that text, there'll be a link for Whisperflow down in the description. And now we need to add our form elements. So the first one is going to be not a text. We're gonna have them actually submit a file. So click on file. This is gonna be required. I only want them to be allowed to upload one file, so I'm gonna switch off multiple files. And then for the field name, we're just gonna say product photo. Okay, so now we're gonna add another one, which is going to be the product title. So I'm just gonna write product title. This is gonna be text. For placeholder, let's just put toothpaste since that was the example. This will be a required field. So the placeholder is just gonna be the gray text that fills in the text box so people are kind of, they know what to put in. Okay, we're adding another one called product description. We'll make this one required. We'll just leave the placeholder blank 'cause you don't need it. And then finally, what we need to get from them is an email, but instead of doing text, we can actually make it require a valid email address. So I'm just gonna call it email, and we'll just say like name@example.com so they know what a valid email looks like. We'll make that required because we have to send them an email at the end with their materials. And now we should be good to go. So if I hit test step, we'll see that it's gonna open up a form submission, and it has everything that we just configured. And now let me put in some sample data real quick. Okay, so I put a picture of a Clone bottle. The title's Clone. I said the Clone smells very clean and fresh, and it's a very sophisticated scent. Because we're gonna have that description be used to sort of help create that text-to-image prompt. And then I just put my email. So I'm gonna submit this form. We should see that we're gonna get data back right here in our N8N, which is the binary photo. This is the product photo that I just submitted. And then we have our actual table of information like the title, the description, and the email. And so when I'm building stuff step by step, what I like to do is I get the data in here and then I pretty much will just build node by node, testing the data all the way through making sure that nothing's gonna break when variables are being passed from left to right in this workflow. Okay, so the next thing that we need to do is we have this binary data in here, and binary data is tough to reference later. So what I'm gonna do is I'm just gonna upload it straight to our Google Drive so we can pull that in later when we need it to actually edit that image. Okay, so that's our form trigger, that's what starts the workflow. And now what we're gonna do next is we wanna upload that original image to Google Drive so we can pull it in later and then use it to edit the image. So what I'm gonna do is I'm gonna click on the plus, I'm gonna type in Google Drive, and we're gonna grab a Google Drive operation that is gonna be upload file. So I'll click on upload file, and at this point you need to connect your Google Drive. So I'm not gonna walk through that step by step, but I have a video right up here where I do walk through it step by step. But basically you're just gonna go to Docs, you have to open up a sort of Google Cloud profile or a console, and then you just have to connect yourself and enable the right credentials. APIs. But like I said, that video will walk through it. Anyways, now what we're doing is we have to upload the binary field right here to our Google Drive. So it's not called data, we can see over here it's called product photo. So I'm just gonna copy and paste that right there. So it's gonna be looking for that product photo, and then we have to give it a name. So that's why we had the person submit a title. So all I'm gonna do is for the name, I'm gonna make this an expression instead of fixed, because this name is gonna change based based on the actual product coming through. I'm gonna drag in the product title from the left right here. So now the, the photo in Google Drive is gonna be called Cologne, and then I'm just gonna in parentheses say original. So because this is an expression, it basically means whenever someone submits a form, whatever the title is, it's gonna be title, and then it's gonna say original. And that's how we sort of control that to be dynamic. Anyways, then I'm just choosing what folder to go in. So in my Drive, I'm gonna choose it to go to a folder that I just made called Product Creatives. So once we have that configured, I'm going to hit Test Step. We're going to wait for this to spin. It means that it's trying to upload it right now. And then once we get that success message, we'll quickly go to our Google Drive and make sure that the image is actually there. So there we go, it just came back. And now I'm going to click into Google Drive, click out of the toothpaste, and we can see we have Cologne. And that is the image that we just submitted in N8N. All right, now that we've done that, what we want to do is we want to feed the data into an AI node so that it can create a text-to-image prompt. So I'm gonna click on the plus. I'm gonna grab an AI agent. And before we do anything in here, I'm first of all gonna give it its brain. So I'm gonna click on the plus under chat model. I'm personally gonna grab an OpenRouter chat model, which basically lets you connect to a ton of different things. Let me see, openrouter.ai. It basically lets you connect your agents to all the different models. So if I click on models up here, we can see that it just lets you connect to Gemini, Anthropic, OpenAI, DeepSeek, It has all these models and all in one place. So go to OpenRouter, get an API key, and then once you come back into here, all you have to do is connect your API key. And what I'm gonna use here is gonna be 4.1. And then I'm just gonna name this so we know which one I'm using here. And then we now have our agent accessing GPT-4.1. Okay, so now you're gonna go to that PDF that I have in the school community, and you're just going to copy this product photography prompt. Grab that, go back to the AI agent, and then you're gonna click on Add Option, Add a System Message, and then we're basically just going to, I'm gonna click on Expression and expand this full screen so you guys can see it better, but I'm just gonna paste that prompt in here, and this is gonna tell the AI agent how to take what we're giving it and turn it into a text-to-image optimized prompt for professional style studio photography. So we're not done yet. Because we have to actually give it the dynamic information from our form submission every time. So that's a user message. That's basically what it's going to look at. So the user message is what the agent's going to look at every time, and the system message is basically like, here are your instructions. So for the user message, we're not going to be using a connected chat trigger node. We're going to define below. And when we want to make sure that this changes every time, we have to make sure it's an expression. And then I'm just going to drill down over here to the form submission. And I'm going to say, okay, here's what we're going to give this agent. It's going to get the product which the person submitted to us in the form, and we can drag in the product, which was cologne, as you can see on the right. And then they also gave us a description. So all I have to do now is drag in the product description. And so now every time the agent will be looking at whatever product and description that the user submitted in order to create its prompt. So I'm going to hit test step. We'll see right now it's using its chat model, GPT-4.1, and it's already created that prompt for us. So let's just give it a quick read. Hyper-realistic photo of sophisticated cologne bottle, transparent glass, sleek minimalistic design, silver metal cap, all this. But what we have to do is we have to make sure that the image isn't being created just on this. It has to look at this, but it also has to look at the actual original image. So that's why our next step is going to be to re-download this file, and then we're going to push it over to the image generation model. So at this point you may be wondering, like, why are we going to upload the file if we're just going to download it again? And the reason why I had to do that is because when we get the file in the form of binary, we want to send the binary data into the HTTP request right here that actually generates the image. And we can't reference the binary way over here if it's only coming through over here. So we upload it so that we can then download it and then send it right back in. And so if that doesn't make sense yet, it probably will once we get over to the stage. But that's why. Anyways, next step is we're going to download that file. So I'm going to click on this plus. We're going to be downloading it from Google Drive, and we're going to be using the operation download file. So we already should be connected because we've set up our Google credentials already. The operation is going to be download. The resource is a file, and instead of choosing from a list, we're going to choose by ID. And all we're going to do is download that file that we previously uploaded every time. So I'm going to come over here, the Google Drive upload photo node, Drag in the ID, and now we can see that's all we have to do. If we hit test step, we'll get back that file that we originally uploaded, and we can just make sure it's the cologne bottle. Okay, but now it's time to basically use that downloaded file and the image prompt and send that over to an API that's going to create an image for us. So we're going to be using OpenAI's image generator. So here is the documentation. We have the ability to create an image, or we can create an image edit, which is what we want to do. Because we want it to look at the photo and our request. So typically what you can do in this documentation is you can copy the curl command, but this curl command is actually broken, so we're not going to do that. If you copied this one up here to actually just create an image, that one would work fine, but there's like a bug with this one right now. So anyways, I'm going to go into our n8n, I'm going to hit the plus, I'm going to grab an HTTP request, and now we're going to configure this request. So I'm going to walk through how I'm reading the API documentation right here to set this up. I'm not going to go super, super in-depth, but if you get confused along the way, then definitely check out my paid course. The link for that's down in the description. I've got a full course on deep diving into APIs and HTTP requests. Anyways, the first thing we see is we're gonna be making a POST request to this endpoint. So the first thing I'm gonna do is copy this endpoint. We're gonna paste that in, and then we're also gonna make sure the method is set to POST. So the next thing that we have to do is authorize ourselves somehow. So over here I can see that we have a header, and the name is going to be Authorization, and then the value is going to be bearer space our OpenAI key. So that's why I set up a header authentication already. So in authentication, I went to generic, and then I went to header. And then you can see I have a bunch of different headers already set up. But what I did here is I chose my OpenAI one, where basically all I did was I typed in here authorization, and then in the value, I typed in bearer space, and then I pasted my API key in there. And now I have my OpenAI credential saved forever. Okay, so the first thing we have to do in our body request over to OpenAI is we have to send over the image to edit. So that's going to be in a field called image, and then we're sending over the actual photo. So what I'm going to do is I'm going to click on send body, I'm going to use form data, and now we can set up the different names and values to send over. So the first thing is we're going to send over this image right here on the left-hand side, and this is in a field called data, and it's binary. So I'm going to choose, instead of form data, I'm going to send over an n8n binary file. The name is going to be image because that's what it said in the documentation. and the input data field name is data. So I'm just gonna copy that, paste it in there, and this basically means, okay, we're sending over this picture. The next thing we need to send over is a prompt. So the name of this field is gonna be prompt. I'm just gonna copy that, add a new parameter, and call it prompt. And then for the value, we wanna send over the prompt that we had our AI agent write. So I'm gonna click into schema, and I'm just gonna drag over the output from the AI agent right there. And now that's an expression. So the next thing we want to send over is what model do we want to use? Because if we don't put this in, it's going to default to DALL-E 2, but we want to use gpt-image-1. So I'm going to copy gpt-image-1. We're going to come back into here and I'm going to paste that in as the value, but then the name is model because as you can see in here, right there it says model. So hopefully you guys can see that when we're sending over an API call, we just have all of these different options where we can sort of tweak different settings, to change the way that we get the output back. And then you have some other options, of course, like quality or size. But right now we're just going to leave all that as default and just go with these 3 things to keep it simple. And I'm going to hit test step and we'll see if this is working. Okay, never mind, I got an error and I was like, okay, I think I did everything right. The reason I got the error is because I don't have any more credits. So if you get this error, go add some credits. Okay, so added more credits. I'm going to try this again and I'll check back in. But before I do that, I wanted to say me, clearly I've been like spamming this thing with creating images because it's so cool, it's so fun. But everyone else in the world has also been doing that. So if you're ever getting some sort of like errors where it's like a 500 type of error where it means like something's going on on the server side of things, or you're seeing like some sort of rate limit stuff, keep in mind that there's, there's a limit on how many images you can send per minute. I don't think that's been clearly defined on gpt-image-1, but also if the OpenAI server is receiving way too many requests, that is also another reason why your request may be failing. So just keep that in mind. Okay, so now it worked. We just got that back. But what you'll notice is we don't see an image here or like an image URL. So what we have to do is we have this base64 string and we have to turn that into binary data. So what I'm going to do is after this node, I'm going to add one that says convert to file. So we're going to convert JSON data to binary data. And we're going to do base64. So all I have to do now is show this data on the left-hand side, grab the base64 string, and then when we hit test up, we should get a binary file over here, which if we click into it, this should be our professional-looking photo. Wow, that looks great. It even got the wording and like the same fonts right. So that's awesome. And by the way, if we click into the results of the create image where we did the image edit, we can see the tokens. And with this model, it is basically $10 for a million input tokens. And $40 for a million output tokens. So right here you can see the difference between our input and output tokens. And this one was pretty cheap. I think it was like 5 cents. Anyways, now that we have that image right here as binary data, we need to turn that into a video using an API called Runway. And so if we go into Runway and we go, first of all, let's look at the price for a 5-second video, 25 cents. For a 10-second video, 50 cents. So that's the one we're going to be doing today. But if we go to the API reference to read how we can turn an image into a video, what we need to look at is how we actually send over that image. And what we have to do here is send over an HTTPS URL of the image. So we somehow have to get this binary data in N8N to a public image that Runway can access. So the way I'm going to be doing that is with this API that's free called imgbb. And, um, it's a free image hosting service. And what we can do is basically just use its API to send over the binary data and we'll get back a public URL. So come here, make a free account, you'll grab your API key from up top, and then we basically have— here's how we set this up. So what I'm going to do is I'm going to copy the endpoint right there. We're going to go back into AnyDen, and I'm going to add an HTTP request. And let me just configure this up. We'll put it over here just to keep everything sort of square. But now what I'm going to do in here is paste that endpoint in as our URL. You can also see that it says this call can be done using POST or GET, but since GET requests are limited by the maximum amount of length, you should probably do POST. So I'm just gonna go back in here and change this to a POST. And then there are basically two things that are required. The first one is our API key, and then the second one is the actual image. Anyways, this documentation is not super intuitive. I can sort of tell that this is a query parameter because it's being attached at the end of the endpoint with a question mark and all this kind of stuff. And that's just because I've looked at tons of API documentation. So what I'm gonna do is go into N8N. We're gonna add a generic credential type. It's gonna be a query auth. Where it was query, there we go. And then you can see I've already added my image BB, but all you're going to do is you would add the name as a key and then you would just paste in your API key and that's it. And now we've authenticated ourselves to this service. And then what's next is we need to send over the image in a field called image. So I'm going to go back in here, I'm going to send over a body because this allows us to actually send over any binary fields. And I'm not going to do any binary, I'm going to do form data because then we can name the field we're sending over Like I said, not going to deep dive into how that all works, but the name is going to be image, and then the input data field name is going to be data because that's how it's seen over here. And this should be it. So real quick, I'm just going to change this to get URL, and then we're going to hit test step, which is going to send over that binary data to imagebb, and it hopefully should be sending us back a URL. And it sent back 3 of them. I'm going to be using the middle one that's just called URL because it's like the best size and everything. You can look at the other ones if you want on your end, but this one is going to load up and we should see it's the image that we got generated for us. It takes a while to load up on that first time, but as you can see now, it's a publicly accessible URL and then we can feed it into Runway. So that's exactly our next step. We're gonna add another request right here. It's gonna be an HTTP, and this one we're gonna configure to hit Runway. So here's a good example of we can actually use a curl command. So I'm gonna click on copy over here when I'm in the Runway. Generate a video from image, come back into n8n, hit import curl, and paste that in there and hit import. And this is gonna basically configure everything we need. We just have to tweak a few things. Typically, most API documentation nowadays will have a curl command. The edit image one that we set up earlier was just a little broken. img2bb is just a free service, so sometimes they don't always, but let's configure this node. So the first thing I see is we have a header auth right here, and I don't wanna send it like this. I wanna send it up as a generic type so I can save it. Otherwise, you'd have to go get your API key every time you wanted to use Runway. So as you can see, I've already set up my Runway API key, so I have it plugged in. But what you would do is you'd go get your API key from Runway, and then you'd see, okay, how do we actually send over authentication? It comes through with the name authorization, and then the header is bearer space API key. So similar to the last one. And then that's all you would do in here when you're setting up your Runway credential authorization bearer space my API key. And then because we have ourselves authenticated up here, we can flick off that headers. And all we have to do now is configure the actual body. Okay, so first things first, what image are we sending over to get turned into a video? In that name prompt image, we're going to get rid of that value. And I'm just going to drag in the URL that we wanted, that we got from earlier, which was that picture I showed you guys. So now Runway sees that image. Next, we have the seed, which if you want to look at the documentation, you can play with it, but I'm just going to get rid of that. Then we have the model, which we're going to be using Gen 4 Turbo. We then have the prompt text. So this is where we're going to get rid of this. And you're going to go back to that PDF you downloaded from my free school and you're going to paste this prompt in there. So this prompt basically gives us that like 3D spinning effect where it just kind of does a slow pan and a slow rotate. And that's what I was looking for. If you're wanting some other type of video, then you can tweak that prompt, of course. For the duration, if you look in the documentation, it'll say the duration only basically allows 5 or 10. So I'm just going to change this one to 10. And then the last one was ratio, and I'm just going to make the square. So here are the accepted ratio values. I'm going to copy 960 by 960, and we're just going to paste that in right there. And actually, before we hit test step, I've realized that we're missing something here. So back in the documentation, we can see that there's one thing up here which is required, which is a header, x-runway-version, and then we need to set the value to this. So I'm going to copy the header, and we have to enable headers. I deleted it earlier, but we're going to enable that so we have the version. And then I'm just going to go copy the value that it needs to be set to, and we'll paste that in there as the value. Otherwise, this would not have worked. Okay, so that should be configured. But before we test it out, I want to show you guys how I set up the polling flow like this that you saw in the demo. So what we're going to do here is we need to go see, like, okay, once we send over our request right here to get a video from our image, it's going to return an ID, and that doesn't mean anything to us. So what we have to do is get our task. So that is the— basically, we send over the ID that it gives us, and then it'll come back and say like the status equals pending or running, or it will say completed. So what I'm going to do is copy this curl command for getting task details. We're going to hook it up to this node as an HTTP request. We're going to import that curl. Now that's pretty much set up. We have our authorization, which I'm going to delete that because as you know, we just configured that earlier as a header auth. So I'm just going to come in here and grab my Runway API key. There it is. I couldn't find it for some reason. We have the version set up and now all we have to do is drag in the actual ID from the previous one. So real quick, I'm just going to make this an expression, delete ID. And now we're pretty much set up. So first of all, I'm going to test this one, which is going to send off that request to Runway and say, hey, here's our image, here's the prompt, make a video out of it. And as you can see, we got back an ID. Now I'm going to use this next node and I'm going to drag in that ID from earlier. And now it's saying, okay, we're going to check in on the status of this specific task. And if I hit test step, what we're going to see is that it's not yet finished. So it's going to come back and say, okay, status of this run or status of this task is is running. So that's why what I'm gonna do is add an if, and this if is going to be saying, okay, does this status field right here, does that equal RUNNING in all caps? Because that's what it equals right now. If yes, what we're gonna do is we are going to basically wait for a certain amount of time. So here's the true branch. I'm going to wait, and let's just say it's 5 seconds. So I'll just call this 5 seconds. I'm gonna wait for 5 seconds, and then I'm gonna come back here and try again. So as you saw in the demo, it basically tried again like 7 or 8 times. And this just ensures that it's never going to move on until we actually have a finished photo. So what you could also do is basically say, does status equal completed, or whatever it means when it completes. That's another way to do it. You just have to be careful to make sure that whatever you're setting here as the check is always 100% going to work. And then what you do is you would continue the rest of the logic down this path, once that check has been complete. And then of course, you probably don't want to have this check like 10 times every single time. So what you would do is you would add a wait step here, and once you know about how long it takes, you'd add this here. So last time I had it at 30 seconds and it waited like 8 times, so let's just say I'm going to wait 60 seconds here. So then when this flow actually runs, it'll wait for a minute, check. If it's still not done, it'll continuously loop through here and wait 5 seconds every time until we're done. Okay, there we go. So now status is succeeded, And what I'm gonna do is just view this video real quick. Hopefully this one came out nicely. Let's take a look. Wow, this is awesome. Super clean. It's rotating really slowly. It's a full 10-second video. You can tell it's like a 3D image. This is awesome. Okay, cool. So now if we test this if branch, we'll see that it's gonna go down the other one, which is the false branch, because it's actually completed. And now we can with confidence shoot off the email with our materials. So I'm gonna grab a Gmail node, I'm gonna click send a message, and we are going to have this configured hopefully because you've already set up your Google stuff. And now, who do we send this to? We're gonna go grab that email from the original form submission, which is all the way down here. We're gonna make the subject, which I'm just gonna say marketing materials, and then a colon, and we'll just drag in the actual title of the product, which in here was cologne. I'm changing the email type to text just because I want to. We're going to make the body an expression and we're just going to say like, hey, here is your photo. And obviously this can be customized however you want, but for the photo, what we have to do is grab that public URL that we generated earlier. So right here, there is the photo URL. Here is your video. And for the video, we're going to drag in the URL we just got from the output of that runway get-task check. So there is the video URL, and then I'm just going to say cheers. Last thing I want to do is down here append n8n attribution and turn that off. This just ensures that the email doesn't say this email was sent by n8n. And now if we hit test step right here, this is pretty much the end of the process, and we can go ahead and check. Uh-oh, okay, so not authorized. Let me fix that real quick. Okay, so I just switched my credential because I was using one that had expired. So now this should go through and we'll go take a look at the email. Okay, so did something wrong. I can already tell what happened is this is supposed to be an expression and dynamically come through as the title of the product, but we accidentally somehow left off a curly brace. So if I come back into here and add one more curly brace right here to the description— or sorry, the subject— now we should be good. I'll hit test step again and now we'll go take a look at that email. Okay, there we go. Now we have the cologne and we have our photo and our video. So let's click into the video real quick. I'm just so amazed. This is, this is just so much fun. It looked— the lighting and the reflections, it's all just perfect. And then we'll click into the photo just in case we want to see the actual image. And there it is. This also looks awesome. All right, so that's gonna do it for today's video. I hope you guys enjoyed this style of walking step-by-step through some of the API calls and sort of my thought process as to how I set up this workflow. If you're interested in more step-by-step styles or you like the way that I teach, then definitely check out my paid community. The link for that's down in the description. Like I said, we've got a great community of members that are doing so much stuff with AI automation with N8N. So a great place to learn and collaborate, as well as we have a full classroom section with deep dive topics like APIs, vector databases, classroom on building AI agents. And then I'm right now working on two courses, which is like for beginners to start here, understand the foundations of LLMs and APIs and all this kind of stuff. Before you hop into this course called 10 Hours to 10 Seconds, where you learn how to identify, design, and build time-saving automations. So anyways, I'd love to see you guys in the community. We also have 5 live calls per week, but that's gonna do it for this video. Really appreciate you guys, as always, making it to the end of the video. If you enjoyed this or you learned something new, please give it a like. Helps me out a ton, and I'll see you all in the next one. Thanks, everyone.










