How to Build a Client Onboarding AI Agent with n8n (Step-by-Step Tutorial, No Code)
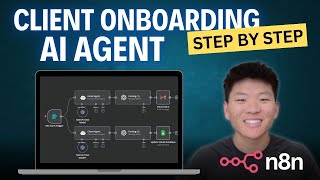
Dr. Violet Howard builds a no-code client onboarding workflow in n8n using OpenAI agents to generate welcome emails and client summaries, then sends them via Gmail and logs them to Google Sheets. The setup uses GPT-4 for writing and 4-mini for parsing JSON outputs from the agents.
Chapters
In this step-by-step tutorial, I'm gonna be walking through how to build this workflow where we're gonna be utilizing two different agents in order to get rid of some of the tedious and time-consuming stuff that comes along with onboarding a new client. By the end of this video, you'll have this workflow up and running, and you can do so with using absolutely zero code. So let's not waste any more time. Let's just hop straight into this video. Okay, so this workflow is gonna be taking client information as we're onboarding them, and it's going to do two things. The first one is that it's going to automatically send them an email that's a kind of like a warm welcoming message, welcoming them to the partnership, that sort of thing. And then the second one is that it's going to take their client profile, give a nice summary, and put it into a spreadsheet for us automatically so we can see all of our new clients in one consolidated place. So with that being said, the first step that we're going to do here is going to be an N8N form trigger. So the idea is that you would, as you're onboarding a client, you would say, hey, can you fill out this form real quick? They'll fill out this information and then After they submit the form, all of this other stuff will just happen automatically. So within this NNN Form Trigger node, we can see we've got the URL. That's what you're going to be able to send to the client in order for them to fill it out. We can leave the authentication at none. And then for the form path, we don't really have to change this, but I'm just going to call it demo for this video. As you can see, it made the URL appear a lot shorter, a lot easier to look at. And then we need to just configure the form itself. So the title, we'll just go with client onboarding. For the description, we will say, um, please fill out the required fields. And then we have our labels to set up. So for this first one, we'll just say like name. We want their full name, obviously. And then the placeholder, we can say your name. And we want to make this a required field because if they don't fill it out, then that kind of stinks because we don't know their name. So I'm going to fill out a few more fields here and then I'll be back in a sec. Okay, so we've got the fields filled out. We've got name with the placeholder of your name. That's just gonna be kind of like a grayed-out area where they'll see an example of what they should fill out. You'll see in a second when we look at the form. Email, your email. Company industry, example finance. And then what are you hoping to achieve through our partnership in the next 3 months? And you can see all 4 of those are required fields. And then at the end, I just threw in anything else we should know, and it's not required. You know, the more information the better, but they don't have to fill that out. And then we want to respond when form is submitted. That's when the workflow will trigger. And then at the end, I just like to click on Options, Add Option, Append N/A to an Attribution, and then just turn that off. It just makes the form look a little cleaner. So that should be it for this node. If we hit Test Step, it'll pull up an example form for us. And as you can see, we've got the 4 required fields here with their placeholders, and then we have the last one at the bottom. So I'll fill this out real quick so we can get some data to run through this as an example. Okay, so here's the information I'm going with. We've got my name, one of my emails, finance is the industry, um, he wants to increase revenue by 217%, and then he doesn't want to be contacted after 6 PM or on weekends. So we'll submit this form and response has been recorded. We can see over here, this is the information that came through this node into the form. So we've got the name, email, industry, all the information, and then we've also got submitted at and the form mode. So this is the information that's gonna come through every time a new client fills out the form. So we're just gonna pin this data. If you click on this pin up here, the data is pinned. So that just means that as we're testing every other node in this workflow, this'll be the example data that we'll be parsing through each node. So that just helps a lot with, you know, troubleshooting and all that kind of stuff. So next we're gonna add our first AI agent, so we can do this by clicking on the plus typing in AI agent, and we can click right here. So this guy is going to be the one that is making that warm welcome message for the client. So we need to distinguish what type of agent this is gonna be. We've got tools, conversational, OpenAI, and 3 more. We're gonna do conversational because we're not actually giving this agent access to tools. We're just having it take data from the form over here and then outputting, um, an email for us. So we're gonna click on conversational. We also want to prompt it not from the node previously. We want to prompt it with something that we define. So we'll click on that and I'm going to type in this prompt real quick and I'll be back in a sec. Okay, so we've got our prompt here. This side is what I typed in and then the right is the result. So as you can see, the green is the only stuff that changes. These green variables with the double curly brackets just mean that it's a JavaScript variable and that just means that we're pulling in this information from over here. So that this stuff will change every time there's a new client. So I said, can you please create a warm email, warm welcome email for a new client based on their information? We want the email to be concise and friendly, but also professional. It should be personalized to them based on their industry and what they're hoping to get out of our partnership. And then we gave it information about the client. So the name, Nate Hurk, email, natehurk88@gmail.com, industry, what they're hoping to achieve. And that's the information that it's going to be using to write the email. So then at the bottom we said make sure to always sign off the email from Bob Bob. This is where you put your name, the company, and the position. So you can clarify that stuff because otherwise it's going to throw in variables like this. So I said don't throw in variables for the sign-off if information is unknown. We don't ever want your name or your contact information in the email because that would look super unprofessional if, you know, clients are getting an email where there's like a variable that clearly wasn't filled in. So we want to make sure that that does not happen. And then finally, we want the information output into 3 different fields. We want the subject for the email subject, the body for the email's body, and then the email, which will be variable based on what they enter in the form. So actually, we didn't need this part up here. I can just delete that because that's repetitive. So we've got this. So now let's test the step and see what we're working with. Okay. As always, you need to connect the chat model to the agent. You need to give it a brain. So Let's do that. Otherwise, it's not going to work. So OpenAI, we're going to select our credential. If you don't know how to set it up, you just got to go to OpenAI, grab an API key, super easy, and then copy it into here. And then I'm going to grab 4.0. I'm grabbing 4.0 for this, this guy's brain because 4.0 is kind of like the most consistent that I found at least. And we're asking it to, you know, take information and make an email. So I want the best model rather than if I was just, you know, parsing information or labeling. I would maybe use a 3.5 or a 4.0 mini because it's a little more cost effective and they don't need to be as powerful. So that's why I'm using 4.0 here. So now we should be able to test this agent and see what it is giving us as an email. So on the right-hand side, let me go to table mode. No, we'll just stay in, we'll stay in JSON. Okay. So here's the information we've got. Um, we've got the subject, welcome to ABC Corp, Nate, the body, Dear Nate Hurk, I hope this message finds you well. On behalf of ABC Corp, I'm excited to welcome you as a new client, blah, blah, blah. As you can see, it's pretty personalized. We've got, you know, increasing revenue by 217%. So it seems like a human actually wrote this. And then at the bottom we've got warm regards, Bob Bob, internal relations, ABC Corp. So there's no, you know, square bracket variables. So that looks good to go. And I think we're ready to move on to the next note here. So the next thing that we want to do is we want to get those 3 different parameters, you know, subject, body, and the email. We want to get that actually into 3 different parameters. So I'm going to add an OpenAI node. We're going to grab this OpenAI node and we're going to do a text action of message model. So we'll grab this same thing. You need to set up your API key in order to be able to access OpenAI. But this time we won't use 4.0. Like I just said, we want to— oh, we'll keep it as message model. Sorry. For the model though, we're not going to use 4.0. We're going to use I'm going to use Forum Mini. And just like I said, because we're just going to be parsing information here rather than generating information. So I'm going to quickly write the system prompt and then I will be back. Okay, so that didn't take long. I wrote parse the JSON query, which is going to be this output over here from the AI agent and output the parameters separately. So then I just outlined what the parameters are just in case, more consistent. We've got subject, body, and email. And then make sure that's a system prompt because we're telling this OpenAI node how to act. So that's a system prompt. And then for the second message, we'll leave it as user. And we actually have to give it this information to parse. So we'll just drag in the output string from over here. We can see the subject body and the email that we have. And we can test this step. So before you test it, make sure you turn on output content as JSON. That just makes it, you know, it actually separates it into the 3 fields. So we've got it separated with the subject. The body of the email, and then the email that we're going to be sending it to. So this information looks good, looks like it passed through this node correctly. Now let's move on to the next step. So the next thing we want to do here is we want to actually add the Gmail node that we'll be using to send the email. So we'll click on the plus, we'll type in Gmail, and as you can see, 25 different actions. But all we want to do here is we want to send a message. So you'll have to connect your Gmail account. Once you do that, we've got You know, the resource is going to be a message. We're going to be sending a message. Here is where the magic happens. So for to, we're going to grab email. You know, that's who we're sending it to based on what they filled out in the form. The subject will be grabbing the subject from that previous node. And email type, I'm going to make that a text. And then for the actual message, we will grab body. So we've got the email configured. And then for options, we want to go in here and do the same thing. Append N8N attribution and then turn that off just doesn't add that little message at the bottom that says that this email was generated by N8N or sent by N8N. So we're going to go ahead and test this step here. Um, the OAuth client was deleted, so that just means that I didn't actually set up this credential correctly. So I'll do that real quick and I'll be right back. Okay, got my account back and connected. Now let's try that again. So we test the step, we see that it went through, it says that it was sent. We'll go into my email and we can see we just got this email. So from upatdigital@gmail.com, dear Nate Hurk, I hope this message finds you well. On behalf of ABC Corp, I'm excited to welcome you as a new client. At ABC Corp, we understand the goal of increasing revenue by 217%. We're committed to supporting you in achieving this ambitious target. Our team is eager to provide the tools, insights, and strategies necessary to help your company succeed. So obviously you could give, you know, the AI agent more information based on what exactly your company does and whatever else that the, the client form is filling out. But as you can see, it's very professional. Once again, welcome aboard, warm regards, and none of this is, um, a variable. So all of this is, you know, Bob Bob, VP of Relations. So that email sent off correctly, and that is it for this first part of the workflow. So like I said, 2 agents. This first one was doing its job of sending a nice automatic warm outreach message. So now second part of the workflow, we want to automatically have a client profile summary put into a database of new clients. So Let's click on the plus button and we're going to add another AI agent. So what's great here is that we already have this information coming in from the form. So we're saving a little bit of time on this step here already. But this is again going to be a conversational agent because we're not giving it access to any tools. Same step here. We're not going to be taking from the previous node. We are going to be defining below. So I'm going to type in this prompt real quick and I'll be right back. Okay. So I filled out a brief prompt here and I'm just going to drag in the information. So take the client information provided and create a summary of their client profile. Here is a client's information. So we're giving the name, we're giving the company industry, we are giving what they're hoping to achieve, sort of similar to the email tool or the email agent earlier. And then we want it to output the, output the following parameters. So once again, we want the name to be output, we want the email to be output. Sorry about that. And then the summary is going to be output, which is a summary of the client based on their information. So unlike last time, I'm going to hook up the brain before we try to test it. We're going to grab an OpenAI chat model. And once again, same exact reasoning as last time, we're sort of making a summary. So I want to use 4.0. And then we're going to delete this trigger because we've got the actual trigger of the form submission. So let's test out this agent here. Okay, so we've got the name, Nate Hurk. Email. That's nice. And then we've got the summary. Nate Hurk is from the finance industry and their goal is to increase revenue by 217%. So obviously in this case, like you really could see that easily based on the form. But if clients are in here and you've got, you know, a ton of different fields for them to fill out and they're, you know, typing a paragraph within their, what they're hoping to achieve and they give you a very detailed, this will give you a nice summary and it's automatically gonna push into a database for you. So next step, again, same thing as up here, very similar workflow. We're gonna grab an OpenAI node and we're going to need to parse the information. So we're gonna grab a TextActions message model, set up our credentials. Exact same reasoning here why I'm not gonna use 4.0. I'm gonna use 4.0 mini because we're just sort of parsing information. And let me write this system prompt real quick and I'll be back. You guys should have the hang of this by now. This is a very similar workflow to that first agent one that we built, but we said parse the JSON query into 3 separate fields, name, email, summary. Pretty simple. That's a system prompt. The next message is gonna be user prompt. We're just dragging in the actual information from that previous agent. As you can see, we've got the JSON output there and it is going to parse this information for us as long as we click output content as JSON. So let's test this step here. And as you can see, we've got 3 separate fields, name, email, and summary that we'll be able to drag into the next node. Okay, so now we're going to connect a Google Sheets node. This is going to be the database that I'm going to be using in this case for our new clients. So we've already got the spreadsheet here. This is the one I just called it New Clients. I've got 3 columns: name, email, summary, and that's where we're going to populate this information into. So let's go back to N8N. We don't need to create a sheet, we just need to append row in sheet. So we'll grab that, we'll hook up our credentials, and we're going to do a sheet within a document and append a row. So we've got the doc called New Clients and there's only one sheet in there. So we'll grab the sheet, Sheet 1. And now we need to map our columns. So this is basically saying, you know, these are the columns that we have in Sheets. And I know it looks a little confusing because they're named the exact same, but in Sheets we have the columns of Name, Email, and Summary. And it's asking us what do we want to put into each column. So it's pretty easy enough here. We've got Name. We want to put the client's name. We've got email, we want to put the client's email. And then finally, we've got the summary about what the client's profile is like, and we'll put that summary into there. So we should be good here. I'll click test step, and I will click on the Google Sheet, and we will see that this information should populate right in here. So perfect, Nate Hurk, we got the email, and then we've got the summary about this new client. So as you can see, if you were just checking the sheet, you could sort of see, you know, your new clients come in and you could get quick summaries about, you know, what, what their profile is like so that you can assign them the right help. But that's just sort of how this step is working. Yeah, so at this point you could, you know, get a little more, um, complicated from here if you wanted to link these up to, you know, a WhatsApp node or a Discord node. You could link it even to an email that sends back, sends back to you any way that you want to, you know, notify yourself that the welcome message has been sent or they've been updated in the database. That's what you could do. But for now, that's— I just wanted to keep this video very simple. It's 3 nodes per task, and we have 2 agents within the same workflow of every time this form is being triggered. So let's give this a save and let's actually test this out again. So I went into our N8N form trigger node and I unpinned the data because we had that pinned to test. Now we are going to test the workflow based on this actual information. And so this form will pop up and we will fill in information here. So let's go with something else. Let's go with, um, John Bob. I don't know why I keep using Bob. The email, I'm just going to use that same one because we want to be able to see if it worked. And then let's go industry, let's do something like technology. And then let me write a ton of information in these two fields so you guys can see how they come out. Okay, so I filled in this information and I wrote, I have a background in sales. I enjoy spending time outside. I like to talk on the phone rather than text. I'm going to submit this, but I realized that I forgot to add this variable into our agent that pushes the data into our Google Sheets. So we'll test this and then we will update that, that node, and then we'll come test it again. So let's just see what happens. So we submit the form. It's going to go through this workflow first, talk to this agent. It just made the message. Now it's parsing the message, and after that's done, it's gonna send the email. Now we're going down to this agent. It just got the summary, parsed the summary, and it should throw that into our sheet. So let's first go to my email. We should see, welcome to Streamlined Future, John. Welcome aboard. We're thrilled to embark on this journey. Um, so at our automation agency, we understand the challenges you're facing in the technology sector. Time-consuming process, high costs. Need to stay competitive without getting bogged down. You'll find our approach is tailored to address your specific pain points, will help you automate repetitive tasks, enhance lead generation and client management. So it took that long paragraph and it addressed those issues for him in here. And now we'll look at the new client's workflow. Let me just wrap this text real quick. We can see John Bob, we got the email and it says John Bob, who works in the technology industry, is seeking to streamline his company's process through automation. He's looking to reduce time and costs associated with repetitive tasks and outdated tools while ensuring the solution is simple enough for his team to use without excessive training. Ultimately, he aims to set up a scalable system that aids in business growth and keeps the company competitive. He desires a partnership with an AI agency that comprehensively understands their needs and can implement AI tools for automation, lead gen, client management. So that's an example of how this sort of, you know, makes a summary of that long-form response. And now let me just show you guys real quick. Let's add back in what I was talking about. We gave this guy access to what they're hoping to achieve, industry and name, but we didn't throw in the anything else. So let's throw in anything else real quick. We'll just call it additional information. And yeah, here you can see that long chunk of text that I typed, but additional information, and then we'll drag in anything else. So now it would have said I have a background in sales. I enjoy spending time outside. I like to talk on the phone rather than text. So let's put this information back into that form and let's send it again and see what different results we get. Okay, huge chunk of text here. Again, this one's for Mr. AI in the beauty industry. So I changed up this prompt a little bit and then same thing with anything else we should know. But let's submit this form and let's see what happens this time. So same thing, it's gonna go through, make the email. Parse it, send off the Gmail. Now it's going to the agent. It's making a summary, parsing that summary, and then it's putting it into the sheets for us. So let's hop over to our email and let's look at this one. Welcome to a new era of efficiency. Welcome to ABC Corp. We're thrilled to have you joining us. We understand the unique challenges you face, whether it's juggling repetitive tasks like scheduling appointments, managing inventory, or personalizing efforts. Our solutions, blah, blah, blah. Rest assured you don't need to be a tech genius. Okay, so I adjust our stuff there. And then in new clients, let's wrap this text again. We've got Mr. AI is the owner of a beauty business who is seeking to partner with AI automation to streamline operations. He finds himself overwhelmed by repetitive tasks such as scheduling appointments, customer inquiries, inventory management, tracking client preferences. These tasks are taking time away from his ability to focus on growing his brand, working with clients, launching new products, all this kind of stuff. He wishes to create a seamless and VIP experience for his clients through easy booking and personalized recommendations. He seeks to use easy-to-use AI systems. I don't want to read that whole thing. Don't want to bore you guys. But as you can see, this time it took, you know, oh, at the bottom. Yeah. He prefers phone communication over texting and enjoys spending time outdoors. So we can see that it actually did take that information. Let's click on the expression and we can see that it grabbed information about, you know, spending time outside and then it put it into the summary that we got over here. So yeah, that is sort of how this one works. And I know that this one was a little more of a simple workflow, but, um, you know, it's open-ended with the way that you can connect more nodes over here and even connect more agents out of this form and do as much stuff as possible when you're onboarding a client. You know, you can send them an automatic, um, terms and conditions PDF that they could, you know, read through. You could automatically, you know, send them an invoice, that sort of stuff. So if you're interested in seeing how you could expand off of a client onboarding form trigger like this, please let me know in the comments. But otherwise, let me know what other stuff you guys want to see. But that's it for today's video, so thanks guys.










