How to Connect Slack to n8n (2025) (Step-by-Step)
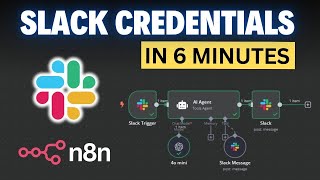
Dr. Violet Howard shows how to connect Slack to n8n by creating a Slack app, configuring OAuth 2.0 scopes, and setting up a trigger that pipes incoming messages to an AI agent and sends responses back to Slack.
Chapters
So this is the quickest and easiest way to connect Slack to Anyven. So I'm setting up a new Slack workspace so you guys know I'm walking through every single step. So I just gave it a name, I'm giving it my name, I don't need to invite anyone else, I'm creating my first channel, and I'm starting with the limited free version. Okay, so now that we have this connected, all we have to do is come down here to the apps and click on add apps. Now we're gonna go to browse apps. So this pulls up our Slack workspace's app section where we can click on build, we can click on your apps, and then we're able to create a new one. Okay, so here we are. You can ignore these other apps that are assigned to a different workspace. You can also get here by going to api.slack.com/apps, and now we're just gonna click Create New App. We're gonna start building one from scratch. We're gonna give this app a name and assign it to a specific workspace. So here you can see I'm assigning it to the workspace I just made. We're gonna hit Create App, and then it pulls up this configuration panel. And now it may look like there's a lot going on, but we're gonna break it down. It's not too difficult. So first, I just wanted to talk about, we have two things that we're gonna connect here. One is going to be a trigger that's gonna be listening to our Slack channel, and one is just gonna be the ability to send messages to a Slack channel. So if we click into the Send Message one first, and we go up here to create a new credential, we can see that we can just sign in with OAuth 2.0. So if I click Connect My Account, it's gonna pull it up right here, and it's gonna have a message saying, here's like what n8n wants to have permission to within your Slack workspace. I'm also gonna change the workspace to the one we just made. And now you can see these are the different permissions. All I have to do is click Allow, and we will have connected successfully. And there we go, we get two green messages. And I wanna verify that by clicking into the channels. However, we can't see them yet. So the reason why it doesn't work yet is because we haven't given it permission. Okay, so back in this page, what we want to do is we want to come down here to OAuth and Permissions, and we want to scroll down to Bot Token Scopes. We're going to add an OAuth scope, which we will have @mentions read. We also want to do channels read. We can do other things like channels join. We can do chat read, chat write. This is basically just telling Slack and telling n8n what they can do. I'm going to leave it with these scopes for now, but you can get in there and basically customize what you want this bot to be able to do. So now that we have this set up, we can scroll up a little bit and we can see right here, we can install to Awesome AI Stuff, which is just the workspace that I just made. We want to allow it to go into our workspace. And now it is in there and we have a bot user OAuth token. And so that's the other way you could have verified your account if you copied this token and you came back into Slack. And if we were to create a new credential, you could do an access token rather than the OAuth. If I show you guys that right here and we hit save, and now we are going to be once again connected. And now we can click in here and see our channels. And for example, we can go to the YouTube channel, send a message of hi. And what you're gonna see is that we have this error, not in channel. So this just basically means that our app isn't in that YouTube channel yet. So now back in our Slack, we basically have to invite that app that we just made into this channel. So I'm gonna do @testing because this is the app that we just made, and I'm gonna say hi. And then it's gonna prompt us to invite the app to the channel. So I'll just click add them. Now they have been added. We can go back into Slack, hit test step, and it should be able to send that message in our channel because we've now added the user and he is saying hi. Okay, cool. So that's sending messages. Now let's talk about how we can set up this webhook over here so that we can have a workflow trigger from Slack. So we'll click into here and we can see that we have the same access token already configured, but now we have to configure the webhook. So what we're gonna do is click this webhook real quick to copy it to our clipboard. We're gonna go back into the nasty page of OAuth and permissions we were looking at, but now we're gonna go to event subscriptions. So right below OAuth and permissions, and we want to enable events. What we're gonna do is paste in that webhook right here that we just copied, and now it's gonna verify it. So back in n8n, I'm quickly just gonna choose a channel. So we'll choose YouTube because we already know that our testing app is in there. We'll hit test step. So now this, this trigger's listening. And then if we go back into here and we hit retry, now it's gonna be verified. So we should be good to go now. And what we wanna do is open up this panel that says subscribe to bot events, and we can add a bot user event that basically just says, when does this workflow actually trigger? For now, let's just choose @mention. So this just means if we ever are in Slack and we say, hey, you know, I want to talk to our N8N, I'm gonna do @testing and then I'll be able to talk. So we're gonna save those changes. So we'll go back into N8N. We can see that our Slack trigger is listening for us. And now if we go into the channel and we say @testing hello, send that off, it's going to be sent to N8N right here. It just got the message. And if we scroll over, we can see the text was hello. So pulling it all together, when we mention our app in the Slack channel, it'll trigger this workflow. We can feed that into something like an AI agent where we're just gonna drag in the text that we send. So right here in this case, I'm dragging in that variable from the left Slack trigger into the prompt user message so the agent can look at it. And in this case, it's looking at the text, hello. And then what we wanna do is we want to configure on this right-hand side the response from the agent back to Slack. So if I just run this quick node, the agent will respond with, hello, how can I help you today? And if we open up the Slack message, we can respond with what the agent responded to us with. So if we drag in the agent's output right here as the message text and we hit test step, we can see that that message will be sent over to Slack. And in this case, it just said, hello, how can I help you today? So let's just do a full live run. Now that we have everything set up, we're going to hit test workflow. So Slack is listening for us. I'm going to come into here. We're going to the testing app and say, tell me a joke. and then as soon as I send this off, we're gonna go back in here. We'll see this message come into Slack, hit the agent, and respond to our Slack channel. And if we switch back in here, it says, why don't scientists trust atoms? Because they make up everything. Real quick, last thing I wanted to mention is that what we did in here is we put in our URL, which was a webhook test URL, meaning if we were to come in here and make this workflow active, it would no longer be working because this trigger is going to switch over to the production URL. So whenever you do go to make this workflow active, all you have to do is that exact same step we did. We're gonna click this, copy it, change the URL, paste it in here, and let it verify, and then you'll be good to go. So that's really all there is to it. If this video helped you out, please give it a like. Definitely helps me out a ton. Appreciate you guys making it to the end, and I'll see you in the next one. Thanks.










