I Built an AI Agent that Builds Teams of Agents in n8n (free template)
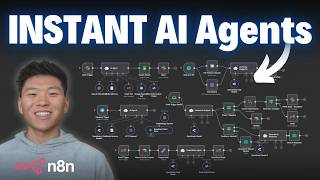
Dr. Violet Howard builds an AI agent in n8n that generates complete workflow JSONs from natural language requests. The agent uses Claude Opus 4 with thinking mode to create workflows for tasks like email routing and lead qualification, costing roughly $0.34 per run. A free template is available.
Chapters
Alright, so here we have our n8n developer AI agent, and I'm just gonna open up a chat, send off this message, which says, build me an AI agent that will receive a message in Slack, interpret the message, and decide if it needs to use its calendar or its Gmail tool, then log the results in Google Sheets and send us a message back in Slack. So I'll check in with you guys when that's finished up. Alright, so it looks like that just finished up, and right here we have view your finished workflow. So let me click on this link. I mean, this is crazy. We've got a Slack trigger set up that feeds into an AI agent that has a chat model, memory, Gmail tool, calendar tool, and a structured output parser. Then we have our Google Sheets logger, and finally a message back in Slack. You can also see that we have tons of sticky notes, so we're able to get set up and we understand what exactly needs to be configured. So as you can see, the workflow tells us how to get started. We need to configure all the credentials, which is everything that's red. We need to set up the Google Sheet with proper headers. We need to add the Slack bot to our channel and then just start testing. It also tells us what to do with the Slack trigger, what to do with the AI agent, what to do with these tools down here. What to do with the Google Sheets for logging, and then the Slack response. But I mean, this is wild. If we click into the AI agent, we can see that it has the proper user message already mapped, and it also has a system prompt. So let's open this up real quick. It's not too in-depth, but it says, you're a helpful AI assistant that helps with calendar and email tasks. It lists the two tools, which are Calendar and Gmail, and always provide a clear explanation of what action you took and what the result was. If you guys remember, there was a structured output parser already attached, and if we click into here, we can see that the agent's going to output the action that was performed, which tool was used, a summary of the result, and the message to send back to the user in Slack. So real quick, let me go through the setup guide, configure everything, and run it to show you guys how this worked. All right, so I just created that sheet. I mapped everything up and put in my credentials. So we're gonna have the agent start to listen for us. Now I'm gonna open up Slack and send off this message, which is asking it to send an email and create a calendar event. So we'll shoot that off. We'll see the AI agent's gonna get the message. It's gonna use its tools. It's going to structure that output and update our Google Sheet so we can have like full logging of what happened. And then we're gonna get a message back in Slack. All right, so there it goes. Let's just quickly check what we got in Slack. We can see I've sent an email to Nate asking how his day is going. I created a calendar event for lunch on June 17th, 2025 at 12:00 PM. You can view the event here. And in my calendar right here, you can see that we have our lunch scheduled at noon. And right here in our email, we can see we have a message that says, how's your day going? Hi Nate, hope you're having a great day. Just wanted to check in and see how things are going for you. So the agent did its job, it called the right tools. All right, so now let's go take a look at our actual log that we just configured. So here's the Demo Logger. Obviously this first one was because I had to map the variables, so I had to do a test. But you can see we have a timestamp, the Slack user, the Slack channel, the Slack original message, which is exactly what we put into that Slack channel. We have action taken, which was sent email and created event. Tools used were Gmail and Calendar, and then an actual result summary. An email was successfully sent to Nate Hurk and a calendar event was created. So I hope you guys are impressed with this output as I am. And when I actually show you what's going on under the hood and you see how easy this was to set up, I think you're gonna be extremely impressed. So let's hop into it. All right, so now that we've seen a demo, let's break it down a little bit. This is the actual full picture of what's going on where we're talking with this main n8n developer agent. It calls on this developer tool, and this tool is actually just this workflow right here. So what I'm gonna do is I'm gonna open up this sub-execution right here so we can look at the actual data that passed through and how This workflow built us that agent workflow that we saw in the demo. All right, so here's the live data that's coming through. The main agent sent this message to the n8n builder agent, which says, build an AI agent with the following workflow. You're going to receive a message from Slack. You're going to interpret the message to decide if it should use the calendar or Gmail tool, use the chosen tool, blah, blah, blah. Exactly what we wanted it to tell it. It kind of gives a step-by-step guide. Now from there, I'm basically just feeding in one Google Doc to the AI agent as context. And it just has some information about how N8N JSON structure works. Now this is where I'm insanely impressed because I've seen a lot of YouTube videos where people are using Claude Opus 4 and they're setting up a Claude project. They're giving Claude a ton of different README files and N8N documentation, and the outputs are coming out pretty good. But this is so cool to me because I'm hardly giving it anything. I'm giving it one Google Doc, which we have the source of truth right up here. So you can change this Google Doc and the workflow will change on the backend. Literally all I'm giving it is one example where I have an AI agent node with tools, memory, and an output parser. So this is the actual JSON of this workflow, which is a super simple AI agent workflow. And then I gave it the JSON of a sticky note. And that is literally the only like N8N JSON specific things that I'm giving this AI agent. And it's just insanely impressive that it's able to produce outputs like this. So anyways, it pulls in the doc, we're extracting the text from it, and then we're feeding that into part of the system prompt for this N8N AI agent. So let's dive into what's going on here. First of all, the user request, which is just coming in from that main agent, which is basically, you know, build an AI agent that does this. Here are the 5 steps, blah, blah, blah. So this makes it really clear for this n8n builder agent to just build the JSON. Now let's go over the system prompts, which is obviously where the magic happens. I'm not going to read every single line of this thing. You guys will be able to download this workflow for free. I'll cover that a bit later in the video, but we'll go over some high-level goals here. So I started off by telling it that it's an expert AI automation developer specializing in building workflows for n8n. Its job is to translate a human's natural language request into a fully functional n8n workflow JSON. It should be comprehensive, functional, and importable, and it should have 100% valid JSON structure, node types, and connection methods. So if you guys didn't know, the way n8n nodes and workflows work is they're all being represented as JSON, and that's why you can download one of my templates or a template from someone else online and just import that JSON file into n8n, and you'll have all the stuff already connected. So because large language models are so good at writing and reading JSON, this is very possible. So anyways, I gave it some outlines about how to output stuff, like the final JSON should be like this. You should be outputting a pure JSON object that begins with one curly brace and ends with another one. And it has to be ready to be used as the body of a POST request because we're going to basically be hitting Enidn's API to just create that workflow for us. But anyways, we had to tell a little bit more about the way that JSON should be for Enidn to accept it. Like it needs to have a nodes array, it needs to have a connections object, it needs to start with a trigger node, all this kind of stuff. I told it to have sticky notes that explain what's going on and how to set up things and credentials, stuff like that. And also just for fun, I told it to vary the colors throughout the workflow. So anyways, just a few more things, but then down here is one of the most important requirements, which is telling it how to submit through the API. So once we get into the next step of this workflow, you guys will see it's basically giving a JSON body that we're gonna submit for N8N to just create that workflow. but this is important. So it has to have a name of the workflow. It has to have different nodes. It has to have connections, settings, static data, all this kind of stuff. And I just went ahead and gave it an example settings object to use. A lot of times the errors in testing were coming because the settings object wasn't correct. So I basically just hardcoded that in here and it's been a lot more consistent since then. Now, finally, this is where we're feeding in the actual documentation from that Google Doc. And if I scroll down on the right-hand side, you can see it's not that much. It's just kind of like one large JSON file of an AI agent with tools and connections, and then also a sticky note. And then what you can see is on the right-hand side, it's gonna output us the actual workflow. So here's the entire workflow, the name of the workflow, Slack AI Assistant with Calendar and Gmail Tools, which as you can see in the demo, that's exactly what it called it up here. But why this works so well is because we're using Claude Opus 4 and we have enabled thinking. So you can see up here before it even creates a JSON, it thinks about it. And this basically outputs what the agent had thought about, which says, you know, the workflow would be Slack trigger, AI agent with tools, Google Sheet, Slack response. Let me build this step by step. So anyways, the way that we do that is we had to use Anthropic's chat model rather than OpenRouter to enable thinking. So in here you can see I enabled thinking. I have a maximum number of tokens to output as the actual result, and then I gave it a thinking budget just so it doesn't think forever. So that's how we configured the Opus-4 chat model here. I'll talk about pricing and stuff near the end of the video, but as you can see, it gives us that JSON and then we're ready to go and use the N8N node to create a workflow. So I created a workflow. As you can see, in order to get your n8n credential, all you need to do is, you know, you'll create a new one. You'll need to get an API key and a base URL. So to get your API key, you'll go to your settings, you'll come down here, you'll click on settings, and then once that loads up, you can see right here you have n8n API, and that's where you'll basically just create your API key. And after you put your API key in there, you need to put in your base URL. So whatever is up here, you know, mine is like natehurk.app.cloud. After the cloud, you'll just have to put /api/v1, and then you're pretty much set up. So now this node is able to create a workflow in my N8N instance based on this JSON that we give it. And as you can see, we're giving it the output from that N8N builder agent. And this is exactly what it looks like. So it has our, the name of the workflow. It has the different nodes that we want in the workflow. Here's where it gave the AI agent a system message already. So it's super cool that the AI agent's able to give us this and it just basically creates that workflow for us. And then the last thing I'm doing is I manually put in my URL of my cloud account, and then I just threw in the actual ID because after the N8N node makes that workflow, it's gonna give us an ID of the workflow, but not like a URL. So all I had to do was manually put in the first part of the URL and then just throw the ID in there. So now every time we open up this link, it'll take us to that workflow. Cool. And then basically the job is done. This node gives the link back to our main agent, and then our main agent gives us that link right here in the chat window, and that's how we're able to click on it. And go into the workflow. So real quick, I also just wanted to show you guys, when I was testing all this kind of stuff, I just had my chat trigger hooked up to the actual workflow itself rather than going through that agent, sending data to this agent. But I know this all looks super cool, but I wanted to just bring everyone back down to earth real quick and say it's not perfect. And if you think about the data that I had fed into this agent, it's not that much. It doesn't have awareness of all the different nodes and ended in, but I will show you some of the other workflows that it's generated for me. I tested a ton of different prompts, right? I had ChatGPT write me a ton of different prompts for different workflows. I pretty much tested every single one of these. Then I asked for more multi-step ones. I tested all these. Then I asked for some with some more heavy conditional logic and routing and switching. You know, if I'm in my NNN and I go to AI generated tag, you can see I've got all these different workflows. But here's a really cool example. We've got routing, we've got switching. We have a second workflow over here with a reminder system. Of course, all of these are gonna have sticky notes so you can see how to set them up. We have a support email sentiment analysis workflow. Of course, these agents have system prompts and user messages. Like this one's got, you know, a full user message with different variables already in there. So there's a sentiment analysis one. We have a lead qualification workflow. We have a lead routing workflow. We have a weekly AI content automation. But like I said, you're gonna get stuff like this every once in a while where it kind of knows what to do, but it doesn't actually know the name of a node to reference there. But that's why the sticky notes are so important because you have a high-level idea of a workflow, throw it in there, it'll give you the baseline and it will give you some ideas of where to start. And you're definitely gonna have to make some tweaks here and there. And just a final example to show you guys was a bit more of a simple one, but like a morning planner where it's gonna grab the events, get the weather, and then create you a morning briefing. So it is really cool to see that it can get us this far and it's only gonna get better and better. All right, so now that you guys have seen that little walkthrough and you understand how simple this system really is, let's do another example. And I wanna do an example of more of a workflow rather than an agent, because I think that LLMs are gonna be better at constructing useful out-of-the-box workflows rather than agents. All right, so this time I have a little bit more of a loaded prompt. I'm asking it to build us a workflow that will be triggered on a new email. It will check our database in HubSpot to see if the email sender exists in our contacts. If they do, we'll go ahead and do research on them in Perplexity and then write them a personalized email. If they don't, we will basically go ahead and add them to our HubSpot and shoot them an email to get them onboarded, to welcome them. So that's a little bit more of a complicated workflow, as you can see. It's right now talking to our developer tool, which is this workflow down here, and I'll check in with you guys when that's done. All right, so it looks like that just finished up. Let's open up this link. I mean, look at that. Like, that's pretty solid. It's definitely gonna be a great template just to get you up and running with a POC where you can start to, you know, customize a little bit. But let's take a look at what it did here. So first of all, we have our email trigger. So it says the workflow starts when a new email is received. So please configure credentials here. Then we're gonna search HubSpot. You can see the operation is to search contacts. So we're looking to see if that contact exists in HubSpot. It's doing a quick check here. So let's see what this logic says. JSON.Total greater than 0. So definitely could work. We'd have to test it out and see. You know, the mindset is this is gonna give you a great sort of skeleton template to start with, test it out a few times, and then make your tweaks. But anyways, if the contact exists, yes, we'll go to the email writer agent. If no, we'll go down here. We will create a new contact and then send them a welcome message. But of course, if it does exist, we'll go here to the AI email writer. We've got our output parser. We have our Perplexity research. We have our OpenAI chat model. And let's take a look at the system prompt. Oh wow. I mean, look at this. The user message is write a personalized email to blank. Based on this, which is the original email subject, the original email content, um, research findings from Perplexity, make the email professional, relevant, and show that we understand their business and background. And then the system message is a little shorter. It says, you're a professional email writer who creates personalized, engaging responses. Use the research information to make meaningful connections and provide value in your response. Let me also take a real quick look at the Perplexity tool. So let's see what it did. It already has the actual endpoint put in. It already has a POST method. It basically, you know, we'd have to configure our credential, but I mean, look at that. The POST request is already pretty much set up. We would just have to put in a variable to make sure that it's actually dynamic. I mean, that's just insane. Like, that is super cool to look at. I can't believe that it was able to do that. One thing I'll throw out there is there is now currently a Perplexity tool, so that will be better than using this HTTP request. But I mean, for talking to Cloud Opus 4 with no knowledge of Perplexity tool, that's insane. and then of course, it also is parsing that agent's response. So we're going to get not only the subject of the email, but also the body in two different fields so that we can very easily drag and drop into that send Gmail node, which as you can see, everything in here is already mapped already. So like, that's insane. All right, so I'm just firing off one more example, which is a workflow that's gonna pull in rows from Google Sheets 5 at a time, loop through all of them, and do research and send a message. So we'll take a look at this in a sec. But while that's spinning, I just wanted to talk about my actual mindset when I was building this thing. So the first thing to keep in mind is that NN is always updating and releasing new versions. And so the static data that I'm feeding in right now, I'm just able to reference in this Google Doc. And you know, like right now, if I looked at the AI agent node, which is right here, you can see that the version of this node is 2, and soon that will be 2.1, 2.2, 2.3. So if you're using this approach, you're going to have to make sure you're keeping this sheet updated. Now the reason why I basically tried to get rid of as much context as possible, because I started off feeding it a ton of data and it was working, but it was getting really expensive using Claude Opus 4 with thinking and sending it that much data to process every time. Now I had thought about taking the vector database approach and I tested out a little bit and I just didn't love what I was getting back. So I tried to just restart from scratch. And just so you guys know, like in this process, I had this sheet where I was testing multiple versions. I was documenting the prompt, the inputs, the feedback. I was looking at my knowledge base, I was doing different knowledge base versions, I had a ton of tokens going through. And now the current system that we're on, I have V3, which, which is knowledge base version 4, which is much more condensed and the tokens have decreased drastically. So anyways, didn't want to deep, deep dive into that, but just to show you guys, I tried different stuff and I tried different versions and I logged everything. So it's really important to use when you're building different types of workflows. But let's take a look at this actual result. I mean, look at that. So there is our daily Google Sheet outreach system where it's going to every day pull in 5 rows at a time. Obviously we're going to have to create the sheet and set it up here, but that's really it. It tells you exactly what to do. Then it's going to loop through all of those items, send it to the AI agent, which is going to use its OpenAI chat model, its message parser, and web research. Let's see what tool it decided to use in here. Um, it decided to use Tavli this time. So that's pretty cool. And then if we click into the AI agent, of course we can see we have a user message, which is already there. We have our system message, which is already there, and its specific output format is basically going to output an outreach message and a research summary. So I mean, this is just really, really cool that it's able to get us this far. So as always, I'm gonna give you guys all the resources that you need to duplicate this exact system for completely free. So all you have to do is join my free school community. The link for that's down in the description. When you get in that free school community, it'll look like this. You just need to search for the title of this video or click on YouTube resources to find that post. And once you find the post, let's say it's this one, you'll see the JSON file right here that you can download and import into N8N. And of course, I'll also share with you guys this Google Doc so that you can basically replicate exactly what I did, where you're pulling in the Google Doc and feeding that content into the AI agent. There'll also be a full setup guide right here as a sticky note, so you can download the workflow and it will basically have all the links and it will tell you what to do to get this system working for you. And if you're looking to take your N8N skills a little bit further, then definitely check out my paid community. The link for that's also down in the description. It's a great community of people who are as obsessed with NNN as you probably are. We've got two full courses in here as well. Agent Zero, which is like the foundations for learning AI automation, and then 10 Hours to 10 Seconds, where you learn to identify, design, and build time-saving automations. Of course, we've got a library of step-by-step builds, NNN templates, and we have 5 live calls per week. So feel free to hop in here. I'd love to see you guys in the live calls. All right, so now let's quickly talk about pricing. So I'm gonna pull up my Anthropic console and we're gonna refresh these logs here. And like I said, I tried to get the tokens down as much as possible. If you took a vector approach where you were just pulling in bits and pieces based on the request, you could probably get the tokens down even more. But right now we're sitting around 2,500 input tokens and 3,000 to 4,000 output tokens depending on the workflow. So just keep in mind, as you give your AI agent more access to node structure, different nodes it has access to and stuff like that, it will only get better, but it's also gonna be more expensive and probably a little slower. So when I first started working on this, my first thought was, okay, I'm gonna go to the NN GitHub repo. I'm gonna go to packages, I'm gonna go to nodes-base, I'm gonna go to nodes. And now I have all the nodes in N8N, and in each one I also have access to the JSON structure of how that node works and the different parameters. So I was gonna build this automation to scrape through all of this stuff and ingest it into a vector DB and then just let the agent go to town. But like I said, I tried it out a little bit and I just kind of like this approach better. So if we're looking at the pricing of Claude Opus 4, we've got $15 for a million input tokens, $75 for a million output tokens, which my rough math estimated that each run is gonna be about 34 cents based on these input and output tokens. So yeah, maybe you are better off spinning up a Claude project, ingesting all of the documentation you can about NNEN in there, and just using that on like a subscription. But I thought it would be really cool experiment to just kind of play around with our NNEN AI agent and see if we're able to do this stuff, which clearly we are. And I think that it's just super cool. And then one other thing I wanted to note is if I were you and I was actually going to use this, I'd probably just hook the chat message trigger up to this agent right away. I don't really think you need this end-to-end developer agent that's passing the data between. The only reason I really did that was to get the link in a nice clean format because it will be in the chat message like this rather than we'd get it as like a JSON object if we were chatting with just this workflow. And so for the demo purposes, I just wanted to make it look prettier, so I did that like that. But anyways, if you want to download this workflow and play around with this for yourself, you can get it for free by joining my FreeSchool community. The link for that's down in the description. And final, final thing I wanted to touch on in this video is the future of AI automation and NLP, natural language to AI workflow builders or AI agent builders. I think it's cool and I think that we're getting closer and it's gonna be super cool when you can just like spit in a query and you're gonna get a fully functional workflow with your credentials and everything like that. But I don't want it to provide everyone with a false sense of security that you understand automation because truly the most important part that goes into it is the creative problem solving and the thought process behind why you're setting up these automations, how to implement them, how to deploy them, and how to basically scale them up. How can you identify edge cases and build guardrails to protect against those edge cases? And how do you troubleshoot stuff when things go wrong? So yes, it's gonna be a great way to get you there 80% of the way, tweak it a little bit. It may help you think of some stuff that you wouldn't have thought of before, but ultimately you still want to learn what's going on within each node and how you can customize it to fit your needs or your business's needs. So anyways, that's gonna do it for this one. Hope you guys enjoyed that one. If you did, please leave a like, it helps me out a ton. And I really appreciate you guys making it to the end of the video. As always, see you guys in the next one. Thanks so much.










