I Built an AI Voice Travel Agent with ElevenLabs and n8n (Free Template)
The transcript captures a full interaction between the AI voice travel agent named Jessica and a user planning a trip from Chicago to Los Angeles. Jessica greets the caller, confirms intent to help, and systematically gathers essential travel details: departure city, destination, travel dates (March 1‑7), number of travelers (single), activity preference (surfing), and the user’s email address. After confirming the information, Jessica informs the user that the plan is being processed, checks that the user is still present, and finally confirms that the travel plan has been emailed. The dialogue demonstrates the agent’s conversational flow, data collection prompts, user confirmation handling, and final delivery of a travel itinerary via email.
Hey there, I'm Jessica. How can I help you today?
Hey Jessica, I'm looking to plan a trip.
Great, I can definitely help you with that. To start, where are you traveling from?
Chicago.
Okay, and where are you planning to go?
Los Angeles.
Got it. And when are you planning to leave?
Yeah, I want to go from March 1st to the 7th.
Okay, so you want to leave on March 1st and return on March 7th. How many travelers will there be?
Just gonna be me.
Alrighty, do you have any activities you'd like to do in Los Angeles?
Yeah, I'd love to go surfing.
Okay, great. Finally, could I please get your email address so I can send you the travel plan?
Sure, you can send that to nate@example.com.
Perfect, please give me a few moments to look into this.
Yeah, no problem, take your time.
Are you still there?
Yep.
Okay, great. I have emailed the travel plan to you.
Okay, awesome. I'll go check it out.
Happy to help. Have a great trip.
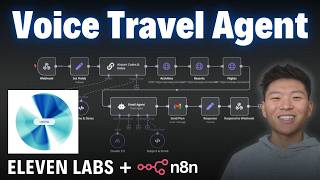
Okay, cool. So as you can see, she just ended the call because she knew it was over, and apparently we have a travel plan in our inbox. So let's go take a look. Okay, so here it is. We have your exciting Los Angeles getaway, March 1st to the 7th. Get ready for your LA adventure. We're thrilled to present your upcoming trip to the City of Angels. You'll be soaking up the sun, exploring iconic sites, and creating unforgettable memories. Get ready for a perfect blend of urban excitement and beachside relaxation. So the first thing it does is it lists our flights. So we're departing from Chicago to LA on March 1st, returning to Chicago March 7th. And then it says we found two great trip options for you. So we have Frontier and Spirit, um, two great options. Anyways, um, it gives us the duration, it gives us some features, it gives us carbon emissions, um, and then a price round trip. Then it moves into the resorts. So as you can see here, we have three resort options. Each one has an image, and we can click into the title of it to see, um, the direct website. So this one is the Metric, um, this one is $179 a night, gives us a total rate for how many days we're staying. Walt Disney Concert Hall is nearby, 4-minute taxi Third Street and Lucas Ave is a minute walk away. Free breakfast, free Wi-Fi, air conditioning, golf, smoke-free. We have a picture here for the second one, Sunset Marquee. As you can see, we could click into this link as well, and it pulls up this, this website right here. We have the total rate is $5,400, so a little pricey, but it's nearby Holloway, 4-minute walk, LA Airport, 39-minute taxi. We've got breakfast, free Wi-Fi, parking, outdoor pool, air conditioning, pet-friendly, all these other amenities. Then we have the Stay Open Venice Beach. Once again, we can click into this link, we get the website right here, we can look at, you know, how to book this place if we want to stay there. It gives us a rate again, which is $110 per night. Nearby we have the Venice Boardwalk, which is 2 minutes away, and then Main and Brooks, a 4-minute walk away. And then finally we get some amenities down there as well. And finally, remember we asked for activities, so here we have the Ultimate Guide to Surfing in LA. So the— it gives us a brief description about what we can do here. We can click on the link And once again, it'll bring us into, you know, maybe where to do it and any resources we may need. And then we have a second one, which is also where to surf in LA. So this one again is gonna give us some more details on if we're trying to come out here in LA and go surfing. Finally, it signs off with, we're excited for you to experience the best of Los Angeles. Wishing you sun-soaked days and unforgettable adventures. Best regards, True Horizon Travel Team. So now that we've seen a demo, let's dive into how this all works. All right, so as you guys saw in the demo, this is what the workflow looks like. Obviously, the trigger is a webhook that ElevenLabs sends over information for us to feed into these 3 requests where we're getting activities, resorts, and flight information, feeding that into an email agent to actually create that email in HTML structure with the images and the links and all that. It sends it off and then it responds back, responding to the webhook, back to the voice agent in ElevenLabs. So we'll dive into the actual ElevenLabs configuration of the agent. We'll dive into all of these nodes here in N8N and see what's going on. but I wanted to say that, you know, there's a lot going on in this workflow, so we're gonna go over it at a pretty high level. If you're looking for a more hands-on approach and you wanna see the step-by-step build, then definitely check out the paid community. The link for this will be down in the description. We have a great classroom section where we're going over things crucial to this video, like APIs, HTTP requests, step-by-steps where I'm doing all the builds from the YouTube channel, and then also other deep dive topics like building agents and vector databases. Also got a great calendar section with 5 live calls per week to make sure you're never getting stuck and make sure you're meeting people in the space as well. So we'd love to see you guys in these calls, but you can also download this workflow for completely free if you'd like. You can do that by joining the free community, which is also linked in the description. You'll come into here, click on YouTube Resources, click on the post associated with this video, and then as you can see right here in the post, you'll have all of the workflows available to download. Once you download them, you'll come back into Editn, open up a new workflow, hit the three dots in the top right, and then you can click Import from File. And this workflow right here will pop up for you, um, you know, with all the prompting already in here as you can see. This prompt is pretty robust with all this mapping, and we have the system prompt in here. So if you want to just download it, then you can do so by joining the FreeSchool community. Okay, so we're going to start off in ElevenLabs and talk about how we configured the agent to actually extract the right information we need in a conversational manner. It's going to send that information over, like where you're traveling to and from, the dates you're traveling, how many travelers, what you want to do there, and that gets sent over to the webhook. And then we're going to go down the process, you know, one by one of what each node is doing. I'll break it down as simple as possible. And that way we can just see how an initial conversation, the data is extracted. And then the end result is, you know, this email with research and different sections broke out. But we're going to hop into ElevenLabs first to take a look at how we configure that voice agent. Okay, here we are in ElevenLabs. What you have to do is go to Conversational AI, go to Agents, and then you're going to create a new agent. I'm on the starter plan, which is like $5 a month. And as you can see, I still haven't used like anywhere near my credits. So that's a great place to start. Anyways, from there we're creating a new agent, and I called it Travel Agent, and then I created from a blank template. So once you open that up, it's gonna look like this, and we're gonna go over what you need to configure to get this thing up and running. So the first thing is, you know, you can choose a voice. So we chose Jessica in this case, that's why the travel agent's name is Jessica. And then we have our actual main agent configuration page. So the first thing is we chose our language, we didn't touch any additional languages, and then we set up the first message. So when we hit start call, the agent says, hey there, I'm Jessica, how can I help you? If you leave this blank, then it's just on the human to start the conversation. Anyways, from there we set up the system prompt. So what I said here was I gave it an overview. You're a travel assistant. Your job is to help the caller create a travel plan based on the details they provide. Next, we told it the tool that it has, which is only one. We said your tool is N8N, and use this tool to send the caller's travel details to. This will generate a travel plan. And so when we scroll down a little bit more, I'll show you how we set up the tool and how it all works. But for now, just remember that the ElevenLabs agent has access to a tool called N8N. And then we gave it a brief set of instructions. So we said, extract the required details from the caller. Then you'll always send the details to the N8N tool. After you use the N8N tool, say, please give me a few moments to look into this. So it's not just awkward silence. If you were forced to speak, just say, thanks for your patience. I'm almost done. Never say there was an issue with the server. And we put this in here because the N8N, you know, workflow that we set up, it takes more than It takes like 20-25 seconds to run, and there's a setting in here if you go into advanced where we have turn timeout. So if 15 seconds passes, the agent will be forced to respond if we don't say anything, and 15 seconds is the max. I try to make it like 30, and 15 is the max. So what we wanted to do is build in a safeguard here where it says, you know, basically the agent will be forced to speak. So when you're forced to speak, just say, thanks for your patience, I'm almost done, rather than saying you know, there's an issue or I can't access the server or something like that. So, you know, obviously we don't want that to happen because nothing is broke. It's just waiting for the email to be written. And finally, we said once the travel plan has been emailed to the caller, cheerfully let them know. We have the option to set up dynamic variables. In this case, we didn't, so I'm not going to dive into that. We have the LLM to choose from. As you can see, Gemini 1.5 Flash is the fastest, and that's probably the default. But if you do that, when you see your tools down here, it says when using tools, we recommend avoiding Gemini Flash. And using a different, more powerful one. So that's why we chose 2 here. But anyways, you've got your temperature. So default 0.5, we're going to keep it there just for now. Basically, this is the creativity or randomness in, you know, when the model is predicting— or not predicting— when it's generating its next words. You're just basically widening the range. If you like this, you're widening the range of words it could choose, or you're shortening it for more consistent results. So we're just going to leave it as 0.5. You can limit your token usage here. You can add a static knowledge base, which in this case we don't really need to do so because we're using basically search functionality to get all the information back. And then finally, here's where all the magic happens with the tools. So first thing to note is that the agent will likely by default have this end call system tool, which just gives the ability to the agent to end the call if it knows it's over. But then this is the custom one that we set up. So you'll click on add tool, custom tool, and then this is where we configure everything. So this is the screen you'll see, and I'm going to pull it up with our n8n tool. So first of all, we gave it the name n8n, then we gave it this description, which is this tool generates a travel plan once the details are collected. We have the method to be POST. By default, it will probably be GET, but you want to change it to a POST because what we're doing is we're trying to send over data to n8n to run it through these different APIs and then create an email. So that's why it's going to be a POST. We have the URL right here, which is just the webhook URL from n8n. So if I go back into my n8n, click into this webhook, you can see the POST request endpoint right here. So this is the one I click to copy this, and then I pretty much paste that right in there. So then 11Labs knows where to send the data to. Now in these tools, you have the options to set up your, you know, header parameters, path parameters, query parameters. We don't need to do that. All you want to do is enable body parameters, and this is actually going to be the things that we— the attributes that we set up to to have the ElevenLabs Gemini 2.0 Flash model look at the transcripts when it's conversating with us, pull out these details, and send them to an ADN. So first of all, we describe how this is going to work. We say collect all of these details from the caller, then send the request. So now we're going to set up the different properties we want to pass over. The first one is return date. We're saying that this is a string data type. We're going to be pulling this from the LLM prompt rather than using dynamic variables. and then we describe it as the day the caller wants to return. Now what you could do is you could come in here and you could specify the format, because through the different requests in NNN, and you guys will see, we want the format to be year, year, year, dash— or sorry, year, year, year, year, dash, month, month, dash, day, day. But we just changed that formatting later, so I'll show you guys that. Anyways, you could specify that here as well. Then we have departure date, also a string, required, the day the caller wants to leave. Activities is also going to be a string, any activities the caller wants to participate in at the destination. So it's just important to basically give detailed descriptions, and I know these aren't too detailed, but they're pretty straightforward, but a description so the model knows what to fill in for each identifier. Then we have destination, where the caller is traveling to, it's a string. Travelers, this one's a number, the total number of travelers, and then the format I gave it just so it wasn't spelling out like O-N-E rather than giving 1, you know, I put it as a data type number, so it should work anyways. Then we have the origin, which is a string where the caller is traveling from. And then we have email, an email to send the travel plan to. So that's all we have. Those are the maybe 7, 6, 7 properties we have. Um, and then basically that's all that's going on within our travel agent within ElevenLabs. So test that out a few times. You'll basically just make sure that data is being passed over correctly. And if it is, you'll come back into here This is the webhook response. These are the headers. We don't need to look at that. We only set up body parameters. We can close out of headers. And here we have body. What you can see is we have March 9th, March 1st, um, riverboat tour, Chicago, OneTraveler, New York City, nate@example.com. And so now what's next is we need to format some of this stuff because first of all, when we're putting in our request to, you know, the resort or the, um, flights, we don't want to use these city names. What we want to do is use airport codes. So we have to get the airport codes, and then we also have to turn these dates from strings into date format. Okay, so before we do that, what I wanted to do is just set all the fields from the webhook node. So we can always reference this Set Fields node to get everything that was original data. So we're setting the origin. All we have to do is come to the webhook and drag in the origin. Setting the destination, dragging in the destination. Departure date, you know, this is literally you just drag the field and then you're dragging it into the right place. return date, return date, travelers, we're dragging that in as well, setting that to a number variable type rather than a string. And then the same thing for activities and email, we're just dragging them in. And so now you can see the output. All we're getting is just a really clean 1, 2, 3, 4, 5, 6, 7 things that the ElevenLabs model was able to send over in that body request. Cool. So from there, we're passing it into a basic LLM chain. And this is the one where I talked about we have to format our dates and get the airport codes. So this is an AI node. We're using GPT-4o to do so because it's aware of city names and airport codes. So what we did is we gave it, um, 4 things. We gave it the origin, and here, let me pull this up so you can see the actual result. The origin, New York City. The destination, Chicago. Departure date, March 1st. Return date, March 9th. So it's going to use its AI brain to turn the origin and destination into their airport codes, make sure the departure and return dates are in the future, not the past. And here is the current date and time. Because ElevenLabs doesn't natively have awareness of what the current date and time is, so if I said March 9th, it could try to book us a flight for March 9th in 2019. So this is where we're using the brain of the AI and the structured output parser, which you can see right here. We required specific output format to output this kind of stuff. So what we're getting is origin JFK, destination ORD for O'Hare, departure in the format we want and return date in the format we want. And we're able to do this by using the structured output parser, where we're basically just defining— and if I open it like this, it gets cut off for some reason— but what we're defining is an object with 4 things inside of it. So we have the origin, which is a string, we have destination, which is a string, we have departure, which is a string, and then return, which is a string. And as you can see, for these date formats, we had to specify like, this is how we want you to output it. And we said all 4 fields are required. And as you can see on the output, we got all 4 back over here exactly the way we want them. Okay, so now that that part's done, all we have to do is set up our different requests. So the first one we're doing is the activities request. So in here we are making a POST request to Tavaly. So you'll go to Tavaly, you can get an API key for free, you'll get like 1,000 free calls. Um, and then we're looking at the search endpoint. So this is a POST request. You can copy this curl command and then you can paste it right into here. Import curl, paste the command. and then it will populate everything. All you'll need to do is put in your credential and then set up the query you want to actually search the internet for. So in this case, we're searching for, um, riverboat tour in Chicago because we mapped back from the set fields once again. So I'm gonna drill down to set fields. We wanted to pick activities, so I dragged in activities, and then I said in, and then I dragged in the destination. So every time this is gonna be going through and doing a web search for whatever activity we said in the destination that we set. The only thing else I changed is I made the max results 3 rather than 1, just so we could get more than one option back. And so on the output, what we have are 3 different results. As you can see, result 1, result 2, and result 3, although it goes 0, 1, 2. And then each result has like an article title, a URL, and then a brief description of what that article talks about. So that's how we map it into the email later. So I know HTTP requests and APIs and looking through the documentation can be a little intimidating, a little confusing, especially with these next two. These are SERP API ones where we're looking for hotel API, um, and you have a ton of different parameters to set up and you have a different like search engine and a base URL. So I'm going to walk through it kind of at a high level here, but if you're looking to dive into it and understand it on a deeper level, definitely check out the paid community. I've got a deep dive course around APIs and HTTP requests, so that could be definitely helpful because APIs are something really important to know anyways. What we're doing here is making a request to Google Hotels API, which is within SERP API. If you make a free account and get your API key, you'll get like 100 free calls a month. Anyways, the first thing we see is a base URL. So this is the base URL, which is serpapi.com/search. So what I did is I put that in the base URL as, you know, right there. So anyways, we know the method is GET because it says right here utilizing a GET request. And then what we have are different parameters that we need to put in here. Based on, you know, to send through so we get back what we want. The first thing that we want to do is go down to the bottom, and we'll see here are the SERP API parameters. We need to specify what search engine we're searching in within SERP API, which would be Google Hotels. So back in n8n, you can see my first query parameter is called engine, and the value is Google Hotels, just like it says in the documentation. And then also what I did is I set up my API key as a predefined query auth. So, um, in the documentation we can see that also a query parameter will be API key and then your API key. But what you can do is to save your credentials, you can predefine them and then have them saved. So I always have my SERP API key right here because I chose, you know, a query auth type. A lot of times they're going to be a header auth type, but either way you can create a new credential and then you'll put in like API-key right here, and then you'll put in your API key here and it will just be saved. So every time you want to make a request to SERP API, you don't have to go find your key. You already have everything saved here in n8n. So anyways, from there, the rest of the parameters we need to set up are pretty much dynamically mapped based on our conversation with the voice agent. So the first thing we can see is we needed to put in a queue. If we go up to the top, we can see a queue is the search query that's required, and this is basically just the location that we want to search for hotels in. So we're putting in a queue and we're dragging in from set fields. So let me drill down to set fields. We're dragging in the destination as our search parameter. Then we have check-in date. Once again, we're dragging in our departure date— or actually, no, we're not dragging in departure date, sorry. You can see here we have check-in date and checkout date. We need the format of yyyy-mm-whatever. So good thing we already changed that within N8N. Where we want to get this from is the basic chain node where we change the output. So that's what we dragged in right here for check-in date. We drug in departure date, and then for checkout date, we drug in return date. So as you can see, it's coming through in the format that we need. Then finally, we just need to know how many guests will be staying. So back in, um, SERP API, we can see that the parameter here was— actually, I think I passed it right up here— adults. It's an optional parameter and it defaults to 2. So we want to specify. We can just say, you know, we'll throw in our set fields, the number of travelers. That is what goes in the adults parameter. And then we can see what we get back is metadata on our search, parameters on our search. We can close out of that, we can close out of this, and then we have a list of properties right here. If we expand this list of properties, we can close out these objects and see how many properties we got back, which is a ton. Um, so yeah, this is what we use also to map into the email, and we only chose the first, you know, 3 for this example, but look how many properties are coming back. Um, 20 total. So That's what we're getting back from this request. So then after the resorts request, we're making a request for flights. So this is once again SERP API, same base URL, but we're going to specify the engine as Google Flights rather than Google Hotels. So same thing, I'm using the exact same query auth that I had for the previous one because they're both going to SERP API. We can come in here to Google Flights API and we'll see exactly again we have query parameters and we have some that are optional and some that are required. So going down to the bottom, we can see the first one we need is engine. It's required in Google Flights. So that's where I got that. Then we have API key, always required. So that's why I put in my query, um, auth right there. But then what we want to do is specify certain things. So departure ID and arrival ID, we can see that this needs airport codes, not just cities. So for the departure ID and arrival ID, we went to our, um, basic chain once again, where we had it get those airport codes. And then we could say, okay, for departure ID, we're gonna do origin. So we drug that in there. And then for our arrival ID, we wanted to do our destination. So then we threw that in right there. Finally, we have outbound, return date, and adults. So same thing, we're getting it from our structured output from the basic chain where we do our departure and we do our return. And then finally from adults, we just do the number of travelers once again. And then same type of format as our output from the previous node, we have metadata, we can close out of that. Our search parameters, we can close out of that. And then we have best flights. So we can see we have a list of best flights. If we close out of it, we also have a list of other flights. We have price insights, we have airports. So we're getting a lot of stuff back. So it's just about looking through the results and seeing what actually you need. So what we did is we looked in the best flights. We can close out these objects and see how many flights it came back with. So in this case, it gave us 4 best flights. And so if we look in the drill down of each flight, we can see we get a departure airport, the ID, the time, the arrival airport, the duration of the flight, the airline, the logo, different amenities, or sorry, features, carbon emissions. Like we have all this stuff, pricing. So that's what you're gonna get for each flight. And then it's all about mapping that into the next node, which is the agent that writes the emails. So first thing I wanted to point out, if you notice for the basic chain, I'm using GPT-4o. For the email agent, I'm using Claude 3.5. This is just because, you know, this is gonna be very structured. We're creating content, it's gonna be HTML. Um, and I just think that Claude does a lot better job at that. So let's dive into what's going on within the email agent because it may seem intimidating, but it's really not too bad. Okay, so we've got a user message and a system message. Typically what I like to do in the user message is feed in information that changes every time. So in here I set a bunch of information about different flight stuff, resort stuff, and, um, activity stuff. But what we want to do in the system message is explain the rules and instructions for how this agent should be behaving no matter what. So overview, you're an expert email writer specializing in creative— creating travel plans. Your job is to output an HTML email with clickable links. You must output a subject and an email body in separate parameters. So once again, we're using a structured output parser, which I'll show in a sec. Anyways, objective is that you are going to receive information about a vacation plan and you need to break the email into 3 sections: flights, resorts, activities. And then we gave it sort of like an output format, so All of these sections here are about the output format, so they kind of roll up into this, but here's what we start with. The email should be structured as HTML that will be sent through email. Use headers to separate sections. Add a horizontal line to end each section. Your subject should contain the travel dates and the arrival location. Introduction, the goal of this section is to get the traveler excited about their trip. You must add a horizontal line after this section. Um, and then we dive into the 3 ones of flights, resorts, activities. For flights, we said list the departure and return dates and locations, list the flights and details about each one. Resorts, we said list each resort with a clickable link as the name of the resort, number the list of resorts, and then we had to specify how you actually put the images in line rather than making them like an attachment. So we said output images in HTML format like this. We were wrapping an image within this HTML tag, so like the left arrow, img, and then the right arrow. And then within that, we're putting the source of the image. So it's going to grab the URL that we define up in the user message. And then we're setting the style, which is we're making the width 20%, and then we're having the height auto adjust. Because if when it was 100%, the images were huge compared to the words, so 20% looks a lot better. Anyways, then I said leave a new line between the resort name and its image, and after the image, just for some spacing. And then activities, list the activities with clickable links as the name of the activity. Provide a brief description of each activity. Sign off, sign the email off in a friendly way, and as True Horizon Travel Team. And then at the bottom, important, do not output more than 1,000 words or you might start seeing some stuff get cut off. So that is the system message, and as you can see, we're getting HTML body over here with these tags, and then we have our subject in different fields, of course, and an output object. But now let's look at the actual user message, which may may look pretty messy. So what we're doing here is bringing in information from the flights request, the resorts request, and then finally the activities request. So let's dive into how we're mapping this stuff. You may see a red thing right here, so keep in mind every time you make a request to these different SERP APIs, typically the, the drill down is going to be the exact same schema. Every once in a while something won't exist. So like in this case, a link didn't exist, and the good news is it's not going to break the automation. It's just gonna leave it as undefined. As you can see, oh, wherever that went. Yeah, right here, it just comes back as undefined. So sometimes, you know, based on your search, if you're going to places that are maybe smaller, you may have less options or less pictures, less amenities, and that's fine. It won't break the automation, but some things may just not show up every time. So just something to keep in mind. Anyways, what I want you to pay attention to here is the right side. So this is the actual result. It's a lot less messy, but the left side can look pretty, you know, Ugly. Anyways, we're starting off this section saying, you know, here are flights from New York City to Chicago on March 1st to March 9th. And for this, we're grabbing everything from the set fields that we set way earlier. So if I drill down right here, you know, we basically just dragged in, um, we want to look at— these are flights from Chicago, so drag in Chicago, or sorry, New York City. And then we're saying, you know, to destination, um, departing on this day, returning on this day, all that kind of stuff. So it's really easy to just think natural language how do you wanna set this stuff up for your agent to process in an email? And then we wanted to start giving it information about each flight. So in this case, I only did 2, but we're gonna open up the flights HTTP request. We're gonna close out of this stuff and we're gonna get to flight number 1, which is what we're looking for. And let me actually expand this a little bit so it's easier for us to see. Yeah, so what I did here is first I gave it the airline. So I dragged in American. You can see it's American. We have the date and then we have the duration of the flight, which all of this information you can find right here. And basically just drag in. So it makes it super easy. Then what I wanted to do is drag in the features. So I dragged in the list of extensions, which looks like this. And then it comes through as, you know, average legroom, Wi-Fi, in-seat power, all that kind of stuff. Then I talked about the price. So we just come down here, we find the price from this section right here. We said the price is $293 round trip. And that's all we did for the first flight. And then I did the exact same thing for the second flight. So all I did is on the left-hand side, I closed out of Best Flights Zero. and I opened up Best Flights 1, and then I map in the exact same information in the same format, um, just so we're getting the same information about each flight. All right, so then moving on to Resorts, as you can see, very similar stuff where we're mapping in the name of the resort. So I'm gonna close out of the Flights request and open up the Resorts request, close out of the metadata and the parameters, and close out of the brands. We want the properties. So the first one is Hollywood Rentals. So as you can see, I dragged that in right there. I gave it the link right there. And then I went down to images, which I have to scroll a little bit farther down, but here's images. So I dragged in the first original image to be used in an email. Then I scrolled back up and I found the rate per night right here. So I dragged in this with $60 rate per night. The total rate is, um, wherever I found that earlier, right here, $480. And then if I go maybe up a little more, um, no, I have to go down a little more. We're looking for the nearby places. So right here we we have a list of nearby places, we have 3 of them, and I dragged in the name, I dragged in, you know, the duration, how long it takes to get there by this type of travel, so 4 minutes walking in this case. And then I just did the same for the next event, or next nearby place as well. So this is where you can really start to customize the information that you want your agent to see. It's really just about understanding how you can look through the schema here and drill down to exactly what you're looking for. Because finally, after the nearby places, I think below the images, I was able to drag in right here the list of amenities. So when I drag in the list of amenities, it pops up with all the stuff like air conditioning, crib, ironing board, kitchen, smoke-free, all that kind of stuff. So that helps too. So then of course, as you can imagine, for Resorts 2 and 3, I did the exact same thing. I just close out of Property 0, open up Property 1, and then drag in the same information once again. Okay, and then finally at the bottom, activities. It's a lot easier. We're going to open up the activities tably request. We can see our query was riverboat tour in Chicago, and then we have 3 results. I'm only going to drag 2 in for this example, but I dragged in the title of the activity, the URL for the activity, and then the description. And then I just did the exact same thing for activity number 2, which are kind of the same things but just 2 different sources to look at. But as you can see, that is what the agent is now getting. And using that information, it creates an email based on these guidelines that we gave it. In the system prompt. So that is how it was able to, you know, insert these horizontal lines. It made an intro section that was exciting. It talks about our flights. It does the images 20% rather than making them huge, 100%. So all this kind of stuff, right? So we were able to just tell it how to do this based on the system prompt that we give within the email agent. But as you know, it outputs a subject and a body. So what we did is once again, same thing we did up here, but it's even easier because there's only two. Which are, you know, we have an object with two things in it, which are going to be a subject, which is a string, and an email body, which is also a string, and then they're both required. And then over here it gives us those two parameters just like we want. So then we can feed them in really nicely to the next node, which is a Send an Email node. We have our JSON output subject, so we just drag this into there, and then we have our email body, which we also just dragged right into here. The one thing we had to do was make sure the email type is HTML so it actually comes through with those tags and formats correctly with you know, headers and all that kind of stuff and the inline images. And then the to email, if we want to drill down, get out of all these requests and go to the set field, here's where we set the actual email from the user in the very beginning. So I just dragged that into there so that every time this will be sending to whoever's on that phone with Jessica, the travel agent. And finally, as you know, when we set up our webhook, we said to listen for a response in the respond to webhook node. So all we wanted to do was set up a response with a set field where we said an email has been sent with the travel plan for blank. We dragged in the travel plan, which was just the subject from the email or the email agent. So an email has been sent with a travel plan for your Chicago adventure, March 1st through 9th. We output that and then we're feeding that directly into the Respond to Webhook node. We say just respond with the first incoming item. So it's grabbing this response, as you can see. And so that is what the ElevenLabs voice agent sees after this whole process runs, and then that's how it knows to respond to us, the human, and say, we just sent that email to you, you know, go check it out. It has your travel plan. And just some final thoughts to wrap up. You know, this system prompt, it's pretty brief. I kept it really clear, really simple. You could definitely get in there and make some adjustments. So like the way I said, you know, after you use NNN Tool, just say, please give me a few moments to look into this. That adds a little bit of personalization. You could maybe even say like, you know, you could do some small talk while you're waiting for the process to finish. You could maybe have it repeat every step. You could have it ask all the questions right away. I wanted it to sort of extract the details one by one. Um, so there's just a lot of stuff you can do when you're testing out this agent within your system prompt. You can make them be more serious, you can make them be funny, you can play with your temperature. You can even test out the different models, of course, which is, you know, going to be pretty, pretty fun to test around with. But just wanted to say, like, when you're in there and if you're doing this yourself, like, you can grab the NNN template for sure, but play around with the system prompts. Maybe don't copy this exactly and just see how the different tool calling stuff works. But yeah, that's pretty much going to be it for this one. I know I went pretty fast, so hopefully you guys were able to follow along and you enjoyed it. But like I said, if you want to watch step by step this video or any of the other builds I've done on my channel, check out the, the paid community. Link for that's in the description. But you can also grab the template just for free in the FreeSchool community. So that's all I've got. As always, really appreciate you guys making it to the end of this one. If you learned something new or you just enjoyed it, please give it a like. Definitely helps me out a ton. But really appreciate you guys making it to the end, and thank you. See you guys in the next one.










