I Built the Ultimate UGC Content System with AI Agents (free template)
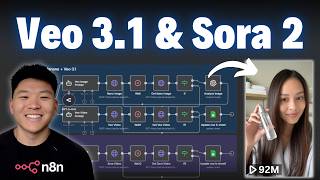
Dr. Violet Howard builds an automated UGC ad system in N8N that reads product data from Google Sheets and generates short-form videos using AI. The pipeline combines image and video generation models, costs roughly $0.15 to $0.32 per ad, and includes live demos with creatine gummies, hair spray, and neck fans showing quality differences between Nano Banana, VO 3.1, and Sora 2.
Chapters
VO 3.1, Nano Banana, Sora 2. There are all of these amazing models dropping, so I figured why not just build a system where we can use all of them? So what we're going to be looking at today is the ultimate UGC ads system where all you have to do is fill in some raw information on a Google Sheet like a product photo, the ICP, the features of that product, and a setting of the video. And then all you have to do is come in here and choose your model, whether that is VO 3.1, a combination of Nano Banana and VO 3.1, which is super cool. I'll show you guys exactly how we do that in a sec here. Or using Sora 2. This lets you seamlessly test a bunch of different creatives and product features and settings across a ton of these different AI video generation models. So the question that we're gonna be trying to answer today is which one is best for UGC ads? So taking a look at this workflow, you can see that there's basically 3 paths. There's the VO 3.1 path, the Nanobanana plus VO 3.1 path, and then the Sora 2 path. So we're gonna jump into a live demo. We're gonna run all 3 of these paths, and I'm gonna explain what every single node is doing so that you guys can set this up for yourself. And as always, I'm giving away the entire system for free. All you have to do is join my free school community The link for that is down in the description. So before we go ahead and run the live example, let's look at a few of our outputs that we've already gotten with this exact system. So the first product we tried was creatine gummies. Here is what the actual product photo looks like. So you can see it's a creatine gummy jar. We then have the ICP, which is young adults wanting to stay fit. The product features for this are delicious gummies, easy to remember to take daily, makes workouts better, more energetic, stuff like that. And the video setting, we have a young man who is parked in his car about to go into the gym holding the gummies. So the first one we'll look at is Nano Banana plus Google VEO 3.1. I love that these creatine gummies actually give me more energy for my sets, and they're tasty, so I actually remember to take them every day. All right, here's the same one with Sora 2. I love these creatine gummies. They actually taste amazing, and I never forget to take them. They make my workout stronger, and I feel more energized. And then here's VEO 3.1. These taste amazing, and I actually remember them every day. My workouts feel stronger, and I've got more energy. You may have noticed a few things with the reference image and the way they were speaking, but let's continue on to the second example, which was hair shine spray. So I'm going to go in the same order: Nano Banana VO3.1, Sora 2, and then VO3.1.
I love how this gives my hair that glossy finish without any greasiness. It dries instantly and feels weightless. I love how this gives instant glossy shine without any greasiness. It dries fast and feels weightless. I love how this adds instant gloss without feeling greasy. It dries so fast and leaves no sticky buildup.
All right, so we've seen a few examples we'll come back at the end and compare more outputs and see which one we ultimately deem being the king of these models. But let's go ahead and do a live example. So the first two that we did were AI-generated images. This first one was creatine gummies, as you can see, and the second one was our hairspray, which looks like this. So what we're gonna do for the third example is a real product image, and this is actually from an Amazon listing. So it is a portable neck fan like this. We have the ICP of middle-aged adults who spend long hours outdoors or landscapers, construction workers. We have product features like it's comfortable, it's light, it delivers powerful air upward and downward, and it regulates your body temperature. And we have the video setting for a friendly middle-aged woman tending her garden in the afternoon sun. So hopefully you guys can see the value prop here. It'd be really easy to just throw in your product information right here and then have this thing every day create tons of UGC ad content for you. Then what happens in the workflow is it takes that and we have different AI agents here that are trained to prompt in different ways, and that's how we're optimizing you know, the features and ICP and the setting to actually go into this UGC content. So I'm gonna go ahead and hit execute workflow. It's gonna pull in that data from the sheet. It's gonna do one row first. And the first row that it's doing is Nano Banana Plus VO 3.1, because as you can see right here, it's basically processing this row and that's the model that we chose was Nano Banana Plus VO 3.1. So I'm actually just gonna start to explain what's going on here as this is running. So you can see here we're pulling in data from this sheet, right? The only thing special going on here is we're making sure that the status column equals ready because we don't want to pull in all of these rows that have already been finished. And then we also turned on this option that says return only the first matching row because we don't want to do, you know, all 6 of these at a time. We want to just do one by one. You could obviously change that if you want, but that's the way we're rocking right now. Anyways, we then go into this switch node and what happens here is it basically just checks what the model was selected as. So if it was VO3.1, it goes up. If it was Nano plus VO3.1, it goes to the middle. And if it was Sora 2, it goes down. As you can see, these 3 paths. So this one was obviously VO3.1 plus Nano Banana, which is why it went here. And that's why we're doing this first step, which is an image prompt. So let me explain why I'm doing this. What we're starting with is a picture of our product because we need to make sure that the product image looks actually good in our final copy. Otherwise, we're not going to be able to sell any of that. So in my mind, the most ideal way to do this is to take that product image that we're given. So if we just want to get a quick refresher, taking this product image right here and using AI to turn this into an image where someone is wearing it or holding it, and then we can take that optimized image and turn that into a video. And so ideally I would do this also for Sora, but when you send an image to Sora, if it looks like a realistic human person, even if it's an AI-generated human, it's going to reject it. Google v3.1, however, does not reject it, which is why we have this little extra bonus method here. Now, the workaround here is if you do Sora 2, you can use Cameos. So if you haven't seen that before, then I'll drop my video I made with N8N and Sora 2. I'll tag it right up here. And you can see you could use Cameos, so you could create one of yourself, or you could use some other person and have them being in your content with your product, something like that. So anyways, we're using Nanobanana to create an image of the product. Being held or worn by a person. And then we take that image and we turn it into a video with VO 3.1. So anyways, you can see that that actually just finished up. So that's telling me I need to speed up a little bit. Let's click into this AI agent to understand how it is making an image prompt. We're giving it two things. We're giving it the product, which as you can see, if I open this up, it's coming through as portable neck fan. And we're giving it the image setting, which is actually just the video setting, but it says a friendly middle-aged woman is tending her garden under the sun. She pauses, smiles at the camera, and gestures toward the sleek fan resting around her neck. So the AI agent takes that information and then it reads through its system prompts to understand what do I need to do with that information. I'm not gonna read this entire system prompt, but you guys will be able to once again download this template for free, and you can dive into this and understand why I have it set up this way. One thing I did wanna preface though is I made this workflow to be a template, so these system prompts are not perfect or optimized, and it would really be on you to get in here and customize them a little bit for your use case. but it gives us a great place to start. So anyways, you are an expert in hyper-realistic UGC, user-generated content, photography, and your role is to generate detailed image prompts, not the images themselves. So you'll be provided with a product photo, which should not be changed or altered in any way, and you will also be given a specific setting or scene description. So it knows that its role is to create a prompt. So we come in here and we give it some prompt guidelines. We talk about human realism. We talk about product accuracy. We talk about composition and perspective. We talk about lighting and environment. We talk about authentic details, technical style, and then finally some critical instruction like only outputting the image prompt, not an actual image, or, you know, hey, here's your image prompt. You know, we just want the prompt. So out of that, what we get is our image prompt, and you can see it's pretty detailed. It has stuff like lighting. It has stuff like camera angle and composition and stuff like that. and we're able to take that output, feed it into the next node, which is our HTTP request to a service called KeyAI, which lets us access tons of different AI image and video generation models. So this is KeyAI. As you can see, we have tons of stuff like VIO 3.1, Sora 2 Pro, 4o-Image, FluxContext, CLING Turbo. It's kind of like the open router for image and video generation models. So I'm not going to deep dive into exactly how I set up this API call, but definitely go and watch that Sora video if you haven't, because I actually go step by step and show you guys how I did that. I'll also tag right up here an API video that I made, which you should watch anyways because it really explains APIs and agents and stuff like that. Anyways, essentially what we're passing over here is our JSON body, which is the most important part. The model that we want to use is Nanobanana Edit. We're sending over the input prompt, which as you can see right here is coming through. This is the output of the image prompt agent that we just looked at. Now there is one thing I did here that's kind of special is I replaced newlines because you can see if I get rid of this expression real quick, what happens is we get these little line breaks in here. and we don't want that because that will actually break our request to Key AI. So that's why I use that little expression. I also talk about that in the SORA video. And then we're giving it the image URL, which is the one that came from our Google Sheet right here, as you can see. Finally, we're just saying we want this to be vertical because a lot of times the UGC content is kind of selfie style and it's for like a TikTok or an Instagram reel. So that's what we do there. Once Key gets this request, it basically says to us, okay, cool. I got all this information. We're working on that right now. And so the next step that we move into here is a wait node. You can see that I have this set up for 5 seconds. So it goes ahead and it waits for 5 seconds and then it checks in on Key and says, hey, do you have my order done yet? And we're able to get to that by sending over the task ID of the previous order. So it's like when you go to a food truck and you order your food and it says, okay, you're order number 43. This is basically you walking back up to the truck and saying, hey, I'm order 43. Is it done? and they'll either say yes or no. And that's why we use this little if node right here, which is basically our yes or no check. And we're looking to see if the state equals success, because if you look at the first time we checked in, the state equals waiting. The second time that we checked in, the state equaled waiting. And finally, the third time we checked in, the state equals success, which means that our order is ready. And so notice that we have false branch or true branch, and it's true when it's done. So what we do is if it's false, we have this line that goes back to the wait. So this is why you can see it waited 3 times, which means this took about 15 seconds to generate. And so the first time it wasn't ready, it came back. Second time it wasn't ready, we checked in again. And then the third time after it waited again, it was done. And so when that's done, what we end up doing is we want to real quick analyze that image to see what is actually in there. So here's the actual image that it created for us, which looks awesome. It's a green portable neck fan. She's in her garden and it even matches the writing. As you can see, if we go back to the source image, there's a little bit of gold Text right there, there's these circles, so that looks really good. And so I basically grabbed this OpenAI node and said, describe what's in the image, describe the environment, stuff like that. And we get back, the image features a woman standing outdoors in what appears to be a garden. The environment has raised garden beds, blah, blah, blah. The woman is wearing a light blue shirt. She has her hair pulled back around her neck. She has a green wearable device that looks like a personal neck fan, blah, blah, blah. So the reason why I wanted to analyze the image real quick is because the next step is to use another AI agent to create a video prompt. And in order to create a video prompt that is consistent with our image, not only are we going to give it that image, but we also want to give it a quick analysis of what is actually in that image so that its prompt is consistent. And I have tried doing this without the analyze image step and it still works, but doing this, it just seems to be higher quality. So anyways, we are hitting another AI agent. This time we're giving it a little bit more information because keep in mind, this agent isn't just creating a video prompt. It's also creating the dialogue that the person in that video is going to say. And so in order to do that, we give it the product, we give it the product ICP, we give it the product features, we give it the video setting, and here's where we give it the reference image description. So this is the analysis of that image. So it looks at all that information and it says, okay, what do I do with that? And so now we have our system prompt. Once again, not gonna read the whole thing, but you guys can have access to it for free. So we said that your role as an expert UGC video creator, your task is to generate a prompt for an AI video model like VO 3.1. Your goal is to create a realistic selfie-style video that appears to be filmed by an influencer using one hand to hold the phone and the other to interact with the product. The video needs to feel authentic, which is why UGC ads are converting so well right now, because it's just real people speaking real raw thoughts. Anyways, we gave it some requirements like subject and framing. We talk about the visual style, we talk about tone and dialogue, we give it some technical specs, we give it some embedded elements in the prompt, as you can see. We tell it that it's gonna get a reference image and it needs to match that appearance and tone. And then a real quick output prompt, which is pretty concise. And honestly, it looks like I might've accidentally cut off the last sentence here, but hopefully it still came out all right. And so after that, we get this output. You can see it starts off with a natural selfie style, 9:16 vertical video, 8 seconds long, friendly middle-aged woman gardener. She's filming on her phone, she's wearing a light blue shirt. And then down here is where you can see what the dialogue says. So I love how it's so light. I almost forget it's on, but it pushes a ton of air and the battery lasts all afternoon. So that basically took the product features that we had given it and it made a quick little blurb for this influencer to say in the video. Now we're gonna take this video prompt and we're gonna feed that into KeyAI once again, and we're gonna send it to VO 3.1. So here is our HTTP request where we're submitting an order to VO 3.1. I'm gonna open up this body and you can see that we have a prompt, which is exactly what we just got from the left-hand side. Now the reason it looks all messy like this is because I'm actually using 3 replace functions. I'm just gonna replace newlines, which we already talked about. I'm gonna replace double quotes right here. It previously said, I love how it's so light and pushes a ton of air, and this was wrapped in double quotes, but we took those away because that will also break the JSON body. And then I also had to add another one. Sometimes based on your chat model, it can be really weird and output these double curly quotes, which don't actually get captured with this previous replace function. So I threw in this one just as an extra guardrail, which you guys will already have all this set up, so you should be good to go. But now we're basically ensuring that our request will go through. You can see once again, we're giving it the image URL, except for this one is actually the image, you know, it's this one that Nano Banana made for us. And then for the model, we're saying v03-fast. We're using fast instead of quality because it's cheaper and it's faster and it's still really good. And I know this is v03, but trust me, this is using v03.1. And then aspect ratio 9:16. We wanted to make sure that it matches the source image. So Now that we have that, it basically does the exact same thing. It gives us back an order number or some sort of ticket, and we go ahead and wait for 10 seconds right here. We then go ahead and check back in on this request, giving it our order number to make, to see if it's done or not. And then you can see this happened 8 times. And so we basically checked in 8 times, so a total of 80 seconds, so almost a minute and a half. And then when we realize that the order's actually done, we go ahead and we write back to Google Sheets. And let me show you real quick how we set up this. Google Sheet right back. So we're using the operation to update the row, and we choose our sheet, of course we shoot, we choose our document, and then it says that we have to match on a certain column. So what we decide to do is match on the column number. So you can see right here, all of these rows have a different unique number, and when the workflow gets triggered, if we go all the way back down to our initial Get Rows, you can see that this row came in and it was row number 10, or technically row number 11, but the number was 10. And so we're basically going to drag in the number right here and say, okay, the row that we want to update is the row where the number column equals 10. And so that's why it was able to write back to this row right here, which you can now see has been changed to status finished. And we have our finished file right here because in N8N we manually set the status to be finished, and then we drag in the finished video URL that we just got back from our key request. And so that's basically the full process, and that's the most complicated one because both the top one and the bottom one are just doing reference image to video rather than reference image to image and then taking that image to video. So anyways, we just covered the hardest one, and then we'll look at the other ones. But real quick, let's just go look at the actual output because of course I'm very curious.
I love how it's so light, I almost forget it's on, but it pushes tons of air and the battery lasts all afternoon.
That's really impressive. I was nervous to see because it's different from someone holding a product. She's actually wearing it. But I mean, the voice was really good. The tonality was good. I thought that this was an impressive result. But let's move on to the next one, which is Sora 2. So what I'm going to do is go back into the workflow and I'm going to execute it. What this is going to do is pull in the next row and you can see it got pushed down to Sora 2 because when it does this check for the model, it knows that the model was right here marked off as Sora 2. So I'm honestly not going to spend as much time in these next 2 flows because you guys pretty much already understand exactly what's going on. We have this video prompt agent, which once again is looking at the product, product ICP, the product features, and the video setting. The only difference here is that it doesn't have an analysis of the reference image because it'll just be given that. But the system prompt, once again, we basically say you're an advanced UGC video creator, you're optimizing for video prompts for Sora 2, here's what you'll be given. And we go over basically the same exact headers, subject and framing, visual style, uh, tone and dialogue, technical specs, prompt construction instructions, and an example output prompt, as you can see down there. So what that does is it once again, it outputs us a video prompt. And you can see in this one, there actually are new lines. So good thing we have that guardrail baked in to get rid of those new lines. As you can see in this HTTP request to key, We fill in our body by saying, okay, the model we want to use is Sora2 image to video. Here is the prompt. And of course we're using all of those nasty replace functions. Once again, we've got the image URL, which we are grabbing from the Google Sheet, which once again looks like this right there. And we're basically just sending all of that over. And so it's going to take that video prompt and it's going to take that source image and it's going to turn that into a video. We're doing the exact same thing here where, you know, we submitted the order, we have to wait 10 seconds and then check in. and we're going to go ahead and constantly be checking until we know that our video is done. On average, I have been seeing that VO3 Fast is finishing in anywhere from a minute to 2 minutes, and Sora 2's been taking typically a little bit more than that, maybe a minute and a half to 3 minutes. There are a few things to consider. Sometimes if you do something like a Cameo, it's gonna take longer. If you've got a really long video prompt, it'll take longer. Also, what can influence it is how many people in the world are trying to use Keys endpoints. That can make it take longer too. But typically Google VO3 Fast is faster. but it's the exact same flow from there. We're pulling it back in. We're doing the same match to update the row, and then we're just updating the status of finished and we are putting in the final video link into the Google Sheet. There you go. It looks like it just finished up. Let's go back into the Google Sheet. It just got marked as finished and we have our file. So let's take a look at the Sora 2 output.
Man, this thing is so light and the airflow hits my face perfectly. Keeps me cool while I work and the battery lasts for hours, so I don't have to worry about it dying out here.
Man. Well, that was another really good one. A little bit confused where this thing came from. That was a bit of a hallucination. But as you can see, this was the reference image and it looks really good in this video. Super authentic. And it looks like she's obviously standing there taking a selfie video. All right. So the final one for this example is VO 3.1. So I'm going to go ahead and zoom out a little bit, hit execute workflow, and it should shoot it up this top branch now. And I'm honestly not even going to break this down because it's the exact same thing. I copied over basically the exact same system prompt. I just switched out 10 seconds, which is how long the Sora videos are, for 8 seconds for how long the VO3.1 videos are. And then I switched out Sora 2 for VO3.1. But I wanted to keep these prompts across all of these flows as consistent as possible to kind of limit the variability that we have in order to truly see the power of these models when we have as many things consistent as we can. So I'm just gonna let this finish up and I will check in with you guys when we get our finished output from VO3.1. All right, so you can see that that one just finished up. Once again, took about 80 seconds. Let's go ahead and make sure we got this updated and let's take a look at the VO3.1 output.
I love how light this is turning. It actually blows enough air to keep me cool for hours while I'm working.
Okay, so it's not too bad. I honestly think that right now my, my order is this exact order that we have here, which is Nano plus VO3.1, then Sora 2, then just VO3.1. A lot of these VO ones have like this super HDR, weird orange glow looking effect. I'm not sure if you guys had noticed that. Here's another example of the VO3.1. It's not, it's not terrible, but just in comparison to some of the other ones, it definitely looks a bit more orange. And then another thing I noticed is this is the VO3.1 example, and I explicitly told it to not change anything about the reference image itself. But we can see the creatine gummies is a jar, and then in the video it's a bag. And so it does have the same branding and same font, as you can see. He even— actually, this is funny— he's got the logo on his hoodie, which is honestly a nice touch. But this is a bag, and in the source image it was a jar. And other creatine ones didn't have a bag, they had the correct jar too. And I know we didn't look at the forearm strengthener example, but this was another one where, for example, Nano+VO 3.1— let me just show you guys this one. I love that the adjustable resistance actually makes my grip get stronger week to week, and it's small enough to use right at my desk. Like, super good, super natural, and the product photo looked exactly like it did that I gave it. which looks like this, as you can see right here. But then that same one with VO 3.1 without Nano Banana, once again, it looks a bit— it has some weird shadows and it looks orange. I love how the adjustable resistance actually lets me progress without extra gears. But the product photo also once again does not exactly match the source image. So that's kind of like a huge no-no for me. And another thing that you guys will notice when you send a source image and you turn that into a video, both with VO 3.1 and Sora is the first frame is the reference image. And this is that first creatine example we looked at with Sora too. And you'll notice the very first frame is once again the reference image. And so when we do Nanobanana plus Google VO 3.1, it still does that, but our reference image is this. So it just is able to, you know, pick up right from here and it looks way more natural. So the point being, you could kind of like automate the content creation and you could have it auto-post as well with this branch. But I probably wouldn't auto-post Google V03 like this or Soar 2 like this because of that whole first frame, first couple milliseconds thing. Now some people argue that it's good because then you have a thumbnail, but then every single thumbnail on your feed would look the exact same, and that I think would just come across really bad. So that's why I think right now my favorite is honestly Nano Banana plus V03.1. Now I think Sora would give it a run for its money if it allowed you to upload a realistic photo of a human. Because if we go back to this first example with the portable neck fan, when Nano Banana made that image, even though this is a fake person and an AI-generated image, if you tried to feed that into Sora too, it would block you because of content restrictions. So that's why this combo has my vote right now. But another thing to consider, of course, is cost. So comparing these options, I guess there were technically 3, but let's just look at these two because VO3 is in here for both. But option one is Nanabanana plus VO3 Fast. When you're going through KI, which is the one that we were on right up here, a Nanabanana image is gonna cost you 2 cents, so not bad. And an 8-second VO3 Fast video will cost you 30 cents. So total cost per piece of content with this system would be 32 cents. Now for option two, if you're using Sora2 and you're going through KI, which is the cheapest I've seen it, so definitely do that. It will cost you 15 cents for a 10-second video. So really not bad at all, about half the cost of VO3Fast. So option 1 is roughly 2 times more expensive than Sora2. So the question is, is it 2 times higher quality and will it result in 2 times more conversions? Or maybe it's not exactly a 2 times match because it's a lot cheaper than how much money you'd make per sale or whatever it is. But there is a bit of a trade-off there because you could essentially make double the amount of short-form UGC content with Sora2, for the same price as using Nano Banana and VO3 Fast. So anyways, I just wanted to sort of give you guys all the info, give you the template, show you the system, and explain the differences between these two models. And of course, I'm really, really bullish on all of this because the fact of the matter is you guys can get in here and make these prompts better. You can play around with different chat models if you want. We used GPT-5 Mini for all of them, as you can see here. And think about in 6 months from now, a year from now, how much better these models will be. When Sora 4 comes out and when VO4 comes out. They're just gonna get better and better and better and cheaper and cheaper and cheaper. Anyways, I don't want this video to go too long, but I did say that you guys could access this entire template for free. So all you have to do is join my Free School community. The link for that will be down in the description. There will also be a full setup guide right over here when you download this template. And when you join my Free School community, this is what it will look like. You'll just have to click on YouTube Resources, or you can search for the title of this video. And when you click on the post associated with the video, you will have right here the JSON file to download, and you import that into N8N and any other guides or PDFs that you need. I will also right here, similar to this post, I will include the link to copy this Google Sheet template so that you guys can plug everything in and have a very minimal amount of custom configuration and just start, you know, producing these types of results. And if you want to see me actually build this system live and just kind of talk about what I'm doing, why I'm doing it, and my thought process, then definitely check out my Plus community. The link for this will also be down in the description. We've got a great community of over 2,500 members who are building with N8N every day, asking questions, sharing what they're learning, helping each other out. And a lot of these people are building businesses with N8N right now. We've also got a classroom section with 3 full courses. We've got Agent Zero, which is the foundations for beginners. We have 10 Hours to 10 Seconds where you learn how to identify, design, and build time-saving automations. We have One Person AI Agency, which is for our premium members. Laying the Foundation to Build a Scalable AI Automation Business. And then here's the course I was just talking about with projects where we actually dive into step-by-step setups of practical workflows that you can actually use. Probably one of the best ways to actually learn N8N in and out. We also have one live call per week. They're super fun. Everyone gets on there and we ask questions and we have some cool conversations about the space, the industry, all this kind of stuff. So I'd love to see you guys in those live calls in the community, but that's gonna do it for today. So if you enjoyed this one or you learned something new, please give it a like. It definitely helps me out a ton. And as always, I appreciate you guys making it to the end of the video. I'll see you on the next one. Thanks, everyone.










