Locally Host n8n AI Agents for FREE (step by step)
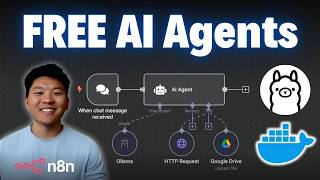
Dr. Violet Howard walks through installing n8n, Ollama, Qdrant, and Postgres with Docker Desktop to run AI agents locally for free. She explains Docker basics, shows how to access the n8n interface at localhost:5678, and demonstrates that workflows and credentials persist after restart. The full stack runs in a single container with no ongoing costs.
Chapters
By the end of this video, you'll be able to run AI agents on NNN for completely free. Now I know that LocalAI can be pretty intimidating, and I myself don't really have that technical background or understand entering commands to a terminal, but we're going to go through this journey together, and by the end of this video, you'll have it all set up, and you'll see it's not too bad. And along the way, I'm going to try to explain the stuff as simply as I can. Okay, so step 1 is click on the link in the description, and we're going to go to the self-hosted AI starter kit, which is a GitHub repository. All we're going to have to do is basically copy one command into our terminal, and then that's like the worst of it. So once we run this self-hosted starter kit, we're gonna have N8N, Ollama, Qdrant, and Postgres. So it gives us good building blocks to start building agents and workflows. So before we actually install it, there's one prerequisite, which is go to docker.com and you're gonna have to download Docker Desktop. And this just basically lets us have a containerized environment for our starter kit that has all of that stuff in it. And don't worry, I'm gonna explain what that all means. But what you're gonna do is come here, hit download Docker Desktop, and then obviously make the download for your system. Okay, once you've got that downloaded, let's go back over to the self-hosted starter kit and we'll come down here to installation. And all we're going to do is find which commands we need to run. So for me, I've got a PC with NVIDIA GPU, so I'm going to use this one. If you've got AMD GPU on Linux or if you got Mac, then you'll use these ones down here. But all I'm going to do is hit copy on these three little lines right here. I'm going to open up my terminal and I'm going to run this as an administrator. And now that I'm in here, I'm just going to paste in what we copied from the self-hosted starter kit. It's gonna run that first one, which is basically just cloning that GitHub repository. So it just cloned the self-hosted starter kit. Now that that's done, we basically just used a cd, which means we're changing our directory into the self-hosted starter kit. And you don't really need to know this, but anyways, now we're just gonna actually spin it up. So right here, I'm just gonna click enter. And what this is gonna do is it's gonna pull in 6 things. It's gonna pull in n8n-import, n8n, Ollama, Postgres, Ollama GPU, and Qdrant. And this is just gonna take a minute or two and it's gonna pull in these different things and then we'll be in Docker and I'll show you guys how that all works. So while we're waiting for this stuff to load in, let me just pull up a quick Excalidraw where I visualized what is going on right now. So in Docker, the three main things we're gonna be looking at are containers, images, and volume. So right now we're basically pulling in four images, which are Postgres, Qdrant, Ollama, and n8n. And these images are basically just open source code repositories that we can pull into our Docker or whatever we want to. And then we use them together to basically run a container. So all of these are gonna be going on within our self-hosted starter kit container. Now where volume comes into play is this is basically like the persistent storage of memory. So when we're in n8n and we build workflows and we set up credentials, we wanna save those in our volume because if we save them in our container Every time the container like shuts down and we spin it back up, it's gonna have lost all of that. So what it does is the container and the images all store this memory in volume. And I'll show you guys that once we get into Docker. But basically that's it. At a high level, it's very simple. We have images, which are different services we wanna use. We have the container, which basically controls all of the images inside of it. And then that's how we have like one containerized environment where all of these things can talk to each other locally. And then we have our memory, which I'll show you guys again, all of this stuff in Docker. Okay, so let's pull back up the terminal and we'll see. It's still pulling the stuff in, so I'll check in with you guys once we have everything in there. And I guess while we're waiting for that to finish up, we may as well cover some real quick pros and cons of local N8N and AI setup. So obviously a big pro is going to be the cost, unlimited free use, but the con of that is that you have to manage your own hardware, electricity, and maintenance. Another pro, we're going to have full data control because we know we're keeping it locally on our own environment. And then the con is just we're responsible for security and compliance. Another pro is that we have full customization to modify code and do whatever we want to do with local models. One of the cons here is that it can be intimidating and requires some technical knowledge. Security kind of goes along with privacy and control. And then we also have pros and cons to the scalability and reliability as well. All right, so now that that finished up, we're able to open up Docker and see what's going on, and we can also go ahead and access our local NNN. Also not sure why mine doesn't, but yours will probably right here say editor is now available via localhost:5678. Either way, we'll be able to get to it. If I open up my Docker right now, what we're looking at is the self-hosted starter kit container. So if I close this out, we can see we have this container called the self-hosted starter kit. If I open it up, we can see what's actually inside there. And we have Ollama, Postgres, Quadrant, and NNN that are currently running. And right here is where we could get to that port. If I clicked onto this, it would open up in our browser localhost:5678. You guys can't see it, but my URL up here says localhost:5678. And now it just needs us to set up our account. and now that we got that set up, you can see we have N8N. The reason we have a demo workflow is because in that starter kit we had like an N8N import, which was this workflow in there. And what happens is when we come in here, we can see that we actually have N8N. We have Ollama already set up as well because that starter kit had Ollama in it. Anyways, before we test this out, let's go back into Docker and let's just take a look at what's going on here. So like I said earlier, we have containers, images, and volumes. So here's the container. As you can see, self-hosted AI starter kit. If we click over here on images, we can now see the different images that we have. So we had Quadrant, Postgres, N8n, and Ollama. And these are images that anyone can access. They're open source. And if I came into here and I wanted to just download an N8n image in my Docker, I would just search N8n. And now you can see right here, we'd be able to pull in the latest version of N8n. And then finally, of course, we have our volumes, which we talked about was kind of like the storage. So here in the volumes, you can see we have N8n storage, Ollama storage, Postgres storage, and Quadrant storage. Anyways, I remember when I first did something like this, I understood like the difference between containers, images, and volumes, but I didn't understand how they actually all linked together. So the way it does that is when you have a container, you basically have a Docker Compose file. So if I came into this container, we can see the stack, but I could click right here into view configurations. And this is gonna show us the Docker Compose file for this self-hosted AI starter kit container. And in this Compose file is where we're able to look at what are the volumes. We're able to change different things like environment variables. and it basically configures this whole container. So right here you can see here are the volumes, n8n, Postgres, Ollama, and Quadrant, just like we saw when we went to our volumes. Here we can see n8n and the different environment variables. So this is where you'd come in here and, you know, if you needed to set up a tunnel, which we'll talk about in a future video, um, you would come in here and set that as a webhook URL. You could also set up different environment variables if you needed to use stuff like community nodes and enable that as tools or whatever it was. You could do that in this compose file. But I know it seems a little intimidating, but it's not too bad. As you can see here, we have services. So we know we have our Postgres image, our N8N import, which was that one workflow that I showed you guys, our N8N, our Quadrant, and then our different Olamas. And right now we're not gonna touch it, but in a future video I'll show you guys how we can edit this file. Anyways, what I'm gonna do is just basically turn off the container. So I'm just gonna stop it. If we go back into N8N right here, you can now see it says connection lost. And if I was to refresh, this is not going to work because the container is off and it's just not running locally anymore. So now that we understand that, I would basically just start this container back up. It's going to spin up all of our different images that we need. And then once the n8n one is available, we're just going to be able to click right here to access that localhost:5678 port. And we should still have that exact same workflow. And if we would have set up any other credentials or anything like that, they'd still be there. So I'm going to open this up. We can see we already have signed in, so we're good to go. And we have the workflow already good to go. And of course, because we have the Ollama image in this container, we don't need to create a credential. We're already connected to that base URL locally using Ollama. And now we could go ahead and just say, hello. And this is going to use the Ollama model that we just downloaded on our own environment locally to respond to us with AI and say, how can I assist you today? All right, so that's going to do it for this one. There's a lot more complexities that come into running N8N and different AI models locally, which we'll explore in future videos. But if you enjoy this one and you learn something new, please give it a like. It definitely helps me out a ton, and I'll see you guys in the next video. Thanks everyone.










