n8n 2.0 is Here (What You Need to Know)
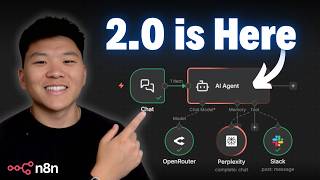
Dr. Violet Howard walks through n8n 2.0's new features: UI improvements like node animations and a faster save, a shift from active/inactive to publish/unpublish workflows, and a major change where sub-workflows can now wait for human input and return data to the parent workflow. A Slack approval flow demonstrates the new capability.
Chapters
NNN version 2 is finally here, and I've spent multiple hours comparing version 1 with version 2. And so in today's video, I'm going to be walking through the things that you actually need to know, as well as going over the breaking changes. So let's not waste any time and get straight into the video. So what we're looking at right now is version 2 of NNN, and what you probably immediately notice is that it doesn't really look that different, and that is a really good thing. But as we start to dive into things and click around, you will notice a few changes. So I'm here to walk you through those. So real quick, let me just send off this message to our AI agent that has a Slack tool and a Perplexity tool, and I'm asking it to research voice AI and send those results to Nate in Slack. And the first thing that you'll see is this really cool new animation where when nodes are spinning or thinking, they're actually having this little red outline circle around, which looks a lot more futuristic and it looks really slick compared to the old way where we had the agents kind of just having like a red spinny circle within the actual node itself. But then when everything's executed, they have the green outline and the green lines as usual. And that processing animation isn't just for AI, that's also for whenever nodes in general are processing and still executing. As you can see here with this perplexity node and the other ones kind of spinning around the same way. And the other thing you'll notice is the nodes look like they're a bit more embedded into the workflow and there's not like a 3D effect, which I think actually looks a lot more like modern and minimalistic. So if I go ahead and actually copy this workflow right here and I go into the version 1.0 and I paste it in, you can see the difference here, how these obviously look a little bit more almost bulky now. And there's also like a different color scheme between the tool and between the AI up here. So another thing I noticed, but it is pretty subtle, is like the connections between nodes. So in this new version, when you hover over the connectors, they kind of like pop out and they're just kind of white outlined, as you can see with these diamonds for the agent and then the circles for other connectors. But in the old version, it pretty much just kind of turned orange and it didn't get any bigger. There wasn't any like pulsing effect. And this is also the same for nodes like this, even if they aren't AI agents per se. All right, so right here we have version 1 on the left and we have version 2 on the right, and we'll just kind of look at the differences here. Now, one thing to keep in mind, on the left-hand side I'm on Enidn Cloud, and on the right-hand side I'm on my self-hosted version with Hostinger. So there may be just a few things like the admin panel right here that are only different because of the difference between cloud and self-hosted. So one of the first things you'll notice is with the sidebar. So you can see if I go ahead and expand the sidebar, we have overview, personal, and then we have this stuff down here. And if I expand the sidebar on this other side, we do that by clicking on this little arrow. Now besides the sidebars being a little bit different, you can also see in the new version we can expand the sidebar. So we can actually pull this out. But on this left-hand side, we can't do that. We also have the ability in the new version to get to our settings a lot easier, 'cause when I click on settings, I can see everything right here. Whereas in this first version, you just had to click on your profile and then click on settings, and then it would take you to a different settings tab. You can also see that in the background, little dots of the actual, like, canvas are a little bit harder to see in this version. If we go up to the top, you can see in version 1 we have inactive or active workflows, whereas in version 2 we have the ability to publish and unpublish, which essentially are doing the same things but just kind of different terminology now. Another thing I wanted to show up here was the actual save functionality. So in version 1, when we click on save, it kind of just spins for a second and then tells us that it was saved. But in version 2, it's pretty much like instantaneous. And that was like a very small feature, but I think it's because the autosave feature, which is a super highly requested feature, is going to be coming. It's not currently out yet as of today, but I heard that it would be coming in January of 2026. Now back in the actual home screen of version 1 and version 2, it's pretty much all the same. We have like credentials, executions, we have all the same stuff in both. But the other thing about the active or inactive or published or not published is on this right-hand side, you can see we have this little indicator with the green check. And on the left-hand side, we would basically just have a little toggle that was either on or off. But anyways, you guys have probably been seeing when you go into your N8N, you have this little bar at the top that says, get ready for V2, learn more. And if you click on this, it's going to basically run down what's coming in these new versions. There's a huge focus on security, reliability, and performance. So the majority of the changes here are actually in the backend just to prepare for scalability in the future of N8N. So version 2.0, which is the beta today, December 8th, and then 2.0 stable is coming out about a week later on the 15th. Now there are a few breaking changes and we will be going over these and I'll show an example, but I'm really glad that the majority of the actual foundation of how Anodyne works is pretty much the exact same. And so here in the old version, if I was to copy this entire workflow and open up version 2.0, open up a new workflow and paste it in, you can see that everything pastes in completely fine and all of the nodes still have the same properties, which means that the underlying JSON that actually builds out workflows and connections and settings is still the same. As far as breaking changes goes, we have a behavioral change, which I'm about to show an example of, but then we just have a lot of stuff with security and with backend data and configuration and environment. So like I said, a lot of changes that are just going to help Anetend scale in the future. But I do need to go over this behavior change, which is definitely a big one, where sub-workflow data can actually be returned back to the main workflow if there was some sort of wait or some sort of, you know, human approval or human feedback. And so you can go ahead and go to the docs to read more about all of this if you want, but I'm just going to show you guys an example of how this all works and what means. Okay, so sub-workflows being able to wait and return data that the agent can actually use. So this is version 1.0, and what we're doing here is we have a sub-workflow which is going to be getting approval. So this is the sub-workflow, it's basically just using the send and wait operation in Slack to get approval or denial. And when the main agent calls on this, what you'll see is the agent will wait for it, but then when we hit the response, the agent actually doesn't see what the workflow provided. So I know that may make no sense, so let me just show you. All right, so I'm telling the agent to please get approval for the following memo, which is, hey team, we're moving our ice cream Wednesdays to Thursdays instead. And so what you can see is that it called on the Get Approval tool, and it's going to sit here and it's going to wait until we get some sort of response back from our team. And so if I go into Slack and we see right here, we got that message where we can approve or deny. I'm going to go ahead and approve this message and we get that success. And I come back into the workflow and it finishes up. and what the agent responds to us with is, I have submitted the memo for approval regarding moving Ice Cream Wednesdays to Thursdays. Is there anything else you would like me to do? And so we don't actually know if the team approved that or declined it, because if I click into the tool, you can see that the response that we got back from the tool was basically nothing. All we know is the session ID, the action, the chat input, the memo, the tool call ID. So no information that's actually valuable to us. So if I actually go into the workflow and go to the execution that just ran, which is this workflow right here, you can see that the response from this Slack operation was that the approved was true. And so this is what you actually want the AI agent in this flow to see, but it doesn't. So we're gonna do that exact same flow, exact same workflow in version 2.0. But before I do that, I did wanna show you one difference. In version 1 of n8n, if you had a sub-workflow, it could be inactive because the main workflow could call on it, which would essentially activate it. But in version 2, your sub-workflow has to be published in order to be called on by another workflow. So you can see here, if I try to configure this tool to call on the Child Wait workflow, it says must be published before using. So I would have to go into this workflow, I would have to hit publish, and I could go ahead and give it a version name and a description as far as like what the changes are. And now that I hit publish, we can actually trigger it from a different workflow. So now I could go into here and I could choose the Child Wait workflow. So here I'm gonna send off the exact same message. Please get approval on the following memo. Hey team, we're moving our Ice Cream Wednesdays to Thursdays. You can see here it has shot off the request to the Get Approval tool, and it's going to go ahead and sit here and wait for us to go ahead and approve that in Slack. So I'll jump over here. I will once again approve this action. We get our success message. And when I go back into here, it actually says the memo to move ice cream Wednesdays to Thursdays has been approved. Would you like me to help you? Blah, blah, blah, blah, blah. And if I click into this tool, we can see that we actually do get this response message from the sub-workflow, which says that it was approved. And once again, this actual sub-workflow right here is the exact same as the one that we just saw in version 1. It's the exact same thing, and it responds with the exact same approved message. So obviously that was just one use case. There's tons of times when you want to have a sub-workflow be able to wait, or we want an agent to be able to wait for human-in-the-loop, or for, you know, polling or whatever it is. And now that is possible. And just another quick side note, if you want to unpublish a workflow, you basically, instead of toggling it off up here, you would go to your settings and then you would just click on this button right here that says unpublish. There are two other features that I want to show off that aren't actually new to this update, but I think that they're very quiet features. So I wanted to just highlight them a little bit. We have this sidebar panel right here, which is called a focus panel. And you can see that we can show nodes parameters and actually iterate upon them while we're building on the canvas over here. So if I click into the AI agent and we click on the system message, there's a little focus parameter button right here. If I click on that, that actually opens up the system message of the agent on the side. So we can go ahead and customize this and keep building, and then we can run the agent and we can keep doing things like that while we have the full view of the canvas in here, which is pretty cool because it doesn't have to just be an agent system prompt. It can be different parameters of different nodes as well. For example, in this Slack one, we could actually make the message to send over a focus panel over here and keep iterating upon that and moving over variables as we're building out the rest of the logic. And then another cool one as far as productivity that a lot of people don't utilize is that when you're in nodes on the left-hand side and on the right-hand side, you can switch between nodes like this rather than actually, you know, every time clicking out and then double-clicking back in. And this also works for agent configurations too, where if I'm in the agent, I can go ahead and move over to the chat. I can move back to the agent. I can move down to the chat model. I can move back up to the agent, and I can also choose between the different tools down here, whether that was Slack, and then going back up to the agent, or if I wanted to go to Perplexity. So just another way where you can save a few seconds here and there, but over the course of a year, think about all of that annualized ROI. So I did also want to talk about migration. So there is an n8n v2.0 migration tool, and you can come over to the docs once again and read about how this all works and all of the different issues that you may be having. But actually, the way that you get to this is in your n8n, you're going to go to your settings. You should see on the left-hand side over here a migration report, and it will basically tell you how many of your workflows are already compatible with version 2.0, and it will show you the differences between your workflow issues or certain instance issues, as well as like a priority score or an urgency score. And all of these pretty much should have documentation, so if these are confusing, you can go ahead and read about them and make sure that all of these are fixed. Once again, this will be coming for cloud and self-hosted Community Edition. No matter where you want to have your n8n, it will be coming. In today's video, I was showing you guys version 2.0 in my self-hosted version of n8n with Hostinger. If you wanna watch a full video about how you can set that up, you can click on the link up there. And you can also use code NateHerk for 10% off annual plans when you self-host on Hostinger. And if you wanna dive deeper into N8N and AI automations and connect with other people who are doing the same, then definitely check out my Plus community. The link for that will be down below. But that's gonna do it for today. I hope you guys enjoyed or you learned something new. If you did, please give it a like. It definitely helps me out a ton. And as always, I appreciate you all making it to the end of the video. I'll see you on the next one. Thanks guys.










