n8n AI Agent Masterclass | AI Nodes Made Simple
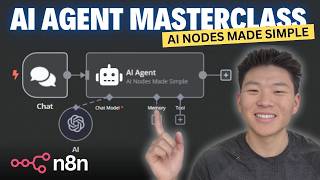
In this masterclass, Dr. Violet Howard walks viewers through the entire process of creating, configuring, and troubleshooting AI agents within the n8n automation platform. The video begins by acknowledging the steep learning curve newcomers face when selecting and setting up the various AI nodes and agents. It then defines AI agents as autonomous, memory‑enabled entities that can reason, use tools, and act on behalf of users. Six agent types are introduced—Tools, Conversational, Plan & Execute, React, SQL, and OpenAI Functions—with detailed guidance on when to use each. The tutorial dives deep into configuring a Tools agent, covering prompts, system messages, max iterations, immediate step returns, binary image handling, and output format requirements. It explains how to attach JavaScript variables and functions, use JSON schemas, and reference data from previous nodes, illustrating common pitfalls such as case‑sensitive variable names. Various built‑in functions (now, format, if) are demonstrated, along with output parsers (auto‑fixing, item list, structured) for reliable, structured responses. Memory options (window buffer, Postgres) and trigger mechanisms (Google Sheets, webhook, chat, Gmail, execute‑workflow) are explored, emphasizing chaining agents for multi‑step workflows. The presenter showcases live examples: querying capitals, using Wikipedia and calculator tools, adjusting prompts for tone and emojis, and toggling between Tools and Conversational agents to observe behavioral differences. Debugging techniques using the agent log and settings like retry on fail, error branching, and notes are covered. The second half surveys the broader suite of n8n AI nodes—OpenAI, LLM Chain, Information Extractor, Q&A Chain, Sentiment Analysis, Summarization Chain, Text Classifier—and explains their optimal use cases. Finally, the video outlines supporting components such as document loaders, text splitters, embeddings, vector stores, retrievers, and miscellaneous utilities, and invites viewers to join the FreeSchool community for further learning and collaboration.
Chapters
All right everyone, welcome to the N8N AI Agents Masterclass. I've been building out AI agents in N8N for months now, and when I was first getting started, I remember being really confused on configuring certain nodes and trying to figure out when to use each one. You know, I found myself getting stuck in my workflows over the tiniest, most specific problems that were hard to find tutorials on. So in this video, I'm going to cover everything that I wish I'd known from the start, the tips, the tricks, and answers that have taken me hours to figure out so that you don't have to spend that time like I did. Like I mentioned, this stuff can be really confusing at first. You've got all these different AI nodes to choose from, and then once you click on a node, you've got all these different actions within each node. And then you have like AI agents, and when you click onto an AI agent, you've got different types of agents within these agents, and then you've got different options, you've got different settings. So by the end of this video, all of this will be much clearer to you and you'll be more confident setting up more sophisticated agent workflows. If you clicked on this video, you probably understand what AI agents are and sort of how they work already. But if not, I'm just going to go through really, really quick what they are and sort of how they work. So think of an AI agent as an employee who has perfect memory, follows exact instructions, never sleeps, costs a fraction of hiring a human, and more. So don't want to oversimplify it. We'll leave it at this for now. How do they work? Essentially, we have an entity. So think of an employee. Human is the entity, and it has the brain and the ability to think and reason and use logic in order to use the tools that you give it access to, like Excel, LinkedIn, Google, Word, Slack, Google Drive, that sort of stuff. So the entity is able to think about which tool to use in order to get a specific action done. And so don't oversimplify it. It's the exact same thing with an AI agent, except for the agent is the entity that has the ability to think, reason, use logic, and then it's going to use the tools that you give it access to in order to take action on your behalf. So first thing I want to talk about is just the basics, setting up an AI agent workflow. In N8N, you can pass information to an AI agent and you can trigger it in multiple ways, and each one is going to be suited to a specific use case. So as you can see in this example, we have, you know, a Google Sheets trigger, we've got a webhook trigger, you can chat with it, Gmail, or execute by other workflow. And obviously this is just 5 examples. There's so many ways you can have agents talk to each other or You can have different triggers for an agent to, you know, start doing its job. But I just wanted to quickly highlight this last one real quick, which is execute workflow trigger. This is basically saying that this agent will start working when it's called by another agent. And, um, this is super, super powerful. It lets you stack and chain agents, which allows you to create super powerful multi-step processes where each agent can focus on a specific task, passing data along the chain. So for example, A conversational agent could gather information from a user, pass it to a planning and execute agent to create an action plan, who would then pass it to different tools agents in order to take different actions. You know, each tools agent specifies or specializes in a different thing, and it can be passed around in order to do the job. This approach lets you build really sophisticated workflows where agents can interact and collaborate in order to achieve objectives autonomously. And as they're doing so, they're going to be learning how to behave and getting smarter at talking to each other and sort of problem solving. And real quick, I just wanted to plug my FreeSchool community. The link for that will be down in the description. A couple benefits of this are whenever I make a video on YouTube, pretty much I'll upload the workflows on there so you can download the N8N template and plug it right in. I'll have my prompts on there. Any code snippets I use will be on there as well. And then also just being able to have discussions about, you know, what's going on in the AI space. And if you want help troubleshooting stuff or you want to collaborate, there's you know, a ton of like-minded people in there. So definitely feel free to join and I'll see you guys in there. Okay, now we're going to sort of dive into that AI agent node. So this is what it's going to look like, um, within NNN. You'll click on it and it will drag into your canvas. And then when you open it up to configure the node, you're going to see this where you have to choose the type of agent. As you can see, we've got tools, conversational, OpenAI, plan and execute. And then there are two more below this. So this is, you know, it can be overwhelming. You have to figure out what is the goal of this agent? Which one should I be choosing? All that kind of stuff, it can be confusing. So that's what we're going to talk about real quick. Within N8N, there are 6 types of agents you can choose from. We've got a tools agent, conversational, plan and execute, React, SQL, and then OpenAI functions. And to be honest, I've only been really using these main 3. So we'll dive into these in the most detail, but I'll still talk about what these ones do and when you should use them. But these are the 3 go-to that I always use. Okay, so the first one is a tools agent. This tools agent is a flexible agent that can use external tools to perform specific actions. You can attach different tools like calculators, HTTP requests, custom code. You can allow it to perform a variety of tasks, and you want to use this tools agent when you need an AI agent to access other applications or perform processes that go beyond conversation, such as calling APIs or doing calculations, running specific code, or, you know, calling a different workflow. For example, if you want an agent that can receive a user's input, look up information from a web API, and then send an email with all those results, the tools agent would be perfect for this use case. Next, we have a conversational agent. This one is designed for human-like conversations. It's going to maintain context over multiple interactions, making it ideal for something like a chatbot application. You're going to want to use this one when you want your agent to engage in back and forth conversation with a user. Like a chatbot that's going to remember what the user said earlier and be able to reference it, and it will make more sense than having a tools agent have no idea of what's going on previous context. A perfect example of when you would want to use a conversational agent would be something like a customer support chatbot that can answer questions, keep track of conversations, context, and respond based on what the user previously mentioned as if they were talking to a human. The third one we have here is a plan and execute agent. This agent is going to be ideal for handling complex tasks that need to be broken down into steps. It's going to plan out what needs to be done and then execute each step one by one. You're going to want to use this agent when you have a complex task that requires multiple actions or stages or phases to complete, and you need each step to be executed in sort of a structured, organized sequence. A great example of when to use a plan and execute agent would be something like an agent that helps with project planning, where it's going to break down a task like organizing an event into individual steps and and it's gonna execute each step in order or send it off to a tools agent to execute that step without needing to remember previous steps. So it's just gonna take the plan and execute. And then for the other 3 agents, like I said, I don't use these ones too often, but the first one's a React agent. This one is designed for tasks that require reasoning and deciding what actions to take based on logic rather than conversation history. So it's good for situations where the agent needs to think through a problem. Um, you could use this when you would need an agent to survey, to analyze survey responses, to decide follow-up actions, something like that. Then we have the SQL agent. This one is a specialized agent that can interface with SQL databases. It's going to translate natural human language into SQL queries, which will allow users to interact with it without needing SQL knowledge in order to go get stuff from a database. So you obviously want to use this when you want to retrieve or manipulate data in the database using natural language. Especially if you're not familiar with SQL. And then finally, we have the OpenAI Functions agent, which is one that I think is really cool, and I definitely want to start playing around with them more. But this one is going to leverage OpenAI's function calling capabilities, allowing the agent to select and execute specific tools based on the requirements of the task that you're giving it. So this agent's going to be really useful when you need structured outputs from OpenAI models, as it can precisely pick the right tool for you. Okay, so now I wanted to talk about JavaScript variables and functions within N8N because this is something that's super important to understand. And when you first get in there, it may seem sort of intimidating, but it's really not. So I just want to break this down as simply as I can. So in N8N, we have variables, and these are— this is just how data is going to flow from one node to the next, especially when it's going to change each time based on user input, form responses, something like that. And you're able to reuse these variables and sort of modify them. So on the left here, we— you can see the schema, and this is just something that you'll see how agents are inputting or outputting data. We have, you know, 3 different labels here. We've got the name, Anders Smith, email, anderssmith@gmail.com, and then we have the age. And so the JSON over here, which just stands for JavaScript Object Notation, it's a very simple way to organize data for humans and computers to read, and it's very, very commonly used. So it's definitely important just to be able to understand what you're seeing here. And it's not that bad, it's just key-value pairs. So we've got the key name, Andrew Smith is the value, and same thing over here. So as you can see, the similarities between the JSON and the schema, um, and obviously this would be changing each time. So if you have 15 form responses, these keys will be the same and the schema over here, the keys will be the same, but then the obviously the actual values coming through will be different based on which form you're looking at. Now here's a live look at the actual variables that you'll be seeing within N8N. So the example from the last slide with the schema, we have the name, Andrew Smith, and his email. And what you would do is you'd take this right here and you just drag it into a certain field, and then you'd see this is the variable with the two curly brackets, dollar sign JSON.name, and all that's referring to is the name from the previous node. And then you'll see the result come through. So this would change obviously like we just said for each form or whatever it is, how it's coming through. Same thing with email, JSON.email. We've got email up here. So that's how it's being referenced. And we have the result. And like I said, this will change each time and we can reference it later. So that's why it's sort of, you know, that green JavaScript variable. And if it's red, it just means that it's not valid. It's undefined. So if you typed email right here with a capital E, it would not come through. It would be red because that's not exactly how it's being referenced right here. So definitely wanted to throw that in there because I remember one of my first agent builds, I was having a problem where It was trying to read in, you know, chat input, and the I in chat input was supposed to be capitalized, and I didn't have it capitalized, and it just wasn't working, and it couldn't read anything, and I was getting pretty flustered. But then I just realized, okay, well, it's just not being referenced correctly. So make sure that this is sort of being referenced the same way that it comes through. Okay, now just one quick slide on functions. And like I said, after this, we'll get into N8N, and I'll show some of this actual live, and I'll show the drag and drop, and it will make more sense. But functions are other ways that you can have things happen within JavaScript. So normally it's like JSON.something if you're calling, you know, a variable from a previous node. But here we have actual functions within N8N. So this is where it could seem a little codey, but it's not too bad. So one thing that I was very confused about is how do I get the agent to know the current date and time? And it's a super simple function. You just do the two curly brackets, dollar sign now. And as you can see, it's going to display the current date and time right here. And then that's obviously not how, you know, computer can read this, but a human doesn't want to look at this. So you can.format, and then this will automatically pop up and you can see it displayed differently. So this is like the year, the month, and the day. But you can also edit this and you can change how you want. You could have it actually say November. You could actually have it, you know, say the day in a different way. So I'll get in and show you guys that in a sec. But then you can see here's an example of a different function. So this one is if. And you've got conditions, value of true, value of false, almost similar to like an Excel function. But you really don't have to use these too much because you're able to sort of like use the large language model to determine if, you know, value of true, value of false. So you really don't have to look at this. It's nice that if you type in two curly brackets, it'll pull up sort of like a list of JavaScript functions you have available to you and it will sort of explain how to use them. But To be honest, I hardly touch these. I really only use like now and I format now. So like I said, let's hop in NNN and just sort of look at this kind of stuff. All right, we are now in NNN and I've just set up a super simple agent. It really doesn't do anything, but just wanted to talk about, um, the JavaScript variables and how they come in and out of like an agent. So in here we can see this workflow would be executed by, um, a different workflow. And this is the pinned data we have, which was just in the slides. The name, email, and the age. And right now we're in the schema. We can go to table and we could see how simple it is. And like I said, if you had multiple responses, they'd be down here just like a, just like an Excel table with, you know, column names and then the values. And then if you want to look at the JSON, we've got the name, email, and age. So you can kind of choose how you want to see your data. I usually go with schema because that's how you can actually drag and drop this stuff. And I'll show you guys that in a sec. But this is the data that's coming through. And so then we open up the AI agent and let's say that we wanted to have the prompt is what we wanted to give him this information. And I'll get more into like what we're looking at in the screen in a sec. But for now, this is what we want. And let's say that we wanted to give this agent information about a client. So we said, here is the client information. And then we'd go name. And all we would do is we'd come over here to name and we'd drag in right here. So as you can see now, that is a JavaScript variable. It turned green, JSON.name. It's referencing this, and the name is Andrew Smith. We could do the same for— oops, we could do the same for email, and it's simple drag and drop with Schema. We come in here, JSON.email, and we get the email down here. And then finally, we would be giving it the age right here, drag that in. It's all green, we're all good. And as you can see, this is the real information coming through. And this is just one item. So if we had 15, it would be different for each one. But these variables would always be the same. So that's kind of the point of the variables. Okay, now let's say we wanted to, you know, give the agent context of here is the current, you know, date and time. So we just come in here. And if I type in the two curly brackets, we'll see the JavaScript functions available will pop up. So obviously, this looks pretty codey. Like I said, I don't really touch this stuff too much. But I could go to now right here, and that's how we're gonna get the current date and time. And then like I said, if you type in.format and just hit enter, it's gonna automatically do this format for you. So you can see it's automatically done yyyy-MM, and you get— this is how you get it back. But let's say we didn't like that. You could come in here and so you can see how it changes. So now it's just the year. But let's just say if I did Capital M, capital M. Now we're getting no— nove. Now we're getting November. And now we're just getting an N. You could come in here and do a capital D. You're getting the date like that. If you go again, you'll get something different. You go again, you'll get that. I'm not sure what we get there. Now we even get the day of the week. So let's say that's how we wanted the agent to be able to understand what day it is. We would just do that. And then this variable would always stay the same, but this would change every single day based on the time. That sort of stuff. So that's a really cool one. But then like I said, yeah, you can just type this in and you'll be able to see all it's available to you. You'll see sort of how to configure it, but I don't touch that because let's say we wanted to do an if, you know, if the person's age is greater than, you know, 25. So we would just say instead of doing a function, we could just say do, you know, whatever it is if you want them to send an email. So send an email if, um, right here we'll just drag in if age is greater than 25. And we could leave that value hard-coded, or we could have that be a different variable, but it'd be coming through as like, you know, let's actually just change this for the sake of the video. We would say— oops— we would say only send an email if 32 is greater than 25. And obviously we would change it a little bit, make it more easy for the agent to actually understand. Like, if, um, Andrew Smith's email is greater than 25, we would just have to drag in the name and we could sort of configure it, right? So, um, if Andrew Smith's— oops, okay, that's inside the variable. We just want to make sure it's not inside the JavaScript functions. So we could just say like, if Andrew Smith's age which is 32, is greater than 25. So I don't know, that's just a quick example of how you could do it and why you don't really need to use all these, you know, codey JavaScript functions. But this now one is definitely very useful. And that's something that I had to figure out. Okay, now let's break down what we're seeing here. So obviously, this is where you choose the agent like we talked about, we have all these, these 6 different types, and we talked about when to use each one. So right now, we'll just stay on a tools agent. And then we have the prompt. So you can either define below like we just did, where you talk to it, or you could take from previous note automatically, which will look for an input field called chat input. And this is, you know, a lot of times this is when you're actually talking to the agent where you're using chat message. So that's how that would work. And it would take like the chat input field from over here, json.chat_input, or you could have it find below, obviously. So that's what we just did. And this is the prompt for the main instruction or the question that the AI agent is going to respond to. So this is the direct command that the agent is expected to look through and act on. So that's a little different from like an actual prompt. This is kind of like its instructions for this use case. But then if you come down to options, you would go to system message and this is where you actually want to give it the background, the instructions, how it should behave, the context. This is where you would set, you know, the tone, personality. And all the context of like how it should act. So this is like its instructions and then this is like the current message. So if like, for example, the prompt here was you are, you know, a client onboarding agent and you're going to take information from the forms, you're going to run them through the CRM, you're going to email them, that sort of thing. And then up here we would actually just be feeding in the information about the client. So if that makes sense. That's the difference between like this prompt and then the system message. And so think of this as like, you know, giving it the personality and the job description down here. So we've covered that system message. There's also other options we can look at. So we've got max iterations. This one is going to control how many times the agent can go back and forth in a conversational loop. So it's going to limit how many turns the agent can take in a conversation. You probably want to use this when you want to limit the conversation length, especially for use cases where you want to avoid an endless loop. So an example of that would be if you're setting it to 3, it means the agent would only try to reply up to 3 times. And then we have return immediate steps. So if you turn this one on, it is going to allow you to see all the steps that the agent took to reach its final answer, and it's going to show all of this immediately after the decision. You want to enable this when you want to have help debug, troubleshoot, figure out what's going on when you want detailed transparency on how the agent arrived at its answer. And you could look at the logs for that, and we'll get into logs later. But it's helpful to understand the flow of the conversation, and it can be really helpful when you want to refine your prompt and you want to see how you can change it to make the agent act the way you want it to. And then the final option down here is automatically pass through binary images. So when this one's enabled, it's going to take any binary image, images like image files or, you know, PDFs from a previous node, and it's going to automatically pass through the AI agent node without being changed. So this is going to allow you to keep your image files flowing through your workflow alongside other data without the AI agent trying to process it or interpret it as plain text. All right, so I haven't yet touched on require specific output format. I'll get back to this in one sec, but first I just wanted to highlight how, you know, different agents have different options. So that was tools. Conversational has the same 4 options, as you can see. But if we go to a plan and execute agent and we hit add option, it's just going to add this. It doesn't pull up that list of 4 options. So let's just quickly talk about what a human message template does. This is just a way to guide the AI through each step of a complex task. So we talked about how a plan and execute agent will break down a task into individual steps and then work to execute those sort of in order. So this is like a script that keeps the AI focused on what it's already done. What it needs to do now, and then any notes that it needs to help remember that process. So obviously we've got previous step. This is going to be, you know, what it already has done and so that it doesn't lose track of, you know, where it needs to be and what it needs to do next. Current objective, pretty much same thing. This is what the AI is focusing on right now, and it's going to keep it focused on executing this task without getting distracted by other data or other steps that are coming through. So it's just going to be a clear instruction. And then the scratchpad, just a space where the AI can sort of jot down any information that it might need later. It might need to reference back later. And usually the best case for when you're using a plan and execute agent is to not touch this stuff. You can pretty much just leave it as is. This was already hardcoded into this agent configuration. So I would just leave this as is. I've tried to play around with it before and it kind of just doesn't really add any value and it even makes it mess up more. So just leave this as is because it's just going to take what it's already done, what it's doing now, and then write down notes and stuff like that. So that's what this option does. Okay. And now we have the settings tab, and this one is pretty much the same for all different types of agents, conversational tool, plan and execute. So the first thing we have is always output data. This is going to ensure that, um, the node outputs data even if it didn't execute a specific action. So you want to enable this if you want the workflow to keep flowing regardless of whether the AI agent returned a result or not. Then we have Execute Once. So when this one's turned on, it's going to restrict the agent to only running once during the workflow. You want to use this to prevent the agent from being triggered multiple times, which is helpful for controlling execution in loops or repetitive tasks, stuff like that. Then we have Retry on Fail. So when you're using this one, it's going to automatically retry running the agent if it fails the first time. So you'll use this to enable it for scenarios where you may have like network issues or temporary errors that may cause a failure. So it's going to allow your agent to continue retrying before it gives up. And obviously you can, you can set up how many times you want it to try and wait between tries and stuff like that. So that's how you can kind of be in control of its retrying. And then you can set up what do you want it to do on error. So the default option is that it's just going to stop the workflow. Even if there's stuff after the agent, it's just going to stop. But you can choose to have it continue. So if you do this, obviously it's going to just pass an error message through. But another cool way to do it is continue using an error output. So this will sort of break off two different branches off of the agent. So as you can see, there's a success branch and an error branch. So this is cool because if it's working successfully, you could have the agent continue going down this logic over here. But if it doesn't work, then you could have the agent, you know, send some sort of email saying that it didn't work, or you could have it respond to the agent saying, you know, what the error was. So this is a cool way to sort of have that error handling built in. But as you can see, if you turn that off in settings, just with the stop or continue, we'll do continue, it's going to take away that branch. And so now we only have one option to go through no matter what. So that is just another cool way to make the agents more powerful and smarter. And then back in the settings for this agent, we have notes. So I used to think that this was something like within a prompt where you could tell the agent very specific things on how to ask, on how to act, like I, like saying please answer in all caps or something like that. But that's not the case. This is pretty much just notes for you to remember stuff about this agent or for if you're collaborating, collaborating with someone on this workflow. Like if I said prompt needs refining, that's just notes for me and my team to look at. And then you could also display the note in Flow. So then it would just come right here. Prompt needs refining. But if we turn that off, then it will just say like plan and execute agent. So that's what it is. And it has nothing to do with the actual way that the agent will act or the way that it's taking in data. It's just for you to see pretty much. Okay, now the last thing I wanted to touch on is the require specific output format because we didn't talk about this. So if I turn this off, we only have the tool option, at least for this agent. A conversational or a tools one would have the memory as well. But we just have tools now. We turn this back on, it's going to say connect an output parser to the canvas to specify the output format you require. And as you can see now, we have an output parser over here. Um, so yeah, pretty much this is just going to allow you to control the format of your response that you receive from the AI. When it's enabled, it's going to have you specify exactly how the output should be structured, such as if you require it to be in a particular format, you know, a particular JSON format so that you can pass it through into the next fields, but it will just let you list or, you know, specify the structure that you want from the agent when it goes off this way. So if you click an output parser, you have 3 options: auto-fixing, item list, and structured output parser. And let's just hop back into the slides real quick in order to talk about these things. All right, so output parsers, we very briefly touched on it, but I just want to reiterate the 2 reasons you want to use them. For consistency and for reliability. So it's going to ensure that your AI's response is in a predictable structure, helpful for workflows that need to process the output in a specific way. And it's also going to make it easier to handle and pass data to other nodes after your agent in the workflow, since you know the format is going to match exactly what you specified. So the first one we have here is an auto-fixing output parser. This one is going to automatically adjust the output if it's not in the expected format. This one will use some sort of large language model to look at and fix by itself. And this is good for when you need the flexibility, but you still want reliable formatting because the parser is going to sort of fix the response in to fit the required structure. Then we have the item list output parser. This one is going to separate the output into individual items. So you would use this when you're expecting to get a list back of results and you want each item to be handled separately, like multiple rows within a spreadsheet. And then finally, we have the structured output parser, which is going to force the output to follow some sort of strict JSON structure that you define in that output parser. So for example, um, like the stuff we were looking at earlier with the name and the email, you could have, you know, you could have the JSON put in there in a very specific structure with name, email, age, and then it will always come through from that agent matching those, those, uh, keys to those values. If that makes sense. Okay, back in N8N now, I just wanted to show what it looks like when you actually attach these different output parsers. So obviously we talked about what these do. And so wanted to show this because it may be a little confusing. When you add the auto-fixing one, you can see that you have to add a chat model obviously. So we'll connect this real quick. But then also you see that you need to add some sort of output parser. So in here, once again, it opens up the same output parser. So, you know, we choose from list or structured. And this is kind of confusing because it's like, why would you add this here if you could just add, you know, this structured one right away? And so that's like what was going through my mind. But basically it's going to be more flexible because the auto-fixing one is going to correct any small formatting errors with the AI response first of all, because the AI occasionally will return data that's almost but not quite in the required format to feed straight into the structured output parser. And so after the auto-fixing step, the structured parser will confidently enforce the JSON format that we had specified with less errors than if we had just connected this straight away to the agent. And so basically it's just an extra step right here to make sure that the agent's response is being fed in properly because we want it to come through as specific JSON. Right here is state and cities. And as you can see, it would sort of list out the stuff correctly. and if we were to do the item list, this one doesn't even really need to be configured. But once again, just wanted to sort of lay that out because I was always thinking, why would I even add that auto-fixing one and have it connect to a large language model if I could just throw in the JSON right here? But hopefully that made sense, and that's why you would do it like that. Okay, now we're going to be doing just a live build of an AI agent. NNNN. We're just going to build out a really simple one, give it access to a few tools, and just to show some of the aspects of looking at the agent logs, looking at memory, seeing the differences in prompting and how that's going to work. So we're just going to do a simple agent here. Our trigger is going to be on chat message because we will be chatting with this agent NNNN just right here in this chat window. Obviously, we talked about some of the triggers. You can connect it to, you know, your SMS if you wanted to text it, you could. Have it on Gmail, or if you want to talk to it through some sort of website or different app, obviously you can trigger there. But we're doing just chatting with it in NNN. And we're going to go into the next node and grab an advanced AI. Obviously a ton of AI nodes. We'll talk about these ones later, but just wanted to show a quick agent build. So we're going to grab an AI agent. We're going to leave this one as tools and we will configure this stuff in a sec after we give it access to some other stuff. So the first thing obviously is to connect a chat model. Sort of the brain. It will think about what we said based on this chat model. So we'll come in here and click what will take 4.0. And as you can see, we got this right here. So it'll think about what we say and then it will hit the chat model and then go back to the agent in order to interpret what we asked and to figure out which tools to send it off to. So before we add tools, we're going to go with the window buffer memory. This is sort of the N8N built-in one. It's super easy to configure because you don't even have to. But we've got other options for memory. We've got Postgres. You can use all this other stuff, but I'm going to use window buffer memory here. Going to leave it as is, leave it as 5 context window length. And basically when we're chatting with it in NNN, it'll remember 5 of our past interactions and it can see how it answered and it can see what we're referencing. And I'll show a live example of using this and then I'll show where we take it out and we'll see. But that is how that works and it's super easy to configure and we just throw that in there. And so for tools, we are just going to grab a simple Wikipedia tool right here. Don't even have to configure that one. And then we'll grab a calculator as well. Don't have to configure that one. And then obviously this is where you would be able to call some sort of N8N tools. So let's say this agent was supposed to be helping send emails. We could choose from workflow and I could grab like a send email tool right here. So I could configure this one, have it set up right here. and then when it figures out it needs to send an email, it would hit this tool because it's referencing a different workflow that goes through logic to send an email. So we'll get rid of this for now, but that is just sort of how that could work and super cool stuff. So these are just the tools that we're gonna give it access to and the model and the memory. And now we need to see what goes on in here. So we don't need to require a specific output format. We'll leave it as a tools agent, and I'll switch this later to conversational and we can sort of see the difference. But the prompt right now is going to be taken from the previous note automatically. It's going to be looking for a field called chat input. So once we chat with it, the field of our query, whatever we type in, will be right here under, you know, a JSON key or schema of chat input, or it'll be json.chatInput. But I'll show you guys that in a sec. So we've got that, and then we have a system message. So Right now it's just going to say, "Your helpful assistant." We'll save it as that. And then we'll ask, "What is the capital of Illinois?" It will— so it's going to go through here. It's going to store it in the memory. And then let's see what it said. It told us the capital of Illinois is Springfield. So now we can go into the log. We can look right here, actually. So the first thing that it did was it received our message, and then it updated in the window buffer memory, "What is the capital of Illinois?" Illinois. It ran through its prompt and how to format, and then it hit the OpenAI model. The capital— what is the capital of Illinois? We can see the input, and it actually just answered from this model. So that's pretty cool because it didn't even have to reference the Wikipedia node. So we'll do one where it has to reference that to show that. But then it finally just updates the response in the window buffer memory. So you can see it was what we asked, what's capital of Illinois, and then it responded, the capital of Illinois, Springfield. So then I could reference it again and just say like, what about Florida? And it will know that we're asking about the capital because we just pretty much talked about that. So the capital of Florida is Tallahassee. If we were to remove this window buffer memory, so now it has no context, and I said, what about California? It's probably not going to give us the capital. It's going to say, could you please specify what you'd like to know about California? See, um, that's sort of how that works. But yeah, so we'll add this memory back in here. Right here. It's going to go back in here. And now what we should try is we'll see the difference in a prompt. So helpful assistant is good. But now let's say you should always respond very friendly and use jokes and emojis. Okay. So that's a super simple prompt. Obviously, that's not how you prompt. I want to make a video on prompting. So if that's something you guys are interested in, please let me know. But now we will see if we ask another question. So like, what is— or like, can you— what does the company Nike do? It will search Wikipedia for Nike and then it will give us the information and it should do it friendly, maybe a joke or two in there with emojis. So Nike is this like superhero of the sportswear world emoji. They're the largest supplier of athletic shoes, apparel globally, blah, blah, blah. Their product lineup includes various brands like Nike Golf, Air Jordan, Converse. And at the bottom it says, so if you're looking for some sporty swag, Nike's got you covered. So it's friendly, it's got emojis. We didn't see really a joke yet, but we will in the future. But let's look at the log. So obviously it updates the window buffer memory with what we said. And as you can see, it has the past interactions. It has capital of Illinois, Florida. So it knows what we talked about previously. And then it gives the input to the chat model. It's going to come hit Wikipedia. So the query for Wikipedia was literally just Nike, comma, Inc. So it took that based on what we originally asked it, which was what does the company Nike do? And so it used the chat model to figure out that it's going to send the query of Nike Inc. to Wikipedia. We got this big response. It pretty much scraped the page of Wikipedia. But then the chat model is coming back and it is taking that and then formatting an output that's easier for us to read because it's more concise. And that's where it threw in the emojis and the sort of joke at the end. And then finally, it's just going to update the window buffer memory. So now we see what we asked and finally what it answered to us. So let's try, we'll try to get the calculator tool involved. So what, what is 12 times 52. We'll be able to look at the log of what it did. So the result of 12 multiplied by 52 is 624. Math can be so much fun, can't it? So there's another, the friendliness coming out of the prompting that we gave it. So once again, it updates the window buffer memory. It looks through it. It hits the chat model with what we asked, which is what is 12 times 52. And then it's a calculator query, 12 times 52, response 624. It takes that input from the calculator and then makes this output for us and then finally outputs the response in the window buffer memory. So it has all this context of what we've talked about so far. So the logs are very important to be able to look through and understand what's going on. You can see step by step, which is good for, you know, once you have multiple tools and you need to troubleshoot, you know, the prompt, you needed to redefine it. So it's taking action in the right step or it's hitting the right tools. Sort of as necessary. And now let's see if we were to switch this to a conversational agent. Let's just see if it changes anything like that. We will come in here and add assistant message once again, which it has this default one, which is huge. Assistant is a large language model trained by OpenAI designed to be able to assist with a wide range of tasks, constantly learning and improving. So this one's going to hopefully give us a human-like message. So I won't even add anything right now about like emojis or anything like that. We will just chat with it again to see any difference. So let's do another one where it will talk to us. So can you give us some key highlights from Apple in the past year? Let's see what it says here. So it should be looking through Wikipedia, and we didn't even really prompt it in that it has that tool, but it should still be able to go through it. So it did. Apple Inc. has been actively announcing new and redesigned products as well as upgrades. Most announcements take place at high-profile press events that draw significant media attention. Um, so we can take a look at the log. Obviously it updates, hits the chat model to figure out what to do. The output is action Wikipedia Apple Inc. 2023 highlights. And then it searched Wikipedia, got that big response, and then it formed the response with, um, Well, that's a huge chunk, but then it gave out the final answer. And then this is what we see right over here. So that's how that one works with the log. See if there's anything else that we could take a look at in here. I guess you can see right here. So right here, you know, it says take prompt from previous node automatically. It's looking for an input field called chat input. So that's what's right here, chat input. But we could also just define below and we could drag that in. So it's going to be referencing the same thing, which is we asked, can you give us some key highlights from Apple in the past year? And so this is where you could also give some more context as to what exactly you're looking for based on the user query, that sort of thing. So let's see, now let's just add at the bottom of this one to make sure to always tell a joke at the end. So we'll see what that one does with the conversational agent. Let's ask about, what should we ask about? Something that it would search Wikipedia for. Actually, no, let's just do another calculator thing. So what is 2784 divided by 16? See what we get here when it hits the calculator tool. The result of 2784 divided by 16 is 174. Oh, wow. Is that actually an even number? Um, good example, I guess. But, um, yeah, I guess this one didn't actually give us a joke, probably because of it has this huge other prompt. But yeah, that's just sort of the difference between using these two. And we saw what happens if you take away the window buffer memory. We saw the way you could look through logs in order to see what takes place. And you can also in real time see it happening. So let me just show that real quick. What is NVIDIA? So we hit that and we can see it's hitting the brain. It's up to— it updated this. And now, oh, it actually answered just based on the model. It didn't even go to Wikipedia. But this is the result we get. So it pretty much gives us key areas where NVIDIA excels. Stuff like that. And once again, you can look through the log. So we can see that it didn't even hit Wikipedia. It would have gone through here, then hit Wikipedia, then came up. So let's just do an example of that actually. Um, can you provide information about Honda, the car company? So this one probably will go to Wikipedia. We'll see it hits the window buffer memory, goes here, and then it knows to search Wikipedia to get that information. And now it's turning that information from Wikipedia into a response that we can digest easier. So here's some information about Honda, key highlights, stuff like that. We could obviously prompt it to make this more concise or to use emojis and jokes and stuff like that. But hopefully that gives you a good understanding of, you know, the actual interfacing of agents and how they work as far as their process. So the next thing to do from here is we want to talk about the other AI nodes. So once you come in here and you click edit, Advanced AI, you've got all this stuff, obviously. So we've kind of talked about the agents. We've seen some stuff with OpenAI, but we'll talk about it real quick. And then we have all this other stuff. And then we have other AI nodes in here too. So this is where back at the beginning I was talking about, you don't always know when to use which one and it can be overwhelming. So we're going to hop back into the slides real quick and just sort of go over when you would want to actually use each of these AI nodes. All right, now we're going to look at these 7 other AI nodes. NN8N. OpenAI is the one that you'll probably use the most often. That's the one that I use the most often, usually just to message a model, but we'll sort of break that down. And then we've got LLM chain, information extractor, question and answer chain, sentiment analysis, summarization chain, and then finally text classifier. So let's hop into this first one here, which is going to be OpenAI. So what this one does is it connects to OpenAI's models like ChatGPT. So that's where you can choose, you know, 4.0, 4.0 mini, 3.5 turbo, whatever you want. That's where you can choose that. And you can use this to generate text. You can talk to a model like ChatGPT. You can analyze images. You can create audio or more based on the sort of the function you choose and the way that you instruct the node to work. You're going to want to use this one when you need to interact with a general purpose AI assistant, ask questions, generate text. Create summaries, or even analyze content from images. And, you know, something like the, the summarization chain can also summarize, but sometimes you need to have a multi-step thing within this node that's going to summarize and then extract certain things, or summarize and then create new things. So that's sort of why you'd want to use this. It's very powerful. So something like creating a customer support bot that can answer questions based on like a summary of a huge report or something like that. And then we have the basic LLM chain. So this one's going to provide a very simple streamlined way to send a prompt to a large language model, LLM, and get a response. So you want to use this when you're doing something very straightforward where you need an answer or output from an AI without complex configurations. So if you're asking AI for a quick response to a user's question, like what are the best practices for email marketing, it would hit that LLM and then answer you. Right away. So then we have Information Extractor. This one's going to pull specific pieces of information from a block of text that's usually organized in a structured format. So you want to use this when you need to extract details from text, such as pulling out names, dates, locations, you know, from emails or messages or documents. Something like extracting customer details from an email to pass it into your CRM automatically. Okay, so we've got 4 more. These 2, question and answer chain, sentiment analysis. For the first one, Q&A chain, you're gonna use this, um, when you want AI to answer questions based on specific documents or, you know, content you provide. So like a knowledge base rather than general LLM internet knowledge. You want to use it when you wanna limit the AI's answers to specific documents. And a good example would be a Q&A assistant for employees that are getting questions answered based on the company's policy documents or specific training material. Then we have sentiment analysis. This one can analyze emotion or tone of a piece of text, and it can categorize it as like positive, negative, or neutral. So you want to use this to understand the mood or attitude behind like a customer feedback or certain social media posts. Or reviews about your product or something like that, you know, it's going to automatically analyze those emails and then sort of give you the tone that it was written in, sort of thing. So then we have summarization chain. What this one does is it's going to condense long pieces of text into shorter summaries and it's going to capture those main points and highlights for you. You can use this to create summaries of lengthy documents, obviously making them easier to read or pass through. Quickly. And then you can, you know, summarize meeting transcripts or feedback documents or policy documents in order to make sure that you're getting all the key information from it. And then finally, we have the text classifier, which categorizes pieces of text or a piece of text into predefined categories based on the content of what it's reading. It's going to automatically label or classify texts, such as sorting emails into different departments or tagging different types of customers or tagging different types of feedback. An example would be, you know, classifying incoming support tickets into categories. You could have like billing tickets, technical issues, customer support, general, general inquiry, and then you can route them based on this classifier into different logic of, you know, where it could get sent around. So all of these nodes, obviously very powerful. It's important to understand when is the best use case for each one. But they're all just ways that you can add, um, large language models, you know, artificial intelligence into your workflows in order to make them even more powerful than, you know, static automations. All right, we're sort of starting to wrap up the masterclass. We just talked about these other advanced AI nodes right here besides the agent. We've got these ones that we just talked about in those slides. And finally, just wanted to end off by talking about these other AI nodes in here because once again, it's a little overwhelming. So. First off, I want to say that, um, in my NNN Masterclass video, if you guys haven't seen that, I talk more in depth about the document loaders as well as, um, the text splitters that are down here. And then also sort of vector stores. So for more in depth, I would go watch those videos because we sort of get a workflow where we talk about what's going on in each of these sort of AI steps. But first one, we have document loader. It's just going to bring documents into the workflow for processing. Like loading PDFs or text files. And like I said, if you need more information, this is pretty much how it looks. And then you add the text splitter, which are, you know, down here. And I talk about these more in depth in the N8N Masterclass video. Then we have language models. So as you can see, these are the different models that you can choose from. I pretty much use OpenAI most of the time, but these are just models that can understand, generate language, and they're used for tasks like answering questions or creating text. When you want to talk to something like, you know, GPT or Claude. And then we have memory. We've talked about this again. You've got the option for window buffer, which we have right here, or sorry, window buffer memory we have right here. And then these other options, basically just storing information temporarily during a workflow so the AI can remember these details to reference later. Then we have output parsers. We talked about these earlier too. We have retrievers, which search and pull relevant information from a specified source. And this is just so that they can sort of assist in answering questions and finding details. So we've got different options here. Vector store seems to be the one that I've used the most, but you've got different options as, of course, because there's just so many to choose from. And then after retrievers, we have text splitters. We talked about those tools. This is where you can either call an NN workflow or there's a ton of integrations as you can see. and these are just going to give you, you know, actions within these popular systems that you probably use every day. Then we have our embeddings. This is just going to convert text into a vector format, which helps tasks like, you know, RAG and semantic search and finding similar content. So if you don't understand these embeddings, I would also maybe go watch that NNN Masterclass video. We talk about, you know, pushing data into a Pinecone vector database, and it's going to push it into a document loader to load the data, split it up, embed it into the vector database in the vector stores down here, which you can see vector stores are going to store and retrieve these vector sort of numerical multidimensional representations of data or text and making it really easy to find for the agent based on, you know, related content, sort of based on the meaning of what's going on. So these are the vector store options. And then finally, we've got miscellaneous. Which I don't even really know is in here. It's OpenAI and then Chat Memory Manager. So within the window buffer memory, you have the option to get messages, insert messages, delete messages. So that is sort of what's going on here. A lot of the times you won't be really coming in here to grab these nodes. They'll be, you know, you'll be grabbing them from something else. Like, you know, when you need the text split or when you need to sort of load data, stuff like that. So I hope, hopefully that at least gave you some general context on this and this, because when you click into AI nodes, obviously, There's a ton that's going on in here. So yeah, I hope that that made sense. So that is going to be it for this masterclass where we talked about a lot of the aspects of AI agents specifically within NNN. So let's just quickly go over what we covered. We started with the basics of AI agents. We explored how these agents can automate tasks. We talked about their triggers. We learned about setting up the workflow. We took a deep dive into each of the agents because when you open up an agent, you've got a tools, conversational, plan and execute. and more, and each have sort of unique strengths and use cases. So we talked about what they each do and when you would want to use each one. Then we talked about JavaScript functions and variables, which are super important when you want to build agents or even just build workflows in ANN. Um, they help make our workflows more dynamic and customizable. Then we talked about some key settings within the agents, like prompts and system messages and, you know, the other options and settings and how we want the agents to interact. We talked about some output parsers to ensure that responses are structured in the way that we need them. And then finally, we just dove into some of the other AI nodes that are available within N8N to extend the power of your workflows. Stuff like document loaders, embeddings, and, um, you know, text classifiers, sentiment analysis, that sort of stuff. So at this point, um, if you're excited about building AI agents within N8N, there's so much more to explore. Feel free to check out other videos on my channel where I dive into you know, building advanced air agents and different simple workflows in N8N step by step, or even live builds, um, you know, some more real-life examples and more in-depth looks at each of the tools. So, um, finally, I just wanted to say, um, feel free to join the school community. There's, you know, it's growing really fast, and a lot of people are in there, you know, talking about N8N, talking about other ways to, you know, improve workflows or getting help on certain workflows. And I would love to just, you know, see all you guys in there because it's really nice to interact and, you know, see what people are working on, see what people want to see from future videos. But that's really all I've got for today. If you made it this far, really appreciate you guys taking the time out of your day to watch this video. And I would really love some feedback because I hope these sort of longer form ones are educational and at least you get a few things learned out of the videos. But again, I really appreciate all the support lately, and thank you so much for watching. I'll see you guys in the next video.










