n8n's Agent Builder Somehow Made Building Agents Even Easier (text to workflow)
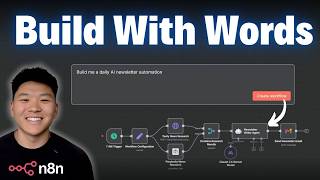
n8n's Agent Builder converts natural language into workflows. A vague prompt creates a lead-qualification workflow with CRM and Slack nodes; a detailed prompt builds an AI-newsletter tool using Tavily and Claude with HTML formatting. Complex multi-agent setups need manual fixes, so treat generated workflows as starting points, not finished products.
Chapters
All right, here we are in n8n and we're looking at this ChatGPT-like interface and I'm just gonna tell it to create this workflow. And I said that I need a workflow that will receive a form submission via webhook. We need to process information like the person's company, their budget, and their project description. We're gonna use that information to qualify them as a hot, warm, or a cold lead. And that will be decided by doing some research on their company, seeing if they're in the right industry. We're also looking for budget. And finally, we want companies that are looking to implement custom AI solutions in their business. After it's done that analysis, I want these leads to be submitted into our CRM and ClickUp. I also want a Gmail notification and I want a Slack notification. So it thought about it, it searched through all the nodes that it has access to, and then it gave us a little outline. So I'm just gonna go ahead and approve this plan, and now it's building that for us. Wow. So not only did it spit out this workflow that looks correct, on the right-hand side, it gives us a setup guide. So it tells us these 6 things still need to be configured, and then it also tells us how to use this and activate it and actually push it into production. And so if I click into a few of these nodes here, you can see that they're actually configured already. Besides needing to connect to our ClickUp account, we have variables being passed through this entire flow. So we've got the name right here, but then you can also see we're sending over content like the lead info as far as company, contact, email, phone, different information about the lead. It's giving us an AI analysis and a qualification level and also a score out of 100. And then down here it's assigning a priority. And then after it updates that row in our CRM, It uses the set node to create an email subject, an email body. All of these have variables once again, and I didn't even tell it to do this. And then we have our message, and then it uses those variables to send off that Gmail or Slack alert. And then you can also see over here, our AI agent has a system prompt right here, and its HTTP request is already set up to Google the company URL. So that was a real quick demo. We're gonna be diving deeper into this today with a few different examples. I'm gonna talk about what works well, how to approach using this, and also talk about some of the limitations. So let's get into it. Okay, so this is what everyone's been waiting for, which is N8N's native natural language to workflow or agent builder. And I'm super excited about this because it's gonna really cut down the time that it takes to spin up a POC. And I think that's really exciting, but I also am a little bit worried about the, the false sense of security that it's gonna bring to a lot of people. I think there's no problem in using this kind of technology. I'm definitely gonna leverage it as well. But what's gonna be really important is after you get your initial workflow generated, that you can dive into it and understand why it's doing what it's doing and how to fix it, how to improve it, stuff like that. Kind of the same idea of you would never just download a template and push it into production or sell it to a client. You need to understand how it's working fundamentally. And so quick disclaimer, if you're opening up your N8N and you don't see this GPT-like interface, don't worry, it hasn't been officially rolled out to everyone yet. So anyways, now that that's out of the way, what we're gonna do today is talk about how this works and how to make your results better. So what I'm gonna do today is 3 examples. One prompt that's pretty vague, one prompt that is detailed and specific with tech stack and stuff like that. And then we're gonna do one that's kind of like a really agentic sub-agent type of system. And we'll just break down like what worked well and what didn't. All right, so this first one that we're gonna do, like I said, super vague, which is create an AI agent that researches news every morning and emails me a newsletter. So super vague. So what's going on right now is Ennaden's AI builder is thinking about what we want and it's gonna search through Ennaden's documentation, the nodes, and stuff like that in order to figure out how to build this workflow. So what happens is it comes back and says, okay, based on what you said, this is what I think you want. Here are the different nodes we're gonna use. And then at this point we can either approve it or we can request changes. So right now I'm just gonna approve it and I wanna see how well it does with a very vague prompt. And if you guys have ever played around with Enidyn's AI assistant on the right-hand side, which is what you typically would use, like if you wanna troubleshoot a little bit, this is similar. It's just a builder rather than just an assistant. But anyways, you can see what's going on is it put the nodes in the workflow and then it connected them. And now what I think it's doing is making sure that all of the variables actually flow from one node to the next. And we'll take a look once this finishes up, which it looks like it is done. So it gives us a setup guide, which is basically saying, hey, here's what's left to configure. And then it tells us how to actually use the workflow. So let's dive in real quick to see what it did. So the workflow starts with our scheduled trigger because I believe I said every morning We want this to go off. Yep, we said every morning, so it goes off at 7:00 AM. After that trigger goes off, we have some workflow configuration right here, which is apparently just setting the email recipient, which right now is unknown, the news topics, which defaulted to technology, AI, and business, and then newsletter style, which is professional summary with key highlights. So all that looks good. We would obviously have to configure our own email recipient right here, but let's move on to the next node. Which was our news research agent. So by clicking to this guy, what we can do is we can look at the user message as well as the system message. And another cool thing in this update, once you guys have it, is that you can open these up on the side if you wanna just look at it full screen. So the user message for this agent is to research today's most important news and create a personalized newsletter for blank, which is the email recipient. Honestly, that's not super crucial because it doesn't really matter the email address it's going to, It should just be a good newsletter, but it's cool to see that it's able to use context and pass variables through. Anyways, it then said to include 5 to 7 top stories with brief summaries and source links. Make it engaging and informative. So one note here, typically with these sort of system instructions that's really defining the behavior of the agent, I would throw in the system message rather than the user message, meaning I would put that down here rather than up here. That's not a huge deal, but just a little thing I noticed. But let's check out the actual system prompt, which is setting the role and the behavior of the agent itself. It says you are a news research assistant. Research the latest news on topics specified by the user and create a well-formatted newsletter. Use the web research tool to gather current information from multiple sources. Focus on these topics, passes over a variable. Format the newsletter in blank, which is the newsletter style. And then it says with clear headlines, summaries, and source links. So we've noticed that it says use the web research tool to gather information. That's nice. Let's see what's actually going on down below in this tool. Okay, so you can see the tool is not configured at all. It's still a default GET request. There's no endpoint, there's no description. So the tool isn't configured. We would have to do that ourselves here. Not too bad, especially for a first pass. And then what I'm assuming is the output of this agent gets passed over as a variable in the body of the email. As you can see right here, we have the HTML and the text, and then we do get a daily news newsletter, which is today's date and and it's formatted nicely. So that's a nice touch as well. Cool. So that is just to show you guys a very, very vague prompt. It works, but then there's gonna be a lot more to configure. So what we're gonna do is we're gonna go back, we're gonna build this exact same system again, but I'm gonna give it a much more detailed prompt and we'll compare how much better it is. All right, so I'm back with a more detailed prompt and I'm gonna shoot it off. I said to build an AI newsletter workflow that runs every morning at 7:00 AM and it should use Tavily and Perplexity to research the top 5 trending AI and tech news stories. Then I said, pass the results into Anthropic Claude 3.5 Sonnet to write a well-structured email in HTML format. So what I wanted to do here was tell it exactly what chat model I wanted to use and the different tools that I wanted to use so it didn't just try to throw together a random HTTP request. I said the email should include a clear title. It should have subheaders for every story. It should use bold text, a short 2 to 3 sentence summary for each story. And at the bottom of the email, we should have a sources section with the links to all of the articles that it gathered. So once again, it searched through the nodes, it got all the details, and now it has a bit of a different workflow structure for us. And we can go ahead and request changes if we want, but for now we're gonna test out the one-shot prompting and I'm just gonna go ahead and approve this plan. And one thing that's interesting is Tavli does have a community node, but maybe in this instance I haven't installed it, or maybe because it's searching through N8N sort of node documentation, maybe it wasn't able to find that and pull it. But either way, we'll see how it's able to set up these requests. Okay, there we go. So once again, it's done and it gave us a setup guide. So we'd have to configure our email address. We'd have to get Tavly API key, Perplexity, Anthropic, Gmail, stuff like that. But let's go take a look at what it did with the workflow configuration. So once again, it did a set node upfront to set the email, the newsletter title, Tavly API key, and the research query. Okay, interesting. So what it would be doing is it would have us put our Tavly API key here, and then because this is an HTTP request, it would basically just pass it over. Somewhere in here. Okay, right here. It would pass it over in the actual body request of the HTTP to Tably. So that is pretty cool though, because based on what I'm looking at, this does look correct. Meaning if we gave it a research query and our API key, this would work. So I'm actually just gonna go ahead and do that real quick and throw my Tably API key in right there. And then we're gonna take a look at Perplexity real quick. I've connected my Perplexity account, so we should be good there. and then our user message is actually gonna be fixed. So every day it's just gonna search for, find the top 5 trending AI tech news stories from today. So that's all configured. It's obviously a lot easier for n8n to configure native nodes rather than an HTTP request, but you can see right here it was able to do a good job with Tavily. We've got a merge node, which is appending those results, and then we have our newsletter writer agent. We'll take a look at how this thing was prompted. Okay, so first let's look at the user message, which is saying create an HTML newsletter from the following research data. And then here is where we'd get all the research data. And then once again, it's giving us the format requirements up here. I would personally put this in the system prompt instead, but still let's read through it real quick. It's telling it to start with headers, and then here would be the newsletter title. We would have header 2 tags, we would have strong bold tags, we would have 2 to 3 sentence summaries. So everything that I wanted in the initial prompt that I gave to this agent builder, it has put into the prompt. And then real quick, let's check out the actual system prompt, which is pretty short. I would've expected this to be a little more detailed. It says, you are an expert newsletter writer specializing in AI and tech news. Your task is to create a well-formatted HTML newsletter from research data. So then after it's able to write that newsletter, it would go ahead and send it to the email recipient that we set earlier. It would have a subject of the newsletter title plus today's date, and then it would send it over as HTML formatting. So now that we have no more red, I've connected all my credentials. I'm going to go ahead and fill in the email that it's going to send this to, and then we'll just give it a run and see how it works. All right. So I'm going to go ahead and run this. And it's gonna do research with Tavily, Perplexity, and then once that agent writes the final newsletter, we'll go to my Gmail and we'll check it out. Okay, interesting. So we already found one thing that's going wrong, which is it appended the data rather than merging it all back together. So this output 2 items, which basically means we got 2 different newsletter copies. So that's something we'll have to change. But real quick, let's go check in to see how they actually turned out. Okay, so here's the first one, and at first glance, it looks great. We've got a title, we've got different sources. Maybe we want a little more meat in each of these sections, but we do have our sources section down below. And if we clicked into them, we could see that they are real links that take us to articles. And that is how the newsletter was actually created. So that's the first one. This is probably the one that was Tabli's research. And now let's go look at the Perplexity one. Wow, so this one looks cool. This one was formatted differently. So that's the importance of like being specific on how you want the HTML formatting because it looks a lot different. And then we've got our sources down below, of course, again, which we can click on and it takes us to real articles. This one actually pulled from a YouTube video, which is kind of cool. And then we've also got a TechCrunch AI article. So that's kind of how the output was coming out. So like I said, there's a few things that we'd want to change about this. And what I'm curious to see is if we're able to use the AI builder to actually make changes. So at the bottom it says, let me know if you'd like to adjust anything. Okay. So I gave it some constructive criticism and what's cool is it's thinking and it's working. So we may see this in real time actually make these changes. Okay. So we got a little error, not sure what's going on there, but it looks like it is still working. But anyways, what's going on here is I said the data wasn't merged correctly, so I told it we should want one newsletter for both sources. And then I wanted it to change the newsletter prompt to actually have inline citations as well, not just a sources section at the bottom. So we want to know where each sentence is actually coming from explicitly. All right, so it looks like it fixed it. It found the issue, which was the merge node was set to append rather than sort of like combining stuff. and now it told us here are the changes that we made and how it works. So what I'm gonna do is just go ahead and save. I'm gonna execute the workflow and we'll just see if it did actually make those changes the way we wanted, and then we'll take a look at the final copy. And actually, just because I'm curious, while it's doing this, I do wanna see what it added into the system prompt of the AI agent or into the user prompt. Okay, so it added it into the user prompt and it said to include inline citations using 1, 2, et cetera after each sentence. So that's basically the one change it made to the prompt. And now we'll take a look. And once again, it didn't actually change that merge node even though it knew it was wrong. It still has it appending, so it's still gonna create two different sources. So this is why it's really, really important to still understand what workflows are doing, because not only is having that knowledge gonna make it easier for you to prompt this AI builder on what to build, but it's gonna actually help you troubleshoot and figure out, okay, maybe I'll just have to manually go change this real quick and then leverage AI to help me more with the prompting or with other variables to be passed over. But anyways, real quick, let's just go see if those inline sources came out all right. Okay, cool. So we do have numbers, like this is number 1, this is number 5, and you can see what they relate to down here. It would've been nice if it would've made these clickable as well, but because I didn't give it super, super detailed instructions, it didn't do that. Once again, the importance here is all the context that you feed into these AI assistants. To help you do your job better and faster. But obviously this system works. All I had to do was put in my email address and my API keys, and then we are getting a newsletter that's formatted, which this was a lot quicker than if I would've built all this myself and prompted everything myself. All right, and so for the last test that we're gonna do today, I'm just gonna try to throw a pretty complex system at it. So I'm basically having it build a personal assistant. I said I wanna interact with it through Telegram. I wanna have a Gmail subagent, a calendar subagent, a ClickUp subagent. And then it should use the think tool and use CloudSonnet 3.7. So I'm interested to see how this is able to use an orchestrator agent with subagents and subtools and what it's gonna do with those system prompts. Because in my mind, this type of AI agent builder natively in NN is gonna be really, really good at workflows and passing over variables, but it may struggle a little bit more with like autonomous systems. So let's let it search through the nodes and then we'll take a look. All right, so here it is. It's not great because we asked for, like, you know, our Gmail sub-agent and our Calendar sub-agent to have all of the tools, not just one, which here it's just send message and here is just create an event and ClickUp is just create a task. But let's take a look at how it's actually configured. So what's, what's nice is that at least it labels everything and it tells you like how to use it and what you need to set up. We're getting our Telegram input and then we're setting the system prompts and the user preferences, and I'm assuming that those will feed right into the agent itself. But if we actually click into the agent, I already see one big issue, which is that it's looking for the connected chat trigger node for the input, which is not actually here right now. Anyways, from here, the system message is basically saying you are a sophisticated personal assistant that helps users manage their digital life. You have access to specialized subagents for Gmail, Google, and ClickUp, and you can use the think tool to analyze requests Always provide helpful professional responses. So it may have just got confused with Telegram because I don't know if the chat ID and everything is configured correctly as well, or the memory itself. But let's take a look at these subagents and see how they're working. So we've got our user message, which is the Gmail request. Up here it says, you are a specialized agent for Gmail operations. And down here it says, you are a Gmail specialist, handle all email operations efficiently, even though it only has one tool. And then I'm assuming that the other subagents are set up the same way. This one actually doesn't even have a user message, so this agent would error right away. And same thing with the ClickUp sub-agent. There's no user message here. The easiest way to fix that is we would literally just click on this button and the agent itself would be able to get a message from the main agent. But anyways, this kind of proved the point that I was trying to make, which is you probably don't want to use this to build complex multi-agent autonomous systems. Because if I go back into this workflow builder and you can see there's some pre-built ones right here, right? Let's just say we're looking at an invoice processing pipeline. A system like this is going to be a workflow, meaning we're gonna go from step 1 to step 2, from step 2 to step 3, and we're gonna be able to keep this AI workflow on the path that we set for it very clearly. These types of workflows are a lot more predictable. They're a lot easier for a human to build, which means it's gonna be a lot easier for an AI system to build. And you can see that these prompts are specific. It's telling the workflow exactly what to extract, what type of information. It's telling it where to store the information in Airtable and when to actually trigger this AI analysis and what to do with it. So I guess as we sort of start to wrap up here, what I'm trying to say is that this is super, super cool. I think it's gonna be great to leverage this to help you with your prompting, setting up your HTTP requests, getting a really good idea of where to start. But what you need to do in order to actually make that efficient is you need to know very clearly what you want to build, and you need to understand how AI workflows actually work fundamentally, because the more context you can feed in and the more information you have about like, where does my data come from? What do I want to do with the data? What fields am I looking for? What type of AI analysis am I gonna do? All of that information is gonna make your job a lot easier, and that's gonna be super valuable because I'm aware of like sometimes you get in here and you don't know which nodes to use or where to start, and this type of technology will give you a really, really good place to start. And from there you can customize it and learn what's going on. So you guys can see with a workflow like this, I'm assuming that all of these variables are gonna be pretty much perfectly mapped over. We have an AI agent that's given a user prompt in order to parse the information. But look at this, guys. There's actually no live variables being fed into the agent. So this agent knows it needs to parse an invoice, but it's not actually receiving any invoice information. So you still wanna be able to look at this and identify that all of this is fixed and there's no live variables being passed through. But then from there, we have a validation check, which is just making sure that this stuff exists, that it's not empty. And everything like that. And if it's true, we're gonna store the invoice data in Airtable, which will be the variables that we were looking for earlier. Anyways, I just wanted to show you guys how this AI builder works, my honest thoughts on what it's gonna be good at and what it needs to improve on a little bit. And more importantly, I think the mindset of leveraging this stuff should be the same mindset that you have when it comes to AI automation in general, which is AI is not gonna do everything, but if it can get me 70% of the way there or cut down 70% of my time from it, That is a huge win. And that's the way you should be thinking about approaching this as a tool that you can leverage to learn quicker and build quicker. And speaking of learning and building quicker, if that's something you're interested in, then definitely check out my Plus community. The link for that is down in the description. We've got a great community of members who are learning and building with N8N every single day. And we also have a straight path to starting to monetize your AI automation and spinning up a one-person AI agency. You can learn here as a beginner, move into the foundations of N8N, and then start to figure out how you can actually start to work with clients and build a business off of this. So if that sounds like something that you're interested in, then definitely check it out. The link for that is down in the description. But that's going to do it for today. If you guys enjoyed the video or learned something new, please give it a like. Definitely helps me out a ton. And as always, I appreciate you guys making it to the end of the video. I'll see you on the next one. Thanks everyone.










