The Easiest Way to Use Community Nodes in n8n
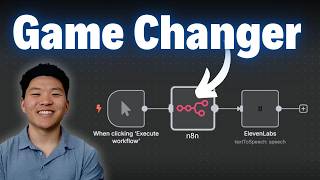
Dr. Violet Howard shows how to enable and use verified community nodes in n8n across cloud and self-hosted setups. She replaces manual HTTP requests with the Tavily node for search and installs ElevenLabs to generate speech, demonstrating how community nodes simplify authentication and reduce boilerplate code.
Chapters
If you're tired of setting up manual HTTP requests, then this is the video for you because today I'm going to show you guys how to connect to community nodes, whether you are hosted on N8N Cloud, self-hosted in the cloud, or locally hosted. And a community node is just a node that a member of the community has built because it solves a specific problem or adds more functionality that N8N doesn't natively have. So let's get into it. All right, so here is an article that N8N released last week that says community nodes are now available on N8N Cloud, which is great because previously you had to be self-hosting the community version of N8N if you wanted to use these nodes. And as you can see down here, they're starting with just 25 nodes that are some of the most used community-built packages and partner-supported integrations. And they're going to be expanding the library gradually, bringing on more verified nodes so that we can connect to pretty much anything a lot easier now. They talk a little bit more about why they're investing in the ecosystem. Community nodes have been extremely successful over the past couple months. And then it's gonna spotlight a few of the community nodes that will be available on cloud, like Tavily, PDF Forge, BrowserFlow, we've got 11Labs, we've got SERP API. So let's get into our N8N Cloud and check it out. One thing to note at the top of the article is that it says you must be on version 1.94 or later. So if I go into my N8N and I click on my admin panel in the bottom left down here, we can see that I'm currently running 1.94.1, so I'm good. But what we have to do is click on settings and we have to go down here to verified community nodes and turn that on, and then we have to hit save changes. So this is going to basically restart our workspace. So make sure you have your workflow saved and everything. And if I go back to my dashboard, it's going to say that it's basically spinning it back up. It's making the changes right now. And then once it is green, we'll be able to click open and we'll launch back into our n8n environment. All right, so we're green. I'm going to go ahead and open up my workspace. And now that I'm back in my environment, what we can do is go down here to settings and we'll see we have a new option down here that says community nodes, which would not have been there before. And it says you can install community and partner-built node packages that have been verified by n8n directly from the panel. So rather than having to come here to install it like you would if you were self-hosting the Community Edition, you can just do it straight from the panel. So let's hop into a workflow and take a look. All right, so here we are in a workflow, and what I have done is I've connected to Tavily using an HTTP request. And if you guys have been watching my channel for a while, you've probably seen me connect to Tavily a ton. It basically lets your agents search the web with real-time articles, that kind of stuff, and And what we had to do inside this HTTP request is we had to go to Tavily, we had to go to the API documentation, and we had to set up all this stuff with all these different parameters. As you can see, we put in all this information, we have our parameters, and what we asked was, what is AI automation? And then here we get our actual answer, and then over here we get a result with an actual URL. But what we're able to do now with the community nodes is if I move this nasty HTTP request out of the way and I click on the plus, if I search for Tavily, we can see right here that we have a Tavli community node. And if I hover over the check mark, it says this is an official node maintained by Tavli. So I'll click on that. And what we have to do is install it. So I'm just gonna click install node. This is gonna take like 10 seconds. It doesn't take long at all. Now you can see that we have it installed. If I go into the actual community nodes of our cloud, you can see that this is the one that we have. This is where you could go ahead and look at documentation or uninstall this package. But now that we have it installed, what we can do is we can use that search endpoint which is exactly the one that I used back in this previous HTTP request right up here. And so now it's pretty cool. We have a native node that has the little Tabli logo and everything. And all I have to do in here is I have to put in a credential and a search query. And then we have the option to add all these other things that we had in the actual request right here, but we don't have to deal with the actual body parameter. Let's say we wanted to, um, you know, do a different topic. We have the option of general, news, or finance. Or let's say we wanted to do max results. We can just put in a number and it's way more easy to look at. So first thing I'd do is I'd want to create a credential. So I'd click on create a credential and all I have to do is plug in my API key. So I'll go to Tavaly and I'll just copy this key right here, hit save, and we'll be good to go there. And then I just need to type in a search term. So I'm just gonna type in what is AI automation just so we can see the same thing as what we did earlier. And now we're running it. It is a community node. As you can see, you can see we get back this results. We don't have an answer probably because we did different results, but we have 5 different URLs and they're all gonna tell us about what AI automation is. And what's really nice about these community nodes is a lot of times I see people have issues with the authentication because with Tably specifically, in your authentication, you have to put in bearer space API key. But as you guys saw in this native node, when you create your credential, all you have to do is give your API key. So whoever built this community node is handling all of that kind of stuff on the backend. Okay, so let's look at one more real quick. If I go come down here and let's try the ElevenLabs. So you can see interact with ElevenLabs API. What we have to do of course, is install it. All right, there we go. So we just installed the ElevenLabs API. And now let's see what I want to do is let's do convert text to speech. So as you can see, everything's already configured. We just have to put in a few things. So what I'm going to do first is my credential. So all I had to do was paste in my ElevenLabs API key. I didn't have to mess with bearer space or x-api-key or anything like that. I just threw in my API key and now we're good to go. And what I can do is choose from a list of voices rather than just having to go and get like a voice ID. So we can see I have Nate Hurk, I have Jarvis, I have Archer, I have all this kind of stuff. Let's do one with Rachel and then the actual text for ElevenLabs to turn into speech. So here we're going to have Rachel say, community nodes. Wow. We'll run this and we'll see what we got. All right. I just downloaded the file that I got from ElevenLabs. Let's hear it. Community nodes. Wow. Okay. So that's just to prove that we actually were able to access ElevenLabs API server. And another thing I wanted to mention is just because it's a community node doesn't mean that you can't have triggers or agent tools as well. So for example, if I click on the plus under our AI agent, What we can see is that if I want to do the Tavli again, but this time use it as a tool, we see right here we have our community tool, which is part of that Tavli package, which of course was this one that we just used down here. This is the official Tavli one, and then this is the tool that is part of that package. And so of course I could click under there and I could add it to the workflow. And now we have our Tavli tool that we can hook up to our AI agent. And we already have our credentials saved because we just set it up with this package. And then when it comes to triggers, you basically would just have to play around to see if the community node that you're trying to use has a trigger. So if I came into this workflow and I just typed in trigger, we can see we have a ton of different triggers. Um, looks like this one right here, Swiftgum, is one of the official ones that is a community node. I also noticed earlier that we had one called Chat Data, which lets you take action in chat data, but also it can be used as a trigger down here. So they've got it all. Okay, so now we are in my self-hosted version of N8N, and I'm gonna do the same thing, go down to settings, and click on community nodes. And like I said, now it's a little different because we can install community nodes straight from here. And it's super, super simple. All you do is click on install and then you could just basically type in the name that you need of the package. Or you could come here and click on browse and you could look at all these other N8N community node packages. And I'll also include a link to this GitHub repo in the description, which is the top 100 community nodes. And it has different categories like communication and messaging, document and content generation, browser automation, data processing, API and cloud integrations, this kind of stuff. What I'm gonna do is, because we did an example with Tavely earlier, I'm just gonna use that exact one that we used, but this time in a self-hosted environment. So I'd come here, I could click on this, which would take us to the npm site for this actual community node. And it's really easy. All I'm gonna have to do is go here and copy that, go back into n8n, paste that in there, hit the check mark, and then click install. And so now we have our Tavely node installed. I can go back out of here and open up a new workflow. And so now in this new workflow, if I come in here and I type in Taveli, you can see that we're gonna have two. So the first one is the verified one from n8n that's maintained by Taveli, which is the one that we just saw an example of. We come in here and we can install it, or we can see that we have this other one that we just installed, and this little block means that it is a community node from a package that we installed ourselves. And we could click in here and we could do the exact same thing where we could either search or extract. And then the only difference would be if you were running n8n locally, You couldn't just come here to your settings and go to community nodes and install one by typing in the name because you need to install the actual node package somewhere that your local n8n can access. So according to n8n's documentation, what you need to do is if you want to manually install the community node using npm, you will have to access your Docker shell, which is you just get into your n8n environment, create a directory for n8n nodes if it doesn't already exist, otherwise just navigate to it. And then you just have to run the npm install command and it will already be there. So according to the Tavli node that we just looked at, you would basically just have to run this command and all of the other nodes will have the npm command right there. And then of course you can go look at the GitHub repo for this community node if you need some more information. And then when you restart N8N, it should be there when you type into the node panel for that node you're looking for. All right, so that is going to do it for this one. Hope you guys enjoyed and hope you get in there and play around with some community nodes, see the value in that. If you guys want to see a video on some automations using different community nodes or some of the most useful ones, let me know. I'd love to throw that together for you. Anyways, as always, appreciate you guys making it to the end of the video, and I'll see you in the next one. Thanks everyone.










