This AI System Posts Viral ASMR Shorts Hourly (free template)
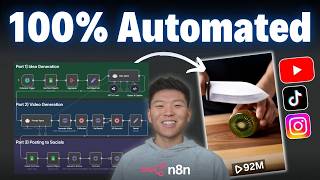
An n8n workflow automatically generates and posts AI ASMR videos of objects being cut to YouTube, TikTok, and Instagram hourly. It uses Google's VEO-3 model to create 9:16 videos with synchronized sound, costs about $6 per video, and includes a free template to download and customize.
Chapters
Okay, so these types of shorts have been going viral all over social media and they're completely generated with AI. They're really satisfying. It's like a knife cutting through a glass fruit or some sort of object that you probably couldn't cut if it was glass, but it goes right through and it sounds great. Now in order for those videos to be high quality, it really depends on the prompts that you feed these text-to-video generators. And so today, not only am I gonna give you the prompts that I've used to get thousands of views on this type of short-form content, but I'm also gonna give you this exact system so that you can plug it in and set it and forget it and the workflow will just pump out Shorts on autopilot. Not only is it just gonna pump 'em out, but it's also gonna post them to your socials. So right here I've got it set up for YouTube, TikTok, and Instagram. So we're gonna hop into a live demo. I'm gonna run the system in front of you guys. We'll see the output, we'll see it posted on our social medias, and then I'm gonna break down how this works and show you guys how to set it up for yourselves. All right, so I'm just gonna go ahead and hit execute workflow, and this is basically gonna pull in a database of past fruits or objects that we've used. The Idea Agent is choosing an object and a caption, and now the prompt agent is creating that high-quality text-to-video prompt. We fed that into Google VEO-3, and now we just gotta wait. I have this set to 5 minutes, so I'll check back in once this step is done. All right, so the video just finished up. Now we're moving on to that third part where it's gonna update our sheet and then post to socials. So right now it's getting uploaded to Boteito, posting to YouTube, posting to TikTok, and posted to Instagram. So let's go take a look at the final video. So you can see in Boteito, we just got this new glass kiwi, which was posted to Instagram, TikTok, and YouTube. So let's click into Instagram and take a look. All right, there you go. So that's what one output looks like. Let's flip back over the workflow and let's kind of go over how I built this thing. So the cool thing about this workflow is you can literally set the trigger to go off however many times you want it to per day and then just set it and forget it and it will just continuously post stuff for you. So at a high level, what happens is we pull in the past 7 objects that we've used in the videos. The idea agent will look at the past 7 and give us another idea that hasn't been used yet. We'll create the video for that new fruit, and then we'll post them to socials. And we also basically delete that first row and append another one. So the idea agent's always gonna be looking at a sheet of the 7 most recent posts that we've made. And that's how we're gonna keep the content fresh, even if we let it run 7 times a day. And real quick, something I wanted to throw out there is that as I was testing, my prompts have only gotten better and better. And here was one of the first outputs I tested. I threw it up on YouTube and Instagram and it ended up getting like 35,000 views in one day. And I would say that the outputs that I'm currently getting are far better than this one right here, but this is the one that did pretty well on that first day. And here's another one that did really well on Instagram that was a way older version of the prompt, and they're only getting better from here. So like I said, the outputs we're currently getting with this prompt and this system I think are far better and will probably do better on social media. But anyways, let's start to break down how this workflow works. All right, so starting with part 1, which is the idea generation, we start here with a scheduled trigger so that if you come up here and make this workflow active, you could set this thing to go off 3 times a day, 5 times a day, 10 times a day, however much you want. Once that goes off, it basically will go check this Google Sheet that we've set up, which is called VO3 ASMR, and it basically just pulls in all 7 rows. So as you can see on the right-hand side, we see glass apple, glass grapes, glass mango, pineapple, banana, dragon fruit, blueberry, blueberry. So then what we do is we take these 7 objects and we aggregate them into one item. So we have all of them right here, and then we just use a set field to turn that into a list. So now we have a list where we set the objects. You won't have to touch this, and it's always going to output a list of those 7 most recent videos. So we take this list of past fruits or past objects, and we're just going to feed that into the idea agent. So as you can see right now, we have objects, and then we have this list of those fruits. And so this agent's only job is to basically output a new object and a caption that will be posted with the videos. So if I click into this system message real quick, we can see the agent is supposed to be selecting unique fruits for ASMR-style glass cutting videos. You will receive a list of 7 fruits that have already been used. Your job is to generate 1 new fruit that is not on that list, and it should look visually compelling if it were made of glass and cut with a knife in a close-up ASMR video. So it's really simple, nothing crazy going on here. I will say we are using a structured output parser to make sure it outputs two different things. One is just the object and then one is the actual caption. And so we kind of define that here, but what you have to do is have a structured output parser. You turn on this option and then I have got my structured output parser right here, which basically tells the AI agent, okay, you need to output these two things, an object and a caption. Okay, so that's part one. We have a new fresh fruit for the video. and now we're going to feed in that fruit to the prompt agent. So let's click into this guy. So as you can see here in the prompt agent, the first thing to call out is the user message. We're giving it the output of the previous agent, which just gave us the object. So right here it says glass kiwi, and now the agent sees that we're going to do a glass kiwi, and it looks at its system message to understand what to do with that glass kiwi. So I'm not going to read this whole prompt. This is obviously where all the magic happens, but keep in mind you guys will get access to this prompt for free. All you have to do is download the free template in my free school. I'll touch on how that works later in the video. So anyways, the key here with text-to-video prompt generation is we want to give it a format to follow and we want it to be very specific about certain things. So first of all, we said you're an AI agent that specializes in generating text-to-video prompts for ASMR-style videos using Google VEO 3. These videos must be in a 9:16 aspect ratio. You'll receive the name of an object like a glass apple, a glass mushroom, whatever it is, and your job is to create a hyper-realistic, sensory-rich video prompt of that object being cut in a close-up ASMR scene. So we gave it some core requirements. Feel free to read through those, just telling it like, you know, make it cinematic, cut through, make sure it doesn't shatter, all that kind of stuff. We also gave it some more prompt requirements down here, which is like describe the scene, describe the object in detail, describe how you cut, describe the sound, all this kind of stuff. And then finally we told it basically how to format it. So we want a subject, a setting, an action, a style, sound, camera motion, composition, ambiance, and aspect ratio. So it's always gonna output these different 9 things. And just kind of fill in the template. So on the right-hand side, you can see we have our subject, our setting, our action, our style, our sound, all this kind of stuff because we basically defined how it should output and we gave it a template. So now the goal is we take this video prompt and we're gonna feed it into Google VEO 3. And we feed it into Google VEO 3 using a FAL API. So real quick, I'm just gonna switch over to FAL. Here is what it looks like. Here you can see the request we just did with the glass kiwi. and we are looking at the model Google V03. So basically FAL lets you connect to a ton of different models. So if I real quick come up here to explore, we can see that offered through FAL, through FAL's API, we can use V03, CLING 2.1 Master. We can also use different like image to JSON models or image to video models. There's all these different ones that we can use. And so that's how we're accessing Google V03 over API. And so what you can do is you can come in here and use the playground to just test out some prompts and get to a place that you like. And then go into N8N with it to automate it. But now that we have our prompt, we basically just have to look at the API documentation to understand how to send over requests to FAL. So basically what I did is I came in here and I switched this to HTTP rather than Java. And then all I really wanted to do was I had to get my API key, of course. So you guys will have to go get your API key. And then all I had to do really was come down here to input schema and just understand what I need to send over to FAL to get the video back in the way I want it. And really all that was going to be was a prompt, so a text-to-video prompt and aspect ratio, because I want all of this to be short-form 9:16 vertical content. So like I said, the HTTP request is already set up, so you guys don't have to worry about that. What you will have to do is come into FalL. You want to go over here to your account and you want to go to your API keys, and then you're basically going to add a new API key. You'll copy that value, and then when you get into N8N, all you have to do is open up this node and and create a new header auth for Fal. So what you're gonna do is you're gonna, under authentication, click on generic. Then you're gonna go to generic and click on header auth. And then in header auth, you'll click on create new credential. In the name, you're gonna type authorization. And then for the value, you're gonna do capital K key space, and then you'll paste in your API key right there. And then what I would do is just, you know, rename it up here, call this Fal so you have it saved for later. And then you just hit save and you should be authenticated to use Fal. Anyways, now that we have that set up, like I said, we're just basically sending over the prompt, the aspect ratio, and then I also just included generate_audio=True. If you left this out of it, it would automatically just do it by default, but I just wanted to show you guys it's really cool that using v03, it can create audio and video together so we don't have to like do that separately and render it all together. So anyways, I basically just dragged in the output from the prompt agent right in here. I have a little bit of a replace function going on down here, so we get rid of newlines and any double quotes because that would break the JSON body. So that's why I have these functions in here. And then when this gets run, it basically responds to us and says, okay, we're working on that video. We have, you know, here's the ID, here's the URL of your request, and all this kind of stuff. And so now what we have to do is wait for 5 minutes, and then we're gonna check in to see if it's done. So real quick though, if I flip back over to FAL and we go to our requests with v03, you can see this example only took 186 seconds. Which is a little over 3 minutes. And the reason why in here I come and set this to 5 minutes is because it really depends on the amount of traffic that VO3 is receiving at the point in time. So right now it's morning, so not many people are using it. It's going through quicker, but I was using it in the afternoon the other day and it was taking 7, 8, 9 minutes. So what we do is we set this for 5 minutes, but we also include this polling check so that if this node errors out, it's not gonna matter. It will basically come here, wait for 10 more seconds, and then check in. and it will continuously check over and over until the video's actually done. So we have that guardrail baked in, and obviously you can adjust the time that these nodes are waiting, but that's just what I have it set for. And so the way that this works is, like I said, once we put in that request to generate a video, it gives us back an ID of that request. And then in this node, what we're doing is we're checking in on that ID. So here you can see we're basically accessing foul. We're looking at our VO3 requests, and then we're filling in our request ID. and basically this node will come back and it will either error if the request isn't done, and that's why we can send it down the error branch, or if it is done, it'll give us the URL of that video. And the way I'm able to get these two branches is I go to settings and then I choose on error to continue using error output rather than the default option, which is just to stop the workflow. Okay, so now that we have that video, I'm basically just setting it right here as the URL so we have the URL in a clean spot. And now we need to move on to part 3 because we have the idea generated, we have the video generated, and now we just need to post to socials. Okay, so like I said, the first thing we're doing is we are going to delete that first row from the Google Sheet so that it's always only pulling in 7. So this is really simple. All I had to do was link up my Google Sheet, say that we're going to delete rows, we're going to start at row number 2 because as you can see, the first row would actually just be the headers. So it's always just going to delete row 2 and then it's going to append a new one below it. So we're always going to keep that 7 in rotation. We're just deleting one, and then like I said, we're appending the next one. So all I have to do is add in the object and the URL, and we get the object from the Idea Agent. So I basically just went to Idea Agent and I dragged in the object here, and then the URL we can just grab from the previous node where we set it, and I just dragged that in right there. And that is how we got our glass kiwi updated right here as the last row on the sheet. And here's our video file if we wanted to go download that video. Okay, so spreadsheet's updated. Now we just have the last step, which is actually posting. and we're using a platform called Bloatato in order to auto-post to these different socials. And what's really cool about Bloatato is not only are we doing YouTube, Instagram, and TikTok, but we could also post automatically to X, LinkedIn, Facebook, Threads, Pinterest, Bluesky. There's 9 total socials on here that you can post to. So once you get to Bloatato, make sure to use code Nate30 so you can get 30% off for 6 months. But once you're here, all you have to do is log into the socials you want to use, and then you have to come down here and get your API key. So you'll copy your API key, and very similar to the way we set up for Fal, you'll come into this node right here and you will create a new credential type, which will be a header auth, and it will be generic. And then you'll create a header auth, and in here all you have to do is make it Blotato-API-key and then paste in your API key. And now that we are set up talking to Blotato, all you have to do is— we're passing over one variable called URL, and we just dragged in the URL from the previous node, and now Blotato has it. So So the reason we have to do that is because right now, Fowl basically owns this video URL, and in order for Bloatato to post it on our different socials, they have to turn it into a Bloatato URL. So it's the exact same video, it just now exists on Bloatato's servers. So this is the URL that we're gonna use to post on our different socials. So as you can see now, we have YouTube, Instagram, and TikTok. And one thing I wanted to point out is these aren't actually like linked to each other in succession. These are 3 separate ones. I just kind of like put them here for organization's sake. But anyways, first we're gonna do YouTube. So in here we have our Blotato credential connected already. The only thing that you guys will have to change is you'll have to come in here, open up this request, and you just need to change your account ID. Everything else is already gonna be set up. So in order to get your account ID, you'll go into Blotato. The first one we're doing right now is YouTube, so you just click login with YouTube. It'd be the simple OAuth sign-in screen. And once your account is connected right here, you just click on copy account ID. You go back into the workflow and then you just paste in your account ID right there. And it will be the exact same process for TikTok and Instagram. But anyways, as you can see, there's different things we're passing over. Like right now I'm just sending these as unlisted to YouTube. We have the title, we have the text, which are actually the same thing, and then we have the Botato URL right here. And so that's how it's able to post. We're doing the exact same thing with the Instagram and TikTok. Let me just open up these real quick. You have your Botato credential. The only thing you need to do is put in your Instagram account ID and everything else gets passed over fine. And then it's the exact same thing with TikTok. Of course, we have our Bloatato account connected right here. And then in the JSON body, you just need to connect your account once again by going here, logging in with TikTok, and then you copy your account ID right there. So like I said, each of them have different settings. All you have to tweak is the account ID, but you can play around with these settings if you want to change the way that it is posting. But that's basically it. That brings us to the end of the flow. This could go off however many times you want it to per day. And post wherever you want. And just in case you want to keep track and make sure they're actually posting, if you go to Bloatato and you go over here to your published posts, you can see that you're able to see if those were actually posted and how long ago they were posted. So you've got, you know, Instagram, TikTok, and YouTube, and you can click on these links in order to go straight to where it's actually been posted. Now I wanted to touch on some pricing stuff real quick because your biggest expense is going to be the video generation. Google VEO-3 is a super advanced model and it's not cheap by any means. So if we come into here, you can see for every second of the video you generate, you'll be charged 50 cents if audio is off. So in our case, we're using audio for ASMR, and that would be 75 cents per second. And because we are generating 8-second videos, it's going to be $6 per video. So it's not cheap by any means, but I don't want you to get the idea that this workflow is supposed to be like a get-rich-quick scheme. It could definitely help you grow a channel on autopilot, especially right now while this opportunity is pretty new. Because with the short-form content, when you want one to go viral, you really just need one to catch the algorithm. And the more you put out, the better chance you have of actually catching the algorithm. So using an end-to-end automation like this, you're just going to have a higher chance because you're able to do way more volume than other people would be doing manually. So that's really the idea of the system, and also to show you guys how you can find different trends that are working and you can try to piece together how you can automate them. And you can see what we did here was we got creative in order to make sure that this is basically rotating and it's staying very fresh as far as the different fruits that we're using. So just wanted to throw that out there real quick. Now let me quickly touch on how do you actually get this system for free? And you can also get the Google Sheet if you want just to keep track of the different fruits that you're posting. So this template will be available for free in my free school community. The link for that will be down in the description. There will also be a setup guide right here when you download the workflow so you can see what is left to connect still, what API keys do I need to get, all this kind of stuff. But what you're gonna do is go to my FreeSchool community. You want to click on YouTube Resources right here, or go to the top and search for the title of this video. And then let's say this is the video right here. All you're gonna do is you're gonna find this JSON file right here and download that. And then once you have that file, all you have to do is open up a new NNN workflow, come up here and click on Import from File, and then you'll have the system right here in front of you. And now this is a super, super simple Google Sheet. It's literally just an object column and a URL column. But if you want to download this template as well and plug it into the Google Sheet nodes, All you'll have to do is in the FreeSchool community, there will be, um, basically a link right here that will take you to the Google Sheet. And then you'll make a copy and you'll be set up. And if you're interested in joining the number one community for no-code AI automations, then definitely check out AI Automation Society Plus. The link for that will be down in the description. We've got a great community of members who are always sharing problems they're running into, helping each other out, sharing wins. We've got a full course in here with Agent Zero, which is the foundations of AI. We've got 10 Hours to 10 Seconds where you learn how to identify, design, and build time-saving automations. And then we've also got a step-by-step course where it's a bunch of different step-by-step builds that I've shown on YouTube, but I sort of break them down and do them live in front of you. So anyways, that is gonna do it for this one. I hope you guys enjoyed the video. Hope you learned something new or found it entertaining. If you did, please give it a like. It definitely helps me out a ton, and I will see you guys all on the next one. Thanks everyone.










