This Trick Helps me Build Agents 3x Faster (as a beginner)
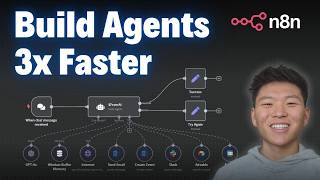
Dr. Violet Howard shows how to build AI agents in n8n three times faster using the $fromAI function to auto-populate tool parameters. The function extracts fields like email addresses, subjects, and search terms directly from natural language queries, cutting out manual setup for Outlook, Slack, and web search tools.
Chapters
Today I'm gonna be talking about the technique that I used to build the Ultimate Assistant workflow in under an hour. Now that won't include final testing and refining and error handling, but the point of this video is that if you don't know this method, or if you kind of know about it but don't really understand it, and you start to use it after this video, it's gonna help you build agents 3 times faster. And if you haven't watched my video about the Ultimate Assistant yet, go to my FreeSchool community. The link for that's down in the description. You can grab the templates for free right here. You can watch the video, and then you can download all of the workflows right here that you need to to plug it into your own N8N. And if you're interested in a more hands-on approach to learning N8N and you wanna see me build out the ultimate assistant step by step, then check out the paid community. The link for that's also down in the description. We've got a great community of members who are always sharing resources. They're all dedicated to learning about N8N and AI agents. We've got a classroom section with different deep dive topics like building agents, vector databases, APIs and HTTP requests. And then here's the series I'm launching up where I'm doing step-by-step builds of all of my YouTube videos. And of course, we've got 5 live calls per week, sort of group sessions where we go over tech support issues, make sure you're not getting stuck, get questions answered, and just network with other individuals in this space. But anyways, let's get back to the video. So what is the method that we're gonna be talking about today? Well, when you are creating an AI agent and you want to give it access to tools, you'll click on this plus, and on the right you'll have a bunch of tools right here. And what we're looking at are these integrations where we have nodes as tools. So in this case, we would've clicked on Gmail tool, and then we have these pop up, and then within there we have to configure certain things. So in this send email tool, for example, we have to configure who is the email going to, what's the subject of the email, and then what is the message of the email in order for the agent to actually be able to send it. And so what we do is we fill out these parameters with a fromAI function. It may look a little intimidating, but trust me, it's not. So this video is all about breaking this down so you understand what's going on. In a nutshell, the AI is going to take your original query when you're talking to it, and then it's gonna be able to use its brain to fill out everything it needs to within this node configuration. So let's hop over to a quick visualization that I made, and then we're gonna look at some examples in n8n and I'll show you guys how quickly we can spin something up. Okay, so here we are in Excalidraw, and I have a visualization that I made, which is gonna explain this process, hopefully really simply, break it all down. What we have here is an AI agent, and its only tool is to send an email, so we're sticking on that theme right now. And we have a trigger, which is us chatting to the agent. We would send over something like, send an email to Nate Hurk asking how his day was. The agent would then understand, okay, I need to send an email, I'm gonna use my tool called send email, but within my tool, I have to configure the to, the subject, the email, CCs potentially, maybe there's attachments. Anyways, it has to figure out all this information in order to actually send that email off. So what we're breaking down is what actually goes on in this black box here of the send email tool. Well, let's come over here and look at this process. So here's the original query right here. Send an email to Nate asking how his day was. The AI is able to interpret based on the function that we set up within the node. Who is the email going to? What's the subject? What's the body? And then it uses the original query to actually you know, fill in those parameters, which in this case, natehurk@example.com, it makes the subject checking in, and then it actually makes an email body for us right here. So once it does this based on the original query, it can feed it back into the tool, put it in, into the right parameters in the node, and then it can go back and actually send the message and tell the agent that we're done. And then the agent can let us know as the human, okay, I went ahead and I sent that email off. So here we are in end-to-end. I'm gonna connect a few different tools and step by step show you guys how to use this function. And you're gonna see that we're gonna be able to spin up an agent in 5 minutes that can do some pretty cool stuff already. So let's first just click on the plus under tool. We're gonna be adding a tool to this agent. And I just named it From AI. It doesn't mean anything special there. You don't have to do anything. But what we're gonna do is we're gonna add an Outlook tool because you guys have been begging for some Outlook integrations. And what we're gonna do here is just stick on the theme real quick and send an email. So as you can see, we have the to, the subject, and the message. What we're gonna do is make sure that we're changing the To field to an expression, and all we have to do is type in two curly braces, a dollar sign, an F, and then we'll see the From AI function pops up. So before we click into this, we can see that we configure it sort of similar to the way we would configure like an Excel formula, where we have different parameters to fill out. The first one is a key. This is describing to the AI model, what are you looking for in this parameter? The key is the only field that's required. As you can see, there's no question mark after it, but the other three ones, description, type, and default value have question marks. So a lot of the times we're able to just only fill out a key, but you can add a description to make it a little more robust. And all that is is just describing what the key is. So we could say the key would be an email address, and then the description could be the email address of the person the user wants to send an email to, but we don't need to do that. Then we also have the data type. So in this case, we know that email address, we're looking for a string or a word, but in a different case where maybe we're looking at, you know, order history and we want to say like the order number, We could tell the AI, okay, you're looking for a number data type in this case, just to make its job a little easier. And then finally, we have default value. So if the AI is unable to find the key that you've described to it, it will just default to this value every time. So in this case, all we have to do is put in two quotation marks, and then within the quotation marks, I'm putting email address. And so this is telling the AI to look for an email address. You have to make sure it's an expression. If it's fixed, it's going to look white like this. But if it's an expression, it's going to be gray or red or green. And that's how you know that it's variably going to be passing over you know, using the AI to fill in this key rather than just sending out this actual text right here. Okay, so I copy and pasted that same expression into subject and message, made them all expressions, and now I'm just going to swap out the key. So for the key in the subject field, I'm just going to type in subject. And then for the key in the email address field, or sorry, the message field, I'm just going to type in email body. So now the AI is going to be able to see the query that we originally sent to it and then pick out the to, the subject, and the message based on these keys that we set up. And just to stay organized, I named this tool Send Email because once again, I wanted to show you guys we have no prompting in here. All it says is you're a helpful assistant. So we didn't tell it anything about the functions. That's all happening within the tool. And we didn't tell it that it has this tool, but it's going to be able to intelligently understand that. Okay, we're gonna test out this tool. I'm saying send an email to Nate letting him know that I'm gonna be late to the meeting, but go ahead and start without me. Please mention to not bring up the budget cuts until I get there though. So as you can see, it was able to hit the tool. It already sent out that email really quick. The agent let us know that it sent the email off, and what we can do is click into this tool and we can see how it reasoned through what to do. So if you remember, we set 3 keys: email address, subject, and email body. And on the left, you can see that it populated them over here with actual text that goes within each of those keys. So it gave us a subject of delay in joining meeting. The body is, hey Nate, I wanted to let you know that I'm gonna be late to the meeting. Please go ahead and start without me. However, could you please refrain from bringing up the budget cuts until I get there? So let's go into Outlook real quick and make sure it actually sent this off. All right, here it is. Hi Nate, wanted to let you know that I'm going to be late to the meeting, blah, blah, blah. As you can see, it didn't know how to sign off as us, and that's just because of the prompting. But the point of this is that it was able to really quickly intelligently make a subject and an email based on our pretty short query. And so all we'd have to do is come into the agent, come into the system prompts real quick, and then just say sign off emails as Bob. We can go ahead and save this, and we will just send that same query back over. It will do the exact same thing, and you can see it's gonna change the actual message a little bit compared to the first one, but this time it's gonna sign off as Bob. So if we come into here, we will see that we have "Running late to meeting," so it's a different subject. Email body is similar but not the exact same, and this time it signs off as Bob. And here we are in the Sent Emails in Outlook. We can see it sent to natehurk88. We have the subject, we have the body, and then we have a sign-off as Bob. Cool, so we already have basically a functioning email agent, and we spun that up in maybe 5 minutes, probably less. Now let's do a different tool. So let's look at using Outlook again, but this time we're going to be creating a calendar event. So I'm going to do event, I'm going to do create, and now we can see after we choose our calendar real quick, now you can see we have 3 fields once again that we need to set up the functions so the AI can figure out how to populate these parameters. So first in the title, make sure it's an expression, grabbing 2 curly braces, dollar sign, from AI, and then in the key I'm just going to put event title. Simple as that. And we could add a description to the event title. We don't really need to. As you can see in the previous example, we didn't have to add descriptions and it still worked. But we're gonna do the same thing now with these final two fields, start time and end time. We are going to copy in this expression into both of them and then just change out the actual key. So for start time, I'm just gonna say start time. And then for this end function, once again, I'm just going to say end time. And then I just named the node create event and And now we have this tool which we can go ahead and test out. One thing I am going to do though is in the system prompt, I'm going to give the agent access to the current date and time. So here is the current date and time, and we do this by doing two curly braces and we're calling a different function. This time we're doing $now, which as you can see on the right, it just gives the agent access to the current date and time. That way we're able to say create an event for 1:00 PM today and the agent will know what today is. And then we said it's gonna be an hour long, and I'm meeting my friend Andy for lunch at Chipotle. So it's gonna be able to know to use the Create Event tool. It's gonna fill out the parameters in there. It says, I've scheduled your lunch with Andy at Chipotle for today at 1 PM. And let's click into the node and see what it did. Now remember, our 3 keys were event title, start time, and end time. And you can see that it populated all these parameters correct. So let's hop into Outlook real quick and see the results. All right, there's my Outlook for today. We can see that at 1 PM we have lunch with Andy at Chipotle, and it made it that it's from 1 to 2. So it listened to us when we said it's gonna be an hour long. Okay, so those were just two examples with Outlook. If you come into here, everything else is gonna be pretty much the same. So let's say we want to do something in Slack. We would basically just send the message to, you know, we could choose our channel, but when it actually comes to the message, all I have to do is come in here, choose the $fromai function, and then just define the key. So all of these nodes as tools are gonna have different parameters to send across, and all you have to do is basically tell the AI when you're, you know, filling out this section, this is what you're looking for. Okay, but now let's say we're doing something that's maybe an HTTP request rather than, you know, one of these wrapped up natively integrated tools in NNEDN. So what we're gonna try here is connecting to an API called Tavily, which lets you search the internet. And if we click on Tool, we can see that, you know, these native nodes as tools, we don't have a Tavily one. So anything that there's not a native integration in NNEDN, we can still connect to using an HTTP request, assuming they have a publicly exposed API, but we wanna do it a little differently. but it's the exact same, you know, principles. So we're gonna go ahead and connect up to this Tavely tool, which is just an HTTP request node as a tool. And so all this stuff's gonna be the same, the URL, the headers, all that kind of stuff. But what's gonna change every time is the actual JSON body that we're sending over because we want to search the internet for something different. As you can see right here, search term, that's gonna differ every time based on what we say to the agent. So this is gonna be a little different than the from AI, but it's the exact same concept where we're setting a key and then the agent's gonna be looking for that to fill in. So in this case, our key is search term, as you can see right here. And then down here you can see it says use a placeholder for any data to be filled in by the model. So our key is search term, and then we're describing that key as what the user is searching the internet for. So I just sent off this query that says search the internet for burger joints. As you can see, hitting the internet tool, and then the search term is gonna be picked out by the model and it's probably gonna say, you know, best burger joints or something like that. So once we get a response from the agent, which right now is processing what it got back from Tavaly, there we go. Excellent burger joints in Charlotte, North Carolina. I'm not in Charlotte, that just has to do with the prompting, I assume. But it listed 10 burger joints, as you can see right here, or 9, and then it gave us also Yelp's website. We could click into it if we don't believe Tavaly for some reason. But anyways, let's click into the Tavaly tool to see what happened. On the left-hand side, we can see that our key of search term got populated with burger joints near me. So that's the exact same thing as, you know, the From AI, because the agent basically is using its brain to figure out what is the search term that we're sending off to Tably. All right, so now that we understand how the From AI function works and how quickly and easy it is to set up some of these different tools, now it's just a matter of plugging them in, testing them, and adding more. So we started off with something like a send email, we test it out, and once we know it works, we can start to add more and more. And as you can see, I was able to add all of these, and then you obviously want to give it sort of a system prompt. Where you're in here and you're telling it what each tool does. As you can see, this prompt still isn't too long or complex at all. But then from there, it's just about manipulating the logic so that you can get what you need within each parameter. So a great example here is with the email reply tool. When we want to reply to an email, the AI is going to be looking for an ID. So this is going to be the ID thread of your Gmail thread so that the agent can actually reply rather than creating a new email. So we told it to look for an ID and we described it as the message ID. And how does it actually get that? Because when we ask it to reply to something, we're not going to be able to provide it the message ID. So what we have to do is first get emails. When we're getting all the emails, it can be either from a specific sender or, you know, the last 10 or whatever. Then it's going to come back as an output and each email is going to have a thread ID. What we did is in the system prompt, we told the agent, you know, when you want to use email reply, you must first get emails so that you have the message ID of the email to reply to. And then once the agent has that, it can send it off to this tool so that we can actually reply to emails. So that's gonna be it for this one. Just wanted to come in here and talk about the From AI function really quick because it's so, so powerful. And if you're not using it, you definitely need to be because like I said, it's gonna help you build agents 3 times faster. So as always, really appreciate you guys making it to the end of this one. If you appreciated it, if you learned something new, please give it a like. It definitely helps me out. And yeah, I'll see you guys in the next one. Thanks everyone.










