This Workflow Auto-Posts to 9 Different Socials (free template)
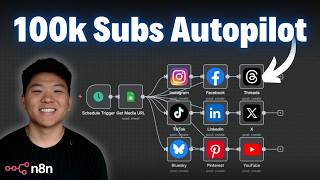
Dr. Violet Howard builds an n8n workflow that auto-posts to TikTok, Instagram, YouTube, Pinterest, LinkedIn and four other platforms using Bloatato nodes. The workflow pulls posts from a Google Sheet, uploads media, creates posts across all nine networks, and updates the sheet with status. She provides a free template and setup guide.
Chapters
Today I'm gonna show you guys exactly how I built this system so that I can auto-post content on 9 different social channels. I'm also gonna give you guys all the resources that you need to set this up for free so that all you'll have to do is connect your own, you know, content and media that you want to upload, and then just log into your own social accounts and you'll be all set up with auto-posting. So I don't waste any time here. Let's go ahead and break down the system. The first thing I want to show you guys is what are these weird-looking pink nodes that you see There's 10 of them here. Well, this is a platform called Bloatato. And as you can see here, what Bloatato lets you do is create viral posts and faceless videos, but we're not gonna be focusing on the content creation piece today. We're just talking about the actual auto-posting piece. I don't know if you guys have had issues before posting on LinkedIn or YouTube and stuff like that through like the other NNN native nodes or through an HTTP request or something, but Bloatato makes it pretty easy. So anyways, when you go to Bloatato and you sign up using the link in the description, Make sure to use code Nate30 so you can get 30% off for 6 months. I just wanted to say I'm not being paid by Botato to make this video. I've used Botato in different builds, which I'll kind of feature at the end of this video. But yeah, it's just a great platform and I wanted to bring you guys this discount. And it's even easier now because in previous videos I've had to use an HTTP request like this and we had to set up all of these different like page IDs and everything in order to pass over the right pages to our, you know, different HTTP requests. But now because of the native Node, it's super, super easy. And if you don't see this verified Boltedo community node, you're gonna have to go to your admin panel in your Ennidyn instance and make sure that you have verified community nodes enabled and that you're updated to a recent enough version of Ennidyn. Real quick, just to show you guys, I'm in my admin panel right now and you can see I have this turned on, which lets me access verified community nodes on Ennidyn Cloud. Anyways, once you're here, you can see there's two actions. The first one is to upload media and then the second one is to create the post. So I'll break down the difference here, but right here, this is where we're uploading media. And then over here, we're creating our posts on those 9 different socials. So the first thing we need to do before we can actually post is we need to create a Bloatato API key and we need to sign into our social profiles that we actually wanna post to. And then once I'm in Bloatato, I'm gonna go to my settings in the bottom left and all we have to do is start to add our accounts. So let's say for the first example, we're just gonna log in with TikTok and Instagram. All you do is click on the button, log in, super easy. You can see I've connected other accounts down here. and then you're gonna scroll up and go to your API, and you'll copy your API key right here. And then after you copy that, you can go into Botato and then open any of the Botato nodes, create a new credential, and just paste your API key right there. And then you just have to make sure that all 10 of these Botato nodes have that credential set up. And then because you already signed into like your Instagram and TikTok account on Botato, all you have to do in this node is choose the right account from the list. So it really should be the only one there, but all you have to do now is choose the right account. and then you can see when you're posting on TikTok or Instagram, they're gonna have different settings. So you have a privacy level, you can like disable comments. Is it AI generated? And all of these nodes are gonna have different little levers and different filters to play with. But it's so much easier as a community node because in the old way we had to do like an HTTP request for all of 'em and they all had different like JSON body parameters to send over. So this is a lot easier now. Anyways, let me just show you guys an example of this in action. So what I'm gonna do is deactivate all of these nodes by just clicking on them and then clicking D. So I'm turning these off because we only want to post to Instagram and TikTok. And what I'm going to do is hit execute workflow. So this is going to do is pull in our video as well as like our title and our caption from our Google Sheet. It's going to upload that video to Bloatato, and then Bloatato is going to go ahead and create those posts on Instagram and TikTok, as you can see. And then it goes back into our Google Sheet that we're originally pulling from, and it says, okay, this first row has now been posted. And keep in mind, this template is not the most robust error handling. It has one error set up right here to mark it off as errored. But if these nodes error, it won't update. So just keep that in mind. But I just wanted to show you guys maybe a way you could think about error handling for this flow. But anyways, now that that's set up, what I can do is go back into my Bloatato. I can go over here to published posts, and then these will pop through as published. So you can see this one already got posted on TikTok. And if we give this another minute, we'll see it on Instagram too. And there you go. Now you can see we have our Glass Apple ASMR on both Instagram and TikTok. And if I click on one of them, it'll take us right to that actual post so we can see that it is indeed there. Okay, so a lot just happened. Let's break it down one at a time. So the idea is that you could have this be an automation that goes off like every morning or something, and all you have to do is be in charge of filling up your database with posts. You could even pair this workflow with a different one that automatically creates the content and updates the sheet, which would be really powerful. But like I said, right now we're just focused on the posting. So what happens is we have our title, we have our actual media, we have our caption, and then we have a status. And this can either be posted, ready to post, or aired. And this template you guys will also be able to access for free in my free school community. I'll show you later in the video how to set up all of it. Anyways, it's going to pull in the first row that says ready to post, and we can control that in this Google Sheet where we basically say, okay, you're looking at this sheet, the status column has to equal ready to post, and we're only gonna pull back the first matching row. And that's what we get over here because we don't wanna pull back like 6 and post all 6 at a time. If you wanted to do 6 every day, the way I would do it is just have 6 different scheduled triggers to go off every 5 minutes at like 6:00 AM, 6:05, 6:10, something like that. Now this next step only applies if you're holding your media files in Google Drive, and I figured a lot of you guys may be doing that, and it's a little more complex, so I just wanted to set this up for you. And what we have to do is we have to extract the Google Drive file ID. So I have this already set up, don't worry about it. If you use the Google Sheet template, it'll match. And we get this file ID, and then we upload it to Botato with this little different schema. So we're putting like this Google Drive URL, and then we're putting in that file ID that we just extracted. And that's how it works. If you're not using a Google Drive file, you won't have to do this. All you'll have to do is link in your own media URL, whether that's like a public URL, or if it's binary data, you can just turn this on and then it will just grab the binary. So super easy. But if you do use Google Drive, keep this step. And then from there what happens is Bloatato basically says, okay, I see your video and I turn it into my own video. I don't add like a watermark or anything. I'm literally just copying it over so I can access it. And then I'm going to post it on Instagram and TikTok for you. So in these nodes, what you're gonna set up is like, you know, text. So here I just basically put the title and the caption and then the actual Bloatato media URL. And of course we have other options that we could set up and each of these nodes is going to vary based on the platform. But super simple. So they're really not too bad. I'm not gonna dive into every single one because there's just different parameters. The one that is a little bit strange is when you go to Pinterest, what you have to do is you have to get a Pinterest board ID, and it's kind of weird the way you get it. It's not super intuitive. So here's an example Pinterest board. I would right-click and go to Inspect, and then I'm gonna click on Network up in the top, and then all I'm gonna do is just refresh the page. Once that happens, I'm going to click on Filter, type in capital B Boards with an S, and then I'm going to click on that first row. And then just scroll up a little bit and you should see this data object, and you're just looking for right here the ID. So I would basically just copy that, go back into the workflow, and then I would just put that right here in the Pinterest board section. And then that's how it knows which board in Pinterest to actually post on. But that's really the only weird thing. Some of these you may need to like verify your account before it lets you post. Through the API. So all you have to do is in this setup guide, when you download this template, if you click on this little documentation here thing, it'll pull you up to social platform requirements and you can see guidelines for all of these different channels. And they also have a really cool AI search feature. So if you ask anything, it will basically search the documentation and help you out. So like I said, I've used Botato before, but I used it before they dropped this verified community notes. So now it's a lot easier. Here's the example of the glass ASMR videos that I did with Google VO3. And you can see down here the posting to social section, we upload to Bultedo, and then from Bultedo we upload to YouTube, Instagram, and TikTok. And here's another example where we automated not only the posting but the content creation. And down here you can see we use Bultedo to post once again on Instagram, TikTok, and YouTube. So that's when this gets really powerful, is when you're able to build a system that automates both parts of this so that all you have to do is just kind of like manually review if you're good with it, and then the content creation and the posting will be taken care of for you. So in order to actually set all this up for yourself, it's really, really easy. And when you download this template from my free school, you'll get a setup guide to make sure you're doing everything that you need to do. But if you're not in my free school already, definitely join it because that's where you can get all of my templates that I show on YouTube for completely free. The link for that free school is down in the description. And once you get here, this is what it will look like. All you'll have to do is search for the title of the YouTube video, or if you go to YouTube resources, you'll see here all my videos and everyone has all the resources there. So for example, if this is the video you're looking for, you'll have a JSON file where you can download that and import that into N8N, and then it will just pop up with this exact workflow. And then this Google Sheet that I talked about, I made a copy of it, and all you have to do is make a copy of it as well. And you'll find the link to this Google Sheet right here in the setup guide as well. So all you have to do is click on this link right here and it will prompt you to make a copy of that Google Sheet. That way your database will be set up the same way mine was so that all the variables throughout this workflow will pass over correctly. And if you're looking to take your skills with N8N a little bit farther, then definitely check out my Plus community. The link for that is also down in the description. Great community of members who are building with N8N every single day. And we also just announced monthly hackathons where we're gonna be giving away thousands of dollars in prizes. And you don't even have to be an advanced automator. We have a beginner section as well, and we've got a full classroom section with 2 courses at the moment. We're always trying to build more, but right now we have Agent Zero, which is the foundations of AI automation, and then 10 Hours of 10 Seconds, where you learn how to identify, design, and build time-saving automations. So if any of that interests you at all, definitely check out the Plus group, and I would love to see you guys in these communities. But that's gonna do it for today. If you enjoyed the video or you learned something new, please give it a like. It definitely helps me out a ton. And as always, I appreciate you guys making it to the end of the video. See you on the next one. Thanks, guys.










