Turn Your AI Agent Into a Voice Assistant in Minutes (n8n & ElevenLabs)
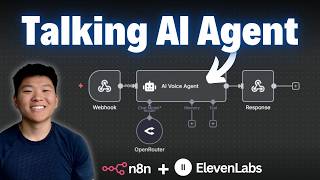
Dr. Violet Howard shows two ways to add voice to n8n workflows with ElevenLabs. First: receive a voice message in Telegram, transcribe it, send it to an AI agent, convert the response back to speech, and send it back. Second: build a real-time voice agent in ElevenLabs that calls n8n to run a research pipeline and return a spoken answer.
Chapters
Today I'm going to be talking about the easiest way that we can connect voice to our N8N workflows or agents for a better experience for the user. There are two ways that we can do this. The first one is using ElevenLabs to turn text into speech and send that over as an audio file. And then the second one is where we use an ElevenLabs voice agent to actually have a real-time conversation. It's going to be super easy and I'm going to walk through all of it live in front of you guys. So let's get started. Okay, the first scenario that we're going to walk through is one where we can send an AI agent a voice file. File, and then it will process information and then send us back another voice file. So it's not going to be a conversation, but it is going to deal with audio and audio. So the way I'm going to do this today is going to be through Telegram. So the first thing I'm going to do is add a Telegram node, which is going to be our trigger, which is going to be on message received. And so what I'm going to do real quick is execute this step. So it's going to be listening in our Telegram channel. I'm going to open up Telegram and I'm going to send off a voice message. Testing, testing. Can you hear me? So we'll shoot that off. It should capture it right there. What we see on this output of the Telegram trigger is that we got this voice file right here, and we can tell it's a voice file because right here it says audio/ogg. So now what we need to do is actually download this voice file and transcribe it so that we can send it to an AI agent. So what I'm gonna do is add another step right here. That's going to be a Telegram node, and we're going to download a file. Okay, so it's actually get a file. It's right here. We're gonna click on that, and what we're gonna do is basically it's looking for a file ID to download. So all I have to do is scroll down on this left-hand side, drag in this file ID right here, and if I hit execute step, it should basically pull over the voice file that we just dropped into it. And here's that voice file. Let me just play it for you guys real quick. Testing, testing, can you hear me? Okay, so now we have that file. Now the next step was we need to transcribe it. Now in the past, what I've showed you guys with something like this personal assistant is we used OpenAI's transcribe recording node to transcribe it. And also what you're seeing here is the method where the personal assistant can get either text input or voice input. But in today's tutorial, we're just going to deal with voice. But the other way that you could do this is with ElevenLabs to transcribe that recording. So I'm going to click on the plus, I'm going to type in ElevenLabs, and this is actually an N8N verified community labs node. So if you don't see this option, you will just have to make sure your N8N version is updated to the release of verified community nodes. And then when you get this, you'll have to install it. And now you can see we have different actions, and there's one down here that says transcribe audio or video. So I'm going to click on this one. It's going to ask us for an ElevenLabs API key. So I'm just going to go ahead and set up a new one right here in front of you guys. So when I click on this button and go to create a new credential, it asks us for an ElevenLabs API key. So you're going to go over to ElevenLabs. The link for that will be down in the description. And once you sign up for an account, you can just get on like the $5 a month plan, or you can just start for free. But I'm on the $5 a month plan and it is not too bad at all. I hardly ever meet the credit limit. Anyways, in your profile down here, you're going to go to API keys right there, and then all you have to do is click create API key. And what it's doing now is asking for different permissions of this key. So what I'm going to do is make sure text-to-speech has access, speech-to-speech has access, and just to be safe and give it access to everything, I could just turn this off so it has no restrictions. So I'm going to go ahead and create this new key and then I'm gonna copy this value right here. And once I close this, I can't get it again. So save that somewhere. And now that I've copied that key, I can go back into my workflow and just paste it in right here. We'll hit save and we should be all set. Connection tested successfully, and we can now access ElevenLabs through N8N. So what this is telling us is that it's gonna turn speech into text and it's looking for a binary file in the field called data, which we can see is right over here. So these two things are linked up. I should be able to just hit execute step, and what it's going to do is turn that into text. So right here you can see exactly what I said, which was testing, testing, can you hear me? So we have our speech turned into text thanks to ElevenLabs, and now we need to hook up our AI agent. So I'm going to click on the plus, I'm going to type in AI agent. We'll grab this guy right here. First thing we need to do is set up the user message, because by default the AI agent is set to look inside of the connected chat trigger node. Which does not exist on our workflow. We want it to instead look at the output of this node for the transcription. So all I have to do is click into the agent, change the user message to define below, and then really simply, I just have to drag the text field right here into this box. So it's now looking at this variable, which represents whatever was transcribed. We could then go ahead and system prompt our AI agent. So I'm just going to say, you're a helpful assistant who is extremely Funny. Okay, so we're set up there and now we have to connect a chat model. So I'm going to go ahead and connect an OpenRouter chat model. You would get this API key the exact same way you just got one from ElevenLabs, except for you'd go to openrouter.ai rather than ElevenLabs. So once you're connected to your brain, we can go ahead and run this agent. It's basically looking at the message, testing, testing, can you hear me? And then it's going to respond with something like, loud and clear. I hear you like a bat in a cave with super sensitive sonar. Or like a mosquito with a PhD in eavesdropping. What's next? Very funny assistant. Great work. And now all that's left is we have to turn that text into speech and then send it back to us in our Telegram over here. So what I'm gonna do is add another node. And once again, we're gonna go to ElevenLabs. We are going to do convert text to speech. And now what we have to do is give it the text to turn into speech, and we also have to give it the voice to use. So what we can do is just choose a voice from a list where we can see we have one of my voices, Nate Hurk. We have Jarvis, we have Archer, we have all these different voices to choose from. And if you want to actually be able to go over to ElevenLabs and test them out, or you don't see one on this list that you want, let me just show you what you can do. So you'll go back over to ElevenLabs. On this left-hand side, you'll go to Voices. And here you can see we have all of these different ones to choose from. And what you can do is kind of hear a preview of each one. So let's say I want to hear a preview of Young Jamal. What's good, bro? This is the only young black accent, so you can use it however you want, cuz. Or maybe we want to test out Jerry.
Down in Dixieland lived a young buck about knee-high to a grasshopper.
So if you're not seeing these in the list option, all you have to do is choose a voice that you like, open up right here, and click on Copy Voice ID. Once I've copied that, I would go back into the workflow, and instead of choosing from a list, I would just choose by ID, paste in the ID right there, and then we should be set up with that voice. And then all we have to do is drag the output of the AI agent into the text field. And then when we run this step, it should be turning that into an audio file. So if I download this file and we give it a listen real quick.
Loud and clear. I hear you like a bat in a cave with super sensitive sonar, or like a mosquito with a PhD in eavesdropping. What's next?
There you go. So we have our voice file, and now all we have to do is just send it back to our Telegram chat. So I'm going to click on the plus after the voice, and I'm going to type in Telegram. What we're going to do is not send a message, we're going to send a file because it's going to be working with a file. So send an audio file. And so now there's 3 things to do really. The first one is where are we sending this to? So it needs a chat ID. So I'm going to click on schema, and I'm gonna go all the way back to our Telegram trigger because this contains metadata like the chat ID. So I would take this chat ID right here and drag it into that slot. And now what's next is we need to tell it what to send over as audio. So you can see that we're working with our binary data field right here. So I have to tell Telegram we're gonna be sending over binary. It's automatically gonna look for a field called data, which is right here, and now we should be good to go. And so now I think we're all set. I'm gonna hit execute step. It's going to say success message has been sent. And now if I pull up my Telegram, we have an MP3 file that I can go ahead and play.
Loud and clear. I hear you like a bat in a cave.
Cool. So that is basically how this thing works. Now keep in mind, because this workflow's not active, if we wanted this to actually work, we'd have to turn this on as an active workflow. And now that it's active, let me try out a full thing real quick. Hello, how is your day going so far? We shoot that off. The workflow right now should have captured that, downloading it. The AI agent should be working right now to create a response. ElevenLabs will turn that response into speech, and then any second now we should get an audio file back. Oh, there it is. Let me hit play.
Hey there, my day's going great. I've already answered a million questions and haven't broken a sweat. How about you? Been causing any digital chaos or just chilling like a chatbot villain?
There we go. So that is our funny sort of cowboy agent. Okay, so that was the first method. Now what we're going to do is go down here and we are going to do a second one where we actually have a full conversational voice agent with ElevenLabs. So we're going to head back over to ElevenLabs real quick. And what we're going to do is on this left-hand side, we are going to go to agents. So up in the top left, you're going to click on these arrows and you're going to choose conversational AI. and now we can set up a voice agent. So I'm gonna click on Agents and we're going to create a new one, which I'm just going to start from a blank agent. So I'm just gonna call it Test Agent. We'll go ahead and create, and then we're gonna have to set up certain things like a system prompt. And the most important thing we're gonna set up is the tool calling. So right here is where you could choose the language. You could also go in here and choose the voice. We're just gonna leave it as default for now. And then we can set up something like a first message. This is the first thing the agent will say when we call it. If it's empty, the agent will wait for the user, us, to start the conversation. So I'll keep it right now with, hello, how can I help you today? And now before we set up the system prompts, let's real quick set up the actual tool call to talk to N8N. So I'm just gonna scroll down and we are going to look for tools. Here's where you could customize letting your agent end the call, which we will give it access to. We can have it transferred to a different agent, transferred to a number, all of this kind of stuff. What we're looking to do is add a custom tool, which will let us send data to N8N, and then N8N can send data back to our agent. So I'm gonna click on Add Tool. You can see that we have all of these N8N ones that we've used in the past, but obviously we're going to create a new one. So I'm gonna click on Add Webhook Tool. I'm gonna call the tool N8N. The description is call this tool to search the web. In this use case, we're just gonna have the agent send data to N8N. The N8N AI agent will look it up online and then send a response back. And then what we need to do next is set up the method. So this is going to be POST because we're sending data to it. And now we have to go get our n8n webhook URL to send data to. So we'll go back into n8n. We are going to add a webhook. And right now we are basically just going to grab this URL right here. We also have to make sure that our method is changed to POST since that's how we set it up in ElevenLabs. And we want to make sure that this thing can receive data. So now that I've copied that URL, I'll paste that right in there, and then I'm just going to make the response timeout as much as possible because we don't know how long it may take to search the internet. Now for these headers and path parameters and query parameters, we're not going to worry about that too much. We are going to add one body parameter, which is going to be the actual search request. So for the description, I said you're going to extract the search query the user is looking to find more information on. The string we're going to be sending over is going to be a search query. We'll do that in camelCase. This will be required. And then we can set this up as either the LLM to basically extract it from our conversation. You could do a dynamic variable or a constant variable. We're going to leave it here as an LLM prompt. And then the description of this body parameter is what the user wants to look up online. So I'm going to go ahead and add this as a tool. So you can see the agent has access to our Any-to-End tool. So now that's why I wanted to set it up before we system prompt it. Because we need to tell the agent how to behave. So what I'm going to do is use this describe_with_ai function where I can basically tell this ElevenLabs box what we want the agent to do, and then it will generate us a system prompt. Okay, so I said I want to create a helpful research agent that will help the user do research and find more information using the web. We'll hit generate with AI, and it should populate a system prompt for us. So we have a personality, his name is Remy. We have an environment, a tone, a goal, And then the one thing we forgot to do was tell it which tool to use. So I'm just gonna manually change this. What I'm gonna do is I'm gonna say the tool is called N8N, and we're going to use this tool to search the web and do research. And then I also said this tool will do research and send back a response, so you must wait for that response. What we're gonna do is obviously have to test out this agent to see if it works. So I'm gonna make sure I save this at the bottom of this workflow. And then what I'm gonna do is click Test AI Agent. So when you click on Test AI Agent, it's gonna open up a little test box like this. And before we actually call it, we wanna make sure that our webhook in N8N is listening to us. So now it's listening. We'll go back into this test field and talk to the agent.
Hello, how can I help you today?
Hello, I'm looking to do some research on NVIDIA.
Okay, I can help with that. Is there anything specific you would like to know about NVIDIA? For example, are you interested in their stock price, their products, or something else?
Yeah, let's just look at their Q4 2025 forecast.
Okay, I will look for NVIDIA's Q4 '25 forecast. Just to confirm, you're looking for their financial forecast for the fourth quarter of the year 2025, correct?
Correct.
Okay, I I've started a search for NVIDIA's Q4 2025.
Okay, so I'm gonna end that call. What I didn't like was how long it took to send data to the webhook. You can see that we captured it, but we maybe want it to be a little more straight to the point. So we'll go ahead and change that in the system prompt later. But what we can see is that we did get the ElevenLabs agent to send data over to N8N. So I'm just gonna go ahead and pin this so we can save it for now and we don't have to keep talking to Remy. But at the bottom, you can see it filled out our search query as NVIDIA Q4 2025 forecast, which is exactly what we wanted. So now we just need to set up an AI agent that will receive this message and then use a tool to do research on it. But actually, I don't even want to use an agent because that would be double processing. Because what's going on in ElevenLabs is we're using an AI agent to conversate and think about tool calling. It ends up deciding to call this tool. And then what happens is if we were to create another agent in here with another aspect of reasoning, it would just be duplicating that for no reason. So maybe what would be smarter is in ElevenLabs, we set up this workflow webhook as a tool called research, and then we can send data to this tool just to be researched. And that's what we're going to do here. So rather than passing this data into an agent, I'm just going to pass it into a Perplexity node that's going to do research. So I'm going to click on this button. I'm going to type in Perplexity. We're going to grab this right here, and then we're going to message a model. I already have Perplexity set up, but if you don't, same way you set up OpenRouter and ElevenLabs, you just need to go get an API key at perplexity.ai. And then I'm just going to choose Sonar for the actual text to do research on. We are going to drag in the search query that our ElevenLabs agent sent over. And I'm also going to simplify the output because we don't want to send the agent back like a ton of information. So we'll execute step and we'll see what sort of results we get back from this node. Okay, so here's the message we got back and we have a little short summary. It looks like down here, although actually let's see how short it really is. It pulled from 5 different sources. And the message is honestly pretty long. So what we'll probably want to do is feed this message into an AI step that's just going to basically summarize the key highlights. So that's what I'm going to do real quick. We're going to do that with an AI agent, and this won't take as long because there's no decision-making going on. We're just using the agent to process and summarize information. So once again, we're not doing the connected chat trigger node. We're going to drag in the output from Perplexity, which is right here. And then for the system message, I'm going to add something really quick. Okay, so for the sake of the demo, I'm saying you're an expert research agent. You will be fed information and you need to make a concise summary. It should only be about 3 sentences. Real quick, going to connect another OpenRouter chat model to process this information, and we'll test it out and see how concise of a summary it's making. So we basically get NVIDIA reported strong Q4 revenue, $39 billion, blah, blah, blah. This definitely looks better as a summary that we can send back to our voice agent in ElevenLabs. So the final piece of this is we have to use a Respond to Webhook node to send it back. So I'm going to type in respond. We're going to grab Respond to Webhook, and it's just going to return the first incoming item, which is the output from that AI agent already. If you wanted to specify in more detail, you could obviously choose right here. But in order for this to work, we have to make sure that that's set up correctly over here. So right here in the webhook, you can see that it's going to respond immediately. But what we want to do is respond using the Respond to Webhook node. So now I'm going to go ahead and unpin this data. We're going to save this workflow and I'm basically going to test it out again. So now it's listening for us. And what I can do is open up our ElevenLabs real quick, test the AI agent, and we will try again.
Hello, how can I help you today?
Hello, I am looking to do some research.
Okay, I can help with that. What topic are you researching? The more specific you are, the better I can assist you.
Can you please find out the difference between dogs and cats?
Okay, I can definitely help you with that. I will use my search tool to find the key differences between dogs and cats. Give me a moment to gather the information. Okay, I have found some information for you. Dogs and cats differ significantly in several ways. Dogs are generally more social and active during the day, requiring regular exercise, grooming, and outdoor space. Cats, on the other hand, tend to be more independent, are often more active at night, and need less grooming and space, often getting their exercise indoors. Also, dogs communicate openly through body language and vocalizations like barking, while cats use subtler cues and different sounds such as meowing. Was there anything specific about the differences between cats and dogs that you wanted to know?
Nope, that does it. Thank you.
Great. I'm glad I could help. Have a great day.
Cool. Okay. So that was like not super concise, but it's fine. Um, but the agent, you could see when it realized we were done with our intent, which was looking up dogs and cats, it ended the call on its own. So just to dive into what happened here, um, the voice agent sent data to the webhook. The webhook is going to wait for the response, does research. The agent summarizes it, sends a summary back to the agent, and you could see as soon as it finished up, that is when Remy started talking again. And obviously what you'd have to do is prompt this a little bit differently if you want a different type of output. And of course you'd need to come into your voice agent and go back into the actual system prompting of it if you didn't like the flow of the conversation. For the sake of the demo, I'm just gonna leave it here because that was perfectly fine. Um, but you can see it's very similar to the way you would prompt an agent in N8N. Just last thing to keep in mind, when you do go to switch this to an active workflow, what you're going to have to do is make sure you switch the webhook in ElevenLabs as well, because what we gave ElevenLabs was a test webhook. So if I click into the webhook right here, even though it shows test, what you want to do is copy the production URL, and then you just simply go back into your agent. You would scroll down to the tool that we had set up, and you can go ahead and just edit this and paste in your new production URL webhook. And really the only difference is that after webhook right here, you would just get rid of -test, and then it's the exact same webhook. You'd go ahead and save it and then test out your AI agent. And just remember, when something's active, you won't see it real time, but it will still process in the background. And by the way, once you have an active workflow and an active webhook, you're going to want to check out this video up here where I talk about how you can protect those so that someone isn't abusing your tokens or accessing your data if they shouldn't be. So that's gonna do it for this one. If you guys want to download this workflow just to get started and play around with it, you can do so in my FreeSchool community. The link for that will be down in the description. Once you join, you'll just come in here and search for the title of the video, or if you click on YouTube Resources, you'll be able to find the post associated with the video and then download that workflow right here. And if you're looking for more hands-on experience and you want to take your learning a little bit farther, then definitely check out my paid community. The link for that is also down in the description. We've got a great community of members who are always sharing what they're doing with N8N every single day, and and we also have a classroom section with 2 full courses. Agent Zero is the foundations of AI automation, and then 10 Hours to 10 Seconds, where you learn how to identify, design, and build time-saving automations. So hope to see you guys in the community, but that's gonna do it for this one. If you enjoyed or you learned something new, please give it a like. Definitely helps me out a ton. And as always, I appreciate you guys making it to the end of the video. I'll see you on the next one. Thanks guys.










