Watch Me Build an AI Resume Analysis System in 28 minutes (no code)
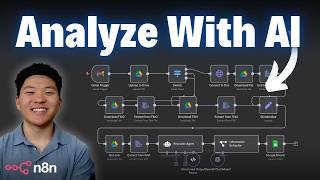
Dr. Violet Howard builds a no-code resume screening system in n8n that captures resumes from Gmail, extracts text, sends them to OpenAI configured as an expert recruiter, and logs the AI's analysis of strengths, weaknesses, and fit score to a Google Sheet.
Chapters
What we're looking at today is the smart AI resume collection system that not only analyzes the candidate for strengths and weaknesses, but it will also look at the job description that they're applying for, and it will tell you what's the risk here, what's the reward, what's the overall fit, and then it will give you some justification for it. This is gonna be a huge time saver for recruiters during the hiring process, and it's also gonna keep personal bias out of the equation. So what I'm gonna do today is build this right in front of you guys live. I'm gonna tell you guys my thought process as I'm building it, and by the end, you'll have it all set up for yourself. Okay, so this is a very simple system and it's able to be customized to fit your needs. And what I'm gonna do first before we start building is tell you guys about how I approach anything that I wanna automate and how I think about it. So this is a really important mindset shift to get in the habit of, which is basically listing out the steps that you would do manually if you wanted to complete this process. And when I start to list out the steps, I'll do that in like a Google Doc or Google Sheets or something like that. And then I always come over to Excalidraw and I take that process map of the steps and I turn it into a wireframe. And the idea here is to understand what's the trigger, what are the different data sources, do we need to do any data transformation, where does AI come into play? And this will make it very clear, kind of like what nodes we need to use. But also, do I need to build an agent or can I just build a workflow? And in this case, we can see that there's a decision to be made right here, which is basically what type of file is the resume. But we can make this decision without using any AI, so we don't need an agent and we keep the workflow really simple. So let's real quick go through this wireframe and understand at a high level how the system works. And if you guys wanna check out my full course on process mapping, wireframing, and then getting into end-to-end and automating the systems, then definitely check out my Plus group. The link for that is down in the description. We've got two full courses in here right now. We have Agent Zero, which is the foundations of AI automation, and then we have 10 Hours to 10 Seconds where you actually learn to pick the process, map the steps, wireframe it, and then you get into end-to-end and start automating processes. We also just partnered up with over 500 tools and you can get up to $3 million in savings. So if you're interested in that, check out the Plus Group. Okay, so when it comes to wireframing, it doesn't have to be perfect, but you want to have a general idea of what you're going to build so that you get into end-to-end and you can just build it. You're going to save yourself a lot of time. Imagine if you open up a Lego box for a tractor and you started trying to build the tractor without looking at the instruction manual. That's kind of what building an end-to-end without a wireframe is like. Anyways, let's zoom in over here and just go down this path. So I knew that I needed some sort of trigger, which would be how do we actually get the resume into Ennidyn? I decided to go with Gmail here, but you could obviously have this be a webhook if it's like a form submission, or you could have it be a new row in your Airtable, whatever you want. You can obviously switch that out. We're going with Gmail for simplicity. Then I basically thought about, okay, so I get this email, what do I want to do next? I want to download it and keep it somewhere. So I have a Google Drive folder that's called resumes where we're going to store all the resumes. From there, what we need to do is we need to extract the text from the resume, and there's different ways that people may send it. It could be a Word doc, it could be a PDF, it could even be a text file. So these are the 3 examples we're going with here, but you could obviously customize that too. And depending on the type of file, there'll be different logic. So Word docs are the toughest. What we have to do is make an HTTP request to convert it to a Google Doc so that we can then extract the text from it. If it's a PDF, we're gonna go down this path and we'll just download it right away and then extract the text from it. And same thing with the text file, it's pretty easy. We'll just download it and extract the text. But ultimately the goal here is we just want to get that resume into text because it comes through as binary. And if it doesn't make sense right now, it completely will once we get into N8N. But just high level, this is what we're doing. And whenever we have data kind of branching off into different paths, it has to get standardized in some form so that we can pass it down the rest of the flow and it will actually make sense. So we're basically routing all of the extracted texts into one node and we'll set it as a field called resume or text just so we can continue on and we'll be fine. We have the resume. What we want to do now is get the job description. So I'll have a different Google Doc with the job description, you know, um, requirements, criteria, responsibilities, that kind of stuff. We'll extract the text from the job description, and then we have our AI agent come into play where we can say, okay, here's the resume of the candidate. Here's the job description. Analyze these both and give us the strength and weaknesses, the risk and reward, the overall fit of the candidate for this job description. And then justify it. And then in our Google Sheet, we also want to have their first name, last name, and email address. And then that's basically the end of the process, is we go to Google Sheet. Now you could also end this off with like a notification to yourself in Slack or a new email, whatever it is. We're ending it here. And so I'm not saying that you can have AI just hire everybody, but you could definitely let the system run and then personally reach out to anyone that ranked high on the overall fit. Or if you're having trouble deciding between two candidates, you could come in here and see what the AI thought from a very objective standpoint where maybe you had some implicit bias in there and you didn't realize it. So anyways, that is what the system does. That's our little wireframe. And now that we have that, let's get into N8N and build the system. All right, so we know that the trigger of this workflow is gonna be Gmail. So I'm gonna type in Gmail. We're gonna grab this guy and we're gonna grab the trigger on message received. So what this is gonna do is every minute it's gonna check and if a new email hits this inbox, it's gonna pull it in. And I just sent myself an email with a resume from a fake character named Jordan Reeves, and it is a Word doc. So I'm gonna hit Fetch Test Event, and what's gonna happen is we see the email came in. You know, it says, here is my resume. The subject is Jordan Reeves, but we don't see the actual resume. So what you want to do is turn off Simplify. You want to add an option down here that says Download Attachments, and we check that on. And now if I run this again, we should see the binary image right here, which is Jordan Reeves' resume as a Word doc. Now you also have the option right here to change the prefix. So right now it just comes through as attachment_0. You could add a prefix and make it say resume_0, resume, whatever you want. I'm just going to keep it as the default for now, but we can see that we got our resume. And by the way, if you're having trouble with Google credentials, go ahead and check out this video that I'll tag right up here and then come back to this build. What's next according to our wireframe is to download the resume. So I'm going to click on the plus and I'm going to grab a Google Drive node. And what we want to do is upload a file to our Google Drive. So we already have ourselves connected. I'm gonna choose where to put it. So I have a folder in my Drive called resumes, which I will choose right there. And now we have two things to set up. The first one is the input data field name. So this is basically the name of the input field containing the binary file that we want to upload to Google Drive. And right here you can see it's called attachment_0. So I'm just gonna copy that and paste that in there. And now these two things are linked. The next thing is what is the file name in Google Drive? So I'm gonna change this to an expression. And I'm just gonna basically make it the person's name and then resume. So I'm gonna go to JSON. Let's basically just assume that we told applicants, you know, put your full name as the subject of the email. So I could just grab subject right here. So now it's coming through as Jordan Reeves, and then I can just type in resume. So that is how the file will go into our Google Drive. So it looks like we're good to go. I'll hit execute step, and we will watch this one send it off to our Google Drive. And what that does is it basically gives us an ID of the file that exists in our Google Drive. So keep that in mind, we'll have to use this ID later. And just to show you guys, here's my folder called resumes, and this is the new one we just got. Okay, so the next thing to do is we want to have a switch that sends the data different ways based on the file type. So I'm going to add a new node, I'm going to type in switch, and what I'm going to do here is first of all, we're just going to worry about Word docs because that's what we have right here, and then we'll come back later and do PDF and text file. So what I'm going to do is look on this left-hand side where we can see some metadata about that file that we just uploaded. And right here you can see application/blah blah blah XML Office document Word whatever. So this basically means this is a Word doc. So I'm going to grab MIME type right here, and basically what we're going to say is if the MIME type variable equals this, which means Word doc, then we're going to go down this path. I'm going to rename this path Word. So when we execute this, it's going to go down this Word path branch, and it's the only one right now, so maybe it seems like it's not working. But if I was to add two other routing rules, which these will be PDF and text file, and hit Execute Step, it will still go down that Word branch. Okay, so this next step is probably the most confusing out of the entire workflow, but it's not too bad, so let's just get past it real quick. And that is converting the Word document to a Google Doc. The reason we have to do that is because there's all these different ways we can extract text from a document in N8N, but there's really not a great way to do it from a Word doc, so we just wanna convert it. So how we do that is I'm gonna add a new node right here, and it's going to be an HTTP request. I'm not going to go super, super granular here, but if you want to learn more about APIs in NNN, check out this video up here. Okay, but now that we got that out of the way, what I'm going to do is I'm going to hit Google Drive API to convert it. So right here I have the documentation, and this basically shows us the method we need to make, the endpoint we need to hit, and what else we need to put in here. So what I'm going to do is copy this endpoint right here, and then I'm going to go back into NNN and paste that right there. We can also see that the endpoint required a POST method, so I'm going to make sure I change the method to POST. We can see right here that the endpoint has right here a parameter for us to fill in, which is the file ID that we want to convert. So I'm going to delete that. I'm going to change this to an expression, and I'm going to drag the ID from this left-hand side right into here, which tells this API which file to convert to Google Doc. And then the last thing we want to do is not just make a copy of it, we want to convert it. So if I go back to the API documentation, you can see right here we have a parameter which is convert. Which says whether to convert this file to corresponding Docs editor format. So all I have to do is add in this query parameter. So I'm going to go back in here, I'm going to add a question mark, which basically means anything after this is like a filter or a setting, and I'm going to type convert equals true because it's either a true or false. And now we should be set up, but we have to authenticate ourselves. And this is really easy because over here you've already connected to Google Drive, so all you have to do is choose predefined credential type you'll type in here Google Drive OAuth 2.0, so right here, and then you're already connected with that same Google OAuth. All right, so what I'm going to do now is I'm going to hit Execute Step. This is basically just making a copy of our original Word doc for Jordan Reeves' resume, and it's making a copy of it in our Google Drive but as a Google Doc. So if I go into my resume folder and I hit refresh, we should see we have two of them, and this one's a Word doc, and then the one we just copied is now a Google Doc. So this is the one we can pull into n8n and actually use to get the text from it. And so just to call out, basically this returns information and it gives us a different ID, which would be— sorry, there's a lot of different IDs. It would be this one right here, not the one that's like in the parent object over here. It's not this ID, it is the one over here. Okay, so now that we have it in our Google Drive, the next thing we need to do is download it back into n8n. So I'm going to click on the plus We're going to add a Drive node, and this is going to be Download File. And then we're able to use that ID to pull it in. So I'm just going to scroll down to that ID that I told you guys. It was not the one in the parents. We're going to scroll past parents, and we should see right here ID. So I'll drag that in there. And then this is an important step. What we want to do is add an option. We want to do a Google File Conversion and add a conversion. So this is basically just saying, okay, whenever we're pulling in a Google Doc, we're going to turn it into this format which is going to be PDF. We'll just keep it as PDF. So I know it's weird that we converted a Word to a Doc, and now we're converting a Doc to a PDF, but just stick with me. So now we have our resume over here as a PDF, and then it's super easy. We're going to add another node, we're going to type Extract, and we're going to be extracting text from a PDF. All we have to do is make sure that the input binary field right here matches the field right here, and when we hit Execute Step, we get basically all the actual text back from the resume. Okay, so we're just gonna continue and build the rest of the logic for the whole workflow, and then we'll come back and we'll set up PDF and text. But what's next is that we want to standardize the input. So I'm gonna add a node, and I'm gonna call this one Set. We'll just call this like Standardize. And all I have to do is basically we want to set everything that's coming in, all of the resume text, which would be down here in one field. So we're setting it to a field called text, and it's being referenced as json.text. So we have to make sure later that PDFs come through, text files come through, and they all feed into this node in a field called text. So we'll set that all up later, but what I'm gonna do is just execute this step. We now have just the resume content right here. What if you could turn your next product idea into a working business this weekend? As someone constantly working with AI agents, I'm always looking for ways to help improve my workflow and efficiency. And with the sponsor of today's video, Hostinger Horizons, I don't need to wait around for someone else to build a tool that will improve my workflow. They are the all-in-one AI partner. They combine design, development, and writing skills and also integrate with the likes of Stripe and Supabase. With Horizons, I can build a web app that can fully automate many processes in my business, giving me more time to work on it instead of in it. For example, when you come to sell your AI agents and services, it's great practice to refine and improve your service using real-world feedback. But getting usable and in-depth feedback is super tedious and time-consuming. So I'm using Horizons to generate a feedback collection tool that I can send out to my clients. I'm going to start with one of their 30+ no-code ideas for this, but I'll tweak it to suit my own needs. I know with AI agents, some of the people I'm selling to will be in the market for this service for the first time. So one thing I need to always understand is whether or not my service matched their expectations. I'm using a prompt here to make sure this is added to my feedback. And just like that, no code required for me to add this, and it has been updated in my feedback collection tool. I can even change the look and feel in one prompt to match my company's branding, keeping everything clean. Once you're done, it only takes one click to go live. I'll hit the publish button right here. And I'm all set. And another thing that I really like about Hostinger is that their expert support is there anytime you need it. It's around 24/7, it's multilingual, so you're never stuck for too long. Everything you need to have a great online presence is in one place, as they include email hosting and domains too. If you want to give Horizons a try to help scale and grow your business, or even to test launch a new idea, use my code Nate Hurk to get 10% off your first month. Okay, so what comes next after this is we want to go ahead and download the job description. So right here I have a Google Doc which is the job title, about the role, responsibilities, qualifications, all this kind of stuff. And we need to get this into n8n so that our agent can look at it. So I'm gonna add another node. We've got a lot of Google Drive nodes today, and this is gonna be another download file. And I'm basically just gonna choose from a list rather than giving it an ID because I know what this one's called. So I'm gonna grab in job title, and obviously if you had multiple different roles, you could just come in here and switch that. And once again, I'm gonna do another Google File Conversion, and I'm gonna turn this Google Doc into a PDF. We'll hit execute step, and now we get the PDF. And then same thing that we did from over here. So I'm actually just gonna copy and paste this node. We're going to extract text from PDF. So I'll run that. And now we're getting the actual job description right over here. Job title, AI Solutions Architect. Okay, so we have the resume, we have the job title and description. Now we want to feed it into an AI to analyze the two of them. So I'm going to click on the plus and I'm going to add an AI agent. And now that we have this AI agent, we need to set up two things: the user message and the system message. The user message is like, hey, here's dynamic information that I'm giving you. Here's our conversation. And so what we want to give it as a user message is the candidate's resume. And then when we add a system message, this is basically its instructions. This is its role. So in the system message, we'll say, hey, you are an expert recruiter. You're going to be given a resume. You're going to be given a job description. And you're going to output the following things to me. So first, let's set up the actual resume real quick. I'm gonna change this to define below, and I'm gonna change this to an expression. And let's just open this up full screen. I'm gonna type in candidate's resume and then a colon just so the agent knows what we're giving it. And all I have to do now is I'm gonna go back to the node where we standardized the resume input, and I'm gonna drag in the text. So now the agent's looking at Jordan Reeves' resume and his skills, all this kind of stuff. and then for the system message, when we open this up, I'm gonna make an expression, make it full screen and get rid of this. I'm gonna paste in this system message real quick, and you guys can take a screenshot of this system message and give it to ChatGPT and extract the text from it, or I'll drop it in my free school community. And I'll also drop this entire workflow in my free school community. So if you wanna download it, you certainly can. That community will also be linked in the description. And what you would do is you'd come into here, you'd click on YouTube resources, or you'd search for the title of this video. And like, let's say this is a video. You would right here have the JSON file of the workflow to download, and then I'd also attach a PDF of the prompts or something like that. Anyways, at a high level, I'm saying you are an expert technical recruiter specializing in AI automation and software roles. You have been given a job description and a candidate resume. Your task is to analyze the resume in relation to the job description and provide a detailed screening report. And then I told it what I wanted to do, like as far as output. So we wanted to give us candidate strengths. Candidate weaknesses, the risk factor, the reward factor, an overall fit rating out of 10, and then a justification for that rating. And then finally, we're giving it a variable, which is the job description. And that is exactly why we pulled it in over here and extracted the text from it. So I just dragged in this variable right here, and you can see what that comes through as is our entire job description over here. So now it has all the context it needs, and it's also been system prompted. But before we can run this, we need to connect a brain. So I'm going to click on the chat model button and I'm just going to choose an OpenAI chat model because I want to use a reasoning model. You don't necessarily have to do that. You can play around with different models, but for this case, I want to go with O4 Mini and we're going to use OpenAI's reasoning model in order to reason through everything we told it to do. So now that we have that set up, I can go ahead and hit this play button above the recruiter agent and it's going to spit out that analysis. So that just finished up and we're gonna look at it, but we're gonna realize we have an issue. So it did everything we wanted. It gave us our strengths, it gave us our weaknesses, it gave everything in one field, and this would not be very easy to drag into a Google Sheet template. So what we need to do is have it output everything differently. So I'm gonna click on require specific output format, and what this does is it allows us to add a structured output parser. So I'm gonna add a structured output parser and click on structured output parser. I'm going to change the schema type to define using JSON schema. And then I'm going to paste in this structured output parser, which once again, if you guys download the template and go to the free school, you'll be able to copy this exact template for free. So basically this is just telling it how to output everything in different fields. So if I hit play and we run the exact same agent, exact same prompt, exact same resume, you'll see that it's going to give us our strengths, weaknesses, all the stuff we asked for. In different fields, and we'll be able to drag it later into Google Sheets really easily. So there we go, it just finished up, and now we have a list of candidate strengths. It found 7 things, it found 4 weaknesses, it said low risk factor with an explanation, high reward factor, a 9 overall rating, and a justification. And it's also a lot easier to just read and look at. And so the last thing I want to do here is we just want to pull out the candidate's first name, last name, and email address. Because we don't actually have that separated yet. We could have easily made this recruiter agent do that, but I just didn't want to overload it with too much stuff. We wanted it to specifically focus on the analysis. And I also wanted to show you guys a cool node you can use, which is called the Information Extractor. So this node looks at a block of text and it pulls out certain things that you define. So first thing is what text to look at. I'm going to pull in the standardized resume once again. So it's looking at Jordan's resume, and then we tell it what to pull out. So I'm just gonna say first name, and a quick description of that is the first name of the candidate. This is gonna be a required field. We're also gonna add last name, so I'm just gonna copy and paste this stuff down here, and we're just going to say last instead of first. We will also make this one required. And then the final one will be email, and we'll just say the email address of the candidate. Which will also be a required field. And typically what I would do is I would just have the email address be the sender of the email that triggered it, but in this case that was me, and I just want to show you guys that it can pull out an email. So these are the 3 things that the agent's looking for, and this node uses AI to read and analyze. So I'm going to plug in the chat model once again, just to the same one to keep things clean. And if I hit run above this information extractor, it will pull out first name, last name, and address. All right, there we go. We have Jordan Reeves and jordan.reeves@proai.dev. Okay, so now we're pretty much done. We just have to write all the data back to our Google Sheet. So I'm gonna click on the plus, I'm gonna type in Sheets, and we're gonna do append row in sheet. If you guys want to follow along, you can download this exact template, by the way, for free, also in my FreeSchool community, and you'll make a copy, and then you can just pretty much map everything the same way I do here. So let's Let's go back into our N8N. We're gonna choose the document to pull from or to write into, which is Resume Screener. We're gonna choose the sheet, which is just Sheet 1, and then it's going to pull up with all the columns here and we can configure what to send over. So the first thing is date. I'm gonna make this an expression and I'm going to do two curly braces and do $now, which pulls up the date. I'm real quick just gonna format this so it looks a little cleaner. So I'm gonna do.format, which now we have the date like this. But then also I want to add a timestamp, so I'm going to do H colon A— nope, M, M space A. And that now gives us the, um, 11:07 AM. So every time a new resume comes in, we'll get the timestamp that it came in as well. All right, and now we're going to put in the actual resume. And by resume, I mean the link because we put it into our Google Drive. So I'm going to do that right here where it says upload to Drive. We want to look at the output from this node. Because it will give us a web view link right here. So I can drag that in, and now we have a database in Google Sheets where we can see all the information about a candidate and also just go ahead and click on that resume if we want to. And then the rest of this is very, very drag and drop. We've got first name, last name, and email, which we just got. So let me put these in here. And now we have the output of our recruiter agent. So I open this guy up, we can see strengths. I'm going to put in strengths, and what I'm going to do real quick is I'm just going to do a quick function to make this more readable. So at the end, I'm going to type.join, and then in the parentheses, I'm going to do two quotes, and then I'm going to do n, n to make two new lines. And now we can see it's basically just a lot more readable. And I'm just going to copy that.join function because we're going to use it again for weaknesses. If I close out of strengths, there's our weaknesses, and I'm going to do paste. So now we have that a lot cleaner as well. Now we want to do risk factor. So what I'm going to do is open this guy up, and I'm basically just going to drag in the score. I'm going to manually hit enter twice and then do an explanation so we can see like that. I'm going to do the exact same thing for the reward factor. So we'll do the score, enter, enter, explanation. And then we have our last ones, which are overall fit and justification for rating. And we should be mapped up. So all I have to do now is hit execute step. We'll go into the sheet and we'll watch that data about Jordan Reeves pop in here. All right, cool. And real quick, we can see we have the strengths and weaknesses. We have the risk factor, which is low. The candidate is highly aligned with the core requirements. Worst case scenario involves a short ramp up on unfamiliar LLM providers or internal governance processes. We've got a high reward factor. Best case scenario is the candidate immediately drives multiple AI projects, reduces delivery time via reusable architect. And becomes a long-term strategic leader. We've got an overall fit of 9 and then some justification there. So we've done all the heavy lifting. Now all we have to do is come back in here and just set up the two other file types, which are PDF or text file. Okay, so I just sent myself a new email with a different resume. So I'll test the step, and now we can see we have Tara Lopez, which is a PDF. So next step, we're just going to upload it to our Drive, and then we're going to open up this switch to set up the next route, which is PDF. So once again, all I have to do is the MIME type variable right here, and we're going to say if the MIME type equals application/pdf, this means it's going to go down this branch which is called PDF. So I'll hit execute step, and we can now see it goes down the PDF branch which is right here in the middle. So that's exactly what we wanted to do, and now it's much easier than up top. We don't have to make an HTTP request, we can just download the file from Google Drive. We can choose by ID, and I can drag the ID in right here. And we don't even have to do a file conversion, we can literally just hit Execute Step. So I'll hit Execute Step, and we will see over here we get the actual file, which is a PDF. And then once again, we're just going to extract from PDF. So I'm going to copy the same node from earlier, and now we're extracting the text out of it. So you can see over here we have our resume in a field called Text. Which is perfect because we can now just drag it into this set node and it's going to come through whether it is a Word doc or PDF. It always gets standardized right here. And now the rest of the process is easy. I'm basically just going to hit play on the Google Sheet and that's going to run everything else, which is getting the job description. Our Recruiter Agent is now reasoning and giving us an analysis. It's going to extract the name and email once again, and then we'll pop over to Google Sheet and we'll see that everything ran as expected. Okay, so here we are just waiting for this to pop in. There it goes. One thing I'll show real quick is that we could click onto this and we will see, um, the resume. We can also do it up here for Jordan, as you can see. There you go. There's Jordan's resume. And we can see that Tara was rated a 3 on the overall fit scale. We could go ahead and look at the risk, the reward, the justification, but let's just go back into NN and set up the last branch, which is a text file. Okay, so just sent myself a text file. Let's pull it in and see if we have Brian Chen's resume as text. We can even view it and see the text right here. I'm going to upload it to Drive, and then we can set up this final switch, which is for a text file. Okay, I'm going to open up the switch, and like I said, we've just set up this one. We're going to do the same exact thing, drag in the MIME type. We're going to grab the result, and we're saying if the MIME type variable equals text/plain, that means it's going to go down this branch called text. So we'll run it, we'll see that it goes down this final branch at the bottom, and now we basically just have to do the same thing as up here where we download the file and extract the text. All right, so I gotta get this stuff out my way. I'm gonna add a new node down here, which is gonna be another Drive. We're gonna download a file. We're gonna do it by ID, and I'm just gonna drag in the ID from the left to right there. And now I'm gonna execute the step, and we should see we get our text file over here. Okay, there we go, text file. And now I just real quick want to extract text from it, so I'm going to type Extract. I'm going to do Extract from Text File. And then one thing we have to do real quick is we have to change the output field to text. Because remember, when we standardize the inputs, we want to make sure everything comes out in a field called text. And now it comes through over here. If we didn't do that, it wouldn't match up right here and we wouldn't be capturing anything. So now that we've standardized all 3 inputs, we know we're good to go on that front. I can once again just hit run on this Google Sheet and it will go do everything else that we already set up. So there we go, it's finishing up. Let's hop into the sheet and we will watch Brian Chen's information pop in. Unfortunately, he's only a 1 overall fit for this job. And as you can see, we can click into this node and we can see his text file resume, which I would never recommend to submit a resume that looks like this. And that's basically it. We just built a smart AI resume screening system. Obviously, there's a few ways you can come in here and customize it. You'd want to change out the trigger to match yours. You'd want to change the job description to match yours. And you could even change the recruiter agent if you want to get different types of insights. And then we write it back to our database where we can now have an automated system for whenever someone submits an application. We can get a bit of a brief already done for us that we can look at after we take an initial pass-through, or we can use it to help us take our initial pass-through. So I hope you guys followed this step-by-step tutorial and you learned a lot during the process. Once again, if you want to download the workflow, I will have this one set up for you guys with sticky notes and a full setup guide when you download it, in case you just want to hop right in and test it out. But if you enjoy this type of content and you're looking for some more structured guidance on wireframing and a full course on building automations with N8N, then definitely check out my Plus community. The link for that will be down in the description. We've got a great community of members who are using N8N every single day, building automations, sharing their wins, sharing their challenges, and sharing their projects. And of course, we have a classroom with two full courses right now, Agent Zero, which is the foundations of AI automation. And then we have 10 Hours to 10 Seconds where you learn how to pick the process, map the steps, NNN foundations, triggers, nodes, AI prompting, all this kind of stuff. Full course on NNN. Anyways, would love to see you guys in that community, but that's gonna do it for this video. If you enjoyed, if you learned something new, please give it a like. It definitely helps me out a ton. And as always, I appreciate you guys sticking to the end of the video with me. I will see you on the next one. Thanks so much, guys.










