A spoken how-to tutorial by Ben Greenfield demonstrating step-by-step how to partially disassemble a triathlon bike for air travel or racing transport. Main actions shown: remove pedals (store in separate bag), remove front and rear wheels and skewers (keep springs/ends with shoes), disassemble headset/stem including star nut, spacers and washers (photograph order; zip-tie/spool spacers to keep order), loosen/remove seat and mark seat height with electrical tape, remove rear derailleur (but leave chain on), and remove cranks; author notes he wraps components in foam/bubble wrap and will show packing in a follow-up video.
Chapters
Hey, folks, it's Ben Greenfield. And if you want to learn how to take apart your bike and get it to be as small as possible so that you could do something like fly for free with it on the airlines or just take it to a race with you, then you've come to the right place, because I'm going to show you exactly what I do with my bike when I travel to a race. So let's go ahead and jump right in. First thing I do is I start with the pedals. I take the pedals off and put them in a separate bag. You can see I've already removed one pedal. I. I'll take this guy off as well. In some cases, you'll need just an Allen wrench to remove your pedals. In other cases, you may need.
A pedal wrench. It just kind of depends on the pedal that you have. But in my case, I just use an Allen wrench so both the pedals come off, and these will go off to the side in their own separate bag. We don't want the TSA messing around too much with our stuff. Lord knows I've lost lots of things. Okay, the next thing that I'll do after that is now I can take off the wheels and put it up on a stand. Yes, you probably should have a stand if you're going to be taking your bike apart a lot. So, front wheel, simply release the skewer, take it off, and off to the side it goes. Okay. For the rear wheel, you'll want to make sure that you're in your smallest cog possible on the back, and that will make removal of the rear wheel much easier, because at that point, you can simply release the skewer. I actually take my skewers completely off when I travel anyways. So I will remove this guy, and when you remove it, put the spring and the other end of the skewer back on so those don't get lost while you're traveling. Usually those will go. Where I put them is actually inside my cycling shoes. And then we'll just take this wheel off. So I flip up the rear derailleur like this, pull the wheel down, and just kind of jimmy it out. Pull it out just like that. Okay, so now we've got that wheel off. We'll put it to the side, take the bike, and put it up on the stand here.
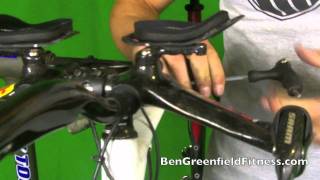
So after I take apart this bike, I will show you what I do to actually protect it while traveling. But this video is going to be more focused on the actual taking apart of the bike. Okay, the next thing that we're going to do is take apart the the front headset on the bike. So there's a star nut on top here. And this will need to come completely out. Okay, So I unscrew this guy all the way because that's going to come completely off. Now pay attention to where your spacers are as you do this. You can see I have a very small spacer here that was on the top and I want to remember that. Now I've taken my bike apart enough to where I. I'll just remember it. But if you're having trouble how many spacers you had on the top and on the bottom, just take a picture of it like with the phone or with the camera on your phone as you're taking it apart and that will help you to remember. So put that down. And then the next thing that you want to do is loosen your stem. And that's typically just two bolts on either side of the stem. These don't need to come all the way out. These can just be hand loosened. So it's one less thing to have to worry about taking out and putting into a bag. So we'll loosen these.
And then this guy will come off. Now, when I am traveling, I will actually and I'll show you how I do this later. But I'll strap this piece to my bike so that. So the video camera turned off for a second. But what I was saying was that I'll fix this to the bike. And then you've got your spacers here on the other side of the fork. On the top side of the fork. When you remove these, again, pay attention to how they are placed. Now what I like to do is I will actually take like a zip tie or a shoelace and string it through these so that they stay in the same order that they were before. And that's just one less thing to roll around in your bike case. So we'll put these down and then we'll also take out a couple of additional.
Washers that are inside the top there. And again, pay attention to what order the washers are in. And you can, if you want to shoelace or zip tie those along with the spacers, that's fine. So that's typically what I end up doing. So we'll put these down as well. And then we have the same type of washers on the bottom of the fork. Make sure you take those off because those can easily slide off during airline transit and you don't want those to get lost. So I'll generally keep those with the spacer as well. Now you'll see this in a follow up video to this video. But all of this will be wrapped in some special foam that I have to keep it from rubbing up against the frame during travel. So these are off and ready to go. The next thing that we'll want to move to is the actual seat. Now sometimes seats can be a bit tricky to remove. Sometimes they tend to feel like they're stuck in there. You may have to use a little bit of flat force and not have butter fingers like me. One thing that's important is that you actually pay attention to your seat height. Now I'm one of those guys who, when I'm out on my rides, I'm constantly kind of tweaking my seat and playing around with it, moving it up a little bit, down a little bit. So I never quite know exactly where it's at, which is why I use a temporary form of marking. I just grab a strip of electrical tape.
And I wrap it around the seat where the seat was. And these.
Bolts.
That hold in the seat, these don't have to be fully removed either. They can just be hand loosened. And once they're hand loosened, occasionally you'll have to take your seat out of the spike. And that's actually what I do sometimes. But anyways, the seat is off and I've got my workout now. Alright, seat goes down, next thing that I take off is the rear derailleur. Okay, rear derailleur. You'll just need the same type of tool that you use to remove your.
Headset. There's typically a space in the rear derailleur just like that. You'll simply unscrew this rear derailleur. I actually do not remove my chain. I clean my chain, but I don't remove it. And I just have a special pouch that I put the rear derailleur in. And then I'll strap that to the bike and I'll show you how I do that as well. So we're almost done here. The only thing left is to remove the crank. And some cranks require special crank tools. Typically, the nicer your bike, the more likely it is that you'll need a crank tool. But on the non drive side of your crank, you'll typically have space that you put an allen wrench into. Now you can use the crank arm itself for torque for something like this. So once you get the crank loosened, you'll simply be able to finish loosening it up and you'll basically get two pieces once it comes off here. So you've got your left side crank pedal removed. We'll wrap this in bubble wrap, and this will go into the bike bag. And then you've also got your actual drivetrain side that looks like this. And this will also get wrapped and go into the bike bag. And in the next video, what I'll actually show you is what this looks like after everything has been kind of wrapped and is ready to put into the bag.