How to Make AI Thumbnails of Yourself (Fast & Free)
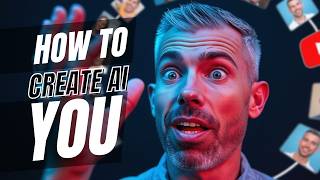
A practical YouTube tutorial by Joe Fier demonstrating two methods to generate realistic AI images of your face for thumbnails: a fast/easy method using RenderNet AI (quick, single-image upload, lower quality) and a higher-quality method using Replicate.com + Hugging Face + Lucas Taco’s Flux model that requires training with multiple headshots. The video walks through account setup, data naming/packaging, Hugging Face token creation, training settings (steps, costs, expected duration), generating images with optimized prompts, and basic post-processing in Canva.
Chapters
Hey, I want to show you how quickly you can generate your likeness, your face with AI in any scenario that you want. Now you're probably seeing people do this for YouTube thumbnail images or just other images that you're seeing online. Maybe you're seeing celebrities, you know, getting recreated in wild situations. We're seeing it all right now. And AI can do this really fast with this new image creation model, this engine called Flow. Now there's an easy way to do this and there's a way that takes a little longer, about an hour or so to set up. And I want to show you the differences between the two and I'll show you how to do both. So this is the first one right here. This is my face. No hat, but see, you know, got the gray right here, all that. So it's, it's poking through here. Looks pretty good. Now we go to this one here. This, this is using one of the other methods. I don't know if you can see the difference here. Quality is a little different. My eyes are also a different color and I have a little distortion around my mouth here. Let's try another one though. So we have this one. I'm going to zoom in a little. A little much. It gave me some wrinkles. I got some wrinkles around there though. It's okay. So I like it. It's pretty cool. So let's see another render. And these are using the same exact prompts, by the way. Here's this one. It's. It's kind of a little, I would say, washed out. Not a lot of detail here. It's kind of blurry and doesn't really have great quality. I'm gonna go to another one here. This is, this was a prompt for basically making me Batman. You know, the face is a little. Again, the quality is lacking on this one. So if I go over here, here is the other model I used and the other method which I'll show you, there's this one, kind of some freaky looking eyes there. And then, hey, let's do this one. And this one I wanted to show because of the detail, if you just look in there and just take a look at things there. Okay, so here's the thing. Creating images with your face on any kind of character scenario, anyone can do it right now. And I want to show you. So there's two methods. The first method, the easy method is the one that was generating this right here. And these types of qualities. Now these were actually using, I was doing side by side, same exact prompts. These are the same prompts as are these, as are these right here. Those are all generated with the same prompt. So the first thing, as you probably can guess, the easy route was generating the ones that were not as good quality. Now, if you want to get up and running super fast, that's using RenderNet AI and you can do it for free. You can create an account. You sign up here. Once you're in there, you have. You could see flux right here on top. So the idea is that you choose a character, you create yourself as that character, and then you can generate consistent images with yourself in it. If you choose to use yourself as the character, you can see they actually give you some characters down here. And then you. You can train yourself just using one single image. It's very easy. You just click this button, you upload your image right here. And you can see this was mine that I uploaded. Very simple. You just kind of crop into the face here. Just frame yourself up. Hit next. You choose either realistic, stylized, female, male, adult, young adult, middle aged, elderly, and straight. I would say I used to have black hair, but now it's more gray. And then I would go next and then name my character. And then really, it's that fast. It's already taken. So let's do another Joe Fear character. And you can see it's successfully created here. Now what I can do very simply is it puts me in this flux mode. Or if I want to go back to it, you would just go back to this front page, say, try flux. Choose your character. I'm gonna choose this one. Generate with flux. And. And you can see immediately it wants to generate me in the style of a model wearing Hugo Boss clothes in a garden. I guess that's their default style. Now let me show you what it made me look like right off the bat. I didn't do any special prompting. It made me look like a older version of myself. I would say much older version. And the face just. It just looks weird. It's adding these, like, scars almost around my face. And it's just odd. You can see some of the other ones. Like, it's really. I don't know what's going on. It's adding a lot. I'm not a fan, to be very honest. Here's another one, very dapper. Me in a garden. But again, why do I look so old? And maybe it's because I specified gray hair. Hello. You could have gray in different ages. So that's this. So what you would do is down here is you prompt, you give It a prompt. And in this case, you know, you can see the prompt I used for, for these ones right here for these two images. If I go back over here that was using this same prompt, it says Joe Fear holding an illuminated book titled Build wealth like the top 1%. This is based off a podcast episode I did. Extreme close up face shot. Piercing eye contact and it goes on. And that's what it generated right here. So you can see. Eh, it looks like I have the option to upscale now. When you generate these, you know there are free options. It does take a long time as you're seeing. I paid for the upgrade just the. The most there I am there. I'm. It's. It's questionable and it doesn't really account for. I've noticed that the quality. This one's actually a little better but again it's not following the prompt. It's not really keeping me really realistic looking. So Render Net AI it's an option for you. I like the fact that it's quick and easy to generate something like this, but I want to show you another way that does take a little bit extra time to set up. But that's the one that's creating things like this where you could see there's a lot more detail. It actually has the color of my eyes in there. There's no extra scars or my mouth in a weird shape over here, you know, different expression. It's actually capturing my hair pretty accurately going over here. Now I'm Batman. I just wanted to try something different. But you could see like it's a lot more realistic. And this was just generated right out of the cuff. Now what, this is what you gonna do. There's two websites you want to go to. There's one called replicate.com and then there's going to be another one called Huggingface Cat. Now what's really cool is I originally watched this video from my good buddy Matt Wolf, who has a bunch of great videos. And he has a signup code for replicate.com that gives you at least at the time of this recording, $10 free to try this. Now that $10 will cover the amount of processing it takes to basically train your face because you're gonna upload images and I'll show you how to do this into replicate. And so it's going to generate all this stuff. It takes a little bit of time, about 45 minutes, sometimes an hour. And I will obviously trim this down, but use that code. It's in the description. Click that. When you sign up for Replicate So you get 10 bucks on. It's not on Matt, but I think it's Lucas Taco, which we'll see who that is in a moment. So once you sign, sign up for replicate.com, use the promo code, basically 10 bucks free to you. It's in the description below. You will sign up and then go into your dashboard right here. Now, the first thing you want to do is go to the top and type in Lucas Taco. And this is. This is a username of a guy who basically hooked you up with that code, but also has created a whole bunch of different, different things to use here to generate these images. The first thing we want to go to is the AI toolkit. So it's this one here. You could also search for Lucas Taco AI toolkit, just right here in the search bar. But this is what we want to use to train our likeness, our face. So the first we want to do, and I will note that it looks a little bit more complicated than it probably is, so if you follow the instructions, this will work for you, the training process, which means you're going to basically take about 20 files of your face. So headshots of you, and you can remove the background or you can't, it doesn't matter, but at least clear shots of your face. And you will now train it. And this is going to help you essentially put it into a model that you can then prompt and then use in any scenario. So what we do on this page here is go to the train button right over here. And scrolling on down over here, we're going to find destination. We're going to click that and create a new model. You can see I have some other models already created, but we're going to create a new model for this. And I'm going to type in my name, Joe Fear, because that will be the prompt that. That uses my face. I'll show you how this works. I'm going to call it Laura or New Laura, since this is kind of a second one for me. So we'll do that scrolling on down over here. This is where we are going to upload our images. Now, a minimum of 12 are required. I did about 20, so let me pull mine up. And they're right here in this file. Now, what I'm gonna show you that is important is the naming convention. You can see how each one, it says person, underscore my name, which is again the prompt. So whenever my name is prompted, inside of which I'll show you, it's going to Basically know that when I prompt Joe Fear it's going to say okay, reference my face. These files that are uploaded. So all of the files that you choose and you could, let's just look at some of mine. I just have a whole bunch of different kind of poses in different ways that I'm looking. Just shot all these in my backyard. Actually my daughter shot a lot of those and I made them into a zip file. So so you need to get all those files organized, named in the proper way. And I would just say person, underscore your name and then the number and you can see naming convention all the way down. I have 22. And then put those into a zip file. I'm actually going to do that because this is an old zip file right there. Let's throw that in the trash, make a new one really fast zip file compress. And then now we have a new one. So what I'm going to do is just drag this over to the images. Now scrolling on down over here we're going to leave the model the same just as it is because we want to use this Black Forest Labs Flux model. This is what actually is being used in the background to generate the image. Alright so now this section where it says H F token that means Hugging face token. So what we're going to do is go over to Hugging Face co create an account if you don't have one already. Once you're logged in you will look at a page that's kind of like this. You want to go to your profile in the top right, go down to settings and what we're going to do here is create a new access token. Right over here in the left you can see I have some others. Let's create a brand new token and what we'll do is set some permissions here for this token. Basically we're. We're allowing replicate.com to use hugging Face my my new token that I'm making here. So on this page where you're creating this new access token, I'm just gonna show you all the different permissions I've selected. It's probably more than you need but going on down over here just select all of these scrolling down to repositories permissions. Make sure that Black Forest Labs Flux.1-dev is selected. You could do that just by this dropdown and if you don't see it, just make sure to type that in there. Looks like that select these permissions down over here. We should be all good to go. These are all kind of Grayed out and let's give it a name over here. So I'm just going to type in Joe Fear, Laura token and now scroll down and create token. All right, now we're going to take what was generated here, the access token, copy that, go back over to replicate.com and paste that into here. Now once that's pasted we want to scroll down and we're going to see number of steps. Now you can do 1000, which is the default. But what I've found is if you bump this up to 2000, you will get a lot better quality and the prompts that you give this to generate your images will be a lot more accurate to what you're actually looking to get out of this thing. Now the downside is that this will make this take longer to train your new images. So if you do about 1000 steps, I would expect about 25ish minutes to train your images. If you go up to 2,000, you're basically doubling that. Now the cost for these things just if you were thinking about, remember you have that $10 credit in the description below. It took about little under $3 to train it at 1000 steps and I would say double that if you want to train 2,000 steps. So you're not going to be out of pocket anything as long as that that link is working down below to because it's going to process basically like you're using the most amount of bandwidth to process your images when you're training. And then when you're generating images it's literally fractions of pennies to, to actually generate new images. So that's about that. Set it to 2000 is what I would recommend scrolling on down over here we're going to leave these all the same or now on the very bottom we're going to see repo id. This is what hooks what you're doing over here and replicate over to Hugging Face. So it's going to automatically load what is done here with the training over back over to Hugging Face. And you can see you need to follow a format that looks like this. So what I'm going to type in is my name, the account over there and it's going to be Joe Fear slash New Laura. And we are going to now create that same, that same naming convention we did over on Hugging Face. So this is where you switch now in hugging face you want to go find your profile that drop down and find new model. Click that and now you can see the owner. This is that first bit. So I'm Just going to paste this. You're going to delete that front bit because that's already over here in the left. And we're going to the model name that we're creating, which is something to remember. Here is your name. So put your name, which you want to reference within the images like we were talking about. Dash in my case, New Laura or you could put Laura or really anything you want. All right, now once you do that, you have that filled in. Skip the license part, make sure that this is public and then select Create Model down below. Once you've done that, let's go back to replicate dot com. Now we are synced up with Hugging face and want to click Create. Create training. This is where we sit and wait for a little bit. But you'll be able to watch the progress of this once it gets moving. So let's take a look at it and you'll see on the right hand side, it'll show you the progress of how we go about things. Again, this will likely take about 45 minutes to an hour at the 2000 steps. And I would predict it costs about 6ish dollars. Now if we look at my invoices from before, so this is how much I paid overall is just 20 bucks. And you know, I had a $10 credit when I first started. And you could see it breaks down how you're actually generating things. So this right here, you'll see my costs as it is to to actually train different models. And I've done this multiple times. You can see I've used $28. But the breakdown here, the unit cost is, you know,.0014 cents per second. So you could start doing the math on that if you were concerned about the cost. But Again, right around $6 or so is what I would recommend. Or I'd imagine that this is. All right, we have done it. We've successfully trained our model. That's exactly what we want to see happen. So I hope that's the case for you. There's a bunch of code and you probably followed along this whole thing here. My whole processing time took 71 minutes. So it was a little slower this time. And again, that was with 2,000 steps. But you know what, it's the best time now to just go test it and see if it works out. So I'm going to show you my process now that we have trained your face, your likeness, and you have everything ready. I mean, now there's no more training to do. That's the hard work. Here's the Second step, or like the next phase is you want to come up with a prompt to use to actually generate this image and I'll give you some ideas and a prompt to use. And then we just got to start generating some images now. Let's go do it. The very next thing you should do is find this page. Now it's over at replicate.com luca taco/flux-dev-laura that gets you to this page. That the same guy that we just trained the model through, he created this that we can basically use as our interface to create new images. Now it's very simple. Again, probably looks more complex than it really is. Now if it was easy, then you would probably not get the best results. So we gotta come up with our prompt. I'm gonna show you how to do that and I'm just gonna use one that I already created and it's this one. It's the same exact one I showed you that generated some of these. It also did generate these not so good ones from the other app, but we're not going to do that. So we're going to go grab this prompt right here and you'll notice that the very beginning has my name. That is the trigger to tell Replicate and the whole Flux system that we'll be using to put my face into the image that we create. So I'm just going to take this right as it is not generate a new prompt. I will show you how I generated this, but let's just test it out. So we're going to paste that prompt right inside of here. And of course this is built out. I did not write this out. I just kind of gave it a rough idea and then it created a better prompt. I'll show you how we do that. So we have the prompt in there. My name or your name is always towards the front because that is going to give it a better chance to highlight you as the main figure. Basically, the further into the prompt it kind of shows that it just doesn't way as much importance as something to actually generate in the image. Scrolling down, we have the aspect ratio. You take a pic I like 16 by 9 because that is kind of a YouTube thumbnail style, you could use it for a lot of purposes. Scrolling down here, you want to skip image, skip strength or prompt strength. I don't touch any of that. This is number of outputs. So typically I like to generate two at one time. You have a maximum of four. And again this is going to cost you fractions of a penny to generate each image, which like in the long run, if you think about it, it's going to save you a ton of money. As opposed to like going to a tool to have them essentially give you this fancy interface to do it through there. All right. Scrolling down past the number of outputs where the inference steps. I skip that, I skip this, I skip this and this again, hugging face. Laura. String. This is where you want to place your trained string. You can see this repo idea. It's kind of the same thing. You want to copy that. Usually going to have your name and whatever you named it over here. And again, that references your. Your hugging face over here. You can. You can always go back to hugging face if you ever forget what your the name of this is. So I'm just going to paste that right inside of there. I don't mess with the LORA scale, but I do have this little pull down here. You want to click that show the advanced outputs. I always like to output either in a JPEG or PNG. Let's go PNG. And the output quality. I bump that to 100 and we have everything else. We just disregard that. You want to scroll to the top. You filled everything out. Now this button right down here hit run. And now we. We're gonna let this do its magic and it'll show you how fast it's doing it here. Guarantee this is going to be faster than the other tool we were using. But, you know, that might change in the future. And I'm not downing the tool, the render Net AI, because I think it's a really good tool. And eventually this whole process is gonna get a lot easier. But for now, this process here is what I've seen the best do. I've been using it to change all the thumbnails on. On my pages overall, like for the podcast. And boom, here we go. So not bad. It doesn't always get the text right. And for some reason it actually has. It looks like a clone of me back here too. So again, it's always a. It's. It's a. An experiment every single time. But you can see build wealth. Like the top 1%. Pretty good. But you can see the realism. It actually did train me. I had this denim shirt. If I wanted to wear something different, I would just tell it to do that. Let's go back. And what's the other one? Whoa, I look really excited here. So me in a denim shirt seems to be like the constant thing now. So you can see it kind of messed up the text. So text doesn't always work. Out. I'm going to X out of those. But what I would probably do is go to my prompt and I would change this. I would probably put a different shirt on me. Maybe I'll even remove the background or not have a background, or I can always take whatever output that I get and I can remove the background in an app, kind of like Canva or something like that. That's probably where I would add the text as well. So what I'm going to do is I'm going to show you a prompt, and this was inspired by my buddy Matt Wolf as well. I'm going to go into my cloud project. So what I have set up here, I'm using Claude AI and I made a specific project to myself that's called Flux Image Prompt Optimizer. Now, in the instructions in the project knowledge of this, I added a prompt and it's this one right here. I'm gonna read it out and then you can copy this. You can modify it. I've modified it as well. And you know, you can. You can kind of simplify it if you want it as well. But let's read it. You are an AI prompt optimizer. Your role is to take the prompts that I give you and optimize them so that the image generated is higher contrast, has more brilliant colors, and, and has beautiful aesthetics. The subject of this prompt will always be Joe Fear. Of course, you'd replace that with yourself. This is the trigger word to use my face within the image. The prompt should always mention what camera angle should be generated. We want the subject, Joe Fear, to always be the main focus of the image and his face to be seen in the image. Always start the prompt with Joe Fear and then continue with the rest of the prompt. Whenever the image prompt is submitted, respond with three optimized prompts to get a better version of the same idea. Don't give any extra context. Just give the optimized prompt. Now what I'm going to do is, and this is me on the fly doing this right now, create.
Different clothes for Joe.
Joe Fear to wear.
We're just gonna do that. That's probably not even the best prompt. But you know what, let's roll with it. Now what I like to do is sometimes just go to previous podcast episodes for me and recreate thumbnails that are already there. You can also, you know, go to your YouTube page, do all that. So I'm just gonna copy this right here. And you know what? I don't try to overthink this. Create a thumbnail nail image around this podcast episode. Let's see what happens. So what this doing now is it's going to recreate the theme of this into a an optimized prompt. Alright, so I'm just gonna take this one. I don't know, I'm just picking the second one without really reading it. I just want to see what it generates just to show the difference of things. So you can see I'm now in a smart casual attire. It has me dressed up a little differently, standing confidently labeled financial freedom in the background with stocks. And it's probably not a one I would actually use, but just for this video's sake, I'll show you all this stuff's going to stay the same. I'm actually going to take this down to one just so it's faster. We're going to run it if you're on the same page. You won't have to tweak any more of the settings over there, but you'll see it generates really fast. And this, I would highly recommend to build your own project in Claude because this is how you can generate ideas super quick as well without agonizing over the prompt. Whoa, look at me. Okay, this is different. Looks like my head's a little tinier than my body, but that's, that's okay. You can see maybe the camera angle should go more high than, than low and up, but you can see it's putting me in different clothes. Let's just for fun do another podcast host one. Let's just, let's throw that in there and run it. And like I said, typically I would have multiple at once. I would do and then kind of pick and choose from there. So as this is generating, I'm going to go over to one of my favorite tools, Canva. So to make a YouTube thumbnail. This is typically the phase I go to or my team does when they want to put some text on there, maybe some more styling. And that will be done in Canva again in the future. This is probably gonna all be one tool, but for now, this is the process. Oh, wow. Okay. So I have my own studio. I'm very professional looking, but that's cool, you know, so I could, I would probably, if I were to make a thumbnail, I would remove the background. But like, check this out. That's pretty cool and high quality. I mean, like I'm a news reporter. It seems like I'd probably copy this, go over here. If I don't just use it as it is and you know, do this. If I wanted to remove the background. That's pretty easy to do. Yeah, you just do that. And it should remove all this stuff around me and then that's pretty good. Alright, so what I want to do here is I would put a background on this thing. I would probably make a new page and find a template that kind of has the style style I'm looking for. So, you know, maybe it's, I don't know, you could find something like this where I replace this guy. And this is probably not the one I would actually choose. But again, for speed I would probably do that. And then, you know, you can now put this in the background. I can, I can tweak all of this up a little bit here. But the point is now I can tweak text, kind of have a thumbnail with me right there. In the mix of things, obviously there's, there's layers here that I'm not going to go through and, and do now. But the point is now I can, I would bookmark this URL right on top here and very simple. You have two tools that you get to use. You have your Claude or you can use ChatGPT with some kind of optimize prompter or prompt optimizer thingy here. And then you want to save this page page right here, the Luca Taco Flux Dev Lora page, and just plug in a new prompt every time. Your aspect ratio, all this stuff is kind of the same here. Maybe change the number of outputs and then make sure that this is tied to your hugging face. Hit run. Make sure that your output quality and all that stuff's there and good. And you got yourself now your likeness in any scenario. Let's do a wild one just to finalize this one. So Joe Fear with Godzilla.
All right, here we go. All right, we're gonna copy this, we're gonna go. And this will be the one I end on, I think. Bam.
What do we have? Oh, man. Okay, so it has Godzilla really big. It doesn't really have me as the focus, but you can see if you sleep in over here, it kind of looks like me in the background. All right, all right, so these are pretty cool, but it doesn't really show me so much. I'm going to do one more. All right, we're going to do a close up shot and just try this one more time. I'm very curious. All right, so you know what, maybe Godzilla is just too large for me to be the focus. But you know, it does look like me over here a little bit. But, but you know, maybe that wasn't the best prompt. Again, practice and just see what comes up. But you know what? At the end of the day, it's very simple. This is a great thing to have someone on your team do if you don't want to get in the middle of all this. And. And once it's trained once on all of your images, you don't have to do it ever again. So have fun with this, mess around with it, make some YouTube thumbnail images and let me know what you think in the comments. If you have any crazy ideas or prompts that you. You think are working for you that we can swipe, it's always cool to kind of test what other people are doing too. And that's a little tip, is look around and just steal some other prompts and put your own likeness in there. And then you'd be surprised with some outputs. It's pretty fun. All right, till next time, make sure to hit, like, subscribe all the fun YouTube stuff. And, you know, I'm here. Basically my role and what I do here on YouTube and also on the podcast Hustle and Flowchart is to basically show off really smart workflows, AI tools like this, and things you can do to work less, ideally, make more money with your business, if that's your thing, and then make a great life and have fun in the process. All right, so thanks for hanging out, and we'll see you next time.
More from Joe
OpenClaw is making AI agents accessible to EVERYONE and this is a total game-changer. 🤯 #ai #ainews

OpenClaw Delete Panic -- The Email Inbox Nightmare! #openclaw #email #nightmare