A hands-on tutorial (YouTube) by John Rodrigues introducing Figma’s Auto Layout features. The speaker demos vertical vs horizontal alignment, wrapping, fill/hug sizing behaviors, and builds a responsive button component while encouraging practice in a small playground.
Chapters
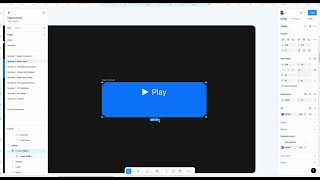
All right, so let's dive deeper into understanding the foundations. And in this we are going to understand the core principles and the core foundations of the auto layout and different functionalities we have in handy to organize our layout, to add constraint to it and things like that. So let's take this. So we'll get started. So I can show you how to leverage the features you have of auto layout. So we are going to deep dive into vertical and horizontal layout. And this is very important to know when you're making any card component and things like that, you need that. So let me go ahead and take this out. So let me delete this so we don't need this. And then let me take all the elements out of this auto layout. So we have this three circle. So let's go and add auto layout to it. You can, you know, it can be arranged anyways. You can just take add auto layout and they will get arranged by itself. So the way to add auto layout is a shift and a or else if you don't recall the shortcut keys and you can select Add auto layout and then it will add the auto layout. So whenever you forget the shortcut key, if you're not aware of it, you can click here and then add auto layout and then you can add auto layout here. So what we are trying to understand is this function of vertical and horizontal alignment. So if I click on vertical, you can see all the elements get aligned vertically. And if you see select horizontally, it gets aligned horizontally. This is going to be super helpful when you are kind of organizing a layout in the complex components. And then this is another feature where it will wrap. So if I change the size of the container, it will wrap around it. So let's say if you do horizontal layout and then you try to wrap, it's not going to work, right. So if you select on the wrap here, so it would wrap like this. So those that's quite important to understand. And then we'll dive deeper into other features. Okay, so now that we explored that, so let's go ahead and create a simple button and this is going to be, you know, will take us to the next level where we're gonna learn about the other features that are available. So let me go ahead and duplicate this. This I'm clicking Command and D on my Mac and then I'm gonna include a shortcut keys list with help you translate Windows and Mac commands and look at all the shortcuts. If you're not sure you can just right click and then you can duplicate from here as well. So paste command group, outline, create component. Yeah, so we have this two things. Let's add an auto layer to it. Shift and a. So here you can see this gap, right? This, when you move this you can see something is changing here. So if I change this value it will impact the the gap there. So let me put as 8 and then you know 8 point system will be using for most of our spacing. So apply and then if you apply 16 here you can see it will get impacted. So let's go back for adding it. And then let's add another auto layout to create that blue background. So let me click on fill and then let me go ahead and change the color. So change the color like this to whichever color you want. And then we can add some corner radius to it, say 12. And now you can see the auto layout is added to it. So if, let's say if I stretch this, you can see, hey, that's not working. That's not how it's supposed to be. Right. So let's problem solve that. So I feel like every time you create a component it can feel new. But then just playing around with this will help you. So let's say, okay, we are stuck here. So why it is not expanding right there? Something is wrong with this container. So let's go ahead and see. This is how this aligned or maybe it's like aligned to the left. We want it in the center. So now you can see it got aligned to the center. And then whenever I kind of stretch it. So it will adapt to that layout. So and then what else? If you want to change the position, you can change from here. But we need this in the center. So this is perfect. So we with few clicks of button you made a responsive button. And if you want to add auto layout, you know, constraint to it, you can add from here. So let me do fill. So it kind of takes the entire space. So here you can see it will fill the container. There's a lot of interesting stuff you can do with this fill and hug. As we kind of progress in this chapter, you're going to learn more about it. So that's about creating a simple button. Give it a try. Create your own button of your favorite color or anything that you may like. And then you know, experiment a little bit with all this things and then see how it kind of responds to it. Right, Let me go ahead and delete it. And so here I've put together a little bit of a playground for you to understand the alignment and things like that. So you have a frame here. So take the circles, add this into this frame. So I wanted to create this because I don't want it to feel you feeling that pressure of able to create something. But just play around and explore it a little bit and get yourself comfortable experimenting with all this features that can be a little overwhelming. But as you practice more, it will get easier. It has gotten easier for me. So the more you practice, more you'll get good at it. And in this course you will. As you do the projects, you'll get better at it. So this will set you up for success. So let me add an auto layout. So I added an auto layout here and then here you can see again, vertical horizontal layout. And then let's say this is cutting off. So instead of the width is not adapting. So we can select and hug. So if you see now it's like kind of hugging, but for some reason it's still breaking. So let's say hug and then. Yeah, so you can apply hug and then it will adapt to that. And then you can select on wrap and then it will wrap around it. So you can play around a little bit like that and then try to move it in different position. And this is gonna be like super helpful for you. And then for the hug, that container will hug to that element. Just have fun with it. Experiment, explore. We'll learn how to add padding and all that stuff as we progress in the upcoming chapters. So yeah, that's about the foundation. Play around a little bit and you know, get comfortable with this. And as we do for the mini projects, you'll get used to it. So let's go to the next module.