100% Automated AI Bookkeeping and Invoice Tracking (Make.com)
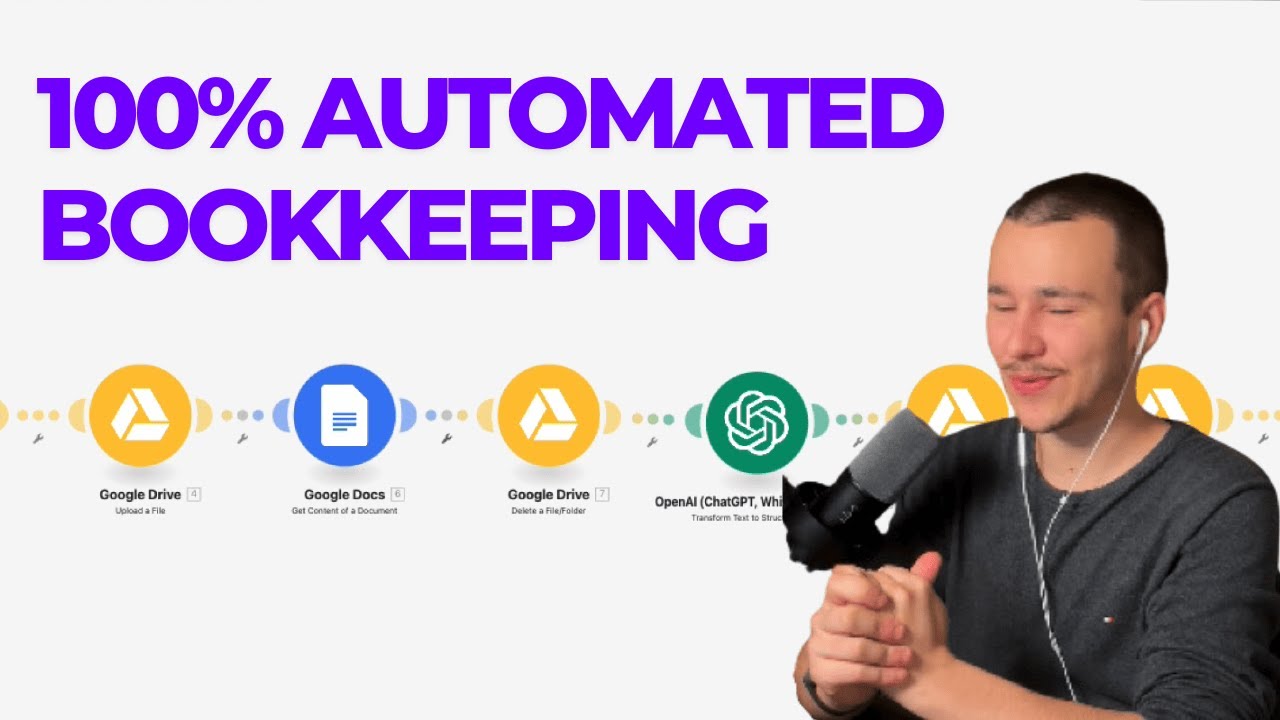
Julius Forster builds a hands-free bookkeeping system on Make.com that captures invoices from Gmail, extracts data with GPT-4o, and logs everything to a Google Sheet. The workflow renames and organizes PDFs by date, auto-categorizes expenses, and can pull paid invoices directly from Stripe webhooks.
Chapters
I've just completely automated my whole bookkeeping from getting the invoices from emails to detecting what's in them and saving them to a Google Sheet. And yeah, I'm going to show you how that works. I'm first going to showcase you how well it works, and then I'm going to show you exactly the process, each module step by step. So let's get into it. First up, this is, is the full automation that detects new invoices that come in into a Google Drive folder. It then reads what's in those invoices, it renames those invoices to have a more suiting name, so it adds the exact date of the invoice to the invoice's name and then what service it is. And then it moves it to a structured folder right here. So in the finance— in the finances folder, I add all of my invoices into the incoming invoices folder, and then it will move them after renaming them. It will move them to the actual year folder, to the structured invoices. So all of the invoices I'm going to show you in a bit are going to move to the 2024 folder automatically. It If it would be a 2023 invoice, it would move to that folder. In the future, in 2025, it will move to the, uh, 2025 folder. Everything completely automated, uh, no involvement from me. And yeah, and then there's obviously the second automation that watches all my emails and checks if an email comes through that has an invoice or receipt attached to it. And if it does, it gets that and it uploads that to the folder, which then triggers obviously this automation, which takes that invoice again, analyzes it, renames it, moves it to the structured, um, year folder, and then obviously adds everything to a nice little Google Sheet right here. And this is obviously the most important part, getting all of the information out of the invoice and adding it to this wonderful Google Sheet, which has the timestamp of when it was added, the type, which is an expense in this case. You can set up the exact same, just copy-pasting it for outgoing invoices, so for invoices you send to your clients, right? Um, for that I have a second folder right here, outgoing invoices. Then the company this invoice is from, or in the other case is for, the invoice number, the date, the description, the total in USD, the tax in USD, subtotal in USD, payment method, expense category, which are preset, by the way. So there's a set number of categories and the actual link to the invoice. So you have everything in one place and you can then build wonderful things like income statements based off of that in Google Sheets. And you can have everything in this one nice Google Sheet and everything automated, obviously. I love doing that and I don't love doing finance stuff. So I had a blast creating this automation, but let me show it to you. And this is with actual data, so I might have to blur some things out. First up, in the incoming invoices folder, you can see those are unstructured invoices. I just threw like all of the invoices for 2024 in here. So yeah, those are a few hundred. Um, and now let me run it. There we go, it is running. It starts with the first invoice here. And obviously I could have added routers and everything to make it look more complex and maybe be a bit more efficient, but usually you wouldn't let that run over like huge amounts, which I am doing right now. I'm letting it run over a few hundred invoices, one after the other. So what I did basically in the first module, I set it to a maximum of 100 just to make sure that we go through it step by step, right? Uh, and not all at once. And then at some point the module, uh, the whole scenario stops and everything. But usually, as I have scheduled this daily at midnight, it would go through all the new invoices you've added to the folder at midnight, and the next day they are automatically added to the bookkeeping sheet. They are named correctly, and they are in the correct folder, all automated overnight. So you come back the next day and everything is sorted. You don't have to do anything. So this is pretty amazing. Right here, let's go into bookkeeping. We can see it already started with the Slack invoices. Let's look at them. Expense, right, here's the timestamp it added them. That's obviously right now. And then the date, we have one for, um, December this year, November, October, and so on, right? You can really see how obviously because of the naming, because of the original naming when I downloaded them from Slack, that they're in this order. So they are the first ones that get processed like that. And you can see how it gives them a description, and it is most of the time super similar. As you can see right here, it adds the date. Here it didn't add the date, obviously. It, it can sometimes make mistakes, but that's not a mistake in my opinion. That is still a great description, that is still completely correct because we still have the date over here, right? So that all works. It added the total, and that is actually correct. That chain changes a lot here, uh, there's no tax on the invoice, so the subtotal is also the same. That is correct. Payment method, correct, yes. And Exactly. Here we still paid with Visa and then with MasterCard. And yeah, for some it added the last 4 digits. Then all of them software subscription, correct. And the invoice link looks amazing. And see how quick that goes. Okay, for this one it added the tax in USD as 0, basically the same as leaving it empty. So not a problem at all. It's done with Slack. It is, um, yeah. And now it continues with the next, with the next item here. Amazing. 100% correct. That is correct. PayPal, correct. That was the payment method. And it is an— it is other expense. That is also correct. Yes, other expense, also correct. So it is super, super accurate. It works really well. It goes through them super quick. And if we just go from our incoming invoices folder to the structured invoices, and they should all be in 2024, right? So let's go into 2024. Yes, they are all in 2024, and we should see one after another coming in here. Let's wait a bit. Let's wait for the next one. So what we're at, 1, 2, 3, 4, 5, 6, 7, 8, 9, 10. Oh yeah, there, there we go. There was the next one. I'm actually scrolled down. That's, that's why, that's why it didn't show up here. But yeah, it gets added here as well. That works well. And you can also see the naming. Uh, I've chosen this naming with the date at, uh, on, uh, at the beginning so that they're already sorted. When I sort them by name, they're already correct, uh, correctly sorted by date because we have 2024 at the beginning, then we have the month, right? So it sorts them first by month. You can see, uh, it goes 1 through 12 and then by day. So they're already sorted, um, even though I sort them by name, they're sorted by date basically. And then we obviously have the name, so then it is sorted it is sorted by name for all of the same day, basically. So that is perfect. That is exactly, exactly what I want. You can see here how it runs through super quick. And what it would usually do, obviously, it would run through at midnight once for every invoice that came in throughout the day. And the next day you come back and everything is already done, right? So you can obviously set the set the time whenever you want. Now let me— before I get into this and I show you exactly how it works, how I set it up, I want to show you the other automation. This one is a lot, a lot, a lot simpler but still works amazingly well. So since we already have that power of that Google Drive folder that when a new invoice is added it analyzes it and everything, we don't need to use that anywhere else. All we have to automate now to basically make, make it a bit more complete is to just move all the invoices we can somehow get from anywhere, basically anywhere and everywhere, we just move into that folder and the rest is taken care of automatically, right? So the obvious next step was to watch our emails. So the first module here watches our emails. And here's the great thing, and I will show you the setup here right now, actually, because it's done so quickly, I won't demonstrate it. You will see it works, I've tried it, but I won't demonstrate it now because obviously the other folder is so full with files that it wouldn't make sense. I couldn't show it completely, but, but it works perfectly. So what you do here is I've chosen the Gmail Watch Emails module. You can use the normal Watch Emails module, but then it gets a bit more tricky because in Gmail you can set the the folder to inbox obviously, and then the filter type to Gmail filter. The great thing with Gmail filter is that it is pretty powerful. It is basically the power of the filter you have inside, inside the Gmail settings when you say you want to select the emails that have this and that and that and want to move them to spam, for example, or to trash, right? You have this really powerful filter in your Gmail inbox. Which you can totally leverage here. So all I did here is as query, filename is PDF and filename is receipt, or filename is PDF and filename is invoice. So all I'm doing here is, um, because some tools don't really give you invoices. As I said, I'm not a, uh, a, a finance guy, so don't know. But I guess, I, I guess receipts are fine as well. I don't know, uh, That's just what I guess. So what I did here, and you can totally change that depending on, on your use case, I told it that the file name should be PDF. That is basically the file type. So you can check the same way you can check basically for the file type. It's also in the, in the documentation here. So you can go to this URL and see all of the documentation for what you can basically do. That's support.google.com/mail/answer /7190. And here you can find the whole documentation for all the filters you can use there. And then in here you can add those. So file type is PDF and the file name includes or is receipt, or the file type is PDF and the file name includes invoice, right? We search for all of those emails, and then I've added the maximum number of results, 20. You can obviously do more depending on how many emails come in every day. So you can also do this every day because checking every— usually, um, a scenario like this would check every 15 minutes. That is the standard interval. But you can totally set this to one day as well because you don't need to add new invoices every 15 minutes to that folder if the folder actually processes these invoices once per day. You can totally run this every day at let's say 11:00 PM or 10:00 PM, then it checks all of the new emails. You can set this, I don't know, to 200 if you get 200 new invoices per day. And you can then just have this running 1 or 2 hours before the other workflow starts. The other scenario, it adds all of the Gmail invoices in the folder and then 1 or 2 hours later the other scenario starts automatically. Gets all of those invoices and processes them. Now, as the second module, we obviously have upload a file. And what I did here is obviously select the incoming invoices folder, and then as file name, we just use the operator first so that we get from an array, because there can be several attachments. So we want to get from the attachments array the first from the first attachment, the filename. And the same with the data, that is just the data of the file because we aren't working with links here. When working with those Google services, we are always working with the actual data in the scenario, which means it costs way more data in the actual processing, but it still works. And it's basically the only, only thing we have. So that works totally fine, and this is basically how you upload it to Google Drive. Also in the Gmail one, I've set mark email messages as read when fetched as yes, so that I can see, okay, those are already, those are already basically done. And what I also did then, I've added a label to Gmail. I've just called it invoices, but you can call it invoice done or invoice added or invoice whatever, right? I've just called it invoice. Super simple. And I apply this label, um, the Gmail message ID is just the email ID basically, and I've applied the invoice label. And when I see an email with an invoice that has that label, I know it's already done. And for all the other ones, this shouldn't get, uh, which are usually the emails where the, um, invoice is not attached as a file, but instead it just says there's a new invoice that's waiting in our portal for you here, check it out here, and then there's the link. That's obviously not as easy because for that you would either have to make an API call where you would need the actual authentication token, which is for the frontend. So it would be the frontend API or for each, for each of the services you use, you check out the API documentation, the actual API documentation, if they have an endpoint for you to get the invoice. That would obviously take a ton of time, not because it's hard, but because you would have to do that for every service. And I bet you at least half of the services you use don't have that kind of API, right? And you don't want to use the frontend API because it is a lot harder to get that actual key, right? Um, so yeah, that is the best chance we have. And this way we basically mark which ones are already in there so that you don't add them twice. You can obviously also use the module delete an email. If you want, I prefer to just mark them as basically done with a tag. You could also move them to another folder, basically. That is the other one. And this one you can see is already at 62 invoices done. I will stop it right now and I will have to do the rest later. But the great thing here is because all of those invoices are already moved to the structured folder, I can now just click on run once. So run it again, basically, and it will continue with the next ones because in this folder it won't find the other ones again because they're in a new location now. So there is no, no way it accidentally adds something twice, um, other than if you get an invoice from the structured folder and put it again into the unstructured folder. Uh, but that doesn't happen here. So That is, that is another super cool thing. Um, yeah, so let me actually show you how it works now. First up, we have a super cool module called Watch Files in a Folder. What we basically do here is we— yeah, yeah, as it says, we watch files in a folder. So we watch files by created time. So we can watch by created time or by modified time. I prefer by created time. Because it works better. That is basically when was a file uploaded to Google Drive, and based on that, it, it gets that or it doesn't. Usually you, you don't need that here because of the way we move the files to the other folder. You just want to get all of the emails. You don't want only to get the latest ones. This would check basically for the latest ones. So it just ran. So it noted the current time, and when, when it runs again, it checks to only get everything that came in new after that time, right? Everything that is basically new, um, that has been created after that, after it ran the last time, and everything before that. So if we stop it like that and I would run it again, and I can show that to you right now, then it won't do anything. Okay, I'm mistaken here. But usually it doesn't, right? Usually it would just stop after one. Okay, bad luck here. But yeah, that is how that works basically. So instead of this module, you could technically use a Google Drive, uh, search, either search for files or folders, or I don't know if there's a GET Get File. No, then it's Search for Files and Folders. Just one that basically gives you all of the contents from a folder, and then you add the, um, the time. So that's the first module. You let it run every day at the chosen time when you want to process those emails. You can also let it run every 15 minutes or something like that if it's very important that those invoices get added to that sheet very quickly, right? But that is fine. You can totally use that. It usually is not a problem, especially when it runs once per day and then you have the invoices processed. It could only be a limit like in my case right now where for the first time, like once, I let it run through for the full year for hundreds of invoices at once and the limit is 100. And yeah, but it should never be an issue basically. It will never be an issue and even in this case I could just say 500, and it should be over it. I don't know the exact amount right now, but that should be fine. But I like to stay— I like to keep it at 100. Let me actually put it to 500 so that it works when I let it run through for the, for the rest of the files. So that is the first module. I talk way too much for such a simple module. It's set up like this. It basically watches all new files that are in this folder. What we do next is we want to recognize what that file contains. So what does that invoice say? And there are a lot of services that let you do that. So there is like, if I put in PDF, I think it's called PDFco. Yeah, PDFco. I love PDF. You can, yeah, PDF OCR, that basically recognizes text in PDFs. A ton of services that all cost you money. I found a way actually through some help from a YouTube video from a different one to basically do the same thing, super reliable as well, super, super reliable, but completely free. So all you basically do is you add the next module, download, download a file, the file ID, you just add the file ID from the first module. Here you select enter manually. Yeah, all of that doesn't really matter, so you can keep that show advanced settings off. Then what you do is you upload it again. So you basically download the file from Google Drive, you upload it again to Google Drive, but the huge difference here is that, um, you select Show Advanced Settings, and under Advanced Settings, you check Convert a File. You check Yes, you check the Yes box, and as target structure, you select Application vnd google-apps.document, right? What this does is it converts the actual PDF in a Google Doc into a Google Doc, and it recognizes all of the text from the PDF and turns that into a Google Doc. And what can we do with a Google Doc? We can get the text from a Google Doc. So we basically, for free, uh, we've gotten the text from a PDF Thanks to Google. Thank you, Google. So this is basically how that works. And then the next module is get contents of a document. So first up with the upload a file document, what I did is I selected a path where I, you, where I usually not, where, where I am, where I never am basically, which is admin, finances, and archive. So I have an archive folder and I just create those temporary Google Doc files in there, and I call them temp_ and then the name of the actual file, which I've— let me put myself over here— the actual name of the file, which you get from Download a File. And down here you get somewhere, you get it. I, I don't want to search it right now, to be honest, but there's a— there is one called Name. Oh, it's up here, right here, name. And then I've just added temp_, so temporary. That's a temporary, temporary file. And actually, if you're in this folder, it will get added and then deleted so quickly that you— that it won't even pop up. At least in my tests, I couldn't even see the file at all. So it won't— it shouldn't bother you at all because you won't even see it. So it, it's so quick. So then you map the Google Drive download a file file right here. You convert the file, yes, to document like this. Next, you use the Get Document, uh, Get Content of a Document Google Docs module. In here, you again, you can select by mapping, um, then the document ID. No, you should select by mapping, not by dropdown, otherwise it is set, uh, it is basically hardcoded. And in the document ID, you put the file ID of the upload a file, not of the download one, of the upload one, because that's the new Google Docs file. Include tabs content, no. And yeah, filter, filter image, I guess. Yeah, you can turn that off. Um, then you click OK, and the next module here is delete a file folder. And what do we do here? We delete the— we delete this exact file again. So you can get the file ID from the upload a file this one right here, and it just deletes it again. If you want to keep this Google Doc, which is basically a Google Doc invoice, like your invoice as Google Doc, if you want to keep that for some reason, you can totally do that. You can save it somewhere and do whatever you want with it, but you don't need it. And I deleted it, I deleted it because it is, it is not needed. We have the PDF, right? And that's enough. And in case it does some weird stuff while converting, which can always happen. It is better to have the actual invoice than some, some, um, some other document that was, that was converted. That's, that's the thing. So next we use the OpenAI Transform Text to Structured Data module. So I have checked the chat completion module because obviously for the chat completion module You can say it should give you JSON back, uh, JSON format. But there's actually another module called Transform Text to Structured Data. Identifies information in a prompt's text and returns it as structured data, right? You select that like this. And now comes the long part, and I will give you in the description access to to the whole blueprint. So you can just get that blueprint downloaded and you will have all of this data in there already because it will otherwise take you a long time. So first up, the text-to-pass model is GPT-4o Mini, and I will actually right now change that to 4o, right? I prefer 4o as, 4o as model when doing something like this. Technically, it's just information extraction, but it has to do a little thinking, so to speak, because it has to come up with a file name, it has to recognize some things correctly, and I think 4o is more suitable for that. I would use 4o Mini more for tagging and super simple yes/no questions and to stuff like that, right? Super simple stuff that, yeah, yeah. Even more simple stuff. This is technically already super simple, but I still want to use 4o. If you have a ton of invoices, you can totally use Minnie, but I feel like 4o is still super cheap. So the prompt here is get the information of this invoice. You can use a longer prompt with more information, but this is the prompt I used. Now, now we have all of the parameters. So those are basically the parameters that you want to get from the invoice, and I have 10. So first up, the company, then the invoice number, the— what was that one— the invoice date, the description, the total amount, the tax amount, the subtotal amount, the payment method if specified. Obviously a lot of them are specified. Um, then the category, which is the one where I said it basically selects from a set number of categories. It hopefully always does that. And then the file name. So let me quickly go through them. So first up, we always for each have a parameter name which is in the JSON, then a description, and then some examples. So here, company name, the company which the amount is paid to, or the person's name if it's a person. And then never use Monera Agency— whoops— never use Monera Agency LLC for this field. That is just because in each invoice, obviously, there's our company as well, Monera Agency LLC, um, as receiver, as who received the service or who received subscription or whatever. Um, so in rare cases, because especially because I use the 4.0 mini model, it— if it didn't find the actual company for some reason, either because it wasn't converted correctly, which is almost never the reason, or just because it didn't really find it, then it tended in super— like, like, not, not very often, uh, super unregularly, so in 1 out of 100 cases maybe, it will then use our company name, but that's not what I want. So I've added this one, uh, this don't use our company basically. And then we have the other things, uh, this is invoice number, unique identifier assigned to the invoice by the vendor, and then always some examples. And I've also noticed that is this parameter required, setting this to no is a lot more safe, um, and I've set it to no for everything, so nothing is required. Except the total amount. Because if it leaves that empty, like in the worst case, if it doesn't find an information that you actually need, but it leaves, it leaves it empty because you said it is not required, that's a lot better than it imagining some, some answer that doesn't exist. That also used to be a problem with 4o Mini, and then especially saying this answer is required, because then it just put anything in there. And what it usually did, let me show you, for the company name, it usually just used the first example. So I, I, I knew when it said Calendly LLC and the invoice wasn't actually from Calendly that it didn't find the company. But the is parameter required field was set to yes, which now is no again, right? So that's why I recommend you to set it to no. It will, if it finds it and It also says that here, if it finds it, it will always fill it out. This doesn't mean it doesn't look as hard for it. It just means OpenAI will be forced to generate a value in the output, even if there's no such value detected in the text. See, it doesn't make sense to have that as required, as you can see, because if there's nothing in a, in a field that you really need, you would obviously look over the entries, you can just go to the linked invoice because there's a link to each invoice. You can just go to that, open it, and put it in yourself. Like, that isn't much work because it won't happen often, especially if you use 4.0. It will happen like never. Uh, yeah, I could go through each one, but they are all self-explanatory, right? Subtotal, they're all Basically completely self-explanatory. Um, the categories— what I mainly did here is has to be one of the following. That is not 100% safe, but it works super, super well up until now. So I've never had it choose anything else except any of them. And this is also one field that I have as required, so it will always choose one of those. It will always output one of those, basically. Yeah, that is how that works. And then for the, for the file name, this is file name. This is how the file will be called in the Google Drive folder in the end. I have description: a new name for the invoice file without file format at the end in the format date minus name of the service and type. Make sure you use a format here that makes sense for the title of an invoice. It should be clear what it is and what service and/or subscription it is. Like, weird, weird English here, but I've basically puzzled it together a bit. And then I've added again some examples. And that is the setup for this module, which is by far the most complicated one— the most, like, not complicated but complex, the largest one, right? So next we have search for files and folders. What does it do here? It searches for files and folders. Um, so, ah, yeah, yeah, I, I can tell you why that is. I was a bit confused for a second. Why would it do that? Uh, why did I add it in the first place? But basically what it does is it goes into the structured invoices folder because obviously it has to find the correct folder for the current date, right? So it goes into the structured invoices folder and then it does a full text search there for the following query: format date, past date, invoice date, this format, and then this format. What that does is it gets the output of the invoice date from the ChatGPT module. That is one of those fields is invoice date. And I've given it the format that it should output, which is the following. Year, year, year, year, minus, minus month, month, minus day, day, right? That is the output it should give. And what this now does is it parses the date with that format, meaning it recognizes that date by me giving it the date format that this invoice date is in, because it's actually not a date, it's a string, right? It is a text field, and we want to turn the text field into an actual date field. So we parse it, and then what do we do with the parsed date? We format that date to just include the year. You could totally use some regex or however you want to call that and just extract the first 4 numbers of that because it will always be the year. But I prefer to actually parse the day to actually get the correct date, to understand— for it to understand the date, and then just output the year of that. And we want to get only one, right? Because we only want to get the current year's folder. What it basically does here is it goes, it searches in the folder for just the year, and every folder in inside the structured folder in here is just the year, right? That's why it will find exactly the right one every single time. Then it moves a file or folder It actually moves, moves the file, obviously. We select My Drive, select file folder, it's a file, and then the file ID, we take that from the— whoop— from the very first one, watch files in a folder. We take that one as the file we want to move because that is the original PDF. New location is My Drive.. And then you basically do that right here. What is that? Let me, let me copy it real quick. What you do is you turn Map off, you select the new path. So you go, for me it is Admin, in here it is Finances, then we have Structured Invoices, and inside of Structured Invoices we have the Years. Right? So what we do now, because we don't know the last folder, it is dynamic from the first Google Drive module, we just turn on map and now it gives us the IDs of all of those folders and you just add a slash at the end and then you add this one, file ID. This is basically the file ID you get from the search for file folders module. This file ID, this is basically not the actual file ID but the folder ID., but it names it file ID because with that module you search for files and folders, right? So now it basically gets the correct new location it should move it, um, which can be dynamic. Again, this is why we're doing all of that, because it moves it to a dynamic date depending on from when the invoice was. So you could put 2022, 2023, 2024, all kinds of invoices in there as long as you have a folder for each year. For which an invoice is in there. You can just throw all of them in there and it will put them into the correct folder. It will name them correctly with the correct— and that is actually, actually the next module. It will update the file. This is the next module. It will name them correctly. So we use that file ID again, right, from the Move a File folder, um, because we moved that file. And then the new updated file name. And keep in mind This parameter overrides the filename and does not have to include the extension. So we don't use to have— we don't have to use .pdf. That uses from the ChatGPT module the filename output. So now it names it correctly, it puts it into the correct year folder. It obviously adds to the name at the beginning the year, the month, and the day. So it will automatically sort them within the year folders. And you have the nicest invoice sorting system on top of having everything in one Google Sheet. File description you can leave empty. Change file content, I've just— no. And this one can be empty, so you can leave Show Advanced Settings off again. And then the very, very last step already is add a row to a Google Sheet, uh, search by path, Drive. Then you select the sheet you want to add everything to. And the sheet has— yeah, I've showed you the sheet earlier, you probably remember. You select the actual sheet, which is Income Expenses. So you select the spreadsheet first, then you select the sheet, so the page within it. Then the table contains headers. Yes, it will always contain headers. Then for value A, which is the timestamp when this was added, you just go into here and you search for now and you add now. This just adds the current, uh, timestamp, so you will know exactly when it was processed and added. Uh, for B, which is type, you just write in expense because all of these— like, this whole scenario gets all of the invoices from the, um, incoming invoices, so from the expenses, right? Then, uh, column C is company, which you just put in the field company name, and you get all of these now from the Google— from— no, from the ChatGPT module. So first up, company name, then invoice number, invoice date, description, total amount, tax amount, subtotal, payment method, category, and lastly, the invoice, which is the web view link of the updated file right here. And in update a file, you can find the— right here, web view link, this one. You put that in here if you want. I highly recommend you to use the web view link because if you click on it, if you open it, it will in Google Drive open the invoice, the full invoice, and show it to you. If instead you want to input a download link which directly downloads the invoice to your PC because you are some weirdo who uses some external program for PDFs, like Adobe Acrobat— weird. No, in this case, in this case, you would use the web content link. This will download the file directly to your computer upon clicking this link, right? You can also do both, right? You can have the next column just be the web content link. So yeah, super easy, super simple. You can add as much, like, all the other stuff you want in here if you need any other information. You can add that here. If you want the, uh, want to extract any more information from the PDF, you add that in the ChatGPT module. So you can always add a new thing, always set required to no, as I told you earlier. And it's that simple, right? It is really that simple. Now you save it, you turn it on, set it to whatever time you want, and it will run through. It will process all your invoices, all the invoices you add to that folder,. And then you have your second folder, outgoing invoices. You basically just duplicate this whole scenario. You rewrite especially the ChatGPT prompt a bit, telling it those are invoices we send to our clients, to our customers or clients, process them. But actually what I would recommend you to do, I bet you're using Stripe, right? If you're using Stripe, you can just use the Stripe API, which I have also, which I have also set up, but I won't show you right now. Um, basically what you're doing is you set up a webhook. Whenever a Stripe, um, a Stripe invoice has been paid, then you're going to trigger a scenario. And this scenario just adds all of those infos in there and then, um, adds the PDF to the Google Drive folder. Let me, let me actually, let me actually show you how, how that would work. Let, let, let me show, show it to you real quick. One second. Okay, here we go. This is basically the other one because I remember that finding the exact webhook isn't as easy as— like, it's not super direct, but that's why I'm showing it to you right now. So for all the outgoing invoices, if you use Stripe and you want to do basically the same but without having to use ChatGPT to analyze the invoice, you can just get all of those infos right from Stripe, right? And you can add all of those outgoing Stripe invoices to the correct folder as well. So yeah, super simple. Uh, this is not the complete one. I haven't updated this one yet according to the other one, but basically your first module is Stripe Watch Events. And here you add a new webhook, and this webhook is New Payment Intent. So this is important for you to use. Use the webhook payment intent. This is basically, uh, let me see if I can, I can find it real quick. Yeah, this one, payment intent. This is the correct one. This basically sends this webhook whenever someone paid, right? Next, you use the Stripe Retrieve an Invoice module. Stripe invoice ID is object invoice, so that is inside object here. Yeah, somewhere there's invoice. I don't see it right now. You probably already see it, you smart— ah, you smarty! Invoice right here. You, you select invoice, you click on OK, it will find the invoice. Then you use an HTTP GET a file module, you plug the invoice PDF in here, which basically should be the link, right? So you basically here, that's all example data, you basically put the URL, the invoice URL in here, invoice PDF. Invoice PDF. Yeah, okay, that's somewhere in here. Invoice PDF. So just search for invoice PDF. Invoice PDF right here. That is basically— you have the hosted invoice URL which takes you to the, to the typical Stripe site where, where they show the amount and the, and everything about the invoice. But you want the invoice PDF because we want the PDF. What that does is it basically downloads that file to use in that scenario. The same way we did it right now. And then you can upload it to that other folder. Or as I said, I haven't updated it yet. You, instead of uploading it to the other folder, you would actually— so you would actually— making some poses here— you would actually just take basically the rest of this one. So you would take, uh, everything from here, I would say. And then in this, in this chat, you would use all of that. You would copy paste that over. And in this ChatGPT module, all you are going to do is you're going to analyze one thing which— oh no, you actually don't need to do that because I think the— yeah, yeah, see, those give you everything you want. This watch events and retrieve an invoice, those already give you all information about the invoice. So you don't have to check anything in the PDF. The PDF is just there to upload. I had— I thought a bit wrong, right? Uh, wrong. Only wrong. Um, so what you're going to do is you're just going to take the rest of it, those 4. First, you're going to search for Files, Photos. This is basically where you are going to take the actual invoice date from either of those modules, whichever gives you the invoice date. You're going to do the same thing with extracting the of it, and then searching for the folder, for the year of the folder, for the folder year. Then you're going to upload, you're going to upload a file. So you're going to use this one to upload that PDF. This is already in here. Yes, upload a PDF. And you, you don't even have to move, move the PDF because you can upload it right away to that correct to that correct path, basically to this path you get right here, you can upload it directly and you don't even have to update it anymore. All you have to do is name it the correct way from the beginning on. You name it year, that year that which you get from this, the Stripe one, and then the customer or however you call the items. You get all of that from Stripe, right? And then you use the same module add a row to add all of the information that you also get from Stripe. There you go. All of the outgoing invoices, all of the invoices for your clients, for your customers that you handle through Stripe are already checked off. So technically you wouldn't even need the outgoing invoices folder if you have any other way to write invoices that is not Stripe, which I wouldn't recommend, by the way. I would recommend to have all in one platform. But if that's the case, you would obviously set up this same automation that you have for incoming invoices. So for invoices you have to pay, you would set up the same one for this outgoing invoices folder. But in this case, I can just delete— I won't do that now because it's possible that I have something in there still. You can just delete the outgoing invoices folder because all outgoing invoices will be automatically handled from the beginning on. Because of Stripe's amazing API integration. So that is my voice. Oh God, that is already it. That is already it. Everything gets added here, each and every single one. It couldn't be any better, right? If it could be any better, it totally can be any better. Every, every scenario on Make can be better. Every scenario on Make can be improved. If you think something here should be improved, or if you want something to be improved, or you want something to be changed up, let me know in the comments. Email me, uh, go to my website and work with me. That would be— I would actually prefer that because I make money from that. So yeah, but no, no worries, uh, just, just send a comment and I will, I will even help you in the comments. No need, no need to, um, to work with me except you if you have a larger project that I would love to work on that. I absolutely love automations. So yeah, feel free to email me at any time, julius@munira.com, or go to my website, or just write a comment, and I will definitely answer every single comment because I know this video will get like 3 views. But even if it gets more, I am super thankful, and I will answer every single comment. So yeah, you have a good one, and goodbye.