Gamma Exposure is the Most Powerful Tool | How GEX Predicts SPX Moves (AND HOW TO TRADE IT)
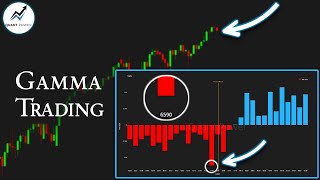
Kardec Trader shows how gamma exposure (GEX) predicts S&P 500 moves better than macro indicators, with zero-DTE options now 60% of volume versus 15% five years ago. He maps gamma peaks onto price charts to find intraday support and resistance, walks through profitable trades on specific dates in September 2025, and introduces the Quant Power Line for position construction.
Questions this video answers
Approximately 60% (speaker's claim).
30–50% profit on credit strategies (speaker's guidance).
Chapters
In this video, we'll break down the prospects of the stock market and I'll also tell you about a trading strategy that will make your trading much more profitable. But let's take things one step at a time. Even though inflation remains high, the lack of year over year growth combined with a slowdown in the labor market is being perceived by the market with optimism. This is because it's a factor contributing to a potential decrease in interest rates. This raises the question should should we even expect a market drop now? And if not, how much longer can the rally continue? And most importantly, what should we focus on when making trading decisions? In this video, I explained in great detail that since 2022, the factors influencing the stock market's movements have changed. The main drivers now are liquidity and the actions of market makers. This is precisely why the market is ignoring the slowdown in macroeconomic indicators, quantitative tightening, high interest rates and many other historical correlations such as the yield curve inversion between 10 year and 2 year bonds. One of the reasons for these changes is hidden in this chart. It shows that the volume of zero day to expiration options trading is now approaching 60%. In other words, 60% of the options bought today will be closed today. For comparison, just five years ago this figure did not exceed 15%. The key point is that such a high volume of zero dte options directly impacts the positioning of dealers and market makers. And since they are the main providers of liquidity, their actions directly influence how the market will move. And today, the only tool that can provide a clear understanding of how market makers will move the market and what they will do is the gamma exposure profile. Moreover, the level of signals it sends us is so high that over the past week and a half, even though the market was broadly rising, it was possible several times to profit from a bear call spread strategy, which is essentially an analog of a short position. Let's look at specific examples in our application, the link to which is in the description below this video. Let's open the gamma exposure profile for the SPX on Friday, September 5th. I have already talked about this pattern in detail. Its essence is that when we see negative and positive gamma values of equal significance, it means that the market maker will try to keep the price within this range for as long as possible. From the very beginning of the trading session, one can deploy neutral strategies such as an iron condor, placing the breakeven points at the maximum gamma exposure values. However, one can also open positions from the support and resistance levels. Here we can see that the resistance level was around 6,535. These were the largest positive gamma values which were further reinforced by the largest absolute gamma values. Breaking through such a level to the upside would be practically impossible, making it a perfect level to open a bear call spread. When all these levels are transferred to the working chart, they will look like this. 6535 is the maximum positive gamma value and on the chart it is marked with a green line labeled as P1. The same level had the maximum absolute gamma values represented by a purple dashed line. This level is highlighted as Resistance 1. At the 6450 level, we had the largest negative gamma values along with the second most significant absolute gamma values and the highest volumes for put options. This level is marked as Support 1 and is additionally reinforced by a gamma flip zone nearby, which further strengthened it as a support level. Let me remind you that the gamma flip is the point where gamma exposure transitions from positive to negative values and this level always plays a key role. This chart shows 15 minute candles on that day, September 5th. We can see that the trading session started near the resistance level. The price held near it for the first 30 minutes, but after that a powerful decline began. Thus, a bear call spread opened from the resistance level could have reached its maximum profit within just an hour. However, the decline stopped exactly at the support level and the day closed in the middle of this range. If you had opened a bull put spread from the support level, it would have also yielded maximum profit by the end of the day. Therefore, thanks to the gamma exposure profile, we could have opened three strategies during the day, each of which would have been profitable. I mean, at the beginning of the day, understanding that the price would not leave the boundaries of the range, one could have opened an iron condor. From the resistance level, one could open a bear call spread and from the support level respectively, a bull put spread. Let's look at a second example. This is the gamma exposure profile for the SPX on September 8th. Right away we can identify the 6520 level as a key resistance. This is where we see the largest positive gamma values coupled with significant absolute gamma readings. Since there's nothing of note above it, we can treat this as a hard ceiling. The price is very unlikely to break above this level for the day. We should also flag the 6500 level because it shows the largest peak in absolute gamma. The nearest support level sits around 6,475, which is a gamma flip zone. Finally, we can identify a broader support band between 6440 and 6450. This is where the largest negative gamma values are clustered, along with another significant spike in absolute gamma. For clarity, let's map all these levels onto a standard price chart. We'll plot the largest positive gamma as a green line at 6520. Just below that at 6500, we mark the largest absolute gamma spike, which also coincides with the highest volume of call options. Given its significance, we'll label this as Resistance 1. Further down, around 6475, sits the Gamma Flip zone. Beneath that, around 6440, we identify the largest concentration of negative gamma, establishing a clear support level. However, this lower support isn't our immediate focus. For the price to even have a chance of declining down to this area, it would first need to break decisively below the gamma flip zone overhead. Also on our website, at the very bottom of the main page, there is this chart that shows key dynamic support and resistance levels. On that day, September 8th, we can see that the resistance zone was in the range of 6,500 to 6,510. And this further increased the probability that one could open a bear call spread from here. Answering the question of whether to hold it until expiration or not. It all depends on how events unfold. For example, if we open a position here or here, and the price immediately starts to fall, this position can be held until the end of the day because there will be plenty of time to make decisions if the price suddenly starts to reverse. If the price starts to decline steadily, then even here this position can be closed for a profit, which in this case would be approximately 40%. I have also already mentioned that when you trade credit strategies, which is essentially what a zero day to expiration bear call spread is, a profit of 30 to 50% is more than acceptable. Let me add a few more words about these dynamic support and resistance levels. During the day, they can change their location. This is explained by the fact that data is updated and changed throughout the day. And if the algorithm concludes that a resistance level needs to be recalculated, it will be recalculated. In other words, if, for example, at the beginning of the day the resistance level is here, the price tests it and starts to fall. And if at this point the algorithm determines that the price should under no circumstances rally back up, then this resistance level may be recalculated lower and it will be assumed that the price will now not break through this range. The main advantage of this chart is that if these levels coincide with the levels on the gamma exposure profile that we have already Identified, this signal is reinforced for us, and we understand that in this example, it would be an excellent place to open a bear call spread. Here we see that the resistance zone is at the 6500 level, and this coincides with the maximum values of absolute gamma. At the same time, despite the fact that the largest positive gamma values were at the 6520 level, we see that the algorithm does not expect the price to reach there, and this level is not marked as resistance. Now let me answer the question of when to close a position if the price moves against us. Imagine a situation where at the beginning of the trading session, the price opens around this level, especially if it happens with a gap. Those who don't see these levels might think the price is extremely overbought and decide to immediately open a bear call spread. Since these levels won't be tied to anything, the price might continue to rise and those traders will start wondering what's going on since everything is overbought, and they won't understand whether they should sit through the losses hoping for a reversal or not. Meanwhile, thanks to these levels, we can clearly understand where to open a position. What I mean is that in such a scenario, we won't make any decisions until the price reaches the resistance level. Even if it happens that the price doesn't touch any of these levels throughout the day, which also happens sometimes, it just means we won't open any strategies, or we might build something neutral, like an iron condor. However, if the price does enter the resistance zone, understanding the full significance of this level, we can open a bear call spread with the closest possible strikes, which makes the position's profile very attractive. In such a situation, there are two options. Either sell a call option in the middle of this range and buy a protective call at the upper boundary of the resistance zone. Or a safer option, sell a call option from the upper boundary and buy one five points higher. In any case, since the strikes will be as close as possible to the current price, we will see a very attractive position profile. And the second advantage, since the strikes will be very close. Even if we see the resistance level starting to be breached and we suspect something is going wrong, we can close this position locking in a minimal loss. When should we close the position? If the price starts to break through the resistance level, imagine a situation where we opened a bear call spread from the 6500 level. The price starts moving higher. But there's nothing interesting above on the gamma exposure profile. I mean, there is no large positive gamma, no large absolute gamma, and figuratively speaking, the price has no reason to go there. In this case, the position can be held because the breakout is highly likely to be false and the price will reverse. However, if there are other significant values above the resistance level, which we can also identify as a second resistance, then in case of a breakout, it's better to immediately close the position with a minimal loss and observe. If the price reaches the next higher resistance level, you can reopen a similar position and with a 90% probability you you will close it at the end of the day with maximum profit compensating for the previous loss. Furthermore, if it happens that the price doesn't have the strength to reach the higher resistance level and it reverses again and starts to decline, then when it moves back below 6,500 you can re enter the trade. In any case, thanks to the gamma exposure profile, we will see the levels from which we can open a trade very clearly and most importantly in advance. Also, don't forget to use the Quant Power Line on the main page of our website there is a chart like this one. It's a standard candlestick chart with all the key levels automatically plotted. Most importantly, it features the quant power line which acts as a compass indicating the direction of the price movement. Friends, if you are hearing about this for the first time, I recommend watching the corresponding playlist where I explain in great detail how all of this works, the principles behind its construction and what depends on what. Specifically, regarding the quant power line, I've already explained that unlike simple moving averages or other traditional indicators, this line is built on completely different principles. Any moving average is primarily a consequence of price movement, not its cause. What I mean is that if the price is rising, any moving average will be pointing upward and will follow the price. The price isn't rising because the moving average is pointing up. In contrast, the quant power line is an indicator of where the price will move. Here we can see that on September 8, the quant power line was at the 6,500 level. Meanwhile, two hours before the market close, the price was around 6,482 and by the end of the day, as expected, the price started rising towards 6,500. I've mentioned before that my favorite way to use the quant power line is in combination with the power zone. Remember, the maximum values of the power zone will coincide with the quant power line. When we look at the power zone, we should visually identify the square containing the largest values. This square represents the range that the price will strive towards and where it will trade most of the time. If it happens that the price leaves the boundaries of the range and reaches a resistance or support level, then this would be the perfect place to open a position in the direction of the power zone's maximum values. In such a situation, either a bear call spread or an iron butterfly strategy would work well where the center is placed at the power zone's maximum values and the wing width does not exceed 10 points. In this case, if the price deviates from the maximum values by 20 to 25 points, you would be risking approximately 6% of your invested capital with the potential to earn 100% if the price closes near the peak values of the power zone. But there's another point. Since we will be constructing the iron butterfly to be as narrow as possible and it will be far from the current price, the position's profile will look approximately like this. And if the price declines, you could close this position for a good profit even before expiration. Now let me show you a couple more examples from recent days where one could have opened a bear call spread. On September 10, statistics were released pre market and the SPX opened with a gap up. If we look at this chart, we see that a few minutes after the market open, the resistance level was in the 6560 range. This is exactly what we were talking about a few minutes ago. We we see a very clear level from which to open a bear call spread. But we need to wait for the price to reach it. In the end, the price reached this level, touched it very precisely, then reversed and the day closed below the resistance level, allowing us to take the maximum profit on this position. Finally, I will show you one more example. This is the gamma exposure profile from Monday, September 15th. We could identify the 6615 level as the resistance. This level had the largest positive gamma values and the largest absolute gamma values. This chart shows that even larger positive gamma values were present at the 6675 level, but they were so far away that focusing on them that day made no sense. Also, if we look at this chart, the resistance zone was at the 6620 level, which further increased the probability that the 661520 range would not be broken to the upside. When the price entered the resistance zone 30 minutes after the market open, a post was written in our community stating that a bear call spread expiring that same day could be considered. From this level, the target for the minimum profit was 30% and a stop loss could be placed above 6,622. Another 30 minutes later a follow up post with adjustments was written which said currently the quant power line is sitting at the 6610 level. The peak power zone values are also right at 6610. I'm still holding the position. I've removed the stop loss 6622 due to the potential for a false breakout of the resistance level, but there are no compelling reasons for the price to push above 6620 at the moment. Four hours later the SPX entered a downward correction and this position returned a profit of over 50%. The post mentioned that if the profit was satisfactory, the position could be closed entirely. However, I closed half of the position and decided to hold the other half a bit longer. Ultimately, closer to the end of the trading session there was an opportunity to close the remaining half with a profit exceeding 80%. But there was something else interesting. Even though the resistance level performed excellently and prevented the price from moving higher on that day, the quant power line and the maximum power zone values were around the 6610 to 6615 level. In other words, while a market rally wasn't expected that day, a significant drop was also unlikely. The day ended exactly at the 6615 level where the quant power line was. Thus, thanks to the gamma exposure profile on all these days we not only saw all the key levels in advance, but also understood their degree of importance. Most importantly, thanks to the quant power line and the power zone indicator, we had an excellent idea of how the price would move and now consider the most crucial point. Despite the market rising over the past week and a half, the gamma exposure profile allows you to demonstrate the highest level of skill and essentially profit from short positions. If you want to always be one step ahead like this, access to the website and the community is available in the description of this video. To conclude, let's briefly discuss the overall market situation and the medium term prospects. The interest rate decision will be made on Wednesday. The general consensus is that the rate cutting cycle will begin in September. Although inflation is slowing down less rapidly than Jerome Powell would like to see, he is now much more concerned about the state of the labor market. The latest non farm payrolls data shows simply terrible figures and this is despite the fact that these numbers are still inflated. According to BLS statistics, the growth dynamics of jobs excluding the healthcare sector also show a terrible trend. The red dotted line represents the average pre pandemic level and you can see the current deviation for yourselves. If we look at job openings, this chart confirms the slowdown in the labor market and we can see a downward trend here as well. It's also interesting to look at this chart. The blue line is consumer confidence and the red line is the inverted unemployment rate. As history shows, these charts correlated fairly well and a drop in consumer confidence ultimately led to a rise in unemployment. Since this process is quite slow, we are now seeing a very powerful divergence. However, given the overall trend currently observed in macroeconomics, we can expect a rather sharp spike in unemployment. If we look at the industrial production index, we see that despite all the support measures, industrial production is not growing and remains below pre pandemic levels. If we look at this chart, we see that the market capitalization of Nvidia and Microsoft alone accounts for approximately 15.5% of the index of a level we have never seen before. Looking at this other chart, we see another incredible value. The top 10 companies now make up about 40% of the index. Now if we examine this chart, the white line represents the SPX and the pink line is the Dow Jones Transportation, often referred to as a mirror of the real economy. Historically, these indices have shown a good correlation. There is a belief within the trading community that when a divergence begins to form here caused by the market rising due to a very narrow group of companies, it is more likely that we will experience a bubble burst rather than the economy growing to match the market's current valuations. It's also interesting to look at this chart which shows the ratio of the spx to the m2 money supply. Generally speaking, the m2 money supply represents the amount of money circulating in the real economy. Figuratively, this chart shows how expensive or cheap the index is relative to the amount of money in the system. This chart has several critical levels, but the interesting point is that since 1960, every time the market became overvalued from the level, a decline began. Even over the last five years, we can see that the pandemic crash and the 2022 correction both started precisely from this level. The only two times in history when the market deviated so significantly from this level were during the dot com bubble formation. And what is happening right now. Friends, I want to emphasize once again the main idea I'm trying to convey in all my videos is that over the past few years, the factors influencing market movements and the ones the market pays attention to have changed significantly compared to what we saw even five years. Therefore, none of these charts can predict exactly which day or even month a crash might begin. They merely describe the overall environment in which the markets are currently trading. By looking at them, we can only state the fact that with a one year horizon, the probability of seeing a significant downward move developing is now higher than seeing the market rally by a similar magnitude of potential contraction. This doesn't mean you need to go completely into risk off mode and start shorting with all your capital. But it does mean that allocating a portion of your capital to bet on a market decline, primarily on the Nasdaq index, truly makes sense from a technical analysis perspective. The SPX is currently overbought. The key support level is at the 50 day moving average. A break below this level could accelerate a downward move towards the 5,800 to 6,000 point range. I'll remind you again, the interest rate decision is on Wednesday. If the rate is cut by 50 basis points, it could act as fuel for a short term market rally. However, from a more medium term perspective, it's still more logical to expect the development of a more substantial decline which could begin anytime up until the end of October. We can only understand the market's movement more Precisely within a 1 day to 1 week interval by tracking the actions of market makers and dealers. Therefore, when we see a sustained move by the price into negative gamma territory, we can say with confidence that a reversal has begun. The second factor to watch closely is what happens with liquidity. And here, by the way, don't forget to keep an eye on Japan. Inflation in Japan is now higher than in the United States and the European Union. It's primarily driven by rising food prices, which is causing significant political discontent. The Prime Minister of Japan resigned a couple of weeks ago and a situation could arise where the bank of Japan raises rates before the end of the year. In fact, this is one of Japan's strategic goals. They want to return rates to 2%. This looks especially interesting against the backdrop of all other major central banks continuing their cutting cycles. The idea is to bring capital back to Japan to support the domestic market. Against this backdrop, the Japanese yen could spike, which would lead to the unwinding of carry trades and could create a situation somewhat reminiscent of August 2024. In conclusion, I'll say that in a few days I will start posting an intensive course on options for you. I highly recommend watching it because it will teach you how to trade options like true professionals. Let's wrap it up here. Good luck with your trading.









