How GEX Predicts Trump's Actions AND HOW TO TRADE IT | Gamma Exposure is the Most Powerful Tool
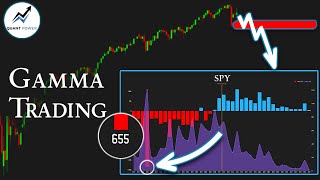
YouTube video by Kardec Trader (Oct 15, 2025) explaining how Gamma Exposure (GEX) and related indicators (gamma flip, absolute gamma, power zone, quant power line) reveal where market makers will act and thus predict intraday and weekly price behavior. The creator walks through many dated SPX and SPY case studies (Sept and early Oct) showing how to identify dynamic support/resistance levels and use them to execute strategies (bear call spreads, iron condors). The video argues that liquidity and market-maker hedging (zero-DTE options) dominate today's market dynamics, making it fragile to shocks (example: Trump's trade remarks), concludes with medium-term caution (possible correction to ~5800–6000), and points viewers to a website/app that displays dynamic levels in real time.
Chapters
Confusion in the financial markets has reached its peak. On Friday, a sharp crash on Monday, an unexpected rally and now investors are faced with a question. Should they buy the dip or will the decline continue? In today's video we will discuss the further prospects and I will tell you how each of you could have predicted this crash a full week in advance. This video will be extremely useful because what you learn today will change your approach to trading forever. In previous videos I have already explained in detail that since 2022 the factors influencing the movement of the stock market have changed. The main drivers now are liquidity and the actions of market makers. This is why the market has long ignored the slowdown in macroeconomic indicators, the QT program, high interest rates, as well as many other historical correlations such as the inversion of the yield curve between 10 year and 2 year bonds. The answer to why none of the negative signals have so far broken the market lies in this chart. It shows that the volume of zero day to expiration options trading is now approaching 60%. In other words, 60% of the options purchased today will be closed today. For comparison, just five years ago this figure did not exceed 15%. The point is that such a volume of zero day to expiration options directly affects the positioning of dealers and market makers, and since they are the main providers of liquidity, their actions will directly influence how the market moves. And today, the only tool that can provide a clear understanding of how market makers will move the market and what they will do is the Gamma Exposure Profile. And before we move on to the main topic of this video, let's take a quick look at a few examples of how this works as a small learning session in our application, the link to which is in the description below this video. Let's open the gamma exposure profile for the SPX on September 8th. We can immediately identify the 6520 level as resistance. This is where the largest positive gamma values are located along with significant absolute gamma values. And since there is nothing of interest above this level, we could interpret it as the ultimate resistance, meaning the price was unlikely to move above it that day. We could also identify the 6500 level because it had the largest absolute gamma values. The nearest support level to the price was in the 6475 range, which is a gamma flip zone. Furthermore, we could identify the 6,440 to 6,450 range as a support area because it contained the largest negative gamma values and significant spikes in absolute gamma. For clarity, let's transfer all these levels onto Our familiar price chart, we plot the largest positive gamma as a green line at the 6520 level. Below at the 6500 level was the largest spike in absolute gamma. And this was also where the highest call option volumes were concentrated. Since this level holds significant importance, we mark it as resistance. One lower, around 6475 is the gamma flip zone. And further down around 6440, we mark the largest negative gamma, which is a support level. However, this level isn't particularly relevant for now because before we can even discuss the price potentially dropping here, it first needs to break downward through the gamma flip zone. Also on our website, at the very bottom of the main page, there is a chart like this that shows key dynamic, support and resistance levels. They are called dynamic because during the day they can sometimes change their location. This is explained by the fact that the data is updated throughout the day. And if the algorithm concludes that a resistance level needs to be reconfigured, it will be reconfigured. In other words, if for example, at the beginning of the day a resistance level is here, the price tests it and starts to fall. And if at this point the algorithm determines that the price should under no circumstances rally back up, then this resistance level may be reconfigured lower and it will be assumed that the price will now not break through this range. The main advantage of this chart is that if these levels coincide with the levels on the gamma exposure profile that we have already identified, this signal is strengthened for us. Here we see that the resistance zone is at the 6,500 point level and this coincides with the maximum absolute gamma values. At the same time, despite the fact that the 6520 level had the largest positive gamma values, we see that the algorithm does not expect the price to reach there and this level is not highlighted as resistance. Thus, within the framework of this example, it was an excellent place to open a bear call spread. Lets look at the next example. On September 10, the SPX opened with a gap up. If we look at this chart, we see that a few minutes after the market open, the resistance level was in the 6560 range. Those who don't see these levels might think the price is extremely overbought and decide to immediately open a bear call spread. Since this entry point would be completely arbitrary, the price could continue to rise and these traders would start wondering what is going on since everything seems overbought and it would be unclear to them whether they should hold through the losses, hoping for a reversal or Not. Meanwhile, thanks to these levels, we can clearly understand where to open a position. What I mean is that in such a scenario, we won't make any decisions until the price reaches the resistance level. Even if it happens that during the day the price doesn't touch any of these levels. This also happens sometimes. It simply means we won't open any strategies, or we might construct something neutral like an iron condor. However, if the price does enter the resistance zone, understanding the full significance of this level, we can open a bear call spread with the closest possible strikes, which would make the position's risk reward profile very attractive. In this situation, there are two options. Either sell a call option in the middle of this range and buy a protective call at the upper boundary of the resistance zone, or a safer option, sell a call option from the upper boundary and buy one five points higher. In any case, since the strikes will be as close as possible to the current price, we will see a very attractive risk reward profile for the position. Here we see a very clear level from which we can open a bear call spread, but we need to wait for the price to reach it. In the end, the price reached this level, touched it very precisely, after which a reversal occurred and the day closed below the resistance level, allowing us to take the maximum profit on this position. Another example. This is the gamma exposure profile. From Monday, September 15th. We could identify the 6615 mark as the resistance level. This was where the largest positive gamma values and the largest absolute gamma values were located. This chart shows that there were even larger positive gamma values at the 6675 level, but they were so far away that it made no sense to focus on them that day. Also, if we look at this chart, the resistance zone was at the 6620 level, which further strengthened the likelihood that the 6615 to 6620 range would not be broken to the upside when the price entered the resistance zone. Thirty minutes after the market open, a bear call spread expiring that same day could have been considered from this level. Four hours later, the SPX moved into a downward correction and this position brought in over 50% profit. But there was something else interesting. Despite the fact that the resistance level worked perfectly and prevented the price from moving higher on that day, the quant power line and the maximum values of the power zone were in the 6610 to 6615 area. In other words, a market rally wasn't anticipated that day, but a decline was also unlikely in the end the day closed exactly at the 6615 level where the Quant power line was located. On September 18, the day after the Fed lowered the rate, the market opened with a gap up and during the first hour the SPX showed upward momentum. From the perspective of classical technical analysis, there were no reference points. The market had just updated its historical high and above the price. There were visually no levels or even a trend line that we could perceive as resistance or a growth target. However, if we open our application and look at the gamma exposure profile, the situation was extremely clear. Moving from bottom to top, we see that the key support level was located in the 6590-6600 range. These are the largest absolute gamma values and the gamma flip zone was also located there. The nearest resistance level was at the 6650 mark. These are the largest positive gamma values as well as significant absolute gamma values. We also see that even larger values were present at the 6700 level. This level could also be designated as resistance. But that day, since it was very far away and there was significant resistance at 6650 in its path, the price would not have reached it. For better clarity, we can plot all these levels on a classic price chart. Since we understand that the price has virtually no chance of rising to 6700, we ignore this level. The 6650 level represents large positive gamma values on the chart. This is marked with a green line labeled P1. Also, at 6650 were the second largest absolute gamma values on the chart. This is shown as a purple dotted line and labeled AG2. Furthermore, this level had the highest call option volumes, so we designate it as Resistance 1. At the 6600 level, we find the largest absolute gamma values on the chart. This will be a purple dotted line labeled ag. This level also had the highest put option volumes. At the 6590 level, we see the largest negative gamma values which are marked on the chart with a red line labeled N1. Additionally, this level was reinforced by the gamma flip. After we have plotted everything, we can see a very clear picture of where the price is relative to the key levels. Furthermore, on the chart showing the dynamic support and resistance levels, the resistance zone coincided with the level we previously identified on this gamma exposure chart. In the end, the day closed below the resistance level and a bear call spread opened from that level would have yielded the maximum profit. Using just the gamma exposure profile and the dynamic support and resistance levels chart, traders can already perfectly assess the market situation and Create an Action Plan in Advance the entire philosophy of our website is built on the idea that analyzing the market situation should take no more than a few minutes and be as clear and understandable as possible. We immediately see all the important levels and understand how and in which direction the price should move. However, this application also allows us to track market anomalies and warns us when it's not worth entering a trade. An example of such a day was Friday, September 19th. If we look at the gamma exposure profile from that day, it looked like this. Let's plot all the key levels on the chart. We could identify the 6650 level as the nearest strong resistance. This is a significant spike in positive gamma as well as the largest absolute gamma values. At the 6620 mark was the gamma flip, and slightly lower at 6610 were the largest negative gamma values. We could designate this range as support, but since the price was near the resistance level at that time, our primary interest should have been what to do specifically with this level. This level also coincided with the resistance range on this chart, which further strengthened it. We see that right at the beginning of the day it already caused a downward reaction. However, the price approached the resistance level again. Under normal circumstances, this would have been an excellent place to open our favorite bear call spread. However, there was a nuance. The issue was that on that day, the quant power line ran exactly along the resistance level. This created a situation where on one hand we had a level acting as resistance which had already triggered a downward reaction at the very beginning of the day. On the other hand, this same level was the target that the price was striving to reach. Therefore, opening short positions from that level, such as the bear call spread, made no sense. This could have been considered if the price had risen to a higher resistance level while the quant power line remained below. But since there were no clear signals for either long or short trades, it was better to refrain from trading that day. Unlike the previous example, trading was significantly easier on Tuesday, September 23rd. The day opened at the 6690 mark, right in the gamma flip zone. This zone itself was perceived as strong resistance, but slightly higher at the 6700 level was the largest spike in absolute gamma. This further reinforced the area as resistance and we immediately understood that the day was clearly not on the bull side. As a downside target, we could identify the 6650 level. This was the largest negative gamma and the second most significant absolute gamma. If we look at this chart, even at the Very beginning of the trading session it showed a key resistance level around 6700 and a support level at 6650. Seeing such clarity in the levels, the entire market analysis and movement forecast would have taken no more than two minutes. From the resistance level, one could confidently open short positions. And considering that a move below the gamma flip would accelerate the downward momentum, a price drop to the support zone could be expected. In the end, if we look at how the day closed, the price movement was simply perfect. The price moved from one level to the other and during the downward move the price encountered no obstacles. Lets look at another example. This is the gamma exposure profile. On Wednesday the 24th, a couple of minutes after the trading session began, the SPX was around 6,670. This was also where the gamma flip zone was located, meaning that if the price dropped below 6,665 the downward movement would accelerate. An additional resistance was the 6690 level. This was where the largest positive gamma values were. If we look at this chart, we can see the day had just started with only the first candle formed. So far we see that the algorithm calculates a resistance level around 6690 which the price is unlikely to exceed and a support level around 6620. However, since the price is in the gamma flip zone, I would also take this level into account which runs approximately like this. It immediately becomes clear that the day will favor the bears. This is evident even from the number of resistance levels above. Against this backdrop, a very simple trading idea emerges. One could consider short positions here with the nearest target being the support level around 6620. In the end, in less than three hours, the price reached this level. Another example. This is what the gamma profile looked like on Monday September 29th. Among the key levels, we could immediately identify the 6645 range. This was the gamma flip zone acting as Support and the 6670-6675 range. That's where the largest positive gamma values as well as significant absolute gamma values were located. We could immediately mark this level as resistance. The day opened near it and during the first hour and a half of the trading session, the price tested this level several times. At that time, a post was written in our community stating from the resistance level I am considering opening a bear call spread. In the end, the price moved down, tested the gamma flip zone and the bear call spread closed with maximum profit. Tuesday, September 30th was the most contradictory day in the last two months. The SPX opened at the 6,655 mark. The nearest support was at the 6,650 level. This was the gamma flip zone and a large spike in absolute gamma lower at the 6600 level were the largest negative and absolute gamma values. The largest positive gamma values as well as significant absolute gamma values were at the 6700 level. We designated this level as the main resistance just in case. We could also mark the 6665 level as intermediate resistance because a negative gamma island was observed here. When Transferred to the TradingView chart, these levels looked like this 6650 is the nearest support, 6665 is the intermediate resistance and the main resistance was around the 6700 point level, which was additionally reinforced by the maximum call option volumes for an hour and a half. The price repeatedly tested the gamma flip zone and the following post was published in our community. Since the gamma flip is always strong support, we can see that this time too the price attempted to bounce off this level several times. However, given that the overall market backdrop looks quite weak, these upward bounces failed to develop into anything more significant. The price is now testing the G flip again. I've decided to open a slightly more aggressive position betting on the probability of the support level being broken in the end. Towards the close of the day the price did start to rise and the day closed near the resistance level. My position closed at a loss and the next day I wrote this post yesterday. After a long battle for the gamma flip zone, the market eventually surged upward towards the end of the trading session and closed near the resistance level. This move was not a priority and even by the end of the day there were no objective justifications for this rally. The Resistance 1 level which was marked on the chart even before the market opened was perceived in this case not as a target for the market's upward movement, but rather as a level from which countertrend strategies could be initiated should the price indeed reach it during the trading session. The situation became even more interesting when in the post market the entire gain was wiped out and the price dropped below the day's lows. On the other hand, the overall market dynamics in recent days suggest that it is being propped up from declining rather than preparing for a new bullish rally. Speaking of more medium term prospects, the period from October to November is likely when we will see the development of a more substantial correction. Now that you understand how the gamma exposure profile works, let's move on to the most interesting part and I Will show you how it was possible to predict the market decline several days before it even started. To do this, we need to look at the spy. The thing is, for intraday trading, it's better to use the SPX because it's a more liquid asset with narrower strike steps. The SPY is good for establishing weekly levels and determining the price movement range. What I mean is, on Monday, when analyzing the spy, we select all five expiration dates and determine the key weekly levels. Meanwhile, the SPX will show how the price will move within any given day during the week. In other words, the SPY can signal that a crash will occur within a week or two. But before it begins, the price might rise or trade sideways for several days. We can track these movements precisely using the daily gamma exposure profile on the spx. If any intraday level on the SPX coincides with a level on the spy, it will be reinforced. Right now we are looking at the gamma exposure profile for the SPY with expiration dates selected from Monday through Friday, October 10th. The key points are. The 675 level is a weekly resistance because it has the largest positive gamma. The 670 level is the nearest support because it has the second largest absolute gamma. The 666 level is the gamma flip level and a break below this level will be a serious signal for a trend change. As the primary downside target, we can identify the 655 level. This has the largest negative gamma values as well as the largest absolute gamma. Let's take a look at the TradingView chart from Monday, October 6th and plot all the key levels. We designate the 675 level as key resistance. This is the largest positive gamma. The nearest support is at the 670 level. This is the second most significant absolute gamma. The 666 level is the gamma flip level and the main support is at the 655 level. Looking at this chart, we see that there are many more important values below the price than above it. And this already indicates that they will pull the price down. Also, in quantitative terms, the negative gamma values are much larger than the positive gamma values. I want to remind you of a very important thing. Positive and negative gamma are not just red and blue bars. They are an indicator of how the market maker will act when the price is in the territory of positive gamma. In other words, when it is surrounded by blue bars below and above, it means that the market maker will act as a market stabilizer and will reduce volatility. What I mean is when approaching support levels, for example, the gamma flip Zone, the market maker will buy when approaching resistance levels, for example, the largest absolute or positive gamma values. If they are above the price, the market maker will close positions. Therefore, in positive gamma territory. When approaching a resistance level, I recommend primarily betting not on the price potentially falling sharply from this level, but betting that this level will not be broken to the upside, for example by opening a bear call spread. In this case, it won't matter to us at all how far the price falls or if it falls at all. The main thing is that it does not go above the breakeven point and in this scenario the position will bring the maximum profit of 100%. Naturally, since a bear call spread is a credit strategy, we will earn less on it than by building a directional strategy. However, in positive gamma territory, it will be much more justified and safer. When the price is in negative gamma territory, the market maker will act in the diametrically opposite way. He will sell into a falling market and buy on bounces from support levels. This will lead to increased volatility and market movements will be quite fast and impulsive. Returning to the spy chart, if we look at the distribution of absolute gamma, we also see that the largest values were predominant in the negative gamma territory and were located below the price. Thus, as early as Monday we understood that the week would be bearish and the price could drop to the 655 level. By the end of Friday, the price had indeed fallen to this level. However, besides the weekly spy levels being realized, the SPX very precisely followed its intraday levels. For example, on Monday, October 6, the gamma profile looked like this. At the 6750 level, there were large absolute gamma values and this was also where the maximum call option volumes were concentrated. This level acted as resistance and since the price was near it, the main question was whether this level would prevent further price growth or if it could be broken upwards. The situation becomes clear using the power zone indicator. Based on the distribution, we see that the price has no reason to rise above 6,750 because the power zone values decrease very significantly. By the way, if you are hearing about this indicator for the first time, be sure to watch the playlist dedicated to this topic. You will find answers to all your questions there. For example, when discussing the quant power line, I've already explained that it serves as an indicator of where the price is likely to move. This line coincides with the maximum values of the power zone. When we look at the power zone, we should visually identify the square that contains the largest concentration of values. This square represents the range where the price will tend to gravitate and where it will trade for the majority of the time. If the price happens to move outside this range's boundaries and reaches a resistance or support level, that becomes an ideal location to open a position targeting the direction of the power zone's maximum values. As I mentioned earlier, the quant power line aligns with the peak values of the power zone and this is by design. The reason is that this line acts as a guide for the price's intended direction. However, the quant power line can sometimes reconfigure during the trading day. Meanwhile, the power zone values themselves update with every page refresh. Therefore, if you refresh the page and see in real time that other power zone values are starting to increase, you will know in advance where the quant power line is likely to shift. We can also look at this chart and see that the algorithms highlight the 6750 range as the final resistance. Considering the combination of these factors, we could safely open a bear call spread and by the end of the day, the price indeed did not move above the resistance zone. On October 8, the day wasn't particularly interesting. The price also reached the resistance level calculated by the algorithms and couldn't break it. A bear call spread from this level also yielded maximum profit and this is what happened on Thursday, October 9th. This pattern is already familiar to many and is known for the fact that when there are negative and positive gamma values of equal significance, an Iron Condor can be set up using these levels right from the start of the trading day. Because the market maker will strive to keep the price within this range. If we transfer these levels to the working chart, there will be two very clear levels. 6775 is resistance and 6720 is the support level. During the day, the price perfectly tested the support level. The day closed within this range and the Iron Condor yielded maximum profit. On Friday, the crash began and since it took on elements of a Black Swan event, there wasn't much point in looking at intraday levels. Therefore, thanks to the gamma exposure profile, we not only see all the key levels in advance, but also understand their degree of importance and have a clear picture of how the price will move not just during the day, but over the span of weeks. If you also want to stay one step ahead, access to the website and community is in the description of this video. In conclusion, let's discuss the overall market situation and the medium term prospects. Undoubtedly, the most significant event in recent days was that on Friday, Trump escalated the trade war with China, promising to impose 100% tariffs on all Chinese imports starting November 1. The markets reacted to this with a powerful intraday crash to avoid making the situation worse. On Sunday, just hours before the start of the Asian trading session, Trump stated that everyone had misunderstood him and there was no need to worry about China because everything would be fine. On one hand, the market often does fall for Trump's provocations, who sometimes makes sharp statements merely to start negotiations from a position of blackmail, leaving himself room to retreat later. On the other hand, what happened on Friday once again confirmed the theory that the market is currently very narrow and extremely overheated. Any bit of turmoil is enough to trigger a mini panic approximately once a month I show you this chart. It's the SPX divided by the M2 money supply. In other words, this chart shows how expensive or cheap the market is relative to the amount of money in the system. It's clear that throughout the history of this chart, every decline began from a level where the market was considered extremely expensive. The only two times this level was broken to the upside are now and during the formation of the dot com bubble. I've already explained that in today's reality, indicators like the spx divided by M2 or the Buffett indicator, which is also in the realm of unprecedented values, are indeed losing their relevance. This happens because the principles governing market trading have changed. I discussed this in great detail in this video. The key change is that in the past there was no mania for trading zero DTE options and no mania for investing in passive instruments like ETFs, let alone leveraged ETFs. The point is that when you buy a call option, the dealer who sold you that option is forced to hedge their position and buys real shares equivalent to the delta of the options they sold you. I mean, if you bought a call option with a delta of 0.5, the dealer will buy 50 real shares. One options lot contains 100 contracts. If the stock price increases by $1, your profit will be $50 because a delta of 0.5 means you earn $0.50 per option for every $1 price move. And since you have 100 options, 100 multipl shows your profit is $50. The dealer is obligated to pay you this profit and precisely to avoid paying out of their own pocket. The dealer will sell the 50 shares which also increased in price by $1, realize a profit of $50 and transfer it to you. Thus, it is the dealers and market makers who exert a primary influence on market movements, and it is Their actions that the gamma exposure profile tracks. If buying dominates the market, the price will remain in positive gamma territory and the largest values located above the price will indicate where market make close their positions. At first glance, this seems like a vicious circle. If everyone buys call options, the market maker will constantly have to inject more and more money into the market. And under such a scenario, the market would always rise. In the past, things were indeed different. If stocks were too expensive and investors lacked the real money to buy actual shares, they simply didn't buy them, which is why a decline would start from a resistance level. Nine times out of ten. Now, the rules of the game have truly changed, which is why such indicators are losing their relevance. However, even though they cannot predict with precision to the week or even the month when a market reversal might occur, we still need to monitor them. They serve as an additional confirmation that the market is currently very thin and even a minor extraordinary event can trigger a panic sell off. The past Friday is a perfect example of this. If the market starts to decline, it quickly leads to a rise in the vix. Consequently, options become more expensive, fewer traders buy them, which means the market will fall even further. Since the dealer holds a huge number of shares and the previously sold call options are now unlikely to expire in the money, they start selling these unnecessary shares into a falling market, leading to an even more rapid decline. Therefore, while this indicator cannot pinpoint exactly when a decline might begin, given the levels it is currently at, it suggests that if dealers start mass selling the shares they have been buying all this time, the M2 money supply might not be sufficient to quickly absorb this sell off. But the most interesting thing is that, as we discovered today, last Friday's decline only created the superficial impression that it was unpredictable, as if nothing would have happened if Trump hadn't made those statements. Today, we found out that market participants were prepared for it a week in advance, with very clear levels outlining how far the market could fall and from where it would be bought back. This even lends itself to conspiracy theories, suggesting this might have been a kind of stress test to see how the market would behave in an extraordinary situation. From a technical analysis perspective, the most critical support level is the 50 day moving average, which the market had held above for a record 114 sessions. Algorithms also typically move their stop losses along the 50 day ma, and a drop below this moving average would lead to more substantial selling. On Tuesday, the price tested this moving average as well as the lower boundary of the ascending channel. So far we've seen a bounce from these levels, the question is whether this will be enough for the market to stabilize above the 20 day moving average by the end of the trading week. If the market fails to hold above the 20 day moving average, the risk of further consolidation or correction will increase. In the medium term, there is a high probability of a test of the 5800-6000 level. What happens after that is still unknown. The market might still have enough strength for another rally to new highs followed by a larger sell off. Alternatively, it might bounce briefly and then continue its decline. It's premature to discuss this now. We first need to see the initial touch of that level. Currently, two main factors continue to pressure the markets. The first is the potential escalation of the trade war between the US and China. Yesterday, China's Foreign Minister stated that China is prepared to fight to the bitter end if the US decides to continue the trade war. Understanding that another hawkish speech could crash the markets again, Trump responded very restrainedly, saying that the US would not buy vegetable oil from China because the US is capable of producing it itself. Nevertheless, even this was enough to cause a slight dip in the market before the trading session closed. The second factor is the ongoing government shutdown. While it continues, important economic statistics are not being published for a while. Investors might perceive this as a positive under the logic of no statistics, no problems. However, sooner or later we will receive a huge backlog of data which could cause significant volatility. I am recording this video just minutes after the market open and the algorithm calculates that the key resistance level is in the 6725 to 6735 range. As the price approaches this range, a countertrend trade can be considered. That's all for now. Good luck with your trading and see you in the next videos.









