The Only Sure Way to Draw Supply and Demand Zones | How to Use Gamma Exposure profile | lesson #4
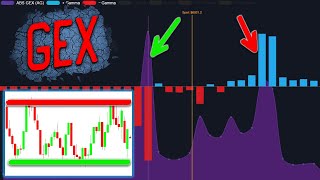
Kardec Trader shows how to use gamma exposure profiles to find intraday support and resistance zones, then pick option strategies. Iron Condors work when large gamma sits above and below price. Iron Butterflies and directional trades work after a confirmed breakout tests support on the 5-minute chart.
Questions this video answers
Jan 29, Jan 23, Feb 5, Feb 20, and Mar 6.
Resistance ~6,100; support ~6,025; gamma flip zone 6,050–6,060.
On the speaker's community website (members have access).
Chapters
With these videos you will learn to understand the gamma exposure profile, learn how to build gamma levels, what signals they send us, understand what primarily affects price movement and learn how to make money from it. In previous lessons we have considered a signal that will indicate that you can safely take a long or short position. We have analyzed the signal that will indicate that it is possible to open a long position to break through the resistance level and a short position to break through the support level. We have studied the signals for a market reversal when it is possible to open a short from the resistance level and a long from the support level. In the same video, we will look at the signals in which we expect the price not to rise above a certain level and not fall below a certain level. Well, let's go straight to specific examples because it will be clearer this way. This is a chart of the gamma levels at the beginning of the trading day on January 29th. What primary conclusions could we draw for ourselves? If you have carefully watched the previous lessons on this topic, then you already understand that the strike of 6,100 points had the largest values of positive gamma. There were also large values of absolute gamma. This is the purple zone and plus the largest volumes of call options are located there. However, if we look at absolute gamma, this is the purple zone, then we cannot say that it dominates at this level. We see almost identical values at 6100, 6070, 6050 and 6025. The price is in the gamma flip zone of 6050 to 6060. This is resistance and there at around 6060 there were quite large positive gamma values that day. I wrote that if the price overcomes 6060 and ideally still tests it as support on a five minute timeframe, then the path to 6090 to 6100 will open. But for now, the simplest thing to do is to highlight the daily range of 6,100. This is the resistance level and 6,025 points is the support level. Because the largest negative gamma values were located there and the largest absolute gamma values were located there. That is, we have identified the levels above and below which the price should not have gone that day. It was possible to open the Iron Condor on these levels. And that's exactly the strategy we've discovered. The position profile looked like this if we look at how events unfolded that day. Then during the trading session, the price repeatedly tested the gamma flip level and as a result the price was unable to break through this level up again. You remember the previous videos where we Discussed that the gamma flip will always be a powerful level of support or resistance. At the end of the day, the price did not go beyond the support and resistance levels and the position was closed with maximum profit. Another example is February 20th. The day started with a drop and an hour after the market opened. The gamma exposure profile looked like this. The price was in negative gamma exposure and at that time we could identify three key levels. 6100 was the level with the maximum values of absolute gamma. It was also the level of the second highest values of negative gamma. But since at that time the price was already near this level, we were interested in where it could go further and where it should not eventually reach. As a strong support level, we could single out the level of 6080. These are the largest values of negative gamma. And we also see that negative gamma falls sharply after this level. And it made no sense for the price to go below this level. Well, as a resistance level, we could single out a range of 6,125 points. This is the gamma flip zone. In this situation, we could have acted in several ways. First, when the price approached the level of 6080 to 6085, it was possible to bet that this level would act as support and the price would not fall. I talked about this in this video. Secondly, we could wait for the breakdown of the 6100 level and open a long position with targets of 6120 to 6125. This is the gamma flip level. But there was also another way we could have done it. Since we have already identified the support level of 6080 and the resistance level of 6125, we could open the Iron Condor at these levels and the position profile looked like this. As a result, the price tested 6080 as support several times during this day. This level did not let the price go down. But the day closed around 6115 and the price did not go beyond the expected range. A good time to open neutral strategies is when there are large absolute gamma values below and above the price as well as large positive and negative gamma values. An example of such a day was February 5th. At the beginning of the trading day, the price stood between two very powerful levels of 6,000 and 6,060 points. I think it probably doesn't make much sense to explain the reason why these levels were important. Let's just say that using these levels, it was possible to build an Iron Condor just in case. By slightly shifting the wingspan beyond the support and resistance levels by literally 5 to 10 points. If we look at how that day went, then in the end the price did not go beyond these ranges. The situation was similar on January 23. There were key levels of 6,055 and 6,120. It was possible to open Iron Condor on these levels. As a result, even though the upward movement accelerated sharply in the last 10 minutes of the trading session, the day still closed inside this range. And if you had held this Iron Condor until the end, it would have brought maximum profit. Well, let's show you another interesting situation using the example of posts from our community. It was March 6th. This is what the gamma exposure profile by SPY looked like at the beginning of the day. The price was near the gamma flip zone. The maximum absolute gamma values also passed on strike 580 above this level, we can see how positive gamma as a whole was growing. And there was such a thought that if there was a breakdown of this level, the way would open to 585 and then 590 as support levels. We could single out for ourselves the first 575, which is the level with the second highest negative gamma values. And it is also the level with the largest put volume values. And the second even stronger support level is 570, which is the largest negative gamma value on the chart. All these levels looked like this. On top, the yellow zone is the gamma flip zone. The same level was perceived as resistance. And there was such an idea that if a breakdown of this level took place, the way would open to 585 and then 590. But so far this is precisely resistance. We already talked about this in more detail in this video when we discussed strategies for breaking levels. But the thought at that moment was this. If SPY were to break through 580, I would take Iron Butterfly on SPX with a maximum profit of 5,845 points. Why was the goal at this level? Because on the SPX it was the gamma flip zone where the price would continue to rise in the event of a breakdown of the resistance zone. By the way, you probably noticed that we were currently looking at SPY and making a decision on spx. There is no sacred meaning here. The levels roughly coincided. That is, roughly speaking, 580 for spy corresponded to 5,800 for SPX. It's just that the picture on SPY was more vivid and cleaner that day. Once again, if we look at the SPX now, it even seemed at the moment that the resistance level was breaking through. But there was no breakdown on SPY and the levels looked more Beautiful. The second option that could have been done that day was if the spx price reached 5775, which was the level with the maximum values of negative Gamma and the maximum values of absolute Gamma, then Iron Condor could be opened by spreading its wings at 5705 from below and 5855 from above. Why was there such an idea? Because these levels were strong support and resistance zones above and below which the price should not have gone that day. And if the price had dropped to 5,775, it would have been exactly in the middle of these levels. As a result, since the resistance level was not broken and the price went down, the Iron Butterfly option disappeared automatically. However, the Iron Condor, which was opened from the 5775 level brought in 100% by the end of the day because the price did not go beyond the target range. Let's also answer any questions that might arise that day. Why wasn't the option of short positions from the 580 spy or 5800 spx level considered? If these were resistances, 580 spy was the gamma flip level followed immediately by good positive gamma values. Although the level was a resistance and the price went down from it at that time, it would be more logical and correct to wait for the breakdown of the level and bet on growth than on a reversal. 5800 on the SPX was also a resistance, but at 5775 there was a strong level in the form of negative Gamma which could act as support. Thus, the spx short from 5,800 was also not justified. Why was the option of long positions from the 5775 level not considered when there was a pullback to it? 5,800 has already acted as resistance and given the proximity of this level, an upward movement could be difficult. One more question. Why were short positions not considered for the breakdown of 5775 with a target of 5710?
Negative gamma values were high at 5775 and there was no certainty that they would send the price down significantly. Another why were long positions from the 5710 level not considered? The answer is why? If there is an Iron Condor, as a result, when the option of breaking through the 580 level on spy or 5800 on spx did not take place, Iron Condor turned out to be a justified strategy that brought 100% profit at the close. In conclusion, I will answer another question that may arise and where to get all these values. All this is on our website. All members of our community have access to it. And there you can look at these parameters in real time. And not only using SPX, you can watch shares of ETFs and much more. And on this site, in addition to the parameters described above, there are also graphs on which these values are plotted. And there are graphs that show key support and resistance levels. But we will have a separate lesson about this later.









