Loma Risper shows how to edit a fragrance label template in Photoshop 2019. Replace the text layer "Million" with "Red Her," center it, then save as JPEG with maximum quality. Import the file into Word via Microsoft Image Composer to create a printable label.
Chapters
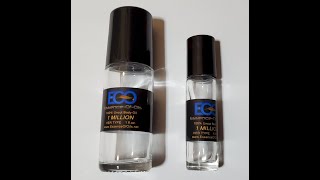
Hey everyone, here's a quick tutorial I made for my client to edit the custom label template I made for him. Okay, here's the tutorial on how to use Photoshop to create your new label for your new product fragrance that you have. First step is to open up Photoshop and see that it's all blank like that. And the next step is to pull up your folder with the templates, and let's work with the 1 oz label for the Her set of labels. And then that, when you double-click on it, it should open up in, in Photoshop. Normally I have— this is the only program where I actually have to open up Photoshop first and then I can pull up the file. Otherwise it'll act like I didn't ask it to open up the file. But here's your label, and the first step you're gonna do is you're gonna take the— choose the Select option on the left side. Actually, you're gonna click on the Text option right there, and then you're gonna come over here to the right side and you're gonna choose the layer which is going to be the Million because that's the only name that we're going to have to change in your label. The, the picture is going to stay the same, the 100% uncut body oil stays the same, the herd type stays the same, the 1 ounce, 1 fluid ounce stays the same, and the website stays the same. So the only thing that's going to change is the Million part. So you just go in here, you click on it one time, and then you can delete the actual Label. I have it in all caps, and we can call this— the fragrance is called Red Her. I know, super creative. But as you see, once you type it, it's not centered. So the next step is to center it, and you first you have to click on the Selection button up here on the top. Once you click the Selection button, you're going to want to come back here to your layers, and the first layer that you choose is going to be the one that is basically like the main one that it's going to, um, that it's going to line up with. So you're going to choose the black background, and then you're going to hold the Control button down, then you're going to click the million points. So give me just a second to do that. So I press the Ctrl and I'm clicking the million. So now we've got both of them selected. And then if you look at the top, you'll see the alignment options, and you'll choose this one right here, Align Horizontal Centers. Once you click that, look at the two overall And you see how that scooted over the red HER? Now you're all set. All you got to do is go in and save. Go to the File, Save As, because we want to make sure we save it under the new name. You're going to go into your 1oz HER folder, and then you're going to change the file type the format, you change that from Photoshop to JPEG, this first one. And then you see it's going to be the same file type as the other items, and all you gotta do is, is relabel it according to the same as the way the other ones are labeled. So in this case, we'll delete all of that. And so the format is 1 ounce her, and then space, dash, space, space, red— oh my bad— red her. Alright, once you've typed it in, the name is all good to go. Press Save. You'll get a pop-up here that says JPEG Options. Leave everything as is. Make sure that yours look like this as well. All the settings of quality, maximum, baseline standard, preview, and then this should be the file size. I don't think it's going to change from label to label. And just press OK. Now you're good to go. So if you go back here into your folder, you'll be able to click on the 1oz her. And let's see, what did we name it? Red her. There it is. And when I double-click on that, I use Microsoft Image Composer. So there is the label, the new label. And you literally, same as before, right-click, copy. Copy, and then you paste it into the Word document with the labels, which is the same way you were doing all the other ones. All right, and that's all there is to it. Let me know if you have any questions. Bye! If you want to see more videos like this, make sure you hit the like and subscribe. Until next time!