CheckIn CheckOut Instructions
Mary Kostka walks through daily front-desk tasks in Heno: checking patients in with one click, checking them out by adding procedure codes from therapist slips, handling cancellations, and using Ready for Checkout to save codes without finalizing. Payment collection is covered separately.
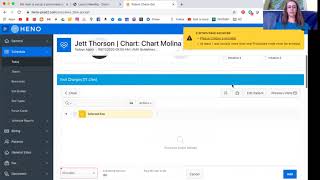
Okay, so I'm gonna teach you guys how to do the check in and check out in the Heno schedule. So this is something that we do every day. And I'll just kind of go through it. So you guys have this for reference. We're gonna be looking at Jet right here and Chase also. So patient comes in. As soon as they come in, we'll click on the appointment to check them in. So if you click on the appointment, this little window will pop up and then you'll just click the check in the blue check in button at the bottom here. So we'll click that. If they have a copay, the copay will show up in this little bar here. Jed doesn't have a copay, but sorry, it'll show up right here. And it's not showing up for him because he does not have a copay. This is also where you would enter payment if you collect a copay at the visit, but we can practice that later. So once this window comes up, you'll click the check in button again and that'll complete the check in process. So we'll click that. Awesome. And he came in at the same time. So this is when I would check him in also. So same thing here. He also doesn't have a copay. So we'll click check in. It's basically clicking these two buttons to check them in. It's very straightforward. So that's pretty simple there. And the checkout process is a little bit more complex only because we're billing the codes for each of the patients. So I have those slips here that I got from the therapist. I guess I'll turn on the video so you can see the pink slips here. I know it's going to be backwards. You probably can't see them super well. But the codes are on here. So that helps us know what we're billing and what codes to add in to check the patient out. So I'll grab jets first. So we'll click on jets appointment again, we can still see here, I guess the box in the corner. My. My little window here is probably really small, so you probably can't see it. But this is the checkout button. Supposedly it's a stethoscope. Picture of a stethoscope. So that's what you'll click to check out. And you can see it says, enter edit treatment code. So that's where we're going to enter the codes that the therapist tells us on the slip here. So we'll click that button. That takes us into the Area where you add codes. The first thing you want to do is scroll down to select the provider. So in the provider it's always going to be Mary. So just select Mary. It won't let you check them out if no providers selected. So you. You will get an error message if you don't select them. I'll show you. So you don't have codes entered either. So it'll also give you an error for that. But you click checkout and it says error. Please choose a provider. Also, at least one code procedure code must be entered so it won't let you check them out if you don't have the provider selected or have any codes entered. So I'll select Mary. And then on this slip, Jen circled the four units of therapeutic activity. So you can click on the number of units that you're going to bill. So I'll select four. And then there's these quick buttons that you're gonna. You can use. You can also select the code from this menu. I find it's easier to use the quick click buttons. So you'll find the therapeutic activity and click and it'll add the four units right there for you. Always double check your work just to make sure you're building the correct codes and the correct number of units so we don't accidentally bill too many units. Like for example, if I, if I were to click this again, it would bill another four units. So you can see it changed that to eight. So I don't want that. If you accidentally do that, you can just go in and edit. Click the edit button and we'll just change that back to four so that we don't accidentally build too many units. And then you always have to apply the changes to save your any changes that you make. Okay, so we got four units therapeutic activity providers selected. And then we'll scroll down and click the checkout button. Perfect. And then once you get to this window, this is just. This will always come up when you need to check patient out. You can. It never hurts to double check your work or triple check. So I always kind of glance up here for units. Yep, I did that right. And then just click back and that'll take you back to the schedule. So we'll do Chase also. And I'll click the stethoscope. It looks like he has an action item. So some. Sometimes this will pop up in the schedule and it won't let you check a patient out until you've addressed any action items that are listed. Usually these are because of the cancellation. So if the patient cancels a visit, it's just alerting us to acknowledge like, hey, this person had a cancel. Are they aware of the policy? Have you gone over the policy with them? And again, it won't let you check the patient out until you acknowledge that. And I will show you what that does just so that you can see what to do in that situation. So select Mary. This one's a little different. Orlando is billing 4 units therapeutic activity, just like the last one. So we'll add that four units there. And then he's also building billing the reedal code. Just one unit. So the 97168. So we'll click the re eval. Can't hurt to double check your numbers. So I'm looking here. 97168 re eval. Okay, that's a good code. Four units. Okay, good. And I'm gonna go to checkout again. Like I said, it's gonna make me acknowledge that action item. So click check out. One action item must be completed before you can check the patient out. So the action items will show up here. You also saw that alert here. You can click either here or here and that'll let you know what the action item is. Cancellation. So they canceled last week. I remember he was sick so we didn't want him to come in. So we don't. We're not going to be charging a fee and it says waived fee. But it's just making sure that we know we've gone over with the patient the expectations. So typically you'll just mark it as complete. That'll allow you to check out the patient. If it's say we did charge a fee and we need to or we need to collect a fee, but for some reason they're not able to. Hey, today we can do next visit and that way it'll let us check out for this appointment, but it'll show up again at the next visit. So I'm just going to mark this as complete and then apply changes. Okay. So no action items are showing up anymore. So we should be able to check out the patient so we could check him out. Another thing that sometimes happens is either, well, I guess if you don't want to check them out or you need to double check something with a therapist, code related something with the therapist before you are certain that they're ready for checkout. You can click ready for checkout and that saves all the codes that you have entered in but doesn't actually finish the process of checking out. So we'll click that just to show you what it's like. And you'll see, you can always see the initials of what status they're at. So these patients are checked out. CO Is checkout. This one now says rfc. So that's ready for checkout. If you check in a patient, it'll say CI, and that's check in, checked in. The T stands for telehealth. That's what that is. So we can go ready for checkout. I guess I'll show you that one more time. So if a patient is marked as ready for checkout, such as Chase, to go complete that process again, you'll click into his appointment and click ready for checkout. And that'll take you back to the code window here. And we can see it saved all the codes that we entered before. Still has the provider in there, and then we can check him out. Sweet. Okay, so there's that. I will do another video on copays and collecting payment, because that is kind of a more involved process to some degree at least. Right now we're working on getting it integrated into hino, hopefully soon. So hope this is helpful for reference. And yeah, thanks for watching.