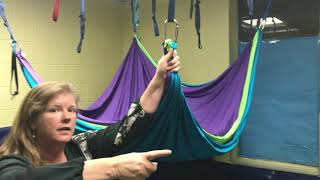
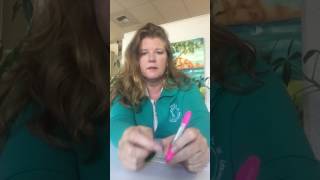
Mary Kostka shows how to build a sensory swing from spandex fabric. You need three layers of dancewear fabric from Joann's, rock-climbing carabiners, webbing, and an eye bolt screwed into solid wood. The swing provides deep pressure and proprioceptive resistance for kids.
Questions this video answers
Three layers.
Two yards per layer.
Dancewear/swimwear (spandex) fabric (sold at Joann's).
About $18 per yard (before coupons/sales).
Square knot (left over right, then right over left).
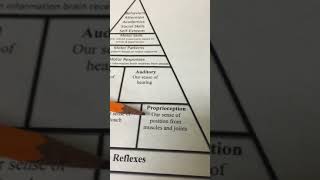
Hi, Mary Koska here with Ohana ot. And today I'm going to show you how we make our spandex swings. So this is a favorite swing here at Ohana. It's made from fabric that's called dancewear swimwear. It's super stretchy, stretches in all directions. We get it from Joann's. You can get it at the store or online. And we always do three layers, and each layer is two yards of fabric. And with three layers, it's super bouncy when they're in it, and then they can climb up and down the layers. The benefit to this swing is it really stimulates all the senses. So you get the tactile sense stimulated with all this deep pressure on the skin. And then you get the proprioceptive sense stimulated in the muscles and joints because you get all this resistance and climbing up and down. So you have. Which is very calming input. But also it gives them a really strong sense of where they are in space, body awareness. And then you can move in every direction. And so it stimulates the vestibular sense, too. So what I'm going to show you, the main thing, when you get the fabric, you just get each layer in two yards. And it's fairly expensive fabric. It's about $18 a yard without it being on sale. So Joann's always has good coupons on their app, on the phone, and also on the Internet. So usually you can get it about half off. I'm going to show you how we tie our knots so that they don't come loose. And we use a carabiner, rock climbing carabiner, so they're nice and strong. And rock climbing webbing, you can use other types of rope. And we hang them. This is drop ceiling, so we had to build a special framework to hang them. But at home you just want to hang it into some solid wood with an eye bolt. If you can't do it from the ceiling, you can do it at the top of a 2x4 in the wall and then come out from the top of the wall. And that works very well too. So what I'm going to show you is how we tie the knots. So on each piece of fabric, you're going to cut off the corner and it's about the size of just. If you made a triangle out of your hand and you want a nice sharp pair of scissors because you do want it to be a nice smooth cut when you do it. And this will enable you to have two ends to tie your knot from instead of just the one which would eventually come loose if you do it that way. So this allows you to tie the square knot from these two ends. So you're going to get the carabiner and you're basically just going to do a square knot. So you're going to go left over right. Whoops. It's kind of awkward and bulky when you first start. And then right over left. Pull as tight as you can. Left over right. Are you nice and close? Can you see it? And you just go until you can't go anymore. So I'm going to go right over left again. Pull as tight as I can. Looks like I could go one more. And you can see these knots are a lot bigger than the ones that were up there that have been used for a while. So the next step is I'm going to hang it up to pull on it to tighten it. I'm just going to pull. Pull as hard as I can to help tighten it up. And the more it gets used, eventually the knots get. You can see they get very tight and very small compared to that. So they'll just keep tightening up the more you use them. It works really great. And that is how we make our spandex wings. So you would just do that on all four corners. And then do your next layer, all four, tying it to the carabiners and then your next layer and you're good to go. Hi again. I am so glad that you took the time to watch this video and I'm really proud of you because I know you're busy and it takes time to. To sit down and focus and learn something new and just really proud of you. Give yourself a pat on the back. You're going to see this after each video because I just want to reinforce you and just let you know I'm proud of you. And change isn't easy. Some of these things. You hear the idea and then implementing it. We're all habitual, so it's not always easy to do. Just do your best to make little baby steps forward and make little changes that are positive and keep watching. See you in the next video. Aloha.