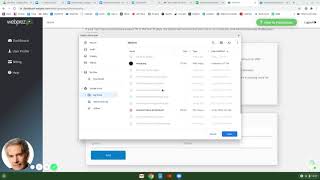
In this product demonstration, the presenter walks through the end‑to‑end workflow of WebPrez’s automated video email marketing platform. The system is positioned as a “launch‑and‑leave” solution that can be set up in about six minutes and then runs continuously, delivering 1–2 sales opportunities per 100 qualified prospects each week. The demo covers selecting one of six pre‑built insurance‑focused campaigns, uploading a CSV contact list (with strict CAN‑SPAM compliance rules and size limits), and how the platform automatically schedules 17 weekly video emails that repeat indefinitely. The dashboard shows contact statistics (total contacts, opt‑outs, opt‑ins) and allows adding, editing, or deleting individual contacts. The presenter explains how to generate opt‑in video links for each campaign and post them manually to various social‑media channels to capture new prospects. Finally, subscription details (a free two‑week trial with no credit‑card required), access to an online campaign guide, and live customer‑support hours are described.
Chapters
Thank you for taking a few minutes to see a demonstration of the WebPrez Automated Video Marketing System. Now with this system, you only need to upload your photo and contact information, select a campaign, and upload your list. That is all. After that, everything else is automatically created and automatically done for you. So this is a launch it and leave it system that literally takes no more than 6 minutes to set up, yet continues to produce sales opportunities for you week after week after week. And you can expect to get an average of 1 or 2 sales opportunities for every 100 qualified prospects on your list each week. So if you have a list of 500 prospects, you can expect to average 20 to 40 sales opportunities every month. Now, to launch a campaign, you would click here to log into your WebPrez dashboard, which will take you right here. And you will see that there is a tab at the top for email campaigns. You click on that and it will bring up the 6 email campaigns that we offer: life insurance, business owners, employee benefits, health insurance, retirement income, and Senior Insurance. Each campaign has a specific target market that is listed right under the campaign. So for example, Life Insurance campaign has a target market of parents with children ages 0 to 20. To the right of that, you will see a blue button titled Video Emails. When you click on that, it will pop up a list of the 17 video emails in the campaign. So you can see all of the topics that will be sent out to your prospect list. You will also be able to see that your life insurance campaign is sent out on Saturdays. Each of the campaigns are sent out on a different day of the week so there's no overlap. You'll also notice that at the end of 17 weeks, which is approximately 4 months, the campaign is repeated And it is repeated indefinitely over and over and over again, which is critically important to the success of your campaigns because only 1-2% of your list will open and watch one of your videos from week to week. So you need to continually offer multiple exposures to your entire list in order to get everyone to watch all of your videos. Okay, you will also notice we give you a snapshot of your list. The first is total contacts. These are all the deliverable emails on your list. Then we show total opt-outs. This is all of the people on your list who have unsubscribed from your list. And then we have total opt-ins. These are all the people who have opted in and been added to your campaign list. Now, to launch a campaign, you click on this blue bar and it will take you to a place where you can upload your list. Now, I want to point out that the CAN-SPAM compliance requires that your list only include prospects who know you or at least know who you are and have given you their email address. If your opt-outs, if the number of unsubscribes to your list exceeds 7% in the first 30 days, the system will assume assume that your list is not CAN-SPAM compliant and will automatically disable your campaign, which means that you will need to rebuild your list as an opt-in list and re-upload it. Now, to upload a list, you may upload up to 500 prospects to begin any campaign. If the list is good and your deliverables exceed 93%, after 30 days you may upload another 500 for a maximum of 1,000 prospects per campaign. If you are running multiple campaigns, you may have multiple lists up to a maximum of 1,000 for each campaign. Your list must be a CSV file, which means comma-separated values, and include only 4 columns in this order and look like this. This is an example of a comma-separated values file, CSV file, And you can see that it begins— the first column is an email address, second column is first name, third column last name, fourth column is phone number. If you do not have phone numbers with your list, you must still have a fourth column even if it is empty. If you have phone numbers for some of your prospects and do not have phone numbers for other prospects, you may leave those off. When you click on upload a CSV file, it will open up your hard drive browser and you can scroll through until you find the file you're looking for, double-click it, and it will begin the upload process in your dashboard. Now, if it is a large list of 500, please allow up to 60 minutes at least 30 or 40, but allow 60 minutes to complete the upload. When it's done, you'll receive an email notice from the system telling you that it's completed and that your campaign has begun for you. There is nothing more for you to do. When it is done, you can come back and log in and you will see that your list is now entered in your dashboard alphabetically by last name. You will also see that you can add individual single contacts one at a time, and I recommend that you at least add your own name to every campaign so that you will see exactly what all of your prospects see. So I'm gonna show you by adding my own name here. Click Add, and you'll see that the system automatically adds my name to my campaign list, and you'll notice that there are two buttons to the right. One is Edit, one is Delete. If I want to edit any information here, if I want to change a name, email address, the spelling, the phone number, however I want to change that, I can do that here. If I find that there's somebody I want to delete from my list, I can just locate them alphabetically, click Delete, and they will immediately be removed from the list. So that is it. As soon as you upload a list or even add one person, one contact to your list, the campaign will begin for those people. Now, I mentioned earlier that you need to constantly add more people to your list, and ideally you want to add them as opt-ins, meaning that they have chosen to be included in your campaign. So we created a list of opt-in videos which you can see here under My Videos, and one for each of the campaigns. So here's the life insurance opt-in. If I click here to use it, I can click this button. You see that it's copied. And now what I want to do is I want to post this link on all my social media sites. So for example, I'll go to my LinkedIn, see where it says start a post, click on that, right-click inside the post, scroll down to paste, click paste. The system will automatically post or paste the thumbnail image in there along with the link. Your name and the name of the campaign will be there. You can type in whatever other information you want to include in your post. Click the word post, and you will have posted your opt-in video automatically on your LinkedIn site or your Facebook site or your Twitter or your Pinterest or whatever social media sites you're using. We recommend that you do this daily and that you do it in as many social media sites as you can to get maximum exposure and to accumulate or capture as many new prospects as you can for each of your email campaigns. Now, that is all you need to do. We are in the process of automating this process for you, but until then, you will need to— if you want to add to your prospect list, you will need to post these to social media every day. Okay, that is it. That is all you need to do in order to run a campaign through your social media marketing and email video marketing campaign. If you are already subscribed, you only need to launch the campaign by uploading and choosing a campaign and uploading a list. If you are not yet subscribed, you can click here on our website and subscribe for the first 2 weeks. There is no payment card required. You just click the button, set it up, and then go in and choose a campaign and set up your first campaign. If you still have questions, you may always go down here in the lower right corner on all of our web pages to the little web press brain icon. Click on that, and the first thing you're going to see is a copy of the email campaign guide, which is exactly what I just showed you in the campaign. You can click on that, and it will take you to the campaign guide, which you can read through just what I told you anytime you want as a refresher. Otherwise, you can just type in your message here and talk to any of our customer support people from 9 AM through 5 PM Central Time, Monday through Friday. Thank you.