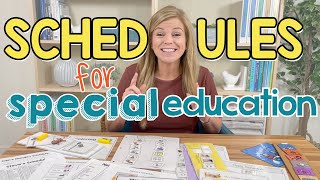
Sasha Long, a former special education teacher, breaks down four schedule formats for classrooms: object schedules for students with visual impairments, picture schedules with movable pieces, static picture schedules, and written schedules for fluent readers. The right schedule reduces anxiety and behavior problems while building independence.
Schedules are one of the most important components of a classroom. They increase independence, efficiency, decrease negative behaviors, and decrease anxiety. I'm Sasha Long. I'm a former special education teacher and board-certified behavior analyst, and I want to share 4 different types of schedules and how you can pick which one is right for your students.
The first type of schedules are object schedules. So these are schedules where there's a physical object on each schedule piece. So So you need some intense glue. Obviously I didn't have that here. And you want to hot glue a relevant object for the center. So if you had a coloring center, you would put, you know, a marker cap, or for playtime, a little toy, lunch, a fork. I like to include the word so everyone is using the same word for that center, and then a picture as well so we can start to teach that picture. You're also going to have an object on the label where the center's at. So I would put this label at the coloring center, and the student would have this schedule set up similar to this. These are their, you know, 3 activities for the morning. They're to do coloring, playtime, and lunch. So they're going to take the coloring picture piece, put it over here, and match. So we're matching a direct match item to item. Object schedules are really great for students with any type of visual impairment because there's going to be this great tactile component. These are great with students with any type of severe and profound cognitive disorder, someone that needs this level of concreteness. So super tactile, super clear what we're doing. Adding that picture is really key. So these are object schedules.
Next are picture schedules.
So the idea with picture schedules is we are going to assign a picture to every center in our classroom, and there will be an identical picture at that location. When the student comes to their schedule, they will take this off, walk over to the schedule and match it. They will do the work at that place. When they're done, bring it back, put it in finish, and go to the next. So there are so many different variations for picture schedules, and I have just a few here. So this first one I have right here are with Boardmaker pictures, and they're also color-coded. I love doing this for students that are not yet fluent matchers. These images, they look pretty similar, right? And if our kids are not fluently matching, we want to add additional prompts of this color coding. So instead of having to match these guys to these guys, we're matching blue to blue. This is going to be a lot more helpful. Remember, this is a tool to help, you know, them navigate their day. We don't want this to be too challenging, something that's accessible. So I love adding the color coding for students that are fluent matchers. You can of course use Boardmaker without, and then we will add these matching pictures to each center. I also love real photo schedules, and here's a few different variations. You could put this on the wall, in a binder, and the same idea, you know, the student is going to match at this exact photo to this exact photo. Real photos, I think, are great for older students. They're, they're more age-appropriate. They look a little cooler and you can definitely create your own. Now these are just with Google Image, but I love a real photo where you are taking photos of your own class. You can even include the student in those so they're really seeing where they're supposed to be and what they're supposed to do. Third type of schedules are still visual with pictures but are on paper instead of having movable pieces. So both of these examples include Boardmaker. These are color-coded like the example I showed before. These are not. You could put Google Images here, you could put real photos of your classroom with the students. So endless options on really what these can look like. I like putting paper schedules in a page protector and then using a dry erase marker to cross off each one. So after the student completes each activity, they cross it off and then you can wipe it off for the next day. If you have a different schedule each day of the week, they could all just go in the page protector and you switch it out. These are great for students that are ready to move on from the movable pieces but still need some picture support. Fourth type of schedule are paper schedules with words, so fully written. You can keep it super simple like this.
You could put the entire week on one page.
I mean, how amazing is this? You just photocopy, you know, 30 of these and you're set for the year. This one includes the times for students that are ready to work on time. Now remember, text is a visual. This is still a visual cue. If your students are fluent readers, this is what you should be using. You can photocopy these like I say and use a pencil or a pen to cross off each day, or you can put it in a page protector or laminate it and cross them off each time as you go through the different centers. Um, but these, if your kids are readers, are really where you should be at because you can utilize those reading skills, those math skills using time. You could even put analog clocks on here. These are so great, and honestly, they're really easy to use.
All right, so those were our 4 types of schedules: object schedules, picture schedules with movable pieces, picture schedules on paper, and written schedules on paper. Depending on your student skill sets, you want to pick the schedule that matches their skills. Now, if you have 10 kids in your classroom and you have 4 different types of schedules amongst those 10 kids, you are doing it right. So pick the type of schedule for each student that meets their needs. This needs to be individualized. This will help your kids be independent, be efficient, and will help decrease negative behaviors and decrease anxiety. I am Sasha Long from The Autism Helper, and please follow our YouTube channel for more back-to-school setup tips to help your classroom run really smoothly.