How to Make an Adapted Book for your Special Education Classroom
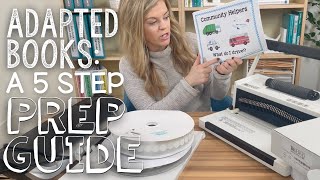
Sasha Long, a former special education teacher and BCBA, shows how to make durable adapted books for autistic students. She covers laminating (3 mil for pages, 5 mil for pieces), applying Velcro dots (½-inch for fine motor challenges), and coil binding to prevent pages from being pulled out. The finished books build vocabulary, turn-taking, and fine-motor skills.
Chapters
Having engaging and appropriate academic materials is so important, but the prep work of it can be overwhelming and a little bit hard. Today I'm going to walk you through all the steps of how to prepare an adapted book, from laminating to Velcro to binding, all of the steps. I'm Sasha Long, I'm a former special education teacher and board-certified behavior analyst, and I'm the founder of The Autism Helper. So adapted books are a great tool for working on so many skills. I personally love adapted books like this one. Is working on finding colors. There's so many things you can do with this. This is great for group work. This is great to build vocabulary. This is great to build all these basic skills. But how do we go from a printed copy to this? Well, that's what I'm going to show you today. So I've got everything I need out already. I have my laminator, my laminating pages, Velcro dots, book binding machine, and the binding combs. So the main 3 steps: 1, we're going to want to print our adapted book. Here's the one I'm going to be making today. This is a really cute one called Community Helpers: What Do I Drive? Great for kids that are super interested in vehicles. I actually think my son is gonna love this. And it's really working on association. So a great skill to work on vocabulary and associations and things like that. So first we're gonna print it. The first step is gonna be laminating, which I'm gonna walk you through. Then we're gonna cut and Velcro. And last, we're gonna bind it. So let's get started. Okay, so first step is laminating. I have my laminator all heated up. I'm using 3 mil laminating pages. There's typically on most laminators a button for 3 or 5. 5 is going to be thicker and 3 is going to be a little bit thinner. Now today I'm only using 3 mil because that's actually just what I have, but my recommendation is actually a little bit different than what I'm going to do right now. So here are the pages of the book. We have the COVID and all the pages, and then at the end of the book we have the pieces. These— this is going to be what the student moves around. So here they're moving around different trucks. I would actually recommend, especially if you have younger students who put things in their mouth or going to touch these things all the time, laminating the pieces in 5 mil and all of the pages in 3 mil. You don't need the pages to be as thick, but the pieces can be beneficial to have a little thicker. But for today, I'm going to do it all in 3 mil for the sake of this video. So what I recommend doing to make this go a little bit more quickly— I'm gonna put this back in order here— is I recommend using Menu Size laminating pages. They're about double the size of regular laminating pages. You'll see here they're pretty big, so you can fit 2 in 1 page. I use these often for file folder activities, but as I said, I like doing it really for anything because it's just going to save you time and you're going to be able to prep a lot more quickly. So I'm going to get some laminating pages out and I'm going to load up 2 at a time in here. So I'm going to do this in order so I'm not going to mess up the order of the book. For some books it does matter, some activities it doesn't. I'm going to put 2 pages in And then I'm going to roll it through the laminating machine. The laminating machine needs to heat up. It's already heated up because it has a little green arrow. I'm going to put that through, just feed it in. Once it catches, it's good to go. While that's going through, I'm going to even start getting my other pages ready so I'm all ready to go when that one is finished. All right, we got all of our laminating pages ready to go. Now turn the laminator off and the next step is cutting. All right, now that everything is laminated, now I'm going to cut out. So this I'm going to explain in a few minutes on how we use this for storage. I'm going to wait on these— this piece with the pages, with the pieces, and this page with the pieces as well. So I'm going to put those to the side and I'm going to cut out all of the pages. Now there's a lot of controversy if you should cut these out ahead of time and laminate I don't ever pre-cut, meaning cut these out, laminate, cut them out again. I always cut out through here. If you have a good laminator and good laminating pages, you should not have an issue. So I'm going to put those to the side and then take all the pages and trim the edges right at the edge so we can bind them all really nicely. So let's get cutting. Okay, so now that we have everything cut out, I'm also going to cut out this last page that is going to be the storage page for the pieces, and I will show you how to bind this so it creates a really cool system for storing all of your pieces so you don't lose them and kids can find them really easily. So I'm just going to trim this guy up so he's ready to go. I'm going to put that at the back of the book because we're going to bind that last. And then we have these pieces. Now, before we cut these out, to save time, we're going to Velcro these first. It's a lot faster to put the Velcro on the back than it is to add that Velcro later. So this next step now is adding the Velcro. Here's the Velcro that I have. I highly recommend Velcro Dots. You don't have to cut them out. They're ready to go. You have to buy Velcro Dots in both the hard and the soft. So I have the hard and the soft here ready to go. These are the 3/4 size coins. I also like the half-inch coins, but if you have younger learners, with, um, they're kind of struggling with fine motor skills, I would use these half-inch. So I always do soft on the back of the pieces and hard Velcro within the book. You can do whatever you want, you just have to stay consistent. Always do pieces in the same thing and then the pages in the same thing. So because I always do soft for the pieces, I'm going to start there. I'm going to get my soft Velcro and I'm going to get the coins. And before I cut it out, I'm going to put all the Velcro on the back. So I'm going to put one piece per truck. You can kind of see through the pages so you know exactly where to put them. One right in the middle, get all my trucks set up here. And then my other page, I'm gonna get my vehicles all ready to go. So I'm gonna— this is gonna make it a lot faster when I am cutting and prepping. All right, so now the pieces are done. The next step we have to do with Velcro are the pages. So on each page there's this little question mark where we're going to put the truck, so that's where I'm going to put the hard Velcro dots. I'm going to put one hard Velcro dot on each page. Now in this last page, I'm going to put a hard piece of Velcro on every dot. This is where we're going to be storing all of the trucks. All right, now the last thing to cut out is our trucks and our pieces, and then we'll be ready to go for the binding step. All right, so we're all ready to go. We've got all our pieces, we have all of our pages ready, Velcroed and cut, and now we're gonna bind. All right, so now let's bind the book. I love a coil binder. This is what the end product looks like. It's really durable. Kids can't pull it out. It's really sturdy. I love this. I prefer this to a comb binder. This is a little pricier, but I think it's really worth it. Now we're going to make an adapted book that's in this setup where everything is bound on the left, but there is a storage page for all the pieces. So the idea here is that when you, when you're working with a student, you can open to a page and the student will have this basically word bank of all of the pieces that they have to pick from right next to them. It's all stored on here. If you have a baggie with the pieces, that gets lost easily. It gets kind of confusing to lay them all out. This is such a game changer, binding this storage page at the last page. I'm going to show you how to do that. This is the style of the book we're making. This is what the finished product will look like. So to do that, we're first going to put all of our pieces on that storage page so we can get them out of the way and make sure we don't lose them. These pieces are a little bit big, so I'm going to make sure to let them overlap a little bit. Put all of my pieces right here so we are ready to go. And then I'm actually going to take scissors and I'm going to trim this edge because I want it to fit really nicely within the book. So I'm going to trim this edge just a little bit so it fits really nice. All right. So I'm going to put this to the side and we're going to do this last. First, we're going to bind the rest of the pages on the left. You can either do this on the side. So you turn this way, you can do it. So you go up and down, whatever you want. I'm going to do it on the side. So we are turning the book this way and I'm going to put the storage page on that, that right side. So first we're going to put all of the holes and use the hole puncher feature of this binding machine. So I like to do a page or two at a time to save time. Put them in, make sure they're all the way in, and then push down, and you're set. It makes these nice holes. So I'm going to go through and do all of these. Now for this very last page, I'm going to put binding holes on both sides because we're going to be binding this piece on the other side of the last page. So I'm going to do both sides here. And while I'm putting all the holes in, I'm gonna go ahead and do this for this guy as well. Take these pieces off so I have enough space, and on the left side I'm gonna put holes in here. Okay, so now comes time for the binding. So for my coils, I have two sizes that I like to use. The first ones are these small ones, and this is the 3/8 of an inch size. I need one of these for that storage page. And then for the main book, I like a bigger coil, so these are 3/4 of an inch. So these are pretty big. That's for the rest of the pages. Okay, now when we are ready to bind, I have the most success when I get it started. So I got 2 or 3 coils in And then I'm gonna turn my machine on and I'm going to use this, put, just push it right here so the pages are nice and tight. It's a little bit trickier with laminating. And then I'm gonna help just push it through. Sometimes it won't catch all the pages, we gotta go back and fix it. And there you have it. So it's all set. The last step is to trim it. Most of these binding machines will come with this, which trims the corners so they fold in and people can't pull it out. So I'm going to trim the corner and it folds the edge, and I'm going to do that on both edges so no one can pull out the coil binding. Okay, so the very last step is going to be this last page. I actually tend to not even use this for the last page. I just bind this by hand. So we have our smaller coil. I'm going to line these up And then I'm just going to scroll. I'm going to twist this coil in. We are in. I'm going to do the same thing and use this trimmer tool to trim each edge. And there we go. Here is our lovely finished product. The book is all ready to go. So now when you're ready to sit with students, you have all of the pieces ready. You can sit with the group, you can work on this. This is great to build vocabulary, this is great for turn-taking, this is great, great for function, this is great for fine motor skills. There are so many things that this works on, and I know that if your kids love trucks, this will be a favorite. Great for working on community helpers, so many great ways to work on this, this skill with this book. There we go.










