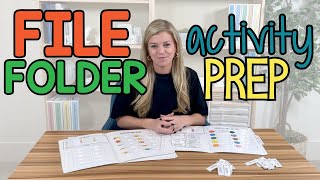
Sasha Long from The Autism Helper walks through making file-folder activities for special education classrooms. Use 3 mil laminating pouches for folders and 5 mil for pieces, apply Velcro before cutting to save time, and batch your work with paraprofessionals to speed up production.
Chapters
File folder activities are a great activity for independent work or direct instruction. What I love about file folder activities is they don't take up a lot of space, there's a clear start and end point, and you can use them for so many different skills. Today I'm going to show you how to set up a file folder activity from start to finish. We're going to go through some tips on how to laminate, how to Velcro, so you can create these activities in a super time-efficient way. I'm Sasha Long, I'm the founder and president of The Autism Helper. Follow our YouTube channel for more strategies on setting up your classroom. Here are all the supplies that you need when setting up your file folder. We have a laminator, 2 types of laminating pages— I'll show in a minute why we need that— Velcro— I recommend Velcro dots— and of course the file folder activity. So here we are doing an anchor chart file folder. I really, really love these. These are great to scaffold for higher skills. I'm going to explain how to set these up. Our very first step will be putting everything in the file folder. All right, so the very first step is setting everything up in the file folder. I'm going to use a glue stick to lightly paste the pages within the file folder. So this is going to go in the inside right here, and then this is going to go on the opposite side. For this file folder, there's actually a built-in storage system, which is really cool, and you'll see that once we complete the entire set. So I have this inside my file folder, and the last piece is I'm going to put on the label. I love making labels for file folders because once you have a bunch, you want to be able to find them really quickly. You want to be able to know which ones go together. Um, so I recommend labeling this top cover as well as the tab. The tab's helpful if you store everything in a bin or a crate so you can go through and grab those really quickly. So here is the tab and the main label. I'm going to go ahead and also glue those, and then we'll be ready to laminate. If you're doing a bunch of file folders at once, which I recommend you do, I would do each step altogether. So let's say you're doing 10 file folders, I would do this process for all 10 and get all 10 ready to laminate. This is nice if you have paraprofessionals in your classroom, you can have them be kind of working on this slowly. If they have a few spare minutes here and there, they can be working on this. So we have everything ready to go and now we can laminate. Okay, so we have our file folders ready to go, all taped in here. Now we're gonna laminate them. So I have a few particular things with how to laminate file folders, and this really helps your file folders last longer. So for the file folders themselves, you can order menu-size laminating pages. This is key to fit that whole file folder in. I like to do the file folders on 3 mil, so it's a little bit thinner, it's easier to fold, but I like to do the pieces with 5 mil laminating pages. These are heavier. The pieces are what the students are gonna be touching all the time, so I like it to be a little sturdier and longer lasting. Now if you notice, when I put the file folder in here like this, these tabs stick out. I prefer to cut those tabs off so you get a kind of good seal on the one side. You could do this with a paper cutter and make it look nice, but I'm just going to trim these little edges here so the entire folder fits in. So we'll have it really nice and neat. So I'm going to put it in the file folder. I like to put the tab first because again, we'll get a better laminate, uh, laminating seal on that side. So I put the whole thing in and then in my big laminator I'm going to put this the closed side first into there. So I'm going to do the, the file folders first and then second I'll switch the function on my laminator to go to 5 mil and then we'll do the pieces. All right. So I have everything laminated. Now is Velcroing and cutting out the pieces. I highly recommend using Coin Velcro. It's so much faster. I get mine from Feiner Supply. This is gonna make it really quick and easy. So on the file folder itself, put hard pieces in every empty box. On this one, as you'll see once we set it up, there's a storage page in addition to the spot where the students will complete the activity. If there wasn't a storage page, we would be putting all the pieces in a Ziploc bag, but here this one's really nice. We have a cool way to store all the pieces. Which really helps prevent them from getting lost. So I'm going to go ahead and add all of my hard Velcro pieces to this one right here, and I have my other one done already. And then I will show you how I do the pieces. I like to do the pieces, put the Velcro on before I cut them out. Um, this sometimes is controversial because I did not pre-cut my pieces. That means I did not cut each one out and have it separate. I did it all together. When you do a thicker laminating like 5 mil and when you have a personal laminating machine like I showed, it does not open up when you cut. I absolutely promise you this. People get very heated on social media talking about pre-cutting Velcro. Um, I've laminated literally thousands of pages in my life. Yes, if a student sucks on these pieces for days and days, they will open up, but so would any laminated piece of paper. These do not open up when you cut them, and this saves you so much time and actually money because look at how many pieces I got on this page. So I'm going to put all of my soft Velcro there and then I will cut it out. That will save me a lot of time. All right. So we've got everything cut out, Velcroed. The last piece is the easiest one. We're going to go ahead and set up all of our pieces on each file folder. Again, if you didn't have this storage system, you would just put them all in a baggie and then I would recommend Velcroing that baggie to this file folder and labeling the baggie, or else you would definitely lose it. So there we go, we're totally set up. Last piece, fold it, and you are good to go. So what's cool about this activity is this little embedded anchor chart. So maybe your student doesn't yet know the word red, R-E-D, but they do know how to match the sample. So they can find that word, match it, find the red, and match. So a really great way to scaffold to new skills. This is one of the things I love about file folders. You can do so many different things. Simple matching, complex matching, math, Sight words, any skill can really go in a file folder. They're space efficient and a great teaching tool. Thanks so much for watching. I'm Sasha Long from The Autism Helper. Follow our channel for more tips for your classroom.










