How to Teach Autistic Students How To Wait
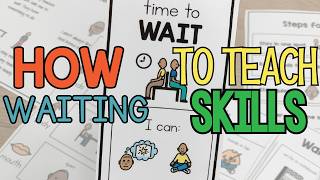
Jen, a former autism teacher, shows how to teach waiting using concrete visual tools like time charts, hourglasses, and countdown boards. Start with a few seconds and gradually increase wait time as students succeed, offering structured choices like music or fidgets to make the invisible skill tangible and manageable.
Chapters
Let's talk about teaching kids to wait. It's a hard skill but an important skill. I'm Jen and I am a former K-12 self-contained autism teacher, and when I was in the classroom, this was one of the hardest things that I taught. Now, I myself don't like to wait, and I'm guessing that if you really want something, you don't want to wait either. So let's talk about how we can help our students learn the skill of waiting. The thing about waiting is it's not concrete. You can't see it, you can't touch it. You just know that there's something that you want and you can't have it. So that's what's going through our students' brains. I want you to now think about the last time you wanted something. You went to the store, it caught your eye, and you were like, man, that would be really cool to have. I really want that. What's the first thing you do? You go up and you flip the price tag because when you flip the price tag, you're gaining information. You're figuring out how much it costs. Can I afford this? Can I not afford this? And then you think to yourself, how much money do I have? Is this something I can purchase? Is this something I need to save up for? You are making a plan in your brain and making decisions based off of information that you gained. So what we wanna do is give our students similar information. One of the best ways to communicate expectations, especially in waiting, is by giving a visual. One of my favorite ways to do this is our time and waiting visuals. These are amazing. I'm actually prepping these today for a friend who is teaching this year, and she's got a friend who's really struggling with waiting in her class. And so we are going to start with this 3 right here, and then we're going to move our way up. Another really cool visual is this one. So it's just a blank piece, and then you cut these puzzle pieces out. When the clock is done, it means that we are all done waiting. This makes waiting concrete. We are giving the student information so they can make decisions. Now, when you're in the classroom or when you're at home and you're ready to teach waiting for your child or for your student, I want you to think about the situation that you first start teaching this skill. Don't make it something that is super reinforcing. The thing is, is that the more that we want something, the harder it is to wait. So pick something that the student's kind of neutral about, and that allows you to teach the skill when the child is more regulated, and then that skill can carry over to more and more and more desirable items. So in the classroom, we're going to pick something they don't really want or they're kind of neutral about, and that's the opportunity that we are going to teach waiting. My second piece of advice is set this scenario up. Set this up, be it in centers, be it in a indoor recess, be it in just a free play moment, but set up a moment where you can intentionally teach waiting. Because if you are not intentionally teaching it, it's not going to necessarily happen. You're not gonna have everything you need at your fingertips. You need to carve out time to teach this skill. I always thought as a classroom teacher, oh, I'll just teach that as I go. The problem is, is that this is a skill that needed to be directly taught. And so once I started directly teaching it and using these visuals, it came much faster. The student knew much more of what to expect. So my last piece of advice while teaching waiting is to start small. Now in the beginning, I told you I was working with a teacher who has got a student who's really struggling with waiting, and this is where we chose to start. So I wanna show you how I would use these in the classroom and kind of what I advised her to do. So we are going to cut this out and then there are these hourglass pieces. Every time one goes on, they've waited a little bit longer. When they get to all 3 and the board is filled, then they're done. Alternatively, you could put them on and then take them off and say, then you are done waiting. So whichever visual is right for you guys, you do it however you would like. You teach it however you would like. For this student, they use a First Then board, and so they're putting stars on so they know when the stars are completed that they're good to go. So we're going to continue that here. So here, time to wait, we're going to put those on. So you're in control as the teacher of these pieces, you're holding them, and then I always suggest giving it to the student so they feel like they're in control of putting it on their board. Oh wow, you earned this, here you go. Um, oh wow, that's really great. So we are gonna give this to the student and then they're gonna put it on their board, but you're in charge of the time increments that they're getting these. So here's the deal. When you first teach this, make it short and fast, then slowly increase your time. If you start teaching waiting and you expect a child to wait for 10 minutes, it's not gonna work. 30 seconds might be hard. 3 seconds might be a win. Ooh, you're waiting, that's fantastic. Ooh, you're waiting, yep. Ooh, you're waiting, oh, you get it, bye. That was great waiting. So that's how we're going to teach this. And then once they've got this mastered and I've, I've lengthened the time to an appropriate time, I'm going to move to the 5 board because that 5 board is going to be even longer. And maybe I am going to lengthen the amount of time even here to where I don't have to move to the 5. So maybe I'm going to wait a minute, a minute, a minute, and we're good. Maybe I'll make— wait 2 minutes, 2 minutes, 2 minutes, and 6 minutes is all I need. Really, these are as flexible as you need them to be, but start small. I mean, start in a spot that the kid's gonna experience success. If you don't experience success right away while waiting, it's not gonna be great. So give them those and then, phew, right away let them go have what they were waiting for. If you have a student and you don't think that the time to wait visual is going to work, this waiting visual might just win. I love this one because you just move the arrow to where it is, especially in a center. I used this all the time when I would run centers and I had one center that was really desirable and one that was not. We would move this arrow down the row and be like, oh, it's not time to go there yet. Oh, we're almost there. The bell would ring, we're ready to go, we get to switch to that center or we get to switch to that activity. And so this can be a really great visual and this is way, you can use this in the classroom and just pretty much everything. Math lesson. You can do it while you're waiting for recess. You can do it while you're waiting for lunch. I had one taped to my door. You can have it on a clipboard or literally anywhere in your classroom. So this is a really good one too. The other one that I really like, especially for kiddos who love to count down and who have number concept, being able to count down 5, 4, 3, 2, 1, it's time for— what am I, what am I doing right now? And so this comes in a big one and in a little one. I love this to tape to a desk This is really great to tape to a desk because students are a little bit more in control of their space. This is honestly fantastic. Students love this because they have a really clear visual of what they're getting to. And so, you know, if you have a student that you don't think that this time to wait is appropriate for and they need something a little bit more complex, this is a really great option. You know, one of the things that I love to do in the classroom is give choices, but I think we also have to teach the skill of waiting. And so when I say wait, our students don't know what their bodies should look like. They don't know what their hands should be doing, what their mouths should be doing. We need to model this, and we need to give them visuals so they know. Not only are we counting down so they know how to get there, but once that is done, we want them to teach them how their body should be. So this is a social story about time to wait. This is what it looks like. I love this. Another one is Picking How to Wait. Picking what's appropriate for the child or what the child wants to do, giving them choices in this. I use this all the time in centers. Oh man, we have to wait. And I would use that visual of the red and the yellow and the green. Ooh, we're not on green. We have to pick something to wait. Maybe our kids are going to have their hands by their sides. Maybe they're going to hold a fidget. Maybe they're going to, you know, put their hands in their laps. Maybe they're going to sit. Maybe they're going to stand. Maybe they're going to be at the table. Whatever it is, I'm going to give them a visual of how to do it. So this actually comes with this set and I just, I love that. Here's even a waiting choice board. Do you wanna listen to music? Do you wanna go get a drink? What do you wanna do while you're waiting? And giving kids options is a really great way to teach them how to wait. When we wait, we typically pull out our phone, right? If I'm standing in line, I've got a phone in my pocket and I'm pulling that out and I'm checking my phone or checking my email, I'm texting someone. And so we can't expect kids kids just to stand there and do nothing forever. We don't do that as adults. So especially the longer that we wait, or if it's a highly reinforcing item, we want to give them an option of something to do. The more options that we give, typically the less behaviors that we have. So I would love to know if you have tips and tricks on teaching your students to wait. It is such an important skill to be able to teach, and I know that your students are going to experience success, and I cannot wait to see you guys use these in the classroom. If you use these, definitely drop us pictures and let us know. We'd love to see these in action.










