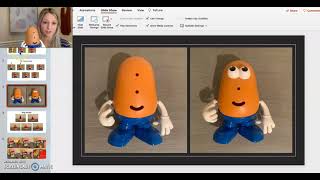
Gina from The Autism Helper shows how to use visual schedules to teach kids with autism to play with toys like Mr. Potato Head and Ring Stacker. She walks through presenting choices, guiding each step, fading prompts gradually, and tracking progress with laminated checklists.
Chapters
Hi everyone, this is Gina from The Autism Helper. I'm here to show you how to use structured visual schedules or play activities in order to teach your child or student how to appropriately play with some toys. So in my last video, I showed you how to create this type of board. Now let's show you how to actually use the board. So for example, say you have a choice between the Mr. Potato Head, um, activity and the Ring Stacker. Those are the two toys that maybe you're working on right now. What you can do is you can say, "Which one do you want to play with? Do you want to use Mr. Potato Head or the Ring Stacker?" And just say they picked Mr. Potato Head. So what you're gonna do is you're gonna say, "Alright, let's get out our board," and you bring out this visual board that you made, and you're gonna show them how to go through each of the steps. The important part is, is that you always have control over the parts. I like to keep them in a little bag that way. If there's any behaviors, they don't go flying, you know, off the table, or you're not scrambling, dropping them on the floor, bending over. We know all these things happen, right? Especially with little kiddos. So what you're gonna do is you're going to have your board out and then just point to it. So here I'm pointing to it. Number 1. Okay, Mr. Potato has on his shoes. All right. And maybe, maybe it's kind of separated and you show them how to put it together and you help them. And This part may be enough for the day. Who knows? You know, that's why I have made, um, some slides that have just 2 parts to it, because putting on 2 pieces may be enough for your student at this time. But say that you're able to go through more steps. So you have the shoes on, number 1. Okay, number 2. Oh, look! And you're pointing his— what are those? Maybe your child's able to say eyes. Maybe they imitate eyes. Maybe you have to do more of the work. Eyes! Miss Russell's eyes. Where's your eyes? And they point to their eyes. This is a great way to learn body parts, which is very, very important. So you can hand them the eyes and have them put it in. And again, depending on your child, depends on how much, you know, prompting or assistance you might give in the beginning, depends on the day, right? Maybe they're having a really tough day and this is a lot, so you might have to give them a little bit more assistance, and that's okay. Just remember to fade those out eventually because We want them to be able to do it. And so you help them. You can maybe tap on the, on the part where it goes. Put it here. And then you let it go and see if they can push. Maybe they struggle. Maybe you're working on help and language. Push, push, push, push, push. Yay! Good job! Number 2 is all finished. You could have this laminated and check them off as you go or put a Post-it over it. Whatever way is best for you and your student. Alright, let's look at number 3. "Oh, he has a big red nose. Let's find red nose." And you're gonna find your next piece, which is the nose. Where's your nose? Nose, nose, nose, nose. As you move it towards, tap, tap, tap nose, or maybe you don't have to point at all. Maybe they're looking. All depends on your student. And so you just keep going through all the steps. You might have to reinforce in between each step. Maybe they're working for some bubbles to be blown, or a small piece of a chip, or a pretzel, or a star, or maybe just checking off the pieces is enough. It really all depends on your student. But eventually you get to the end and you can celebrate and then reinforce. Maybe you take a break before your next activity, or maybe you just stop right here. So I hope that's helpful and have fun playing with your students!