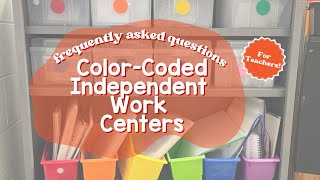
Jen from The Autism Helper walks through her 3-shelf independent work system for special ed classrooms. Color-coded magnetic schedules show students which tasks to complete in order: Task Boxes, Book Boxes, File Folders, then a Free-Choice reinforcer. The system lets teachers see at a glance what each student has finished and makes end-of-day reset simple.
Chapters
You asked questions about independent work, and I'm gonna answer. I'm Jen. I am one of the bloggers here at The Autism Helper, and I have shared this 3-shelf system for my independent work, and I'm gonna be answering some of the most frequently asked questions about it. Here we go. The first question we got was from somebody setting up this exact same system, and they asked, how do students know what to rotate through? How do they know what they're supposed to do when they come to independent work? Well, let me share my little secret, and it has to do with visuals. On the side of my independent work shelf, I have visual schedules that are magneted onto the metal shelf. I've got the student name covered up for privacy purposes, but in my previous videos, I talk about how everything on my shelf is color-coded. This is my student who is green. This is their color-coded Visual Schedule. So my student who's green is going to come over, they're going to pull this off, and then they're going to have their schedule of what tasks I want them to do. Here's an independent work spot, so a student's going to bring this over, they've got their tasks for the day. The first thing up is Task Boxes, so they're going to turn, we'll find the green Task Boxes, pull it over, the student will complete the Task Boxes inside, And then when they are done, they will pull this off, put it on, and then walk it back to the shelf. They will check to see what's next. Books. So now they will come on over here. They will grab their book box, set it down. They'll complete their book, pull this off, put it on. If they've got file folders, sometimes I have some, sometimes I don't. This will come off, go right on the envelope, this will go back. Then it's time for free choice. Free choice is always a favorite. They can pick anything off of that bottom shelf, something super reinforcing. These have been a huge hit. These are from Lakeshore Learning. These are giant lacing beads, and so when students are finished, they pull it off, They put it on. Now, why do I do this? A couple things. So, two reasons stick out in my mind. Number one, I want to know what students have completed. If I look at that visual schedule, I know instantly what students have done and what they have left to do. Number two, it tells me what I need to reset at the end of the day. So many times my students don't get all the way through independent work, and it's not necessarily their fault. It might be that they got pulled for related services, or they've got had a, you know, a special activity, maybe they left in the middle of the day, or maybe they were absent. I don't want to have to dig through my shelf to know what to reset at the end of the day when my students are gone, and so I wait until the end of the day is there, and then I look for any little visual on my task boxes or in my books, and that's how I know that I reset those things. I also talk about how I switch out materials and all those kind of things in my previous videos, so if you've got questions on that, make sure check those out.