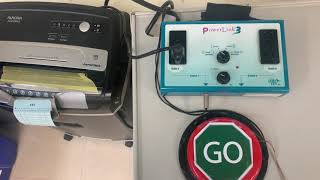
In this video, Katie from The Autism Helper demonstrates how to set up a shredding job on a college campus so that a wide range of students, including those with autism, can participate independently. She shows the shredder and adds a piece of tape as a visual cue to indicate where paper should be placed. The core of the accessibility solution is an assistive switch system: the shredder and a Big Mac switch are both connected to a Powerlink circuit, which is plugged into the wall. The Powerlink is programmed to run the shredder for a set number of seconds each time the switch is pressed. Katie walks through the workflow: a paraprofessional or peer loads a sheet of paper into the shredder, the student presses the switch to activate the shredder for the preset duration, then repeats the process until the pile is shredded. This setup provides multiple participation options, allowing students who can handle the whole task to do so unaided, while others can rely on the switch and visual cues to engage with the job independently.
Chapters
Hi guys, it's Katie from The Autism Helper. I want to show you how we set up our shredding job on campus so that a wide variety of students can access it, participate, and be as independent as possible. So here is our shredder. Some students are able to come over, take the paper from the pile, put it in the shredder, and just keep going until that pile is complete. I did put a piece of tape here to just make it visually a little bit more clear where the paper goes. Tape is a great, quick, easy option to make a visual cue wherever you are. Some other students may need a little bit more help participating, um, maybe need the task to look a little bit different for them to participate and be independent. So we have this switch setup, which is really cool. We have a Powerlink. The shredder is plugged into the Powerlink. The Big Mac switch is also plugged in on the same circuit, and the actual Powerlink itself is what's plugged into the wall. So the way we have it set up for shredding is we have it on, um, seconds here, and then this is about the amount of seconds I want the shredder to turn on for once somebody presses the switch. So what our students do is they come over, they press the switch, that activates the shredder for the certain amount of seconds that I've indicated here. Once those seconds are done, the shredder turns off. And to do the next paper, the student has to access the switch again. So let me just give you a little example. So in this situation, you know, the para or another student that might be working alongside the student may load this into the shredder. I'm trying to do this while holding the camera. So you're going to thread it in there. Okay, and then the student would press the switch that turns on the shredder. Okay, and then it turns off. You would load the next piece of paper and the student would press the switch again, and you would just repeat until the shredding is done. So hopefully that helps you kind of envision how we set this job up. And, um, a lot of our different students are able to participate in this job because we have a variety of ways for them to do it.