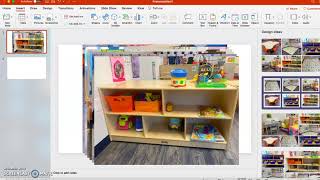
Gina from The Autism Helper shows how to build a picture schedule for a 2-year-old using iPhone photos, PowerPoint, and a printer. She walks through capturing images, resizing them in PowerPoint's Design Ideas, laminating, and mounting on a strip board so the child can match pictures to activities throughout the day.
Chapters
Hello everyone, this is Gina from The Autism Helper. I'm here today to show you a very quick tutorial on creating a picture-based schedule for your classroom for any of your kiddos. This happens to be for one of my friends who's in a daycare. He's only 2, but this is his first time in a structured environment, and any kid this age, the receptive language skills are not quite formed all the way. A lot of kids may be able to understand a lot of verbal directions, but a lot of them cannot yet, and that's totally age appropriate, but this schedule will help out this little friend and I have a feeling they might want some copies for most of the kids in the class. So what I did was I just do it in PowerPoint. It's so easy with formatting. If you have Boardmaker, you can totally do it in there. I am using real pictures because again, this is this child's first experience and knowing what a table is, is just so much easier when he sees an actual picture of it. I'm not using an object schedule at this time. I think the pictures are gonna be fine because he can visually discriminate very well with puzzles and other things. So matching the pictures to the pictures I think are gonna be great for him. So anyways, what I did was I just went ahead and, um, pulled up a blank template. You can go to Insert, Pictures, and then wherever your images are, I have, um, taken them from my iPhone, AirDropped them to my MacBook, made a file folder, and then it was easy to just insert them. So just go and insert them wherever. They usually pop up like this if you do it all at once. And then what I love about PowerPoint is it actually comes with some design ideas, and sometimes this is kind of helpful. So I actually like the formatting of these right over here and it sized them all exactly the same for me right away. I didn't have to do anything at all. And so what I would do next is maybe just duplicate this page several times when I print it off, or if I really like one of them, like this one, he might need several times because we work at— he might go to the table a lot and I'm actually gonna stretch it out just a little bit. And then you can Command+C to copy it and paste as many as you want to the paper. I also like to make, and then here comes our design ideas again, a little bit wonky with the sizing over here. And then I'd like to make, my plan is to have either a smaller picture or say I wanna do the circle time. So this is where they sit for circle time. So I'm gonna copy this one so that when he goes over to circle time, there will be one of these bigger pictures there and he can just match it. So maybe I'll put it on the wall over here. I'll put this picture actually right here and he can match it to there. If you have several kids going to an area, I like to— let's see— have one of these. And then what you can do is I call them blank boards, and you could either make a little table or you can do a shape See here. And again, copy, paste. And you could make smaller versions of these and the kids can go up and put their picture on here on the, on the blue square. You could say, "Go put your picture on the blue square." Or maybe you have smaller pictures of these that they match them to. You can do it any way you want. It's really dependent on what the kiddos need. So that's just how you can make a quick schedule. Obviously, I'll print these out, I'll laminate them, I'll cut them out, and I'll put them on a strip board on the wall. I think that'll be best for him, and then we'll just have a few of them to get him through the important parts of his day to support that language. So I hope you guys find this helpful!