Quick & Easy Visual Schedules for Special Ed Classrooms and Homeschooling
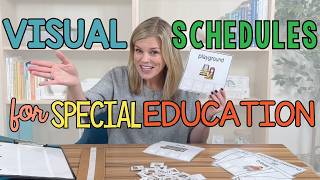
Sasha Long, a former special ed teacher and behavior analyst, shows how to build visual schedules using laminated icons and Velcro. She covers printing, laminating with 5 mil pouches, applying Velcro dots, and arranging pieces on clipboards or wall strips. Visual schedules reduce anxiety and prompting while helping students work more independently.
Chapters
Let's prep some visual picture daily schedules in a way that is quick and efficient. I'm Sasha Long. I'm a former special ed teacher and board certified behavior analyst, and I know that schedules are an essential tool for classroom success. Schedules help increase independence, decrease prompting, and decrease anxiety. You're going to get way more cooperation and collaboration from your students when they know what to expect each school day. So to get us started, Let's start off by printing out our schedule pieces. Basically, you're going to be selecting an icon or picture for every single area, activity, or class in your classroom. So if we have a computer center or we have teacher work, we're going to assign a specific picture for that center or class. So I'm going to go through any type of schedule I have, and I'm going to pick out exactly the pictures that I want to use. Any schedule that you purchase probably has all kinds of pictures. You likely don't need all of them. So I went through and I made a list of just the ones I need in my classroom and printed those. These are going to be assigned to the different areas of the class. This big icon on the top is to label the area, and the small icons on the bottom are what will go on the students' schedules. So after we have everything printed, now it's time to laminate. All right, as I'm getting these pages ready to laminate, I want to talk about my laminating must-haves when it comes to schedules. Now schedule pieces are things that the students are going to be touching all day every day, right? These small icons are going to be on their schedule. They're going to be taking them off and putting them back on multiple times. So we want to use the heaviest laminating quality that we can. So I have a personal laminator here which I much prefer over a big school laminator because the laminate is going to be thinner. Here what I've purchased is 5 mil laminating pages. Whenever I'm doing a schedule piece a file folder piece, something that kids' hands are going to touch a lot, I always use 5 mil. This is a lot thicker, it's a lot more heavy duty. You have no issues cutting this out. People get nervous sometimes when they see me doing this. They're like, you have to pre-cut the pieces. I promise you, when you use 5 mil on a personal laminator, you can cut this open and it's still all sealed. So use 5 mil and go ahead and laminate everything. After it is laminated, then we will put Velcro on it and cut it up to get set up for the schedule. All right, we got everything laminated. Now we're going to Velcro. I recommend Velcroing before you cut out because it'll save you some time. And I highly recommend Velcro dots. I get mine from Fehner Supply. Super cheap when you're buying in bulk. You have to buy the hard and the soft Velcro separately. FYI, I'm going to go ahead and put soft Velcro dots on the back of every individual schedule piece. Depending on the age of your kids, you may want the Velcro to be a little bit of a bigger dot because they might need a little bit more support on attaching that in the right spot. Um, here I've got some smaller size Velcro dots. It just really depends on your students. So I've got the soft on the back of the pieces, and now I'm going to put the hard Velcro in these boxes. And this is where the student will check in at each spot. So let's say I have this bus picture near my door. Students will check out when they go on the bus. So I'm gonna set up all my schedule pieces like that and cut them out. Now that we have everything cut out and Velcroed, now we're going to prepare the actual student schedules. So these are the pieces that will be on the student's schedule that will tell them where they are going. They will then match it to the identical picture here so they know that they are going there. So when we're ready to go for the bus, they will check in there. So these large pieces will be placed around the classroom. This will go in the computer center. This will go by teacher work. I recommend anything that's happening outside of the classroom— playground, bus, maybe lunch— This can all go by the door because you have to leave and go through the doorway, right? So they can check out throughout as they leave the classroom. So they'll put the playground icon on there when they're heading to the playground so they know when they're leaving where they're going. So let's set up the actual student schedules now that the classroom is labeled. There's a lot of options on what you can do with these pieces. You can put them on the wall. You can put a strip of Velcro right on the wall. You put it on a piece of cardboard or construction paper, put that on the wall and have the pictures go in order. You could put it on a clipboard, you could put it in a binder. Lots and lots of options for what this looks like. In general, the schedule will go in a vertical way in the order of activities of how they go in the day. So if you come in in the morning and you have morning meeting, that's first. Then we have teacher work, then we have a break. Then let's say we have playground, we have snack, and then we have, or how about lunch? Let's have lunch in there. Lunch, math, bus. Okay, so that's a small schedule. This is for an example, this is short. If you had a lot more activity, a lot more, many more activities than this, you could do it on two sides and have the morning here and have this end at lunch and then flip it over and have all the afternoon activities. I actually really like that option because you don't, you're not overwhelmed by all of the activities that you have. You can also put it on a piece of paper and have kind of two kind of sides. So we have the morning on this side, all of our activities that we have, and then we have, let's say, playground, lunch, math, put some other activities in here, work task, computer, and there's our day. So our day, we can walk in in the morning and see everything that we have to do. So when the student gets there in the morning, they check their schedule. So they come and see, first I have morning meeting, they take the morning meeting picture off, They go to the morning meeting station and they check in. They do morning meeting. When they're done with morning meeting, they'll take the picture off, come back to their schedule, and put it in some finished bin. So I like having a baggie, an envelope. If you do it in a binder, you could put it right in the binder. You put it on the back of a clipboard, Tupperware, somewhere. They put it in finish, and then they come to the next one. Now they go to teacher work. They'll check in at teacher work. They do their teacher work. When they're all done, take it off. Same idea. And then they go to break. So they go through until the whole schedule is finished. This is a great way to see kind of the decreasing time in the day, how much time they have left, and everyone is really clear on expectations. To me, visual schedules are a must for any child. Now it doesn't have to be pictures. It could be photos, it could be words, it could be— have it have a time component on there. It could just be written out where we cross everything off, but we need a visual way to show our students what they're doing that day and the order of things that they will do it in. For more tips on schedules, classroom setup, and behavior, please follow The Autism Helper.










