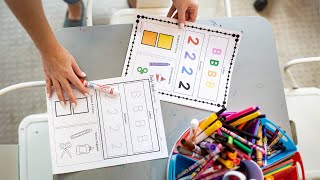
Sasha tours her junior-high special education classroom designed for autistic students, with separate zones for morning instruction, sensory breaks, leveled reading, table work, and high-needs support. Visual schedules, labeled storage, and assistive tech like Dynavox help students work independently and transition smoothly between activities.
Chapters
Hi, I'm Sasha from theautismhelper.com, and this is a video tour of my classroom. So I've made a lot of changes if you saw my video last year, and I'm excited to show you my new room with all my new centers. I'm going to keep this video tutorial brief, but there'll be in-depth video tutorials and tours on each center coming up in the next few months. Um, so here is kind of the central hub. This is the main doorway. This is where we keep all of our schedules, and this is also our morning group and direct instruction area. So when the kids come in, all of their schedule binders are all on these two tables. They're all ready to go. Their schedule's right in here, so it's easy to find. Um, some kids have written schedules and then other kids have text visual schedules, so I keep them all in a binder and they're all in one spot. Also in here are mailboxes, homeworks, any kind of business things we have to deal with on a daily basis. Um, this is the main station of the classroom. I decided to combine my morning group and direct instruction and teacher desk all into one area, so I don't have a teacher desk this year, which I really love. All of my supplies are all stored here. Kids' supplies, adult supplies, everything. It's made it really easy actually. All the adults know where everything is, every therapist, and all my stuff is in one spot. I'm not running between the 3 stations. That's really how I felt last year. Um, so we have all of our morning group visuals all here, our calendar, journals, and routine, all the different independent work they do. Um, and then as I said, over here I keep all of my teacher paperwork, my data, my paperwork for the individual lessons I'm doing, all stored here with all the supplies. Having everything labeled with visuals, the kids know how to put things back as well as the adults. I got this great visual divider a few years ago and it's really nice because it's pretty safe. So this blocks off my break area and sensory area. In here I try to keep it age appropriate so there's not a lot of little kid toys because I have junior high kids, but base that on your age level. So if you have little kids, of course, like put things that are age appropriate, kids toys. But I don't have little kids so I like to have, you know, kind of cool chairs. I got this new chair from Target, so different sensory toys. This is This is what our sensory area is. Sensory is a break. So this is where my kids come to have their sensory time to relax and take some time away from work. Visually divided with shelves. I like using shelves to divide because then there's built-in storage. Over here is our library and our computer area. Our library is leveled and by reading level and by category. So there's thematic sets and there's also by reading level so my kids can easily find the books they need. I also on top have baskets for each student to store their quiet reading books as well. So this is kind of in the central part of the classroom because we use books at a lot of our centers, so it can be easily pulled from. This middle area, I really like having tables in the middle because these are great when we're sitting and waiting, but the main reason, purpose of these is for table time. I have a pretty involved video tutorial on how table time works and actually exactly what's in each of these vocational work boxes. There's a video on as well. But over here, each student has a mini schedule. It's not set up right now, but each student gets a letter or number that they match to a task and complete it at the table. This is a great, great, great alternative to the 3-bin work task. I have over 50 tasks on 2 shelves. I call this my most organized and space-efficient work system ever because it really is. I store everything right here. My lowest kid and my highest kid all use the same work system, and it saves us a lot of time and space. Um, so coming into the second half of the room, the room's a little bit divided by these 4 shelves, which I like to really give some more definition to this part of the room. Over in this corner, I have one student that's pretty high needs who's a runner. Um, so we've really taken some effort to block this off. When you work with him, you need your tasks at your fingertips, so there's a lot of bins to store all of his tasks, his finished work, his data binder. Everything's right here, and it's pretty secluded. There's desks on each side, so it's really hard for him to get out. So this is really critical with kids that do have the tendency to run. Um, a lot of sensory— his sensory toys and reinforcers are stored here. So again, they're all in the same area. Over here are two other independent workstations. I call these factory. A lot of people ask my difference between table time and factory. These are simply big work tasks. I alternate these every week for kids that need to have some downtime in their schedule. I like to plug this station in. It's nice to have a different spot for kids to work. Over here is one of the stations that my aides run. This is language. This is our fluency station. I also have a video tutorial on how to run that. It's one of my all-time favorite stations that I wish I set up my first year teaching. It's basically flashcard decks that the aide runs. She takes fluency timings on individualized sets for each student. All of their data binders are here, their flashcard sets, and their language binders. A lot of my students rotate in pairs to So when one is working on flashcards, the other's working on their binder. Our writing center is also here. This is a product you can buy on Teachers Pay Teachers. It's individualized and visual-based writing centers. All of the directions are written with visuals, and all the prompts are very structured and simple, so it's really ideal for kids with autism. Um, over here we have kind of our kitchen section. So we have our fridge, our microwave, all of our kitchen things is stored there. We do cooking at speech a lot, so it's located near a table. She can easily run a group and we can do our cooking at activity. Kind of swooping around the room, this table is for one of my other students that has a dedicated aide. He works well one-on-one with his para and kind of in a little bit of a separate space of the class. So all of his work, his Dynavox, his LovaChat, his schedule, and all his work is right here. And he and his aide have this whole table, enough space to do all their work. We also use this, this table for when the social worker comes in and needs to pull a group and things like that. It's nice to have sometimes an extra table to put a group in downtime. Over here is the other station that my aide— another aide runs. This is called reading, but it really is everything and anything. With my higher kids, she does spelling and some individualized reading instruction. With my lower kids, she does IEP goal implementation. So I set up what she's working on and the data sheets, and she runs the program. All of her supplies are stored in this shelf, so it's all accessible for a data binder, and everything's all set and ready to go. Um, and then we're back to the main area of the classroom. So like I said, this was just a general tutorial to take note of the visuals, the structure, the different centers in my class. But coming up in the next few months, I'll have in-depth video tutorials on each center to show you exactly what's in there and why it's set up that way. This was a classroom tour from theautismhelper.com.










