Steps for Running a Lesson Using TAH Curriculum
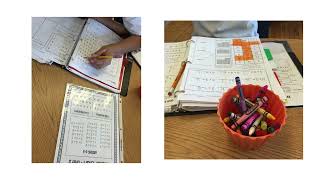
Sasha Long from The Autism Helper walks through a four-step lesson framework: review expectations with visual supports, teach core concepts using anchor charts, assign worksheets flexibly, then add sensory extension activities. The approach uses manipulatives and movement to reinforce concepts across different skill levels.
Chapters
Hi, I'm Sasha Long from The Autism Helper, and I'm here to share the steps for running a lesson using The Autism Helper curriculum. So the first step is to review expectations and the schedule. This should take about 1 to 2 minutes. This is the time where you will use mini schedules or even write the order of activities on the board. Whatever you're gonna be doing, tell your students that. Visuals are a great way to share this information for students with low receptive language, And I love the simple activity of just writing it on the board with a dry erase marker, make sure everyone knows what the expectations are and the order of activities are. And then review any behavior expectations. Keep this very relevant to the needs of your students. If they need to work on classroom rules, if they need to work on incentives or what they're working for, reinforcers, this is the time where you talk about it, remind them of how maybe they could earn points if you're using a token system, and then provide any individualized behavior support. Maybe if the student struggles with raising their hand, you review a raising your hand social story or review ways to ask for help or a break. Next, step 2, we review the core concepts. This is where the anchor chart has its moment to shine. This is where you're gonna take the anchor chart that you are working on and review all of those concepts. I highly recommend keeping the anchor charts in a place where it's movable, whether that's in a pocket folder or in a page protector that you can bring to the table, because you wanna post it, but you also wanna have it be an interactive tool that you can bring to the table. So here's what I would do with a few different levels and within language arts on reviewing the anchor chart. So for level 0.5, this is where we're really focusing on these 6 vocabulary terms. If you are working on receptive language, I would go ahead and practice all of these and say, "Where's the apple?" "Show me the carrot." "Touch the pizza." And if you're working on expressive language, point to each one and have each student say the item on the anchor chart. For language arts level 2, we're gonna want to go through the core concepts highlighted here and practice a little bit. Reintroduce them. Remember guys, we're gonna talk about synonyms and we're gonna talk about verbs. Who can tell me what a synonym is? Are they words that mean the same or different? Who can give me an example? Maybe you hide the anchor chart for a minute so they don't read from the anchor chart. Who can give me another example? If I say, um, little, who can give me a synonym for little? So maybe you practice a few. Then we're going to talk about verbs. Who can tell me what a verb is? And then they'll say a verb is something you do. Maybe you practice saying a few verbs, you practice acting them out, so you're going to review everything on here. For Language Arts Level 4, as we get to our Level 4, there's a lot of content included. We'll again want to review this. Okay, group, we're going to talk about narrative writing. Who can tell me what the purpose of a narrative is? What are our 3 parts? Who can give me an example of something that might be in the introduction or the conclusion? Next concept we're working on is character traits. What are we— what are these character— what are character traits? Who can give me an example? Maybe you reference a recent book you read and pull some of those character traits from that book. And then last, quotations. Maybe you write a few on the board. Is this correct? Is this not? You have people proofread a few. Um, you do some true/false. Is this true about a quotation or is this? And review those rules. So after we review the core concepts, step 3 is completing the worksheet. This can take 2 to 5 minutes depending on the needs of your students and how you set this up. There's a lot of flexibility here on whether you want it to be independent or you want it to be guided or a group work activity. If you do it as a group, this could even take up to 10 minutes. So this can really be flexible based on your schedules and the attention span of your learners. So this can be something they do individual and you help them along the way and you grade it, or this could be something that they do as a group together and you go, "Okay, everyone do number 1." You may want the group to do it on their own and then you check it together, give access to that anchor chart as needed. So again, lots of flexibility on how you set up doing the worksheet. And last, we have step 4: extension activities. Depending on your schedule, you can do a few extension activities and keep it short and sweet, or even longer extension activities and make it longer. Here you basically want to use the worksheet to pull concepts to continue to work on. So if the worksheet is focusing on color identification, you're going to do more color activities. If the worksheet is working on WH questions and sentence rules, do more WH question and sentence rules. You want to get really flexible but also keep it simple. You shouldn't be making new things here. If you have a dry erase board and regular activity things school supplies around your class, that is plenty. Use those activities to practice, to take turns, to extend on anything that's on that worksheet. So let's go through a few examples. So here is Math Level 0.5. So as we can see on this worksheet, we are working on counting with quantities 1 through 3, and we're working on tracing numbers. So here are some examples of some extension activities you can do to extend on this worksheet. You could count real items like small toys or office supplies up to the quantity of 3. You could put a number on the board and have everyone in the group count that amount. Give each kid a set of items to count from. You could put Post-its on the ground, give everyone a quantity or number, and then tell everyone to go stomp on the number Post-it that they have. So put the number 3 on the board and there's Post-its all over the room on the ground, and then everyone has to go jump on a number 3. Or you put a— draw a quantity on the board. You draw 3 circles and say, "Okay, count these and then go jump on that number," making it a little more interactive gross motor, getting kids out of their seat. For working on numbers, you could make this super interactive and sensory-based. They could trace numbers in shaving cream or sand or rice or make the numbers out of Play-Doh. You could find numbers around the room, do a little number scavenger hunt, take some clipboards, get out of the chairs, go find different numbers. You could use stickers to fill in a bubble number. Fill in a big bubble number on a construction— piece of construction paper and fill in stickers. So these are just a few examples, but there's so many ways you can extend on these activities. On these concepts. So next we have Math Level 2. Here are some examples of ways you can extend on Math Level 2. So as we see on this worksheet, we have some single-digit addition, we're reviewing quantities up to 20, and then we have odd numbers. So you can simply extend this by writing more single-digit addition problems on the board. Super simple. You could play Read the Room with addition problems. Put the numbers around the room, the answers on Post-its, give kids some addition problems and have them go find the answer, or the reverse. You could use manipulatives to add 0 through 5. You could make up fake word problems and practice with manipulatives. For odd numbers, you could practice counting odd numbers in a circle. You could do an odd number scavenger hunt around the room. You could make odd or even signs and have kids hold them up when you say or shout out a number. You could make this a competition or a game. And then for quantities, you could practice drawing emojis or different food or funny faces for quantities up to 20. And now we have Math Level 4. On this worksheet we have multiplication, single digit, and we have equivalent fractions. So some possible extension activities for Math Level 4 here could be writing more multiplication problems on the board, working on multiplication fluency instruction, working on multiplication with real items or drawing out the multiplication problems. You could practice with equivalent fractions using folded paper. You could put kids into pairs and make equivalent fractions. You could do an equivalent fraction scavenger hunt and put different ones around the room. So each of these— for every single worksheet, there's endless opportunities for extension activities. If you are a member of Curriculum Access, remember there are implementation guides for every single unit. So we walk you through this lesson format and then we give a huge long list of extension activity ideas. So if you are feeling stumped on what to do, check out the extension activity list. These are all super simple with things you already have in your class. If you don't have curriculum access and you're purchasing the curriculum individually, you can definitely think of these on their own. Get creative, utilize things in your class, keep it simple. You can repeat these extension activities a few times a week and extend on what you've worked on on that worksheet. So overall, here are 4 steps for running a lesson. 1, review expectations and schedule. 2, review core concepts. 3, complete the worksheet. And 4, extension activities. This can take as short as 12 to 14 minutes or as long as up to 30 minutes. Depending on the needs of your student, depending on their skill set, and depending on your schedule.










