Gina from TheAutismHelper.com shows how to build structured task boxes for 5-10 minute skill practice with autistic students. Start by listing each student's IEP goals, rate them on target skills, then use three labeled boxes with picture schedules and interchangeable materials like puzzles and matching activities. Adjust difficulty and storage to fit your classroom.
Chapters
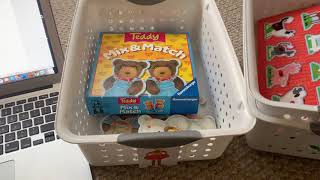
Hi everyone, this is Gina from theautismhelper.com. Today I wanted to show you these structured task boxes that I'm in the process of making. Um, now that we'll be entering the second half of the year, I wanted to really target skill sets for about 5 to 10 minutes on each kiddo. So recently I watched a really amazing, um, example of this in action on the Spectrum Compass with Whitney. Um, she's an awesome mom with the cutest little son, Kyson, who was diagnosed with autism. And she was actually featured on podcast episode number 49 with the Autism Helper. So ever since then, I've been hooked on her videos, working with her son in real life, real life time. So I wanted to take her videos and apply it to the classroom. And of course, I'll tweak a few things based on functionality of my classroom and the needs of my kids. So first, I created a list of my students. And of course, this is a fake list. These are not real names. Well, it's our Autism Helper team. Names. So what I look for is I go through all the IEP goals and I make just a general list of skill sets. So identical matching, colors, puzzles, the Hear, See, Touch programs with nouns. Just a vague kind of overall arching list of skills. And then I rate the students under those skill lists of who's working on that skill so that I can easily group them with the materials that I have. Okay, um, and then next is setting up the boxes. So of course in a classroom you may have a ton of storage room, you may not. For me, I do not have a ton of storage room, so obviously having 3 boxes or 2 boxes per student would just— it wouldn't work. I don't have enough room. So I am going to create either a binder or just one drawer that houses all the different materials and then just pull them out as I need them. So I have 3 little boxes right here. And on the ends, they have little tags, and they'll eventually have a little schedule that matches the tags. And in the videos, um, they use, you know, shapes and different symbols. However, I think you can use whatever you want that's appealing to your students. So for my little guys, they might think these pictures are more exciting to look at, or I might also use like Minnie Mouse or princesses or Peppa Pig or or whatever is age-appropriate in order to match on their schedule so that you can say, you know, "What do you want to work on first? Do you want to work on the crab, the little girl, or the flower?" and have them pick. And then in each of the boxes, you're just going to place in the items that go along with the targeted skills that you made a list of. So for this student and a couple more, they're working on puzzle pieces. And you can modify this based on each student. So maybe a couple of your students are only working on putting 3 pieces in, Or maybe you have a student who's working on all the pieces. So it just depends on your student, but you can modify it still to fit each one of your kiddos. Another little activity is this really neat mix and match teddy bears for identical matching. And I just pull out a few of these, give them a set of each, and they have to match the identical bears. And then the last one is working on colors, and I have some color cards right in here. So this is just a simple way to target skills that I'm really, really going to try and use the second half of the year now that we have routines down and I really know where my kids are and what they need to be working on. Hope you enjoy!