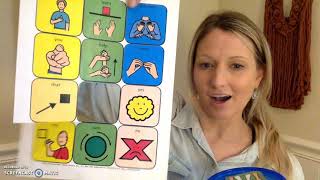
Gina from The Autism Helper shows how to teach one core word at a time to children with minimal communication skills. Pick a word like "open," create three sizes of visual symbols, place them where kids need them, and model the word during daily activities. This focused approach works for home and classroom.
Chapters
Hi everyone, this is Gina from The Autism Helper. I'm here today to teach you about power core words. And if you read my blog, this is where you're going to start. You're just gonna— nothing fancy, just sketch it out a little bit, thinking of what your power core word of the week with your student or child at home could be, how you can empower your families at home just by focusing on at least one a week. Of course, you're still going to encourage them to use other words and keep talking to their child, But sometimes this helps us really empower families and ourselves if we're a new teacher or maybe we're just learning how to do this. Also with the kids I work with, they're on about the one word symbol level at this point. They're just seeing them for the first time. So this is a really great way to introduce them. So as I said in my blog, you want to be a detective. Think about some activities that your child like. This child likes Quick Stix, these little paint sticks. She enjoys opening Easter eggs, eating packaged snacks, and reading books, looking through books. So the core word I would emphasize this week, if this was real, was the word open. And some places to use the word open, activities using the Quick Stix, you can open up the cap. Items in Tupperware with lids, you have to open the lid to get out the egg, which you can also open. Snack time with all those prepackaged snacks that she enjoys. And then smaller symbols on places like the refrigerator door that you need to open, the cabinet door that you need to open, maybe their dresser drawers where their favorite t-shirt is in. So smaller little scale symbols. So this is what you want to do first. Go ahead and make it, map it out a little bit. And then, um, as I said in the blog that you can make different sizes. Again, some of these kiddos I'm working with have never seen symbols before in their life. Visuals, anything in this nature. And sometimes it can actually be a little irritating. Sometimes kids don't like to see these right off the bat. They don't understand what they're there for yet. But, so I just found that having one symbol that I'm focusing on helps parents focus on one symbol and it makes them use them more. So then in turn you'll see more communication. It's just simplifying the process a little bit. So I like this size for when I'm doing activities. So maybe the child's in the high chair or at a little table or wherever we're coloring because I know that this child loves Quick Stix. She loves anything with a cap on it, so I would point to, "Alright, let's open," and one at a time. I have control over all the materials, right? I don't just hand her a whole bunch of markers and just hope that she's listening to me. I like to bring it up to my face, "Open," and then I model how to open it. I might like halfway open it so that, you know, there's success with the child pulling off the lid. "Wow, good job, you opened it. Open." And that's what you would do with the Quick Stix. My child also loves to open Easter eggs. So I have a little egg in here with a little cow that I got at the Dollar Tree. I put my lid on. This one's a twisty one, so this one's harder to open. And again, I'm not having the child necessarily touch or sign or imitate or anything. I'm just experiencing this aided language, aided language input. I'm showing them, "Oh," I hand it to them, they can't open it. "Oh, you wanna Open it. Let's open. So this is when you could use the smaller symbol size. Open. And I honestly just cut this out of a board. I used tape. I didn't even laminate it. I just put clear packaging tape over it and had some Velcro. So nothing fancy there. Practice opening it. Oh, take out the egg. Let's open it. Open. So on and so on. And then, so these are for— you can also put these, like I said, on the fridge, the cabinet. And then I also wanted to show you that I, with the word out, sometimes when I go to homes, if I'm focusing on a Power Core Word of the Week, I have this, but some kids are ready, like they might be more accustomed to a midboard like this, and mid just means, sorry, reflection. Midboard is just showing you that there aren't as many symbols as like a larger board that might have like 56 in them. I think this one's 20. So that, you know, if the opportunity arises, you can just take it out and use it, or you can leave it in and point to it. Or if you wanted "I want open," you could bring it out to the side. Or "I want out," you can put them next to each other. Oops, even though this symbol is on here. It's whatever is best for your kids. Just introducing to them. So that's how you can use the different sizes for different activities. Keep it fun, engaged. We want them, we want kiddos to start learning that these words mean something and they get them something and it gets them help or whatever it else is that they need. So don't forget, make your little list and then you can empower your parents this way. And then you can hang these around your classroom too, like in centers or something like that with what you could do with doll babies or blocks. Or if they're into like putting scarves and just waving them around, think of some words that you can use with that as well. So hope you enjoyed that and good luck!