Video Tutorial - Real Picture Schedules
Sasha from TheAutismHelper.com shows how to build two picture schedules in PowerPoint: a PECS-style Velcro board with large category labels and matching small cards, and a written check-off schedule for higher-functioning learners. She walks through finding real photos on Google Images, formatting in PowerPoint, laminating, and attaching Velcro for reusable, sequential schedules.
Chapters
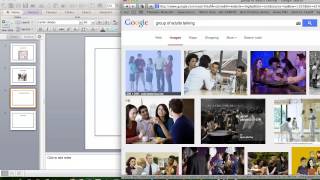
Hi, this is Sasha from TheAutismHelper.com, and today I'm going to show you how to make real photo picture schedules using only PowerPoint and Google Images. So real photo picture schedules are a great way to show children or adults exactly what activities they're going to accomplish in each day and the order of those activities. Today I'm going to share with you two different types of schedules. The first type is going to be a Velcro picture schedule. So that will be the traditional PECS type schedule where there'll be small Velcro pieces to indicate what activity or center and the order those go in. Participants will match the small picture in their personal schedule to the large label at each station. So we're gonna go ahead and start by opening PowerPoint and inserting a shape. So I'm going to insert a rectangle. And first I'm going to make the big labels that I'm gonna put at each center. So I want these to be pretty big. I want them almost the full page. Um, so once I add this, I don't want it blue, so I'm going to format. I'm going to make the line around black and the inside white. Um, the first center I'm going to make is leisure time, so I want to insert my text box for leisure time, move that right to the top, and I'm going to make that nice and big. So now I'm going to go to Google Images to get my image. So once you get to Google, if you just click on Images right here, that will search for only images. So the type of image I'd like for this is a board game, so I'm going to search board game. And I like this one right here of Monopoly. That's a game sometimes that will be played, so that works perfect. So I'm going to center that, and this is going to be my big label that goes at my center. So whatever table is leisure time, we're going to use. So I'm gonna save myself some time. I'm gonna copy this exact slide. Copy. Click out of it and then paste so I don't have to redo all of the insert. Just delete this and then I'm gonna again save myself some time. Copy, paste for however many. I'm gonna make 4 right here. Click out, paste. Alright, so the next one I want to do, then I don't have to waste the time of remaking my text boxes or formatting my box. The next one I'm going to do is social skills. So I'm going to do a social skills group, so I'd like an image for that. So I want to do— I'm going to search for group of adults talking. So I'm going to pick an image that I like. And maybe I'm being picky. I'm gonna go with this first one right here. I liked that one actually. So I'm gonna center that, make that big. The next one I'm going to do is vocational training. So here I'm going to look for a type of task that I might do in vocational training. We're working on sorting silverware as a pre— as a restaurant skill, so I'm going to look up silverware sorting. And that's a good— I'm just going to get just the one of just the silverware right here. Center that. And the last one I'm going to do is reading. We're going to do a functional academic reading center. So I would just want a picture of a book, something simple. I like to pick pictures that are just pretty concrete, not a lot of muss and fuss, just something that's pretty straightforward. But again, I do want to be using those real pictures and not the cartoons to keep this age-appropriate for adults. So, um, having a hard time finding a good book here. Here, this is a good one. So I'm going to pull this over and resize that. So now I have 4 different labels for 4 different centers. So again, I'm going to copy this last slide and paste. I'm going to delete this and move this over. Delete that. So now I'm going to make the small picture schedules that are going to go in my student or participant's individual schedule. So I want these to be small. I'm going to probably want them to be— have maybe 5 activities in a row on a page, so I'm gonna make it about this size, and then I'm gonna go ahead and add my text box so I can copy them all together. So I'm gonna insert a text box. My first one was Leisure Time, and then I'm gonna change the size of the font so that fits in, put that in right there. And then I'm going to copy both of these together. If you click Shift, they both— they both select. Copy, click out, click paste. So then I can move it as one piece. I don't even have to waste the time remaking the other one. I'm going to click all of these and click Shift, copy, paste, move them all over. And then I'm going to go up here and copy my pictures. I'm not going to even go back to Google, so copy Paste, resize that down, copy, paste, fit that into our box, and this one is Social Skills. Next was Vocational Training. So the key is to making sure these pictures match. I've seen some schedules where they don't, and the really— the point of this is to be able to match it to exactly the same picture. So that's why it's really key to do this at the same time and use the exact same pictures so it's matching picture to picture and reading. So there you go, I just got 4 different centers and that only took a few minutes. Um, so these will be the individual pictures that will be used for the picture schedule. So you can follow the same process to add in all of yours. Print these out. I suggest making multiple copies of these because you'll want— you'll lose them, they'll get lost. And then these ones, you can laminate them, you can put them in page protectors and label your stations with them. These you want to go ahead and laminate and put Velcro on the back to create a picture schedule that is sequential. So now we're going to switch gears and we're going to look at a participant or a student that is higher functioning, that doesn't need that picture schedule. We want to always make sure that we're giving our participants or students the most generalized option that is the most functional and the most easy to integrate into the community or an inclusion setting. So the picture schedule is not always— the Velcro picture schedule is not always so generalizable. So let's look at making a different schedule for an adult or a student that can cross off or check things off. So I am gonna open a new PowerPoint and I'm gonna go to Page Layout because I want this to be portrait. So I'm gonna have this one-page schedule that's gonna indicate for my participant everything they're doing in each day. So I'm gonna do a header right here, insert a text box, and this is gonna be Monday's schedule. So I'm gonna say Monday's schedule for Mary. So I'm gonna put that right at the top. And I'm going to go ahead and we're using these same pictures as these other participants, so I'm going to go ahead and copy all of these. This is going to be really speedy to make. Copy all of these. Copy, paste, and move them right in here. So I'm going to put the order of her— so her activities, she has leisure time first, then she's having social skills, so select all of these. Move them over. Next, she's having reading. Move these over. And next, she has vocational, her last task of the morning. So these are gonna be the order of her tasks. If I have— you have more, you can add them in. Sometimes I like to do morning on one side, afternoon on the other. Depends if she's only in my room for a short period of time. This would be your whole schedule. You can center this and obviously make it look a little nicer. This could be something you laminate and they use a dry erase marker to check off, or something you photocopy and they check off with a marker, with a pencil. A bingo marker is great for someone with low dexterity. So this is a great option. These are easy to set up because once you make them, you're pretty much done. So these can go on a clipboard, in a binder, in an agenda or planner, and they have their schedules for the year. So this was a video tutorial of using real photos to make Velcro picture and written schedules using PowerPoint and Google Images. That is a mouthful. Um, so hope you enjoyed it, and this is Sasha from theautismhelper.com.










