Sasha shows how to build a rotating writing center for autism classrooms using eight activity stations in just one and a half shelves. A clothespin system lets students pick their station, with laminated rules and a checklist to guide independent work. Templates are available at theautismhelper.com.
Chapters
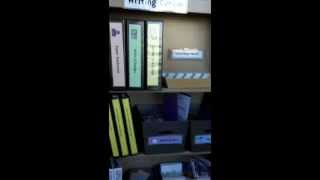
Hi, this is Sasha from theautismhelper.com, and this is a video tutorial of my writing center. So I just finished setting this up, and I'm pretty happy that it really only took one shelf and a half to fill up, so it's a big space saver for me. So the writing center consists of these 6 notebooks or binders and then these 2 bins. and then a finished bin. So that's the whole center. So there's 8 different centers. I made 10 in my packet, and then I'm just gonna rotate the 2 bins out for the other ones. I put actually the name of the other center on the back, so when I want to switch, it'll be ready labeled. So the way the kids are going to pick which center they want to do, there are paper— there are clothespins up here, Velcroed, with their names on them. So they'll pick which center they want to do, and this is laminated and then just taped on the back. So they can pick which center they want to do based on the color. So I don't kind of only want one kid in each center, but I guess two could go too, but there's not really room for more than that. So they'll pick which center and then they'll take that corresponding notebook. So the green one is recipes, so they'll pull the recipe binder and they'll come sit at the table and do the work. So that's the basic system, or if it's a bin, they'll pull the bin out and do the work. So I'll briefly go through each center and then more elaborate descriptions will be on the autismhelper.com under this Writing Center post. So that the recipe one is out, each binder is set up the same way as kind of the template. The writing rules are laminated and on here right in the front. Every page— every center has an instruction page at the start and the "So you think you're finished?" at the end. So kind of to review, like going through each point with a visual. If yes for all, then turn it in. So each center has its own instructions for writing a recipe. It goes through each steps and with a little bit of a visual as well. And then there are worksheets for writing the recipe, so the child will write what the recipe is for, the picture of it, and then the steps how to make it. And then I kept the masters just in the back so I know where they are. Um, so that is writing a recipe. Uh, next we'll do Letter to a Friend, which I actually don't have envelopes yet for, but I'm adding those today. So same thing, the rules, the directions. This one has a sample letter that's color-coded, and then the color coding is onto this side what it means. So The blue is to the name, who are you writing the letter to. The purple is the body of the letter with some ideas about what to write about, and then your name on the bottom, color-coded. So then there's paper, and I'm gonna have envelopes in there as well. And next is Super Sentences. And this one, the directions, they will pick 3 sentences that are very basic, write them and then write the longer versions of them on here. The directions are on the front. I kept those in a, uh, in a pencil case with holes on it so it can go right in, and then labeled. If I Were a— so this one is kind of to work on imaginative writing. The directions, same thing, flashcards in a pencil, pencil case holder, and the paper in the back. So pick a prompt and And I laminated those cards, 'cause I kind of figured they would last a little longer. I did pretty thick binders, but you could totally do smaller ones too. Seasonal writing, for right now, I haven't gotten too crazy with this, but I feel like I'll have more ideas as the seasons go on. But right now it's just worksheets, there's 6 different ones. They can write in what season it is, do you like it, why or not, what food do you eat, write about the weather in this season. So this could go for any season, but I think I'll add, kind of some newer things as we go on. And again, I kept the masters in the back. Seasonal. And then the last binder is pick a subject. Um, I saw this idea somewhere on Pinterest, and I actually don't even remember. They called them blogging notebooks, which I really liked this idea. So there's 4 different subjects with topics that kids can write in, and then they can respond to the person that wrote before them. So there's— I just kind of put them right into the notebook. That's kind of why I wanted to use bigger ones too. The different subjects they can write about, so they can pick one notebook to write in each day that they pick this center. And then the two bin work that I have, I have the mystery box, which I included on my blog kind of how I made this. I just covered it, a tissue box, with that patterned duct tape and kind of cut some slits in it, and then there's something in there to write about, and then the paperwork is kept in a folder. I also have a cover and a label if you want to put this in a binder with paper. There's paper in the back too to write in. So that's Mystery Box. And then the last one is Pick a Stick. Same thing, the directions and the paper are kept in a folder, and then here are the prompts. So I got this thing a long time ago, and I've never really used it, so that's why I use these, but you could totally use popsicle sticks too. So I just taped all the prompts right on there, and I actually doubled them up so they can pick which one, even save some, some space. So that goes in there. So that is the writing center. The two that are missing are the, on the back here, the 5 words like and the roll a dice. So those will be the two centers I'll switch out. But I'm hoping to kind of keep the binder ones the same and just kind of expand on them and make them more complicated as the year goes on. So this was a video tutorial of my writing center. For more tips, resources, materials, please come to theautismhelper.com.