LeadSimple: Building A New Property Process in Realtime
Peter Lohmann, CEO of RL Property Management, demonstrates migrating a property onboarding checklist to LeadSimple. He shows how to build custom processes with conditional logic, embed videos, set up email templates, and sync properties from Buildium, then walks through a sample workflow end-to-end.
Chapters
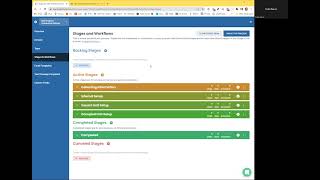
Okay, so thank you everyone for coming to this process live event. I'm Peter Lohmann. I'm the co-founder and CEO of RL Property Management. We manage about 650 rental units in Columbus, Ohio. And if you're here, you've probably seen that I talk a lot about processes and systems within property management companies. And what I'm going to do today is move over one of our existing core processes, which as you can see here on the screen is the new client property checklist. We're going to move that from Process Street to LeadSimple Process. And we've been using, uh, we've been using Process Street here for many, many years, probably 6 years or so. Uh, but we're in the process of migrating our core checklist over to LeadSimple. Which is process software that has direct integrations with a few different property management softwares. So we use Buildium and LeadSimple has a direct integration with Buildium, which means all of our leases, clients, tenants, all that data is available within LeadSimple, which makes it way more powerful than, um, than Process Street because Process Street doesn't have access to all that data. So the thought here is I thought it might be valuable for me to share my thought process as I move over a checklist. It's gonna give some insight into the way I think about building processes. And then also for anyone who's interested in LeadSimple, you can see how that software works and what's involved with it. So I mentioned this, uh, a few minutes ago, but let me just reiterate, I wanna make this very conversational and interactive. Rather than just me monologuing. So for everyone who's here at the live event, I've turned on your ability to unmute yourself and ask a question, or you can type questions in chat. If you have a question, you probably have the same question that everyone else does and they're just scared to ask. So go ahead and ask it. And Todd, he and I were chatting in particular. He's willing to kind of be the voice of the audience in a sense, and he's going to interject if he's got questions, which would be amazing. Um, so we'll get started. Okay. So, so we're in Process Street here. This is our new client property checklist. That's pretty long. As you can see, we've got 59 items. And in order to get this moved over into LeadSimple, it's not just going to be a simple copy paste. Um, unfortunately the way that you build a process in LeadSimple is slightly different than Process Street. Process Street, you can think of as almost like if you printed out a Word document with all these items on it and just check them off as you went. That's almost the level that Process Street is at. Whereas LeadSimple has a lot of automations and integrations that make it way more powerful. So to get started here, I'm gonna go back into LeadSimple and I'm gonna create a new process by clicking this plus button here. And I'm going to click this new custom process at the top here. They have some sample processes you can start with. Um, but we're not going to do that. We're going to create our own. So we'll click new custom process. We're going to call this new property onboarding. That's what we're going to call this process. So we'll hit save. Okay, so now it's asking us what team members we want to give access to this process. And we're pretty much gonna give everyone access to this with the exception of our sales rep, cuz he doesn't really need it. Um, and what the screen that we're looking at right now is the sort of like the settings. So you can see the gear icon. So this is all the settings for this new process that we just created. So we're, if we look at overview, there's not much on here. We'll just create a description. This is the new property onboarding process. Click General, and we're going to add a few contacts. Um, we're going to add clients, and that's going to map to Buildium rental owners. So this is kind of how you're building the data connection to Buildium. And why don't we just start with that? That might be all we need for— oh no, we're probably going to want Yeah, I think that's all we need for now. So we'll leave that and we're gonna leave all this other stuff at kind of at the defaults. And then the main screen we're gonna spend a lot of time on is the stages and workflows. So these are the default stages that you start within LeadSimple Process. Um, you have backlog stages, active stages, completed stages, and canceled stages. Those are like the different types of stages. And a stage in LeadSimple Process is simply a major milestone in the completion of a process. So if we go back to Process Street for a second, you know, all the things that we have to do when we onboard a new client or property, I kind of had broken it down into sections here. Like this is some of the initial setup info we need. And then this section here with steps 3, 4, and 5, this is stuff we need from the client. Then Lauren's doing some stuff right off the bat, more stuff we need from the client, some more stuff that Lauren's gonna do. So those are kind of corresponding to stages within LeadSimple process. Um, LeadSimple has a view where you, you can view all the active processes and what stage they're in. So that's really handy if you just want an overview of where all the checklists essentially, or processes, where they're at in terms of how far along they are to completion. Okay, so let's go ahead and create— we're going to get rid of this backlog stage because we're not going to use that for this checklist. So just delete that. Um, for active stages, I'm going to rename this to the first stage we're going to use, which I like to call Collecting Information. Okay, and I'm going to create a couple more stages that I know we're going to use. I thought about this a little bit before I, before I kicked off today. So we're going to have another stage called Internal Setup. And another stage called vacant unit setup. Oops. And another stage called occupied unit setup. Okay. Okay. So within each of these stages, there's gonna be steps or tasks. So similar to how, you know, like each one of these is like a, a to-do item. That's exactly how we're gonna set it up within LeadSimple. So each one of these stages, which is like a major milestone. Is going to have various tasks within it that can be assigned to different people within the organization. Let me pause here. Does this all make sense, Todd? Are you tracking here? Does anyone have any questions?
So far I'm good, but I, um, I've also played around with the CRM before, so I kind of understand.
Like, I—
it's not the first time I've seen this, I just haven't seen the process side.
Yeah. And if you are familiar with LeadSimple CRM, it's very similar. It uses the same technology on the backend and a lot of this probably even looks really familiar. So that's a nice sort of easy way to get, um, started with LeadSimple Process is if, if you're not already, if you're not already using their CRM product, it's really, really good and pretty much everyone uses it. And then once you're familiar with it, kind of gives you an easy way to start with processes. Okay. So, let's, let's start here. So, let's go into collecting information. And if we kind of look at the checklist that we're starting with, I want to make one clear point of clarification here, which is that in Process Street, this is called the new client slash property checklist. So we would kick off this checklist anytime we onboarded a new property or anytime we onboarded a new client with a property at our property management company. Something that LeadSimple recommended, and after thinking about it, I thought it was a really good idea, was to separate these into two different checklists. So you're gonna have one checklist for new clients and a different checklist for new properties. And the beauty of this is it makes it much cleaner if an existing client adds a new property. So this way, if a new client adds a new property, all you have to do is run the property checklist for that property. And the other thing I like about this is the process of onboarding a property and onboarding a client are actually pretty different and they both need attention. So having them as two different checklists, I think is, is a great idea. And that's how we're going to do it. So what, what that means is as we migrate this checklist from Process Street into LeadSimple, anything that has to do with onboarding a client, I'm gonna skip. And then separately, not today, I'll be creating the new client checklist within LeadSimple. So I hope that made sense. All right, so required information. So here in Process Street, we had to manually enter the client first name and last name and their email address. The beautiful thing is that since LeadSimple is our sales CRM, that data's already gonna be in LeadSimple. So all you have to do when you run this checklist in LeadSimple is select the client and it's going to automatically populate all this. So we don't have to, we don't have to do anything with this in LeadSimple. Now it's asking, um, the unit addresses. And because we have a Buildium sync with LeadSimple, again, this is a step we can completely skip. All we're going to do is select the property within LeadSimple every time we run the checklist. So let's go back into LeadSimple and I actually want to add a to-do item, which is to add property to Buildium. So if we add the property to Buildium, um, then we can sort of attach that property within the LeadSimple process. And I'll show you. Once we get a little further along, I'll run, I'll run this checklist and you'll be able to see what I mean. Um, so I'm gonna add another item that says manually sync lead simple and attach property to this process. Um, Buildium, Buildium automatically syncs, I think every couple hours, but since we will have just added the property a few seconds ago, we're gonna want to do a manual sync. That's gonna pull the property over from Buildium and then we can attach it here in LeadSimple. Okay. So let's see, is this a new client? Um, again, we're not dealing with the new client checklist portion here, so we won't even need this. Was the property just purchased? So this affects some of the logic further down, and we do want to, we do want to enter this. So these questions here that I'm asking as we set up the checklist in the beginning, they drive some conditional logic that's going to show or hide certain steps further down. So what we need to do is create a way to, to store that, um, data. And we do that with custom fields. So for this process, we're gonna create a new custom field called, let's see, property just purchased. And this is gonna be a multiple choice with yes or no. And we can see that got added here. Under the processes with yes or no as the options. And while we're here, I'm going to add a couple other custom fields that I know we're going to use. Property part of association, that's going to be yes or no, cuz that affects, uh, there's some extra items we have to do when we're setting up a property that's part of like a homeowners association or a condo association. So we want that conditional logic to work. Um, let's see. At least one occupied unit. Again, multiple choice with yes or no. At least one vacant unit. So, let me explain what's going on with this. There, again, there's going to be logic driving additional steps that we're going to show for occupied units and for vacant units. And because we onboard by property, right, if you picture a duplex, if we're onboarding a duplex, there could be one occupied and one vacant. Or both could be occupied or both could be vacant. And we want to cover all those possibilities with this checklist or with this process. And so if there's at least one vacant unit, there's some vacant unit steps we need to complete and we want to show those in that case. Same thing for occupied. If there's at least one occupied unit, there's a bunch of stuff around setting up the lease and the security deposit and the tenants. And we want to show those steps in this checklist if there's at least one occupied unit. Okay. I think that's all we need for custom fields. So let's go back to building the process here. And yep, we are gonna want to set up initial info, set up property. Info, see instructions. So LeadSimple has a nice, um, feature here where you can include instructions. So for example, under this instruction, add property to Buildium, I could say something like step 1, log into Buildium, step 2, go to properties page, etc. And you could include all kinds of stuff in here. You can embed a video, you can put pictures, links, long detailed instructions, and that way when the person is completing the checklist, they can click this. I'll show you what that looks like when we run the process, and they'll be able to actually see all the detailed instructions that they would need to complete that item. So let's actually see what this looks like. Even though we only just started, um, I want to show you what it looks like when you actually run a process. So let's actually get out of the settings and we're actually going to run one of these processes right now. And there's a sample one in here already, so let's click into this and we'll bring this back to collecting information. Uh, let's run a new one. That's not populating with everything I want to see. So let's just click start process, pick a due date tomorrow. We'll pick a random property. So this is what it looks like when you run a process. So for the folks who are actually going to be using this every day, this is the view that they're going to see when they first run this process the very first time. So remember how we added those instructions here? Here they are. You just click this green box and it pops up the instructions. Step 1, log into Buildium. Step 2, go to the properties page, et cetera. And you can click close to sort of hide that view. And the view that we're looking at here is showing you a bunch of different stuff. And the first time you see this, you're probably like, whoa, what the heck is all this? But it's pretty straightforward. So up here you have any overdue tasks and the due date. You have who the process is assigned to, the property that's associated with the process, the client that's associated with the process. So you may have noticed that this is a property that I own personally. And then over here under activity, there's like a, a kind of like a changelog or an activity log of everything that's happened with the process. And then this dropdown shows the stages. So remember we set up the stages in the beginning so we can jump between different stages. And this sort of like colorful bar across here is just like a visual shortcut to see what stage you're in. And then sort of the meat right here is this tasks list. So right now you can see it's only showing one task, which is add property to Buildium. Let's go ahead and check that off. And you can see it disappeared and another, uh, another task appeared right away, which is this manually sync Buildium and attach property to this process. So that step basically means if we didn't already have this 970 Bryden Road attached to the process, we can add it just by typing in like this. So we can check that off. And then the next, the next step appears automatically. So that's what it looks like when you actually run the process within LeadSimple. Let's go back to setting up the process. Any questions about what we're doing, what you're seeing? Is this making sense at all? It's hard for me to put myself in the shoes of someone who's never seen any of this before. So if you haven't and you're like, I have no idea what's going on, please, please speak up. And I'm happy to kind of expand on anything that I've done so far.
Making sense to me.
Okay. Anyone else? I enabled everyone's ability to, to talk so you can unmute yourself and talk or pop something in chat if you want to. Okay. Oh, here we go. Benjamin Mass asks, is Buildium connected to LeadSimple? Yes. So you, I don't think you were here in the beginning, but yeah. So LeadSimple. Has a direct integration with Buildium. So it automatically syncs over all the properties, the owners, the leases, the tenants, the vendors. All that is, is one way pushed from Buildium to LeadSimple. I think it happens every couple of hours. I know they're working on reducing that, so maybe it'd be as frequently as every few minutes. Um, but that's, that's honestly the whole reason I'm even doing this is because of that powerful sync. And the ability to have all of that data as part of all of these checklists. I just, I couldn't resist tapping into that. All right, let's keep going. So we're still under collecting information. So something else I'm gonna point out is these stop, this hand sign here. This is called like a stop task. I'm actually gonna turn this off and that's gonna make it so that when we are running the checklist, all the tasks appear at the same time instead of one by one by one as you complete them. I just think it's a little bit simpler, but that's configurable. Okay, so let's go back to the instructions for this, for this step here, set up property info. This is where we want to actually have the user input the data for those custom fields that we set up a few minutes ago. So we're going to say something like, please enter the following data regarding this property. And trying to remember what all those were. At least one vacant, at least one occupied. Property was just purchased, and then is the property part of an association? I think it was those four. Was the property just purchased? Question mark. Is the property part of a homeowners or condo association? Is there at least one vacant unit? Is there at least one occupied unit? Okay, so you're probably like, what the heck is going on here? I will show you. It's easier to show. Let me add— let me see what else we need here. I think that might be everything. So I'll show you what that looks like next time we do, next time we do a run. Okay, so once all this is completed, you can see at the bottom here it defaults to leave process in this stage until a user moves it manually. I'm going to click this dropdown and actually change it to internal setup. So what that means is Process Street, as soon as you complete these 3 tasks is going to automatically move it to the next stage, which is internal setup. So let's go to that internal setup and start building out this part of the process. So what do we need to do here? We need to check off PMA signed, PMA property management agreement signed. Oh, I actually clicked the wrong thing. Let me delete this. And then access to the property provided. So I'm going to copy this text here. Access to the provided by client. And then I'm going to add that instruction here. If there's no working key to an occupied unit, blah blah blah blah blah. So those instructions will be available to whoever runs this checklist. Maintenance reserve and setup fee funds received from client. Okay, so let's Let's actually run this again and see how it's looking. This is something that is good practice as you're building a checklist or building a process. Uh, it's good to actually go and run it pretty frequently and kind of step through it to make sure everything is showing up the way you're expecting. So let's go back into this 970 Bryden one. Let's, uh, let's show instructions for this setup property info now that we edited it. So here's the— here's what I wrote out just a minute ago. Please enter the following data regarding this property. Was the property just purchased? So what I do here is I click on this and it highlights this green section, and I'm going to click yes or no. So let's click yes, save, and then you can see it, it fills it in. And what's happening as we do this is that the data is being stored for this specific property within LeadSimple. And further down in the checklist, we can reference this data and show or hide or do other things with conditional logic, other parts of, of the checklist and the process. So the, this conditional logic stuff, you don't need to start with this. It's powerful and flexible, but if you're just getting started building your very first process, I wouldn't even worry about it. I would just start by getting down the things, you know, you need to do for every property. Get them in here in some sort of way and just start using it. I think that's the best thing you can possibly do with processes is just start with something like the bare bones minimum, start using it and like use it every single time. And then as you use it, you're going to think of 100 things that you can change or update or do better or remove or put it in a different order. And all that stuff is great. So you sort of like, you end up improving it almost every single week. You're gonna think of like different ways you can improve your processes. Like this new client property checklist in Process Street. This has been around almost since day one of our company, which was 9 years ago. And there's been literally hundreds of revisions and things that we've added and removed and changed over the years to suit how we actually do things. Okay, so this data is filled in. I'll click close, and now I can check off this task. And you can see it automatically moved us to the next stage, just like I configured it. So we went from collecting information to internal setup. So we will check off PMA signed. And now you can see, because we don't have that stop task, that like stop hand that holding up like a stop, all the tasks are appearing immediately. You don't have to like complete one task before the next one appears. I just prefer it that way, but, um, you can set it up however you want. Okay, so let's make sure these instructions are showing up nicely. They are. So this all seems to be working pretty well, and you can see as I check things off, um, it's appearing down here in this activity feed, right? So that's pretty nice. So you can see who did what, when, which that saved my bacon a couple of times. Questions or thoughts with what we've got going so far here? Is this helpful? Is this valuable at all? What are you guys, what are you guys getting out of this?
Peter, I think it's all been really clear. I'm following along. I like it. The only small question I have is about removing the stop task If I had been, but they couldn't necessarily go to a next stage, right? Because all the tasks would have to be done before going to the next active.
Uh, yes. So this is this stop task. If you have this on, it won't show the next task until you complete the one above it. And as far as preventing you from moving to the next stage, I'm actually not 100% sure about that. I think you might be able to manually override that. And move it to the next stage regardless?
Oh, I think you can skip in the CRM. I think skip, so it's probably the same thing.
Okay. If you haven't completed one of the tasks and you wanted to, if you wanted to be able to move to the next stage without completing it, you would need to choose the sticky a button for it to allow you to keep that task uncompleted and then move on to the next stage. Yes. Thank you for that clarification. I was just reading that hover over text when you were saying that. You've obviously been using LeadSimple for a minute. So yeah, I think that's, that's exactly right. If you have this checked, I think if you change the stage, the task will stick around, which might be accomplishing what sort of what you were referring to, Todd.
Perfect. Thank you.
Okay. So there's a couple— let's keep going here. Let's keep adding these tasks. Set up Dropbox, add to growth chart spreadsheet, send welcome email. Okay, so this welcome email, um, nice thing about LeadSimple Process is you have the ability to send emails directly from LeadSimple. So instead of having a task here that just says send welcome email, I'm actually going to click the email button. What I've been clicking is the to-do item. That's what you use 90% of the time. They really should move this to-do button right over here because it's like the most common one. But let's click email and we're just gonna call this send welcome email. And we're under where it says send to. I'm going to select clients. And the beautiful thing here is we're going to set up an email template and the template allows you to customize, do like a mail merge basically. So let's just do that. Let me show you. So we're going to create a new template. We're going to click create new here. Client welcome email. So I'm going to try and find this actual email template. Okay, I can't find it quickly, so I'm not going to burn everyone's time while I do that. I'll just type something for now. Welcome to— oh, you know what, let's, uh, so this is the property onboarding, so we don't necessarily want anybody doing client-specific things. So actually we're going to skip this step completely, but maybe what we can do is just make it relevant for adding a property. So thank you for adding a property to RL Property Management. So I wanted to show off this email thing, so this will be fine. So we're going to say dear, and I'm, I hit spacebar and I'm going to click this merge tag. And I'm going to scroll down and just click client's first name, comma, thank you for adding, and I'm going to find the property. Um, We don't have the property in here.
I think I saw a property address. I think you scrolled past it somewhere in the middle there.
Oh, there we go. You're right. Property address. Thank you for adding property address. We look forward to making this property successful for you. Kindly, RL Property Management. So I'll hit save, then I'll select it. And now you can see it, it appears here, client welcome email. And you can even, um, this little lightning bolt, if you click this, it's gonna send it automatically. So I'm gonna, I'm gonna leave that off cuz I wanna sort of show you what that looks like. So let's take a look at this. Let me back out of here. We'll go back in here. We might have to start a new one to make it show up. Oh, there we go. Set up Dropbox folder is complete. Add to growth chart is complete. All right, and here's the client welcome email. I need to add myself back as a client because I removed myself earlier. Oh, this is going to be a problem. There we go. Okay. So now it turned green. So if I click this green compose, it's going to show me like a preview of what it looks like. So it's gonna be, that's gonna be from me to me because it's me. But, um, you can see it populated the subject. It populated the property correctly. Dear Peter, thank you for adding 970 Bryden Road, Columbus, Ohio 43205. We look forward to making this property successful for you. Kindly, RL Property Management. So I can just click send. Um, and that's really simple. Or if you click that lightning bolt I showed earlier, it will actually send it automatically. You don't even have to go through this step that I just took. So I think that's all working correctly. So let's go back into the settings. Property entered in Buildium. So this is a step that I actually moved to the very beginning of the checklist, and we talked about that earlier. Um, you can see we've got a link to a video here. It's embedded, um, showing how to actually add a property in Buildium. I'm gonna go to Loom and copy this, uh, copy the link and put— and go ahead and embed this back in where we moved it to. So right here. So I'm gonna add instructions. Instead of this text we had written earlier, I'm gonna embed this video. Boom, look at that. So we'll hit save. And so now anytime someone's running this checklist, maybe they're new or they forget how to do it, they can watch this Loom video, which is me just talking about how to add a, how to add a property in Buildium. So that's pretty powerful. All right, let's go back to where we were. Management fee setup in Buildium. One thing we haven't talked about very much or at all yet is two really powerful parts of LeadSimple Process. Um, one of them is the ability to assign certain tasks to different people. So let's say this management fees, let's say that, so by default, all the tasks get assigned to whoever runs the process. So if an employee runs a process for a specific property, they're automatically going to be assigned to all the tasks. But let's say that there's someone specific within your company that you always want to be the one to do certain things. Like, you can just click this assign and you can select a specific employee that you always want to be the one to have do that. So I actually don't want to do that here, but, um, I just wanted to show that. And the other thing I haven't shown yet is the, the the due dates, or like when the, when the specific items within the task are due. Again, by default, they're due immediately. Like as soon as you enter the stage, all the tasks become due for that stage. But if you click this, you can actually change it. Let's say we wanted to make this due 1 hour after the previous step, and you can actually select a number of different things here. An hour after the due date, an hour after, you know, it's even pulling in some of the other data from Buildium here, the lease start or the lease end date. Um, so this is really powerful, uh, the ability to configure your, your tasks so that tasks that you can't even do yet, um, aren't showing up like in your My To-Do Items view within LeadSimple. So that's really useful, um, in certain scenarios. All right, let's keep going. Owner entered in Buildium. So this one we don't need because that's part of the client onboarding checklist. So we're going to skip that. Turn on EFT payments for both the property and the owner. Well, we're not worried about the owner, but we do want to do that for the property. EFT payments for the property. Bill for setup fee entered. I'm actually going to change that verbiage a little bit. Enter setup fee for property in Buildium. Owner Buildium account created. Again, that, that has to do with setting up the client, so we're not going to, we're not going to bring that over. Request funds from owner if not received. Okay, yes, we want to bring this over. So this is another email template, and so we'll click— we will click email, request funds from owner email. We're going to send this to the client, and let's go ahead and create a new template for this. Owner email funds request. And I'm just gonna copy, what we already have here. I see your question, Natasha. I will come back to that in a second. So again, we can use the, the nice mail merge stuff here. So client first name. Before we can begin, we need to receive your property maintenance reserve of $500 and your setup fee of $300. Total $800. For convenience, your funds may be transferred to us, blah blah blah blah blah. So these number things, I think I'll turn that into like a real number. Oh, that doesn't do what I wanted. Let me skip that for now. Just leave it as it is. So I'm just gonna kind of leave this the way it is. Um, this is really easy to go in and change later if we need to. Okay. I will select that. And there we go. Okay. Natasha's asking, I'm having trouble with the scheduling part of LeadSimple. I'm not sure how to schedule a task for a specific day of the month, or if that's even possible. I don't think that's possible currently. I know that LeadSimple is working on adding recurring tasks, which it sounds like that might be what you're after. Um, but right now I don't think there is a way to do that that I know of. If client was a referral. Okay. So this part again is. Gonna be specific to the client onboarding. Send the award. So this has to do with like a, like a GIF we send to new clients. So yeah, let's do if check to see if owner qualifies for next award band. And I'll add those instructions. Ta-da! Okay, so that is all the tasks for the internal setup. So we're done here. And under the— what are we going to do with it? I'm going to change this to, uh, actually I'm going to leave the process in this stage. Yeah, actually, wait, we can do some fancy conditional logic here. So if there's at least one vacant unit, then we're going to move to stage vacant unit setup. Yep, that's what we want to do. And we'll have that happen automatically. Okay, so we can move to the vacant unit setup, which Let's see, I'm actually going to work on the occupied unit setup, not the vacant unit. So there's some stuff we need to receive from the client if we have an occupied unit. So Request and receive from the client lease ledgers, tenant contact info, security deposits. Security deposits. Okay. And then here's a bunch of occupied tasks down at the bottom of Process Street. Set up the lease in Buildium. Adjust late fees. So let me take a pause here. Um, we're getting near the end of the time and I want to leave plenty of time for questions or if there's something we want to dive more specifically into. I think I've given a pretty good overview of sort of generally how to set up a new process in LeadSimple and how I think about these things. Any questions, thoughts? Just resonating with folks.
Hey, Peter.
Hey, Paul. How similar is this to just the normal stages, like the setup for normal stages and the LeadSimple CRM? Very similar. Yeah. Have you played with that at all? Not too much. Okay. Once you do, you'll realize it looks basically identical to this. Gotcha. I can even show you. So if I go under leads and I click owners, that's like our main CRM. Like if I click settings, it looks exactly the same. Yeah. It's just a bunch of steps. I mean, obviously this is different because you're, you're looking at like the steps for a sales lead, but all the logic and how you build the processes and everything is exactly the same.
I was actually comparing it side by side because I was wondering the same thing if I had all the same widgets when I go to make like new workflow and that kind of thing. And we're just missing a few on our right-hand side. So I think. Um, I don't have conditional logic in my CRM and I don't think I have due dates either. I have like an add reminder.
Okay. Interesting. I wonder if that stuff gets added when you upgrade to Process or something.
Uh, maybe, maybe.
Yeah.
But pretty similar nonetheless.
Yeah. Okay, cool. Any other questions, thoughts? I just wanted to say I took a lot away from this, Peter. Thanks for putting this on. Awesome. Yeah, happy to do it. This stuff is fun for me. I could sit here and do this all day. So yeah, I'm trying to think if there's anything else. Relevant I want to mention. So let me just go through the process of creating a brand new checklist that we, that we just built. So if I click new property onboard, so under, under LeadSimple here, you know, all of your processes, this is the main menu here. All of your processes are stored under processes. And then if I click the one we just created fresh today, new property onboarding. I'm actually going to delete these because we don't need these anymore. So if I click Start Process, which is also up here, it, it wants me to select a property like right from the get-go. Um, the problem is if you're onboarding a brand new property, then the property is not in your system yet. This is getting back to what I was kind of talking about in the very beginning. So all I can really do for right now is just select the due date. And hit save. And this is what it's going to show me. So this is what we just built. Um, it's assigned to me because I created it, or I started it. And you can see there's no property, no client attached to this yet. And the first step here, you might remember, is add property to Buildium. And here's this nice video showing how to do that. So I can click and click play. You know, and it plays right here, doesn't open a new window. So that's really nice. Now, once I add the property to Buildium and I check this off, it says manually sync Buildium and attach property to this process. There's a place you can go and LeadSimple. I forget exactly where it is to initiate a manual sync. And once you sync, now the property you just added to Buildium is now gonna show up in LeadSimple. And that's when you can go over here and click add property to this process. And do what we did before. Let me just pick a different one. 383 Naples Place, that's another one that we own. And you can see it pulled all that data over from Buildium. So now I can check this off and I can proceed with the next steps in the process, which is filling in all this data. And if I check that off And it's going to warn me that some of these haven't been filled out. I'll click skip. And it moves me to the next step in the process, which is this internal setup. So here's all the to-do items that we added in the last few minutes under this internal setup. And some of these have instructions, right? So here's the instructions we, we added to that one about the awards. We can close that. We can check these off. And here are the emails. Now the email is grayed out because there's no client email. It pulled over my LLC, um, as the owner of this property. But if we had a client who actually has an email address— that's like, that's a vendor, that's not a client. Let's pick a different one. Okay, so now it turns green and we can compose these emails just like we did before. So that's all working properly. And then if we go to— we didn't— that's— I think that's as far as we got. We didn't actually start the next, the next steps, or we did. We started occupied unit setup. So you can see there all the steps are. So that's about it, and Once you have a bunch of these going, you'll see them appear in this view right here under new property onboarding. So all the, um, oh, the name here, because we didn't start with a property. Can I rename this? Yeah, there we go. So once you Once you have a few of these going at once, this is a nice handy overview. So, let me show you what this looks like in kind of in the real world. So, if I click lease ending process, it's going to load for me. There we go. So, here's a bunch of real-world processes for a bunch of leases that are ending, either in the process of ending or they're ending Sometime in the next 90 days. And this is— I showed you, you know, I was talking about how the stage, it'll show you the stage. Oops. So here's the stage that all these various, these various move-out checklists are in. This is so handy right now. I can see all the properties, all the units, the stage that everything's in, who's assigned to it. And I see that we have some overdue tasks from September 21st. So that was a week ago. So I need to figure out what's holding up these checklists and, and talk to Michael and maybe he's hit some sort of a roadblock. Now I can actually have visibility of that, right? Because without this, I have no idea that Michael is held up on some security deposit disposition, but now I can get an overview and see where everybody's at. So that is really, really powerful. So we've barely touched on everything that's possible to do with LeadSimple. Um, There's a ton more that you can do. There's a lot of like power user features, but I hope this was helpful, uh, for folks who are interested to hear sort of how I think through this and how I would build out a brand new process that we're actually gonna use at our company. Any, uh, closing questions or any big takeaways? Um, what's something useful you got out of this? Robert says, I've got 'em sold on getting it for our company. Awesome. Let them know I sent you their way.
Unrelated to this, maybe you'll cut it out. When's the anti-franchise model dropping? Is that in the works?
Oh, spoiler alert. Yeah, that is in the works. Mid-October, I think, is when we'll do kind of a soft launch and you'll see a lot more fanfare and details about that. Yep. Perfect.
Can't wait. And thank you for today. This was, uh, this was great and I'm looking forward to the recording too, so that when we go forward with, um, the process part of, of LeadSimple, I can kind of follow along. So thank you again.
Awesome. Thanks everyone for coming. Uh, this was fun and I hope you got some value and, uh, appreciate everyone coming out today. Have a good one.
Thank you so much.