Thursday Training at Three: Intro into Power Apps
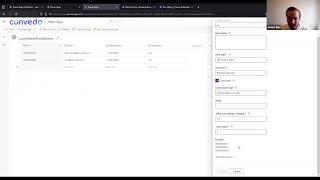
In this 30‑minute Training Thursday session, James By, technical architect at Convedo, walks the audience through a pre‑built Canvas Power App that lets employees indicate their availability for a weekly Wednesday lunch meeting. He demonstrates the app’s UI built with vertical and horizontal containers, explains how the app reads and writes data to a Dataverse table using named formulas, lookups, defaults and the Patch function, and shows how a scheduled Power Automate cloud flow queries the same table, aggregates available users, splits them into pairs, and creates one‑to‑one Teams meetings via the Teams connector. Throughout the demo James covers solution structure, the role of Dataverse as the low‑code storage layer, licensing considerations (including premium connectors), integration with the broader Microsoft ecosystem (Power BI, Teams, Azure AD), and access control. The session ends with a brief market‑position question from a participant, to which James highlights Power Platform’s traction, especially for organizations already invested in Microsoft services.
Questions this video answers
Power Apps is gaining traction as part of the broader Power Platform. Its strength lies in deep Microsoft integration (Power BI, Teams, Azure AD) and low‑code development, making it especially attractive for organizations already invested in the Microsoft ecosystem. While it may not replace all specialized workflow tools, it offers a compelling, cost‑effective option for many internal automation scenarios.
Chapters
Welcome to Training Thursdays. I hope you can all see my screen now. We thought we'd kick it off with an intro into Power Apps. I'm James By, I'm the technical architect here at Convedo. And yeah, today we're just going to simply have a little look at Power Apps. We're going to look at a basic build of an app. Show how it's built and some of the features that might interest you. In the interest of time, as we've only got kind of half an hour, it's a bit of a kind of Blue Peter style, so, you know, we won't be building this hat from the ground up. We've kind of got here's one I've made earlier sort of style. Okay, so what exactly are we going to be covering today? So first of all, what is the app we're going to build? So here at Convedo, we used to do a one-on-one lunch meeting at Wednesdays at 1 PM. So it used to be a good way. We're all working remotely to just have a little chat. With each other and get to know each other a little bit better, even though we may not be in the same office building. What exactly does that have to do with you? Why do you care? Well, the idea here is really because it's a basic app, we get to showcase you some really fairly basic Power Apps functionality and introduce you a bit to the Power Platform. So here are the key points that we're going to cover. We're going to cover first of all Canvas apps. We are going to cover Dataverse tables and Power Automate scheduled cloud flows. Okay, so I'm going to then share my screen. Hopefully you can all see that now. Okay. So first of all, where are we in Power Apps? So inside Power Apps, we're actually in a solution currently. And what I generally do when I create a Power App is I like to start from the solution and build it up within a single solution. So what exactly is a solution? It's basically a grouping of all of the components that you are building for your Power App. In particular, it allows you to export these solutions, change certain parts of it, all in a very handy kind of way. So I would normally go here and go to an app, and today what we're going to do is we're going to build a Canvas app. So Why a Canvas app and why not one of these others? The Canvas apps are the not necessarily data-driven apps. So here you can see you've got a model-driven app. So you may decide we really just want to be looking at some data. So a model-driven app would be perfect for that. You can do absolutely really nice presentations of the data analysis, that kind of stuff. A page, So a page would allow us to basically do very something very similar as a web page. But today what we want to do is we want a canvas app and I'm not actually going to build a new one here. I'm going to just simply show you what I've already built. Okay, so this is the Power Apps editor. Maybe a little bit scary, maybe not if you're used to low-code editors, but it's quite similar to most of them. So on the side here, we've got our options here. You can see the tree view of our UI elements here from the tree view, and then you can see the properties of everything we select. So Let's have a look at the UI itself. So how is this built and what does it kind of look like when we're actually using it? So in order to actually see what it would look like, we can preview this app and we can see it's actually reactive. We can have a look on the phone, we can have a look on the tablet. And we can also see from our browser. Now, how have we created a reactive app here? The first thing I've done is I've created a container, and the way you would do this is you would go to your screen here and you would click Insert, and under Layout and out, we have in this case a vertical container. So the two different elements we've got within this vertical container are a horizontal container in which we've got our question here and we've got a simple toggle. The other element we've got in the vertical container is the submit button. So the idea of this is basically to allow users to say whether they will be in attendance for our lunch meet meeting. So how does this go, this information, a yes or no, to a database or something where we can act upon it? In order to do this, We use data and that's where tables come in. So in the solution we can just add a simple Dataverse table. Uh, but first of all, I should probably explain what the Dataverse actually is because it's the only thing we basically use for a storage solution in the Power Platform. Um, so the Dataverse is basically a Microsoft cloud-based storage solution for business data. You've got access to all of your Dynamics 365 apps data as they all sort of run on the Dataverse as well. And it's very easily, easily used in Microsoft Excel. So you can use an add-in and you can integrate those two. So let's have a look here at our table in particular. So we've got our ID column, and here what we've used is an auto number. So this will generate itself whenever we add something in. For the user, we've just got a simple text column. So that's my user here, and then we've got another user. And what we're going to basically be doing is having a look at when the week is starting in particular, and then the Wednesday of that week, are we available? And once again, available is a simple text item. So there is a reason for this, that it isn't a boolean. We can actually see here we can add booleans, but these are in a special format when you import them into Power Apps and they act as choice items, so they're a little bit more difficult to get the data out of and actually use inside Power Apps. So today we're just going to use a simple text. So how do we access this data from our Power App? It's pretty simple. You literally go in here. And we click on data, and here we've got lunch meet availabilities, which is our table in particular. We've got another one from when I was testing the app earlier. Um, and what are we exactly going to do with this data? How are we going to get the data out of the table? So what I've done in this particular app is I've used formulas. So under App here, we can go along here to Formulas, and these are basically expressions that you want to use multiple times within your app, and you can just reference them. So here we've got Get LunchMe Item formula, and this is a lookup. So For Power Apps, you can use lookups to query collections of data. In this case, we've got a table and we are querying it based on the particular user that's logged in, and we are also querying it based on the start of this week, so that'll be the 17th. Okay, now what do we do if we don't get anything back? Uh, we still want to edit this data and send it back to the database, uh, the Dataverse in this case. And how are we going to do that? So what we can do is we can use a default. So I'm also declaring here under formulas the LunchMeItem, and if in the case that it's blank, what we get back from the lookup, we are going to use the defaults under LunchMeAvailabilities And otherwise we're simply going to use what we've looked up. Okay, so what are we actually doing with this data once it's here? Um, one of the things we're doing is we're setting the default here and we're looking at the lunch meat item formula. And we can actually see, in fact, if we go to variables here, then we go to named formulas, what the values we've got are. So we view this particular record, so we can see available— they're currently not available. So MunchMe item formula available in this case is no on this side. And you can actually see if you click on it the variable there. So we're changing this to a Boolean, and this no is displayed here. Now, what happens if we want to add to this data? Because when we submit, we obviously want the user to be able to say, yes, I am available, I want to talk to someone on Wednesday. So the way in particular we're gonna use today is called patch. There are other ways available, but this way is just a little bit simpler. So the onSelect property of this button contains this function here, patch, and this will add to whatever particular properties you, you specify. So It'll use whatever's already there and you can just add a single property that you wanna change. So in this case, we have to first say what source we have. So that's LunchBeat availabilities and we're then what we're replacing. So this is the current item. So LunchBeat item formula, and these are all of the different values that we want to replace. It's pretty simple. And here we're using the toggles value. And if that's true, we'll have the item, the table's value, column's value as yes. If it's false, we'll have it as no. So pretty simple there. And we can see actually, let's have a look. On this table. So at the moment I am available. So if I submit this now, and what you can do to interact with your Power App is you can hold down Alt and then you can actually interact with it. Otherwise you're just clicking on the items. So if I want to submit no, we can then refresh this and we'll see, no, I don't want to actually have a lunch meet. Uh, in this case I do. So actually, let's change it back to yes. Okay, so we've got this data. It's pretty useless right now. We're not doing anything with it. So this is where our Power Automate comes in. So in this case, what we've got here, um, we have a Cloud Flow. And you can actually see if we were to add a new one, we'd add an automation, Cloud Flow. So what is a Cloud Flow in particular? It runs on the cloud, obviously, first off. And there are different flows within Power Automate. So you can have a Cloud Flow or you can have a Desktop Flow. And Cloud Flows are for things like joining systems together, anything that doesn't require a machine to do. It can be done in the cloud. So when I say a machine, I basically mean something like RPA. So if you need to go in and pretend you're a computer and go in and actually change some data, you'd use a desktop flow. We're not doing that, so we're using a cloud flow. And the type we're using is a scheduled flow because every Wednesday we're going to have a look at 12 o'clock, 1 hour before the meeting, and say, who's up for a meeting? Let's schedule one. Okay, so I'll now show you our Power Automate flow. As you can see here, we've got an interview— interval of once a week, and it's on Wednesday at 12. So this will start off our Cloud Flow. We can currently actually test it. Manually, but we'll get into that later. Okay, so how are we going to find out what users are available this week? The first thing we're going to do is we're going to actually query the LunchMe availabilities. So here we've simply selected LunchMe availabilities and we now have this filter. So this is using OData notation here to filter. You can see that these columns are not actually exactly the same names as the columns we've got here. So we've got new_week_start, and we also have new_available_isYes. You're— week start is this particular week. That's what this expression is doing here. So how do we find out what we're actually supposed to be putting in these filters for the OData? What we can do is we can have a look at the columns here. And then if we want to look, say, for available, new_available here, So this is the actual name. One thing to note, it is actually all lowercase in Power Apps, but it's uppercase here. So if you were to query in mixed case here, you would actually find you don't get any data out of it. So let's have a look at the run history for this. I ran this earlier today and we can basically see what came out. So here we've got our data. We can't really go into it much because it's in a pretty raw format, but basically we are getting these items out. So the next thing we want to do is initialize a variable. So first, to use a variable in a flow, you've got to initialize them. And to do that, we use the Flow Item Initialize Variable. So here we've got the variable available users, it's an array, and we've just started it. The reason we haven't done it inside this Apply For Each is because you can't actually put these initialized variables in any loops or inside any kind of conditionals or anything like that. Okay, so what are we doing with this applyForEach? So for each row, we're getting the value of that row, and then what we want to do is append to our, uh, array variable we've got here. Um, so available users, and we're just adding the user property or column. Pretty simple. So then what we're ending up with here is we're adding each individual, and you can go through and see for each loop what's happened. So there's only 2 loops, but we've added test@convaido and we've added me@convaido. Now what we want to do is we want to have one-to-one meetings. So we're gonna split these up using a chunk function and we're just going to make sure that they are split up to always have two people together. And this would look a little bit like this. So we've got an array, then we've got another array with our two users in. Now what we want to do for each of these meeting splits we've got here is to check a condition. So what we're going to do is we're going to make sure that there are 2 users inside each of these split-up meetings, because otherwise, you know, you, you don't really want a meeting to be created when you're the only user for your lunch meet. A little bit sad if you don't get a meeting created, but probably more sad if you do have a meeting created and you realize you're the only one once you've joined. After that, what we're going to then do. So if this is yes, great, we've got 2 people, we can make a 1-to-1 meeting and we are going to use this Teams module. So I've signed in and I've connected my own Teams, and this is using my calendar. We're just going to change the subject to work meet and the event message to test work meet, and we've set a starting and end time that will be the Monday— on the Wednesday, rather. We've also added the required attendees, so for each of these We use an item, which is the item for each meeting split, and we are joining this together into a string with these semicolons because that's how the Teams module takes that input. Okay, right, so let's, uh, let's give it a run. So we can test here once we've saved, and we can click manual. We'll run the flow and then we'll go to the testing page. Okay, brilliantly, the flow's run successfully. So I'm now going to have a look at my Teams and see if I've now got a meeting. Hey, which is my first time using, uh, the Zoom presenting, so I'm going to try and share my screen again of the Teams. And you can see here we've simply just got a Teams meeting that's called Test Work Meet. Pretty simple. Okay, so now you've kind of got a bit of an idea of the kind of things we can actually do. Apologies. Let's go back to my, uh, PowerPoint. There we go. Hopefully you can all see it. So what are some of the actual advantages of using Power Automate other than some of them that we've gone over here? Okay, the first one is a pretty big one. Power Apps may already be included in your Microsoft license. So Power Apps can also, can be included in, I think it's Dynamics 365 licenses. I think it's a particular one. So if you want to have a go with it, you may actually be able to already. Although one other thing to note is that the For instance, Teams module that I've used there uses a connection that unfortunately is a premium connection. So you may have to use a trial for Power Automate or have a user have a license for that premium. It's low-code. So you can see it was pretty simple to actually create the UI and to actually create some of the flows. So you don't need to pay people a lot of money for high-code solutions. You can also nicely see how things are working and why things aren't working. Flexibility. So the Canvas app is pretty great because you don't have to have it backed by a particular— apparently I'm not sharing my slides. Apologies. Hopefully you can see them now. So there's flexibility in it. Basically, you can create anything that the UI will let you. You can also connect the Power Apps directly to the— the Power Automate directly to the Power Apps. So you can have a lot of flows run directly which is pretty great. And it integrates incredibly well with the Microsoft suite. So whether that is getting your Dynamics 365 apps data or using some of the modules that you've already got for Teams, for Word, for OneDrive, SharePoint, it's incredibly good if you work mostly with Microsoft. One of the other additional advantages is that the access to these apps can be handled with Azure Entra, or Azure AD, as it may be. So you can handle what groups are allowed access to particular apps. Just makes it a little bit more streamlined. Okay, uh, do we have any questions? Looks like we don't. So what's the only thing left to really say? Oh. I'll let— I'll let's see if anyone raises their hand. Okay, right. Well, thank you everyone for joining. And I hope to see you next time. Maybe someone else will be presenting.
James, before you go, sorry for the delay. One question here. So how do you see this app in the market, like competing with other workflow tools? Do you see a strong potential customer base, or how is the market now?
Well, I think definitely Power Apps is gaining a bit of traction. The whole of the kind of Power Platform is. So one of the great things with the Power Platform is that we haven't actually mentioned is Power BI and the ability to analyze your data and look at the data first, data with a lot of clarity. But Power Apps just allows you to kind of interface with that sort of business need a lot more efficiently. And it's really, once again, fantastic for those Microsoft integrations that you may need. It simplifies that an awful lot. So I think it really is— it comes down to how reliant as a company you are already on the Microsoft ecosystem. I think if you are It's great, you can do a lot with it.
More from Sascha




EP112: Inside Enterprise Automation, How Yexle Delivers Real Impact with Appian w/ Vijay Poondy


EP112: Inside Enterprise Automation, How Yexle Delivers Real Impact with Appian w/ Vijay Poo #shorts

#106 Automation and Data...Spreadsheets on Steroids w/ Henrique Cruz (Rows.com)



#103 AI document processing, 2024 US elections and more w/ Petr Baudis at Rossum