In this instructional video, Tom Gellie demonstrates how to install Bar Running carbon‑fiber (or carbon‑fiber/Kevlar) insoles into ski‑boot liners. He explains why the ultra‑thin, stiff yet flexible insoles improve ground feel and help engage the foot’s transverse arch, giving skiers better lateral control and feedback. Gellie lists all required tools—insoles, adhesive (duct tape, contact spray, or glue), a plain liner, permanent marker, scissors, and a clear mind—then walks through locating the small bump on the carbon‑fiber insole and aligning it with the pocket behind the second‑third metatarsal heads of the foot. He shows how to trace, trim excess material, and optionally shape the insole for a “Coke‑bottle” toe profile. The video details attaching the insole (shiny side down, flat side against the liner) using spray adhesive or tape, marking key placement points, and performing a final fit check. Gellie emphasizes that the insoles do not magically make you ski better but provide clearer pressure feedback, allowing the skier to make more precise adjustments. He concludes with a product recommendation (barrunning.com, Adarium Bar) and encourages viewers to rewatch the video for installation help.
Chapters
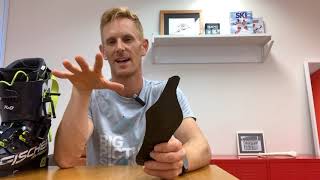
This video is to help you install and fit the bar running carbon fiber or carbon fiber Kevlar mix insoles into your ski boot liner and ski boots. So a quick reason why you would use this as an added layer, you see how thin that is? It's not, it's not, uh, it's not going to take up a heap of room. In fact, it's actually going to make you feel possibly more room in your boot because of these properties I'm about to talk about. So carbon fiber is very stiff. Now, these insoles are still, still flexible, okay, because they're actually made for running as well. But the properties of carbon fiber being very stiff is when your foot stands on it, it gets very instant feedback on pressure. So pressure through all the metatarsals, through the heel. So in a turn, You feel more instantly when something happens, and so you can react back, back against it. So that's one thing. So it gives you better feel, a firmer feel on the ground, even though you think the sole, like the boot board on the ski boot, is stiff or whatever. This is stiffer, and it's closer to your foot where you're going to install it. Even underneath this one here, that's where it is.
You—
it still makes a difference in what you feel. Second thing is there is a strategically placed bump. You'll see there's a slight bump right here in the insole, and you're going to place that under a particular part of your transverse arch of your foot, and this helps you more easily engage your transverse arch. When your transverse arch is engaged, you have better control laterally, fore and aft, in all directions with your foot instead of when the arches sort of give and collapse or don't engage, then you don't have as much leverage or control of your foot to the ski, and then up the chain, the rest of the joints don't work as well. So start with a good foundation. The carbon fiber insole, to me, is a no-brainer to just help make that part easier, help train your feet to engage. So you will, first of all, need a few things. So you will have ordered your insoles, and they'll come like this. It doesn't matter if they don't look pretty. It's not about that. Okay, you're going to trim them, and even if some are thin and a bit funky shaped, it doesn't matter. Okay, you're going to trim this and fit it to size. So you'll need your 2 of those, either some duct tape or some contact adhesive, so spray-on glue. This is to attach this to whatever insole you've got. So you'll also need your insole, whatever you're using from inside the ski boot. This is just a Seadas plain one that they usually mold, but you can see there's no shape in it. I've just got this surface material because it's got a little more friction and grip for my foot than the one that comes stock. You can use the one that comes stock, you can use your, your custom orthotic, whatever. It doesn't, doesn't really matter. You're going to put this underneath it. Okay, so you need that as well. Your ski boot, obviously, permanent marker, pair of scissors, and a clear mind. So that's what you need ready.
Next step is to find the sweet spot in this transverse arch of your foot. So ball the big toe ball of the pinky toe, ball of the fourth, third, second, first. Just behind the second and third is a little bit of a pocket. Like, when you lift all your toes, you'll sort of see there ends up being a little bit of a pocket, not in line with the hard metatarsal heads, but just behind. Okay, on a skeletal foot. It's just in behind there. You are trying to place or find this bump on the insole. So find it on your foot first, feel for where that is, stick your finger in and press on it so you're aware of— that's where I'm trying to feel placement of when I get this all right.
So there it is. I'm going to get my my insole that doesn't have a carbon fiber insole on it already, and I'm going to stand on it.
And all I'm going to do is I'm going to find where, like a ski boot insole, you'll see is really short. So this is fitted for my, for my liner and my ski boot. So I stand where I would when I would be inside my boot, and I look down and I go, where's that that point, the sweet spot right there. And I'm going to get a permanent marker and I'm going to stick my finger, see, under here, and I'm going to pretty much eyeball. Okay, that's where it is right there. So I'm going to make a mark. Okay, now I have to do—
so I'll do that on both.
Now all I have to do is with the shiny side up, so bump facing down, I want to keep the bump down. I'm going to place that on top, bump on top of my black dot, the center of the bump. Have a little look at it right there.
Hold that.
Now there'll be two ways. So see, now I've got, uh, there's, there's still plenty of room at either end. If it was the other way around and I found the bump, see how now this does not reach the end. So there will be a left and a right, will be longer one way. So make sure you get it the right way around. So this is my right foot. Find the bump, line it up with that black dot like such. Now I need to do is flip it over like this, take my permanent marker trace around, and then cut it. So I'm going to do that step right now.
Tracing around here.
If there's any excess hanging off either side, you trace and trim. So I'll be back after I do that.
One thing I'll point out, you'll notice there is this Coke bottle shape that I have with this insole. That is an extra step you can take. It's not necessary. This one is more for running, but I really like it. Basically, your big toe is in this gap. So to get this shape, if you want to try it, I feel it gives some really good control, like in all, all these directions, and allows the toes to sort of act a little bit independently. You are going to mark where the second toe is. So basically, this bit is where the second toe sits. Okay, so you'd mark that, trim back in, come around, and so you end up with this shape. But there's pretty— you'd be fine to just keep the same shape as what you've got in your current ski boot insole. So I've trimmed the carbon fiber insole, taking away any excess, so when I line the bump up the black dot and the bump, there's no overhang. And the way I kind of just check it is I eyeball it from this angle, line it up. That's great. So now lengthways, these two dots line up, and then here laterally across, I just shift it line up. That's good. No overhanging. And I can take a permanent marker now, so I'm going to glue soon, and I can just mark some key places so when I place it back on, it's instantly in the right place. So some different sections up around here because I'm now going to glue it. Simple as that. Remember, shiny side, non-bump side, the flat side goes against here. So we spray. You can use, you can use duct tape. I've done that several times, but the contact adhesive, the great thing about it is it's very strong this way, like sliding this way, but you can peel it off, put it on a different insole if you change your mind, or you can put it on a rollerblade or something else, a mountain bike shoe in the summertime, because it'll peel off but it won't move this way. So now I look and I recheck. So bumps lined up, I'm just going to move that a little forward. That's good. Bumps lined up this way. This way, pretty happy. That little bump spot is going to be right where I'm going to be adjusting my foot as I'm skiing a lot from, plus it's a reminder again for my foot to engage. Like the whole, like the whole foot engages much better when this transverse arch, this arch right here, can— there's a black dot on it now— can tighten and stiffen up. So it's going to help your skiing a lot. That's it, it's installed, ready to go back in the liner, in your ski boot, to go take for a run. And you'll be amazed at the feeling, a different feeling it has when you ski, some better feedback. And that's it, it's no like magic pill that you're going to ski better, it's just giving you better information, better feedback for you to now use your body to make adjustments, control the skis, control your balance, all those things in a far easier way because there's not as much muffled sort of information. You think about it this way, you walk around soft squishy ground for instance, it's hard to really gain, like the information is muffled, okay. This does not muffle. It feeds back straight to you with pressure and information that you can use. So that being said, if you haven't already got a pair and you found this video through just searching, these can be found from barrunning.com, B-A-R-R-U-N-N-I-N-G dot com, Adarium Bar. Is an amazing coach, athlete himself, inventor. I can't thank him enough for all the help and resources, information he's provided me with. So thanks very much to him. Go over there, really cheap addition that can upgrade the performance of your, your ski boot hugely. So yeah, really recommend you go over there and check them out, get a pair, then watch this video again to help with the installation. There's a few different styles you can choose, just choose the one that's for skiing or ice skating, I believe it says. Thanks for watching, happy skiing!