How to Learn the Retraction Extension Turn in 4 Steps
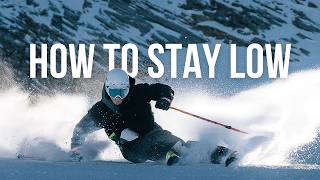
Tom Gellie teaches the retraction-extension turn in four steps: low-stance awareness, low-stance turns with edge rolls, timing lateral leg extension using edge grip as a trigger, and the retraction-traverse drill. The movement reverses normal ski turn transitions to improve edge control and carving power on steep slopes and moguls.
Chapters
Today I'd like to help you improve your carving with an exercise called the retraction-extension turn. This exercise is going to teach you a new movement pattern in the transition. It's going to be sort of opposite to what you are used to. However, if you can get this right, this is going to really have a positive impact on your control, your ability to create edge angles on steeper slopes. And as a great bonus, the movements also fit really neatly into skiing bigger moguls where you need some absorption and extension to stay on the snow. This is a really fun exercise and it's going to make your carving even more exciting and fun to do. However, I need to point out that prerequisites for this are you should be able to already have some fundamentals of being able to carve a turn. So if you haven't already seen my video on 4 Steps to Better Carving, please go check out that one first because that's a better starting point before coming to this one.
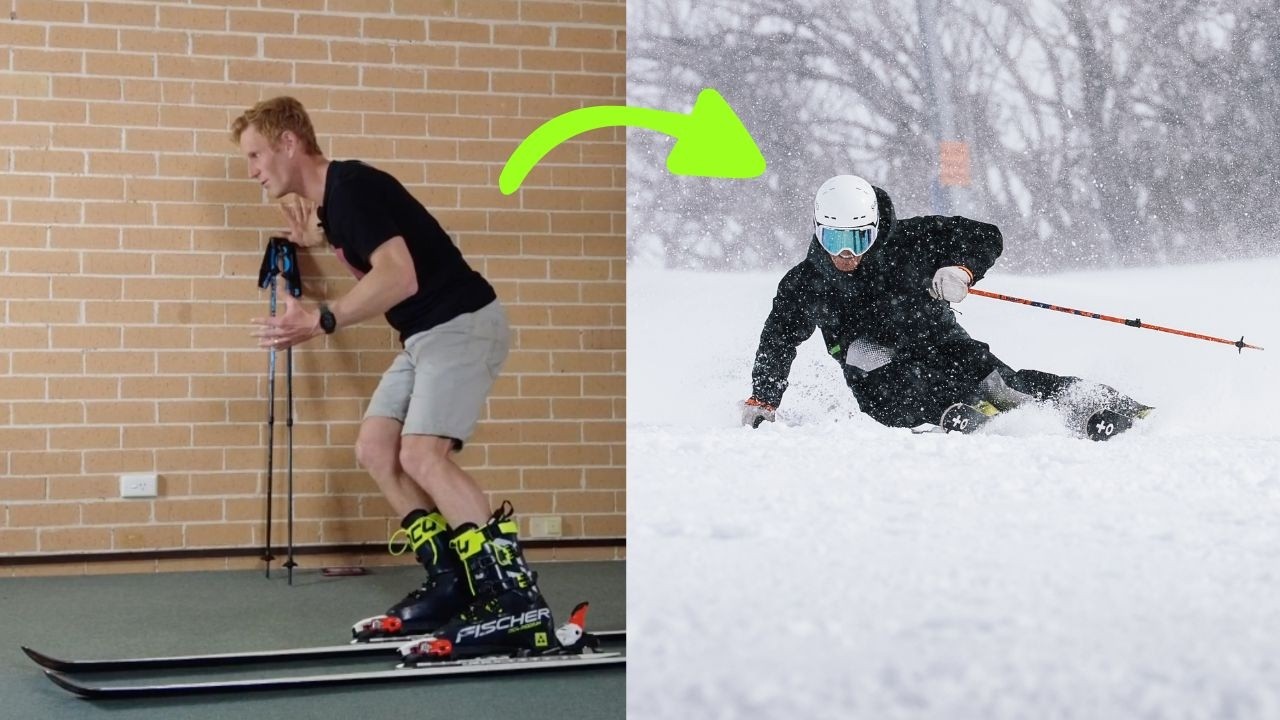
I first want to show you a demonstration so you get a clear visual of this retraction extension exercise. So in this carve turn, you'll notice I'm about to retract my legs back under me, and I'm going to exaggerate it. Then I extend my legs laterally out to the side. So it's not an upward extension, it's a retraction underneath me, so I don't go up, and then I extend my legs out to the side just like that. Here's the retraction moment, there's the extension. Here's the retraction, there's the extension. You don't have to actually carve the turn to get the most out of this exercise. Here I am doing the retraction and then extension in a steered turn. So this one, it definitely looks more like I'm moving down and then up, but that's because I don't have the high edge angles. This is a great way of practicing the movements first without the speed like I'm showing here. So you start with the easier version, and then you start working on picking up speed and taking those extension movements laterally to build higher edge angles.
So hopefully you would have seen in that demonstration that the timing of when I'm low and bent and tall is perhaps a little bit exaggerated and different to a normal turn. So this is one of the key things you're learning to advance your skiing, the timing of when you are bent versus extended. Okay, so you would have seen that I am trying to change my edges and transition from one turn into the next in this height of a position. Okay, so you're going to find it strange changing your edges down here, turning your feet a little bit and your legs down here. That's going to be the biggest thing because I can stand like this all day long. Ski easily. It's not intuitive to be down here and swap your edges and initiate a turn from there. In this tutorial, I'm going to break it down into statically working on what it feels like to be in a low position. We're then going to practice some turns in this mini-me retracted small position. From that point, we're going to break down one turn at a time So you can work on then going from the small position, changing your edges, and then getting the timing of extension right. And that part is probably the trickiest, but also the lightbulb moment that will occur to you when you get that right. We'll then move on to a simple one where we're traversing, learning to retract our legs back under us, before we finally start trying to put it all together and see how it fits into our freeski carving turns. So step 1 is just practicing awareness of a low stance. So get down here, drop your hips low. You've got to keep contact with the front of your shins right here, otherwise you're going to be in the back seat. You've also got to make sure that your upper body tilts forward a bit. Down here, you're probably never going to feel as forward as you are in your normal stance. It's just not possible, so that's okay. So Try and spread your weight as evenly as you can, but it's okay to feel more heel pressure than you're used to for this exercise. That's going to be a new sensation.
I feel a lot more heel than I do on the balls of my toes.
When I'm down here, I can really feel my leg muscles working. This is, this is not an efficiency type thing. This is definitely a performance sporting type exercise we're working on. So don't expect it to feel easy. I'm already fatiguing in my quads. A really good reason why you should do some preseason prep and keep your body in good shape. But for those people who don't have great knees or they're not super strong, just being lower than your regular height, so even here, you're going to get benefits from this retraction-extension exercise. So basically, you choose how athletic, how good your knees are, what stance height you can practice, and you're going to try and be low in, or that's your, your bottom point. So I'm going to try and aim to have my hips at my knee height, perhaps you're going to go partly in between, you be the decider on that one. And if you're at home, you can even try this yourself, but remember to put your ski boots on, because you can't get as much ankle flex with your ski boots as you can in a pair of running shoes, so it definitely sets you up in a different position that you're not used to squatting down in. So let's get used to this first. So step 2, we're going to now make some turns, whatever kind of performance you like. If you're pretty good at carving, you can start low. If you're not quite there yet or you're a bit intimidated, you can make some steered turns. Down at this height, as low as you can, you're going to try and stay there for the purpose of learning what it's like to initiate a turn from this low height position. Let's go.
This first step of staying really low the whole entire time in our stance is to help break normal movement patterns. Of extending to start our new turns. So you're going to get low, hips down almost at knee height, and remember to try and keep shin contact against the front of the boots, pulling your feet back under you if you need be to stay centered. And from here, you're going to change edges together and turn your skis to stay in the middle of the run. You're successful at this stage of the progression if you pretend you are skiing under an imaginary low ceiling. Here I am doing the low stance turns but with carved performance. So I'm railing the turns all the way around in this low position. I want to remind you, you are going to be learning some new sensations of changing edges while low, but also fighting to stay forward in your stance the whole time. It definitely takes some work, some effort with your muscles, so don't be surprised if this is a little bit tiring at first, but I promise you it's worth it.
You can try some low position edge rolls on some easy terrain like this. Low position, learn what it's like to roll your edges not standing up and doing it, but down low. We now need to put in the extension because we don't want to be skiing around bent like this all day. You'll probably be done after 2 runs. The timing of when you add this extension is probably the trickiest part and the one like tripping point you might need to spend a bit more time on.
Timing is off.
Yeah, can you feel that's your natural re— your, your your body is tuned in to standing up to change edges.
Absolutely.
So my suggestion is we work on an upside-down question mark turn, which is like a single, almost like a J-turn. And this allows you to just not over, like, blow the circuits in your brain. Practice the timing and see if you can get it right. Start down the hill, finish a turn, get low, stay low, change your edges, Then stand up, down the hill, turn, get low, stay low, change your edges, stand up. You're going to practice the other side, and to help you really see this, I'm going to do it in a snowplow. You can also do it too, just focusing on one leg changing edges. So down the hill, across, bend really low, change my edge here, feel some grip, then extend. The timing of when you extend and stretch your legs is so different. It's so much later than what you're used to. So that's going to be like a key thing you're going to pick up on. So I stayed low through here. It wasn't until I got to about this point, which is probably even more exaggerated than when we really do it, that I started to stretch my legs out. And a key feeling I had was I felt some grip, so I stayed low. I felt this low position, then I got some grip. It's like, oh, now I've got grip, I can extend against that. So you are looking for a feeling of grip to trigger your stretching out and straightening of your legs. That's what you're looking for, and it's going to be much later than you're used to.
The timing of this extension is what gets everybody messed up, so watch this. I'm low, I change my edges, I find my new edges, and then I start standing up much later than normal. So the feeling I get, what I tell myself is, be in that low stance, change my edges to the new edges, and wait for a feeling of grip. And even a second after that, that's when I go, okay, I'm allowed to extend my legs against this gripped ski as opposed to a slippery ski.
A great visual for this retraction-extension turn can be shown with my Play Adjustable Pole here. So if this is your stance height, what we're first doing is we're shortening that stance height. We're then next learning to time the extension when our legs start moving out and away, and then back under us, short, extending out to the side again. So the real sensation you'll get from this is that your upper your body feels more stable, and it's your legs moving out as opposed to the same stance height and you're leaning in like this. Yes, inclination happens in a turn, but the big feeling— you'll, you'll probably notice this yourself— is it feels like your legs are penduluming under you and moving from one side from the short position and extending to build edge angles out to the other side. Okay, we're up to the final exercise to help you work on retracting your leg back underneath you. So we've got the extension happening, now I'm going to help you with the timing and also the feeling of staying low with your legs coming back under you. So head over there and take a look at the demo of my retraction traverse exercise, which you'll try next too. You start low, across a hill, stretch your leg out without coming up, and let it come back underneath you. Low position, out to the side, extended, retracted back under. Extended, on the edge, retracted back under. The biggest thing with this exercise is not rising up when you stretch your leg out. You wanna stay, you get a sense of staying low, so your hip height stays the same, You don't lean back as you do it. Leg out extended because that's where we're coming from. There, and then you let the ski sidecut bring the ski back under you. Okay, common problem is standing up, stretching out. No, low, stretch out. Let it come back to you without rising.
To help you see where this piece of the progression fits in, it's right here. Notice the outside leg is extended, building pressure, and then it retracts, gets shorter, so that your body can move smoothly across into the next turn. So you're learning at slower speeds the movements in the leg without disrupting your upper body as much. The other excellent thing this drill does for you is teaches your legs independence. So I mean the outside leg extending on its own and then retracting separately and at a different rate to the inside leg. So make sure you spend some time with these retraction traverses, really refining it and getting the feeling of that outside leg going from long to short without your body rising.
Always check up the hill, of course, but you want to try and go quite a few times practicing this extension of the leg and then retracting back underneath.
In terms of timing, when do you add this retraction when you freeski? Well, it is really when you decide to make the next turn. So it's not halfway through the turn, you're not extending for half the turn and then retracting for half. It's actually more a decision based on what's going on in front of you. So I'm like, now retract, make the next turn, hold it for longer, there I retract. So really, if you Tried to hold me down and say when in the turn is it, I'd probably say it's more like the last fifth of the turn really when that retraction is occurring. I mentioned earlier in this lesson that you don't have to do this exercise pure carved, so these are steered retraction extension turns. And if you're a good skier or want a challenge, I highly recommend you do this version too. And I actually think they're harder to do well than the pure carved version. The timing becomes even more important. So again, why are we doing this? It's to really challenge the timing of movements and blending these other skills of edging and turning together. So if we have a closer look, just notice when the extension happens, the retraction right here, there's a pause moment, I extend and steer together at the same time. Instead of standing up to cross over in the next turn, I actually pull my legs back under me like we did in the retraction traverse, hold that position, change my edges, and then steer and extend out at the same time. So don't be shy, give this version a go, you'll learn a lot from this and it'll really help with your mogul skiing part of it. So if you don't just want to work on your carving but your all-mountain skiing, definitely do the steered retraction-extension version as well.
So there we have all the steps of the progression for a retraction-extension turn. You're going to need to revisit these quite a few times, maybe there'll be a stumbling block at each one, They each give you a different feeling, but now it's time to try and see if some of those sensations fit into your freeski carving. So as you follow me down here, watch, I'm going to start with a little bit slower working on the retraction-extension movements, exaggerating it. I'm then going to start taking it more into some fun actual freeski carve turns to really show you how it fits in right there. Now that was really fun, but you know what, I've been doing this exercise and this type of transition for a long time. I think it's time we see someone who's never tried it before and see how they get along with each of the steps, so perhaps you can relate to some of the stumbling blocks, questions they have, and then the aha moments. So let's see how Jonas goes with the retraction extension turn. All right Jonas, so first thing to try is this strange new low stance height. So just get in that position and tell me, tell us what you, what you feel here. Do you feel different pressure under your foot?
Absolutely. I feel a lot more heel than I do on the balls of my toes.
Yep.
And I feel like I'm— I haven't lost contact with my shin to boot, but it's definitely less engaged than what I usually like when I'm, when I'm doing, uh, when I'm doing a medium carving turn.
Yes. Yeah. And already that long down there feels really quite tiring. Yes, absolutely.
Yeah, I can feel my quads really starting to work a little bit, way more. And also, not only my quads but also my calf muscles right here. Yes, they're also getting a bit of a burn sensation happening a little bit. So if you're going to be skiing like this, I would definitely recommend a lot of summer training.
Yeah. Jonas, down here, low stance. See if you can just make more than a dozen turns in a really low height.
Yep.
Nice. So I would say that was really good. You almost started putting the extension in because it feels like you need to.
Absolutely.
How did that feel?
Uh, it felt like I was hanging on a little bit.
Okay, new position. You're not usually down there, right, skiing from that low.
Once I started getting the speed going and I could feel my edges, it's really kind of doing their thing. It felt a lot more comfortable than when I was just standing still.
Yes.
I had that centrifugal force really just pushing back against me, really helping me maintain that.
So would you say that's kind of the— like, that was a bit of a cool feeling that surprised you perhaps a little bit?
Absolutely, yeah. Yeah, I thought I was gonna be way more backseat than I actually was.
Yes.
Because when I was doing that static, I felt like I was losing all shin contact But as soon as we started getting some speed going, I really felt like the pressure was building up enough that even in that low stance, I was able to maintain a really nice—
it was more centered than you thought.
Yeah, exactly.
You shouldn't do—
yeah, shouldn't do boot engagement. And yeah, I was definitely feeling the heel a lot more than what I usually feel, but that's also part of this drill as well. So exactly, exactly. It was, uh, yeah, it was a cool sensation. For sure.
Jonas, this time all the constraint is you're only allowed to steer it. You can't purely carve it, okay? And for the pure fact of, I want you to also learn that if you need to steer the ski, like turn it like this, not just edge it from a low position, I want you to just learn those feelings.
There we go.
There we go. Right, cool. Could you see why I made you do that?
Absolutely, yeah. The biggest thing I felt instead of just doing a steer turn versus my carve turn early was that I didn't have as much shin engagement that I had when I was doing the carving. I think that's just because I was, uh, I was doing a much more of a— I don't want to say this—
brushed.
Yeah, brush turn instead of just getting it on edge and letting that.
So here's a key: if you start to brush and get it more and more on edge, the tip bites and the tip kind of bends back and actually pushes against your shin, and that's what helps you stay forward. You don't have to only just use your muscles. So if you try it one more time and just see if you can focus staying low steering and also edging a little bit more. Yeah. See if you discover that that brings back that feeling of feeling more centered even though you're low. Okay.
Way different with that top half being a bit of a, a smear and then the bottom half is engaging much more. I can really feel my tips just grabbing and really pushing back a lot more.
Yes, give you that shin pressure you know is right. Absolutely. So you know in the back. Yeah. And the ski like just turns.
Yeah.
Back around much better.
It was almost just instantaneously as soon as I started putting them on edge more. And feeling that pressure build up, they just started pushing back, and that's where I got that shin engagement that I was missing at the top.
Right, okay. Let's move on and do the next exercise where you're gonna start working on the upside-down question mark.
Okay.
So see if you can get the timing now. I force you to stay low. You're gonna bring back the extension. We'll just do one turn at a time. Okay. Get low and finish your turn so you're back to that mini man position. Yep, and then you're going to start the turn and stay low. The clue I want to give you is you're going to extend once you start feeling that edging pressure you just got, okay? So wait till your edges actually engage a little bit, which is going to feel later than normal, and then you start pushing and extending and stretching your body against that and just finishing it around in one single— finish the turn like that.
Timing is off.
Yeah, can you feel that's your natural— your body is tuned in to standing up to change edges?
Absolutely.
Yeah, yeah, try again.
All right, this might take a couple times.
All right, yeah, yeah, this is reality, people. This is what happens. Finish, stand up. Close, close, close. You got the timing of standing upright. I don't know if I'm pretty good. Pretty good.
Was that the right timing of it?
Why don't you have one more go? Because you're gonna tell me. I think you'll, you'll, when you get it right I'm not going to jump in. You just keep trying to stay low, change your edges, and then start extending. And it feels like you build pressure as you extend and edge the ski more. Okay, you got one. Yeah, and then as you go faster That's why it's good to do the J-turns, because yeah, sometimes it's like, oh well, what am I supposed to do next? Yeah, so yeah, go back, find some space, do a J-turn. So start low, stand. There you go. Yes, there you go. Let's try another one of the movements, the feelings of the retraction traverse. I'll give you a demo as I ski away, then you just have a go. Remember, you're trying to learn to have the feeling of staying low as your leg goes out, as well as staying low when your leg comes back under you.
Okay.
That's awesome. You're staying low, stretching out. Let the ski come back under you.
First thing I noticed, one side was way easier than the other side. Yes, yeah, I think that's obviously less leg strength. But yeah, I just felt like as soon as I got that ski out, it automatically wanted to track back in.
Yeah, absolutely, absolutely. So what you want to take from that is timing. When you make a carve turn, you don't want to let the ski come back under you straight away. You must want to resist, and you keep resisting until you want to finish the turn. Great. And that feeling you got there of the ski wanting to come back under you, notice it was almost like you let it. Yes. You soften your leg and you let it. Yeah. It's kind of, it's a very short moment in an actual turn. It's not that long. So that'll be the new thing. It'll be like, okay, cool. I've got my leg extended. The ski wants to come back. I'm going to hold it maybe for a bit longer or not. It's your decision when you decide to retract and it happens very quick. Ski comes back under you. Just like that exercise. Yeah, cool.
All right, cool.
Let's go to the top. I think you're ready to just try and put it all together.
Okay.
Feedback.
Yeah, cool.
Um, a little choppy obviously, but wow, that was some cool feelings. Just really getting that edge just really hooking up, be able to really push away from it and having that, that pressure kind of holding you in that one spot that you want to be as you're shooting across the slope, basically coming out of the apex of the turn.
Yeah, I felt like there was way more buildup than, say, your normal carve turn. Yes, yes. Okay, so like the biggest felt difference, more pressure build up. Did you feel like the, the arc of the turn was like really coming like around, like shooting, accelerating?
Yeah, I felt like it was accelerating. It also just— it wasn't, it wasn't, um, didn't feel like it was as round. It felt like it was more just like boom, here you are, you're shooting across. It's kind of like gradually was more almost like you're on this I don't want to say a wall, but it kind of felt like you were hitting a wall, like with your skis, and they were just kind of like grabbing and then just pushing you that way.
Would you make a kind of a guess? Can you see how this would help you on a steeper slope?
Oh, absolutely.
Yeah, yeah, yeah.
I know I've, I've been pumped to go and try this on like a pitch that was groomed, but that black pitch that was groomed.
Yes.
Because I feel like you probably get even a bigger increase of the edge angles and I get that pressure built up even more.
Yeah, did you feel more like your legs were doing the pendulum thing I showed with the ski pole?
Yeah, absolutely.
Yeah, versus your body tilting in and out?
Yeah, not, not so much with my body. Yeah, I definitely felt like my legs were just kind of like— I was trying to stay in one spot and my legs were just kind of like, you know, swinging back and forth and it felt super cool actually. Because I was just like in that one spot. I mean, I don't know if I was or wasn't. I'm sure there was a little bit up and down movements.
Yeah, not too much, but I'll show you, I'll show you the video. Yeah, okay. So, but overall, definitely some new feelings.
Definitely some new feelings.
So now if I left you on your own, would there be one in there that you're like, I want to do that one again and get the feeling right of that one?
Yeah, for sure. When I was traversing and bringing up my leg and then bringing it back in.
Yep. My one side, your right leg out, my right leg out, that was—
I felt way different. And because you and I are doing this, I was able to see the video and I saw what I was doing wrong.
Yeah.
So I would definitely retry that one again.
Yeah.
But yeah, I think overall this is a great way to ski. Just got to work on those quads a lot more in the summertime.
Yeah. Hey, I hope you enjoyed that tutorial on the retraction extension turn. My intention was to really help you build new movement patterns, one where you're flexing through the transition and extending out through the apex. You heard Jonas really feel what benefits it gave him, but don't forget it's not just for your carving, it's also going to help your moguls. So this whole idea of being able to turn your feet, turn your skis, edge from a lower position is one of the key things you work on this drill. So go ahead, practice all those drills individually. The little feelings will start to bunch together and help to give you the total sense of the turn, which you can go out and play with and have an absolute blast with. Now, this is just one piece of the big picture of skiing. I make videos, tutorials on everything from stance, moguls, powder skiing, short turns. I try and cover everything. So there's tons more in my Big Picture Skiing platform. So go check that out. If you're really interested in improving your skiing further. Otherwise, thanks for watching. Please like and subscribe, leave a comment if this helped you, and I hope to see you on the snow next time.
More from Tom


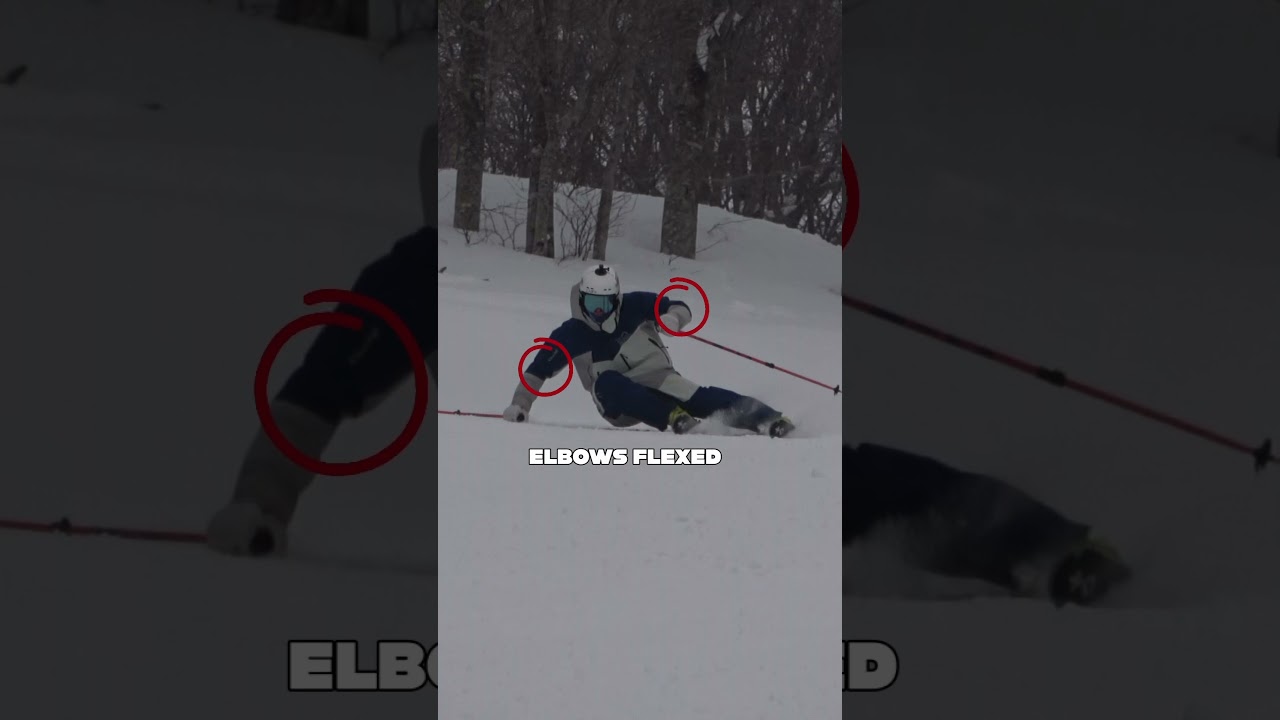
Most skiers overlook how they use their poles. Try these five pointers next time you’re skiing.