How To Use Your Ski Poles - Make Your Skiing Look And Feel Better
In this instructional video, Tom Gellie teaches skiers how to improve their pole plant (or pole touch) to achieve better balance, fluidity, and aesthetics on the mountain. He emphasizes three core elements: a firm pinky‑finger grip that turns the pole into an extension of the body and engages the core; precise timing of the plant when the ski bases are flat and the skier’s torso is perpendicular to the slope, which creates a committed crossover into the next turn; and a light, "pole touch" rather than a forceful plant, allowing the edges and feet to carry most of the load. Gellie demonstrates the difference between a disintegrated plant (fingers released, pole flicking) and an integrated plant (all five fingers, pinky engaged), shows how to position the pole basket ahead of the turn (about 1‑2 m), and explains the importance of aligning the wrist with the forearm and keeping the elbow and arm bent. He uses side‑by‑side comparisons with his cameraman to illustrate timing errors (planting too early or too late) and the resulting loss of crossover feel. The video also touches on aesthetic benefits, drills such as the pivot‑slip drill and a chin‑up exercise to reinforce the pinky grip, and encourages practice on easier terrain before applying the technique to steeper runs, moguls, or off‑piste. The lesson concludes with a call to join Gellie’s ski coaching community.
Chapters
In this video, I want to help you with your pole plant. There is actually a couple of really key things in this that people overlook. One thing you're going to work on and discover is gripping with the pinky finger as you are pole planting is really important. It helps with core stability. The other thing you're going to learn about is the timing of when the pole plant is made. And then finally, that the pole plant and the upper body should move as one. Together as opposed to separate. Let's get into the first thing. So gripping your poles is where we start, and what I want you to really focus on is the grip at the bottom end of the pole. The pinky finger holding on to the pole is really important, as opposed to the pinky finger letting go like this. I see a lot of people open the wrist and let the pole flick like this to pole plant, as opposed to if I have to hold on with a pinky finger and create the same angle, notice what my whole entire body has to do differently.
Wow!
Oh yeah!
To help you see it in action, here's a skier letting go with not just the pinky but quite a few fingers in in order to get the pole out in front. And I would call this a disintegrated pole plant. Contrast that on the other side with my own pole plant, and you can see that I'm gripping with all 5 fingers, and I hold it kind of not like a death grip, but hold it firmly. And what's the result of that? Well, by holding on with all 5 fingers and the pinky, my whole body, if I go back and forth, moves more with the pole plant as one.. So I mentioned that it's like the pole plant becomes part of your body when you grip it like this. It does. And so it encourages you to make this balance movement perpendicular to the slope in the transition instead of sort of staying away from where you're planting the pole down here. So good reason, grip with all 5 fingers including the pinky, and it's going to encourage your core to stay active and this pole plant and pole to be actually more a part of you. So you move more sort of deliberately in the crossover to start the next turn.
One of the main reasons I want you to focus on the pinky finger grip and holding here is it helps integrate your arms and upper body together. As soon as I let go of the pinky, my poles don't— they lose their connection with my body. So one way you could think about this is if I've got grip with my pinky and my whole hand, my poles become an extension of my body. So if I'm dragging the inside one, I now get a better sense of what's going on. If I'm gripping here and I've got my whole poles engaged, I get the sense of better balance instead of holding it loosely. If I make a pole plant gripping with a pinky finger and I move forward here, I need to move with my pole plant if I'm holding the pinky finger. As soon as I let go, like this, I could flick my pole down the hill and I'm not going to move with where I want that pole plant to help me. So with a firm grip with both pinky fingers, you're now just going to try and keep your poles at roughly the same angle as your shins, okay? So this would be behind my shins, this would be in front of my shins, this poles lined up with this line here is a rough guideline of where to keep it. Of course, you can kind of break that rule at times, but for me, I try and keep my poles at this point with gripped, firm pinky fingers holding the poles. So do a couple of runs just feeling that, and then we'll move on to the next thing. So now you're a little more familiar with this pinky grip. We're going to add the pole plant in, and I just want to mention benefits of the pole plant itself. The main reason we are using a pole plant is to help with timing, but also really commitment in moving your body across your skis. A pole plant becomes more and more important when you are in bumps, when you're in steeper terrain and making shorter turns, because you have to quickly commit your body to this position for a moment. And if you make a solid pole plant with a connected pinky finger, you can trust that moment better. So that brings us into the timing. You're making the pole plant to help commit, and I guess you could aim for the moment you want to plant the pole is when the bases go flat.
Now if you can get this timing right, you will really make your turns in all sorts of terrain, especially trickier terrain, far more fluid. So let's have a look at this moment right here when I plant the pole. So you can see that I've sort of committed to it right at this moment where where the bases are flat. So it's at this point that I've gone from inside of this turn right here, and then I'm crossing over into the next one. So I don't want to plant it too early and block my flow from one side to the other. I want to plant it so it sort of helps me get some support and commitment into this turn right here. So this is an act of faith right here that I'm not going to fall over., but you want to get yourself in this position. So I highly encourage you to watch the perpendicular to the slope video because that will help make more sense with what I'm talking about here. Let's look at one more pole plant. So right here, if I draw lines up through my body roughly sort of perpendicular to the slope angle, right in the transition here, there's the timing of the pole plant really firmly in the ground. That's helping me commit from this turn across and over into the next one.
Again, the purpose of the pole plant is to help you commit and cross over into the new turn, as opposed to blocking and stopping you at the end of one. You want to use it to help commit to the next turn. So we're ready, to make the pole plant. Through the turn, from the middle to the end, you need to be moving your outside pole basket forward, ready to be prepared for a pole plant. So from the middle of the turn towards the end, I'm moving my outside basket forward and through the arc faster than my feet go. Okay, so it starts back here in line with my heel piece of the binding, it's going to move forward towards the tip of the ski and towards the point that I'm going to cross over to. So the first thing you need to be doing is setting your pole plant. I find too many people come to the end of the turn and they go, "I've got a pole plant," and they do something like this, and that will often lead to a flick as well because you've got to get it done quicker. So first fix, move the basket forward through the turn, have it ready like a meter, 2 meters before the time you're actually going to plant it.
Now while there are many things we can work on in our skiing, the hands really do make a difference, and the use of the pole plant can really help your balance and integration of how upper body movements are working with lower body movements. So have a look at this example where I've got myself getting my pole plant ready. The setting up is already done, I'm completing the end of this turn and the pole is already out in front ready. Whereas this student over here, the pole is way behind, uh, they sort of haven't got that home position already back here. So that's where you'd want to be looking for that home position next to the shin, like I've got myself with here. Hit the middle of the turn and we start moving the basket forward, and so I'm ready for it. So then I'm already focused on crossing over into the next turn in this one, versus this skier on the right-hand side is not ready. And just even that proprioception idea, like the poles are sort of, you know, tentacles even coming out of your body. This skier is not getting much benefit from where they're holding the inside pole, and that outside pole basket is sort of, you know, up in the air looking for Wi-Fi. And, uh, yeah, it's just not helping. Integrate it with your body, grip the poles better, and then start getting that pole set up already so it's by the time you need to plant it, it's in place.
As you're now going through this setup for the pole plant phase, this is where you really need to keep this pinky finger engaged. As I keep that pinky finger engaged, I'm also going to keep my, my arm sort of bent. This may seem complicated, but once you get used to it, it'll be fine. Watch what this does if I keep my arm flexed, if I keep my pinky finger engaged, and I put my pole plant forward and ready. If I keep this angle, my body has to move towards and stay with it, which will give me an angulated outside ski pressure position, a position that is ready to move into the next turn, far more than this will. If you open your elbow and straighten out, you won't take your body and centre of mass into the next turn, so I need to be moving here with my pole plant. So I fix my pinky, fix my elbow position, even my armpit. I try not to open these joints up, I try and keep it together so my stance moves with the pole plant. So that's the next thing you're going to work on. Don't let go of the pinky, keep it gripped, keep the bicep and elbow engaged, keep this part engage with it, and so you should end up being here at the end of your turn as opposed to opening everything up to plant the pole. So get the pole plant ready and set a meter or so before you're ready to plant the pole. You've got to be in this position and ready to go. All right, now just when you thought, wow, that's a lot in just the pole plant, Well, there's more, okay? How you line up your wrist and your forearm actually becomes really important, or I think so, and it can really make a difference. And if you get this right, I promise you, you will feel stronger and better in your skiing. You want to line up your wrist with your forearm straight like this, as opposed to open or closed. You want your wrist lined up in line with your forearm, okay, like this. Open, aligned, closed. Here's what goes wrong if you have too much of an open wrist when you pole plant. The more you open, you'll get this sort of T-Rex arms like this when you pole plant. Plant. Okay, it also ends up being a blocking style pole plant instead of one that you touch and pass through. So line it up. If you end up closing the wrists too much, it ends up being like you're rowing a boat. Okay, and this does not help me commit to the next turn. If I put my wrist in this closed position and I do a pole plant, I don't feel confident or comfortable crossing over. In the moguls, definitely not. Whereas if I line things up, hit the mogul like this, any force from the pole and the snow coming through is going to go straight into my body better, as opposed to breaking me off this way. It's going to line things up. So your next area of focus, keep the wrist squarely aligned with your forearm. Pole plant, like wrist moves for the pole plant, okay, with a pinky finger grip, but it doesn't open and close.
Now these details in the wrist alignment can really make a difference to not only the functional aspect of your skiing by having a strong position with your wrists, but the aesthetics as well. You'll notice good skiers really like look the part, and I think that's an often overlooked aspect of skiing. It's always all about performance and, you know, like racing and fast. But I think there's a real beauty to making your skiing look great, and when it looks great, it feels really good too. So just like we really are drawn to watching people that can dance really well, that have great smooth movements, a skier is really dancing down the mountain. And if we're not out there trying to make racing turns, and then it's a really fun thing to pursue sort of beauty in your own skiing. And I find things like looking at how my wrists and hands are moving and the timing of when they're doing that and how I hold the poles and when the pole plant is made all have these functional aspects but also bring a certain aesthetic that I really like and I think is pleasing on the eye. So what I'm trying to say is, you know, work on these little subtle details in the wrist. And I think, you know, just as stuff you've worked on down in the feet has probably helped Focusing on how you move, how you hold, and where you position those ski poles is really going to make your skiing look a whole lot better and feel a whole lot better.
Now you've spent some time working on the details of wrist alignment, pinky finger grip, okay, and getting that pole pole plant set and ready well before you're actually going to plant it. So we're ready now to make the pole touch.
Now there's a reason I've said here pole touch instead of pole plant, because ideally I think you should be aiming for a really light touch with the poles and supporting yourself mostly with the edges and your feet, and the poles are just something you add on top. So what you're going to aim for is a very light touch where you ski past the touch in the snow. You keep the hands and wrists where they are, and everything skis past that touch. There's no blocking element to it, and this allows you to keep fluidity and rhythm down the mountain. And to help with that fluidity, remember you're timing the pole plant at the same moment your body moves across your skis and is sort of going through that checkpoint of being perpendicular to the slope. Now these ideals I'm setting up become really difficult when you get to steep terrain and moguls especially. You're really going to want to look for support from the pole plant, but I just want to encourage you as much as you can, try not to look for a pole plant, look for a pole touch, and really look for that timing being when you are going perpendicular to the slope and crossing over from one turn to the next. One way that you could help to work on this is by using the pivot slip drill. So this way you can work on slowing things down but still doing it on steeper terrain. So I can work on crossing over my skis, making a really light touch, and trying to time that with when my body moves to that perpendicular crossover my skis moment. On this really steep run in Sun Peaks, I'm trying to focus on that perpendicular light touching pole plant, and I think it really helps with some flow down this really steep run. So what I notice when I rewatch this is that my body is already crossing over into the new turn by the time the pole plant is made, so I'm not relying on it for balance at the end of the turn. That is all being taken care of by my feet, so this gives me better flow and I don't collapse onto the pole plant. My legs do all that absorption work. So that's where you can take it when you work on all these details in your pole planting or pole touch as we've been talking about just here. So spend the time on easier terrain, and it will really pay off as you start to push your limits.
I hope you've enjoyed today's content. I personally love sharing my ideas and thoughts on skiing with like-minded people like yourselves. So if you'd like the chance to ski with me, I invite you to go over to bigpictureskiing.com and become a member. Videos on hundreds of different topics, everything to do with skiing. I create personally to help people like yourselves improve. I reply to every single comment and videos are tailored so it's like me skiing with you right now. Head on over to bigpictureskining.com, I look forward to seeing you there soon.
I asked the cameraman to actually try out some of the tips from this pole plant lesson, so let's see what he gets up to with these different cues.
Don't let go of the pinky. That was better. Now that I'm paying attention, you can now feel you're letting go. Okay, so just try again. Don't let go. To move to the pole, like to get the pole to touch the ground, move your whole entire body your body with it, don't move the pole and the arm separate. So just try that statically. Don't—
there!
See how you just let the skis— yeah, you don't necessarily want to make them release, but keep going, keep going until they do. That is more what you're after.
Okay, try again. So see Emak the cameraman, his cue this time is to not let go of the pinky finger, hold it firmly, and to integrate his whole body moving across with the pole plant. Don't just move the pole, move the whole entire body to create the pole plant. Now watch, his timing is just a fraction off. I want to see that the pole plant helps him get to perpendicular to the slope in the transition.
That was better. Yep, too early. You're planting too early, too early, too early, too early. Yeah, yeah, so it's too early. You're planting before you move to perpendicular. I want you to move to perpendicular, and that's what makes the pole plant. So as you pole plant, yes, it's going to pull you, pull you even more, and that's when you touch the Snow. You're touch— yes, you're touching too early. Try again. Yes, more like that. That's that. There we go, there we go.
Different.
You can, you can talk. Yeah, why is it different?
Well, because I'm going perpendicular first and then doing the pole plant.
I've always done it the other way. Yeah, yeah, yeah, but never realized until now. Yeah. And what does it make you feel like? You probably need to do a few more turns. Feeling of that— okay, you feel the crossover more strongly? Yeah, a way stronger feeling of crossover. Oh yeah, and You have to trust it.
Yep.
So if the pinky finger is gripping and you pole plant to get perpendicular, you get a better crossover. There we go. Yeah, now I want the pole to be just a little bit shorter again.
Aha. Okay, now this side-by-side comparison is is a great opportunity for us to see the difference between the cameraman and myself's pole touch timing. So they've synced it up so it's exactly the same moment, and what you'll see here is I've attempted with the pole touch timing to get my entire athletic stance forward, re-centered across my skis, ready for the next turn when that pole touch is made. If we contrast that with the, uh, the cameraman, you see the timing of the pole plant, the, the upper body is sort of left behind, it's not integrated with that pole touch moment, and so it's a little bit more delayed and the skier is left behind their skis ever so slightly. Now on this terrain it's not of much consequence because it's pretty easy, however it really shows up this timing when you get to steeper terrain, moguls, and off-piste. Now another chance to have a look at it here, Here's the timing of the cameraman, so notice he's used to touching the pole right here with the edges still engaged from the old turn, and without the body, watch when the pole plant is made, you should see the center of mass really making an active movement here to get across their skis. It's not as much if we now compare it to my motion on the right here with when I pole plant, so you can see me moving forward towards the new turn to get perpendicular to the slope in the fore and aft plane and perpendicular to the slope in the lateral plane right here. So I've skied past the pole, I'm in that home position with the baskets already, uh, start of the turn in a much stronger position. And this is going to really help me out when I take this to steeper terrain. So you want to build habits and patterns that will help you as you get better at skiing and take on more challenging stuff. So no wonder CMac felt a really big difference when he noticed the pole plant timing. If he made it a little bit later, how it would give him more of a crossover sensation, more of what I'm sensing right here, versus sort of— you can see here the pole plant is not integrated, the body is still staying back.
So you just said doing that blew your mind.
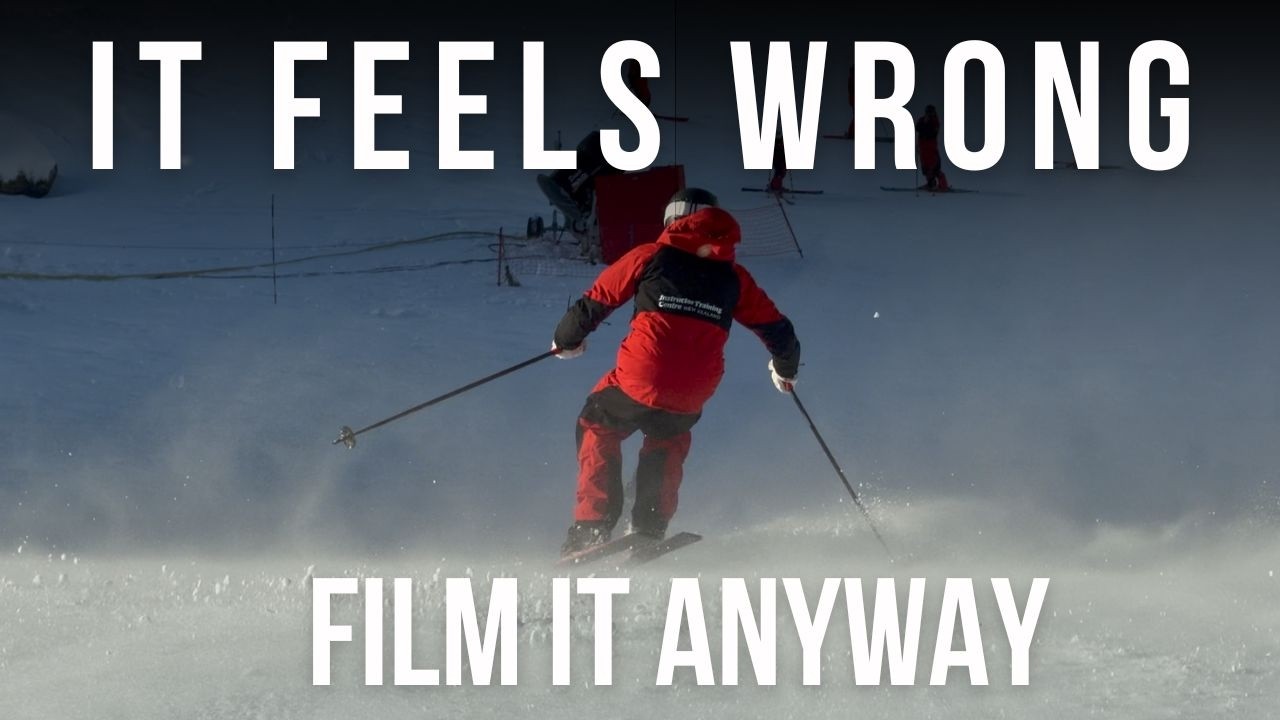
Yeah, blew my mind because to me it was, I got to trust myself that I can be perpendicular first, meaning crossing over before I do the pole plant.
Yeah, and you're saying you've always thought that the pole plant started the turn. That's right. Which, yep, but I was saying no, well, the start of the turn is when your skis are flat and your body is perpendicular to the slope. Yeah. And so it, for you, it must have felt way later. The timing was way super late. Yeah, like this is wrong late. Yes, exactly. Yeah. But yet the, the effect was a stronger crossover. Yes. Moving into the next turn. And can you imagine now doing that on some of the black runs, like how that would really commit you?
Oh yeah, I'm like curious to to find out. Yeah, that was before you turned on the camera.
I was gonna ask or talk about, wow, this is gonna be, uh, well, it actually helps even more on the steeper slopes. If you get it right on the steeper slopes, you can actually tackle them because you're pole planting to get balanced with the slope. Yeah, that's steeper slope angle. Yeah. Yep. And so that's, yeah, you've got to match it to be balanced. So you may have discovered there's actually quite a bit to how you hold the poles and how you use your poles for the pole plant. There's actually even more to this which you'll find out in future videos, but for now, a recap. Be sure to be holding on with a pinky finger, pinky grip. If you even, if you go try a chin-up next time, if you do a chin-up like this and make sure you really grip the chin-up bar with your pinky finger. What you will discover doing chin-ups with a really strong pinky grip is you get a better connection with your lat muscles. So pinky finger grip helps connect the pole plant to your core. Okay, so that's one of the next things. If you've got the pinky finger grip, as the basket starts moving forward, it should change the shape of your body. Your body should start moving into an angulated more balanced over the outside ski and getting ready to cross over into the next turn. I've still got my edges on, but my body is getting ready to go into the next turn. Once it's set here, the timing of it is to help you get your stance and body perpendicular to the slope. So the timing, if you're changing probably from how you used to pole plant, it's going to feel later. So work on that, pattern that in, it will take some time. I've worked on my hands and arms a lot over the years, like I mean a lot. You're going to have to remember things when you get out of your depth, when you go ski powder, when you go ski steeps, when you go ski the bumps. The same principles all apply here, there's a couple of little differences, but for now really just keep it simple and think about the tips that I've given in this video. Get out there, work on it. And then just take it to steeper slopes. I guarantee it's going to help you move into your next turn with better commitment. Good luck! Don't drop that pinky finger. Don't let go of the pinky.
See ya!
More from Tom


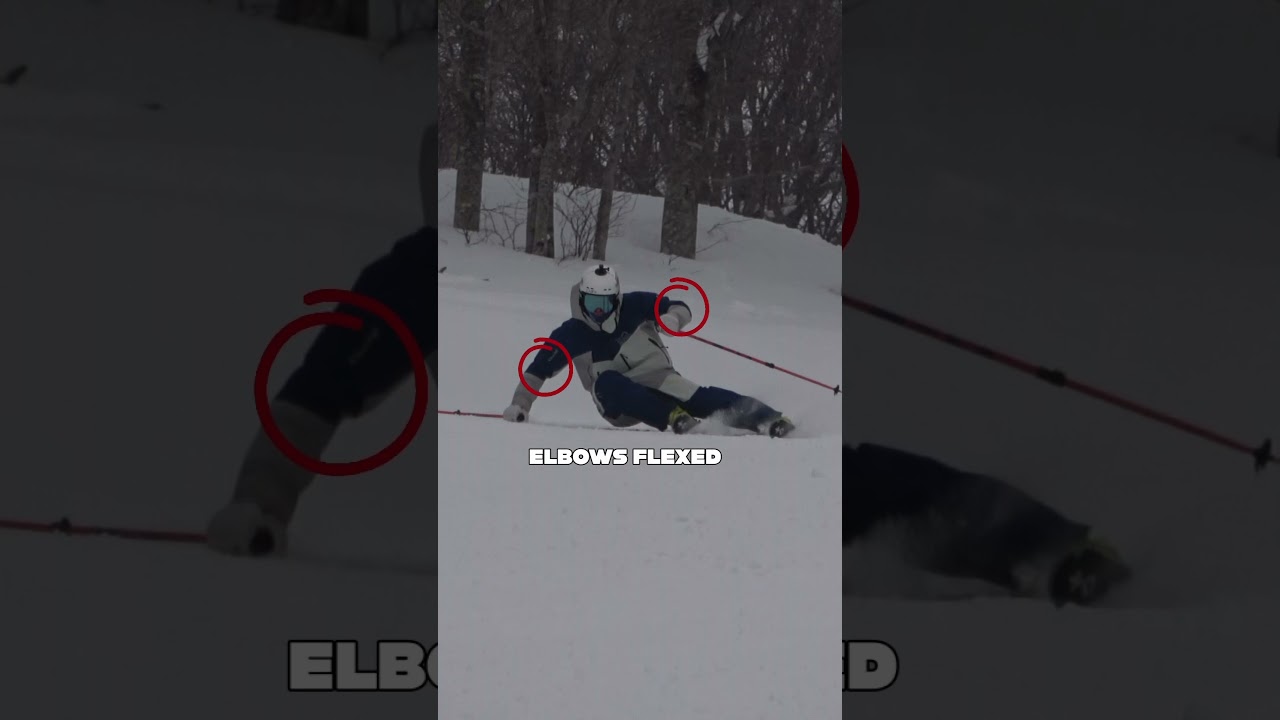
Most skiers overlook how they use their poles. Try these five pointers next time you’re skiing.