Modifications To Make Ski Boots More Comfortable
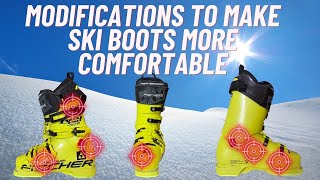
Lou Rosenfeld, a veteran boot fitter, walks through five key modifications to make ski boots comfortable: bunion relief, toe-box thinning, heel-spur grinding, lateral forefoot widening with a custom ball-bearing press, and medial ankle adjustments. Start with a snug shell in the shop, then modify from there.
Chapters
Today's podcast is about modifying ski boots, and you're going to hear from my guest Lou Rosenfeld, who owned a successful ski shop in Calgary for many years. He's an expert boot fitter. He's also done a ton of research on binding placement, and that's one you want to check out in some of the archives of the Big Picture Skiing podcast. His work on that—
fascinating stuff.
But today we want to look at modifying different parts of the boot because most of us don't fit into a boot and it's like perfect. With the get-go. And if you do, you might find out today you're actually getting in too big a volume boot, which is causing other problems, and you're losing some performance. So the premise today really is that you want to be starting off with a snug fit that might actually be a little bit uncomfortable in the store in certain places. As long as the length is right and the volume is right, these other places like the side of your foot, the big toe, a bunion if you've got it, the ankle bone, all these places can easily be modified by a great boot fitter. So we want to go through 5 of the main areas that you can modify in a boot really easily to get yourself in this perfect snug fitting boot that gives you both performance and comfort. We want those both ends of the spectrum, and I can tell you from experience, I've had to learn this the hard way with bony feet, wide forefoot, narrow heel. I've dealt with lots of painful days in ski boots that weren't quite right, and so I went out and learned a lot of stuff myself, working in shops in the evening after ski instructing, buying my own ski tools in the end, And so now I modify a race boot which is literally like a centimeter narrower in the width of my foot, and it kills. I can't even wear it for like 10 seconds. But after all the work and the different areas, this fits like a glove, performs on all types of snow so well, and I can ski in it all day, no problems. So let's get into this episode with Lou Rosenfeld where he's going to show you some different places that can easily be modified by an expert boot fitter and help you get the ideal ski boot setup for your next pair of boots.
So Lou, we're trying to help people realize they can solve the problem of a really good performing, comfortable boot fit through some modifications. Today you're going to show us sort of— we're going to look at 5 main areas around the boot that you can modify. Let's start straight away with like a common problem to do with people that have like a bunion near their, their their big toe and how they would usually solve pain in that area.
Okay. Typical way of solving it in the ski shop, typical way that doesn't work well is to just buy a boot too big. Here's a foot with a bunion. Okay. So if I put the foot in here, I think you can see that there's lots of room in here for the foot to move around and there's no, there's no place on the foot where the boot really fits tightly. Except that the bunion still hits. So as soon as this person starts skiing and their foot moves around, any pressure that builds up on their foot goes directly to the bunion. So this method of solving the problem is comfortable in the store, but it's excruciating once you're skiing. Instead, get a boot that feels excruciating in the store originally, But you can see now that there's a nice snug fit all around the foot. Foot can't move anywhere anymore. And that way no pressure ever comes onto the bunion.
Yes. It's all that getting pressure spread evenly that reduced— that's what reduces pressure.
Exactly. And I could in the store make this punch even a little bigger so it would never touch the bunion. At all. Here it's touching the bunion lightly, but you can easily see that the whole foot is held in place. Like, it just doesn't move around anymore. So pressure's all around the foot, very little on the bunion. If I made this punch just a millimeter bigger, there would never be any pressure on the bunion at all.
Yes. And I think that's a— I wanted to show like a straight-up example first because I think that's a great point. You go and try on new boots. And in the store, if you are the type of person that is looking for, you know, not just skiing for an hour and then going for lunch and drinks, but you want to ski and you want to improve, you need a boot that fits snug. And in the store, that, that first boot you try on that might be snug, if Lou is fitting you anyway, it might feel really uncomfortable. We're trying to show you there are these steps that really good boot fitters will go through to make sure, customize that boot, because you basically are starting with kind of a bit more of a blank type canvas and you're molding these boots, which have to come in kind of a generic shape because everyone's feet are different. And the job of a good boot fitter is to craft that to fit snug but without pressure points anyway.
That's right. When I'm fitting someone in the store, I honestly never worry about whether the boot hurts or not. I, at least not in the beginning of the try-on process, right? I care whether it holds a foot in place properly and I can see the stuff that's going to hurt, and then I know how to fix it. So I, I have a good snug fit right from the beginning, and then I go right into what I need to fix. Yeah.
Now, Lou, if, um, if we go to the toe section next, and I was talking to you before we filmed this, about how my left, my left foot is just a little bit longer and I can feel I've had a couple of black toes and I think I need to create some space for my big, big toe. What, what's a good area there? Because sometimes people will downsize and yeah, their toe shape's different. So can we get up in that area easily?
Well, not necessarily easily, but any good boot fitter has done it thousands of times. So one thing we didn't talk about, this is the same old boot, Look how thick a boot is up here.
Yeah.
Am I, can you see that well, Tom? Yeah.
Yeah. Bring it even closer.
That is almost a half a size of boot thickness. Okay. It's, it's 5 millimeters and a, and a boot size is a centimeter. So if I can get rid of all of that, I gain a half a millimeter without doing anything to the boot that you can, that's even visible. And it's, and it would look like this when it's done. Can you see how thin that? Wow.
There's like, there's nothing left. One and a half, maybe just 1 mil left.
Yeah. So I've gained almost a half a size up here just by grinding out the inside.
Yeah.
It's not necessarily easy to do, but it's done all the time.
Yeah. Yep. I've done a little bit on mine, but I, I think I just, I've realized I need to do a little more. My right foot's perfect, left foot. But I was scared. And here's my question, that, that thickness there going that thin, is there any danger in the structure of the boot being compromised?
No, you can go thinner than this.
Wow.
Need some skill.
Yeah.
You gotta be careful. But I've done boots that are so thin up here that I can see through the plastic..
And so, and you were even mentioning you have a boot fitter friend that pretty much exclusively grinds. He never punches and he hasn't had any people break boots.
Nope.
No. And that's, that includes ski racers and yeah.
Yep. Ski racers, ski race boots are very thick and, and one of the premises is that you start by grinding instead of by punching. Mm-hmm. Yeah. Great. And so, okay. There's a lot of material you can remove. Okay.
Up in that section. But yeah, you definitely wanna see a good boot fitter that, that's done that before to, to, to get it. For sure.
Yeah. For sure. To get a good fit. So, but here's an example. Someone says, boot's great, but I'm hitting my toe. I need the next size up. Well, maybe, but this is where a shell fit comes in. If we do a proper shell fit at the beginning and I see, you know, that much space behind their heel, I know that boot is, is plenty long. And so I wouldn't go to the next size bigger to get a little bit more toe room. I would just grind a few millimeters out of the toe.
Okay. Okay. So then moving on to the other end, the, the heel end, cuz I, I have heel spurs and I think that the, the problem, I mean, there was two problems. One, I telemarked and so telemarking, there was, and, and I think I telemarked in two bigger boots, pull even more wrenching up and down of the heel and it grew. And then I bought some, boots that were way too big. So I'm in a 26 and I think they might have even, they might have even been 28. It was, it was crazy in my first instructing season and I think I ruined my heels. Anyway, if I've got rubbing heels like the back of my calcaneus, it, it rubs. I actually thought I should just, same with the, the bunion, I should make a pocket for it and then that would solve it. But you've actually got a better solution.
Well, the problem with, with your solution is that if you put a punch in here, your heel spur slides back in there. And initially in the store, it feels really good because you've taken pressure off the heel spur. But what's really happening is that when you're skiing and you're forward in your boots, your heel lifts. And if you punch here, the heel spur goes back into the pocket and it's captured even harder, right? So as soon as your heel starts to lift, your heel spur is back in this little cave and it hits even harder. So the right solution, you can see how thick the boot is here and you can see how it tapers in right there, right? So what you want to do is grind this out and make the boot essentially straight up and down here so your heel spur can go up and down without rubbing on anything.
Not rubbing on anything.
The way to hold your heel down is to get in a boot that's properly snug over your instep, and that's what holds your heel down. If you hold your heel down here, well, you just—
well, mechanically, it doesn't even— it doesn't make sense there. I was— yeah, you've got— if you want to hold the foot down, and you know what, I just realized, I just had this picture in my head of the boots that gave me the problem, and they were very high-volume boots, and I think it was just one size too big. But there was the problem. I think I had so much volume. So point to the spot which holds the foot down ideally on the boot. No, the spot we, we want it ideally is up here. Yeah. And so I had my foot had floating room, right? So my heel was moving up and up and down for a whole like 5 months. So there's that. That's, that's for— so people, by the way, we're talking about this heel spur thing, but if you've got one, the real issue is probably this volume fit over the forefoot, and that is not right.
And this is the most important part of getting a good fit. Everything else is about comfort. This area of the boot needs to be snug on your foot without buckling tightly. So when I put my foot in my boot, or if I'm trying boots on you in the store, when your foot is in the boot, I want to know that you feel like the tongue is laying right on top of your foot. Before we even buckle it. Yeah. That way when you do buckle it, you can just buckle it lightly here if you want to. And there's no way your foot can lift and you're never buckling so tightly that you cut off your circulation, you freeze your feet, you get cramps. Yep. Everything goes wrong here, you know? Okay.
So in your process, that spot there, that's, that's where you kind of hone in on, even though there might be these sore spots, someone, oh, my, my fifth toe is hurting. You'll be like, okay, but we need to make sure the top of the foot is right.
Yeah.
Because we can modify everything else.
Everything else is fixable within reason.
Do you know what it reminds me?
I can't, I can't sell someone with a 27 foot. I can't sell them a 25 and make that much room. But oftentimes I might be able to sell them a 26 if they have a really low volume foot. I might be able to sell them a 26 and then work like crazy in the toe area and get them in there and then have a good snug fit. There's all kinds of ways to work it. Yep. All kinds of things that are necessary.
I was just gonna say, reminds me of a young guy who was doing his level 2 in Australia this season and he was asking me about boots and I looked down and, and I could see the buckles over this this front part of the foot, he was like maxed out right on, right on the last one there. And I see this all the time with people and people in rental boots too. If you are there, there's a red flag straight away. Like I barely have to, like it's, it's, yeah, I mean they're worn in now, but when I, when I first had my boots, it was just on the first rung and it was tight.
Mm-hmm. And I, another story, if there's time, I hate to admit it, but it, in the very first year I opened my store, 1st year, a girl came to me. She was a good racer, high-level racer, fist racer, and she had massive heel spurs. And so I punched the boot back here, just what I said not to do. I didn't know better. I punched it right there. She went away and came back and said, it's even worse. I said, oh, I must, I must have just missed the location a little bit. And I punched it again and she came back, it's even worse. And it would be 'cause her heel spur kept moving back further under here and making even more of a ledge pocket that's ramming up at you. Yeah, that's right. And finally I called a friend of mine and I said, what's going on? And he said, well, Lou, you, you gotta grind this outta here. So you don't touch this down here where the heel spur's actually located. You don't touch that.
Mm-hmm.
You work above it. Here and you grind all that out of there and you make room for the— you make like a little sliding board for the heel spur. Yep. Yep.
Yep. Because I mean, you, you can get a pretty tight fitting, like, well fitted over the instep area, but it's— there's going to be— the heel is going to move up and down when you go over bumpy terrain, when you leverage the front of the ski. Like, it's going to happen. So yeah, that's something I've really learned. I'm going to make sure my boots, after chatting with you, I'm going to do a little more above the the heel spur area, because I know I've got the volume right over the forefoot.
So just be very careful that, like I showed you, don't grind down here at all. Only grind— here's where it starts moving in. That's where you start your grind. And you move all of that even with that.
Okay.
Got it.
Hey, just a really quick word from me. If you've enjoyed this episode of the Big Picture Skiing Podcast or any of the other episodes I've put out, could I ask a small favor of you? Could you please subscribe or follow on whatever channel you're listening on, whether it's YouTube, Spotify, or Apple? That really helps support the show and helps me bring on great new guests like Sasha so I can share that information with you. All right, thanks very much for helping me out.
Let's get back to the show. So now we're into, uh, looking at the, the sides of the feet, well, the lateral side, like the pinky toe side of the foot. Do you wanna show us an example of a boot where someone will have been uncomfortable on that part and how you've modified it?
Sure. It, we'll look at some feet later on. And one of the things we'll, we'll see that's typical, especially for women, is a really narrow heel. And, and if I wanna fit that heel really well, and I do, I want her to be snug back here. I've gotta get a fairly low volume boot, but then the boot is too narrow for the forefoot. So I need to have a way to not just make the boot a little wider here. I need to have a way to make the boot wider from way back here all the way up to the toes.
Yeah.
And a regular boot press won't do that. A regular style boot press. And this is a different, this is a boot press I manufacture. This is completely different than a regular press. Regular presses, are very hard to pull. They're all metal on metal here. This press has ball bearings in all the pivot points, so a regular press is really difficult to pull. And the way you work it is you put it here and you pull it down and you lock it there, and then you— and you've heated the boot, and then you walk away, come back in 15 minutes, it's cooled off, and there's the punch. That's great if all you need is to punch for a bunion., right? Because it's just this one little spot where you need to punch for an ankle. But, but if I want to do a really good job of pressing this boot for this woman, I need to press from here. I need to go back and forth. I might do 100 punches on this boot until I'm finished. And then I can come back here and I can snug it up a little bit and make it even a little wider back here than I am up front. And I can taper it. And with this press, I can use it like an anvil, you know, and I can just punch all over the boot in any direction I want.
Yep. It reminds me of like you're, you're massaging the plastic through many repetitions into a, into a bit wider shape. Great way for people like that lady, the pretend lady we're talking about with that wide forefoot. And I'll put an image up here so people can Yeah. See that, that wide forefoot being accommodated for without going to a bigger boot or a larger volume boot in the same size.
Without this press, I mean, I manufacture this press now, but in the beginning when I opened my store 20 years ago, they've taken this press off the market. That's why I'm making it now. I wouldn't have been able to, to run my store the way I did. This is the only press that lets me walk all along here and and just do anything I want.
Do you want to show us the, the, the, the example? Because that boot was already punched. Can you show us the original width and then now the shape you've got into it if you hold the both boots up?
In my right hand is the boot as it comes from the factory, and in my left hand is the work I just did. Yeah. Can you see the difference? Yes.
Yeah, easily. You can— that— yeah, that— there we go. Original boot. And then after working it on the press, bring it back that center, that one a little more for us. Yeah, there's, there's quite a big amount of, yeah, that's a happy foot now. I've done the same thing with, yeah, with mine.
I've had to, this is a World Cup race boot that we're showing. So this boot started out in this size at about 92mm across the forefoot, and it's now somewhere around 97 or 98. I mean, it's a full 2 sizes wider.
Yeah.
Wow. And I have a nice narrow heel and a low volume fit across the instep. Everything I wanted. I just had to make room for the forefoot.
Yeah.
Yep.
So then back to the main point of why we're doing this is there are these solutions which you can get solved by seeing a good boot fitter and going to a snug fit and, and just expanding out in these, for sure, in these specific areas specific for your for your foot. I'll probably point out, like, the last spot we were going to mention, the main spots, is kind of on the inner ankle portion side. And you can perhaps see it here. The, the ankle bone here has been pushed out.
I can see that you've punched the navicular. Yeah, the medial ankle bone.
Yep, those two spots just there. And yeah, and so that's made that very comfortable. That boot, when I first tried it, had I don't know how many spots, but it was 20 seconds and I was in agony. And now I can wear that boot all day long and it's my favorite ski boot because it started the most snug compared to any of the boots I've owned and I've got the most performance out of it because of that reason.
Some people in the navicular area, this area right here where you put a single punch right here, and that evidently worked fine for you. But a lot of people need, because as you're, as you turn and your foot pronates inside the boot, this whole entire side of your foot comes in contact with the shell. And, and, and not only does it hurt here sometimes, but that contact here pushes your foot this way and it really loads your little toe. Yes. And one of the things that is typical is that someone will come into a shop and say, my foot really hurts right here. And the shop punches it right there. And then the person goes out skiing again and it still hurts here. And it's, and then they punch it again and it still hurts here. The problem is that their foot's hitting over here. Yeah. And, and with another style press, all you can do in here is put in a little punch. What you really need is the same thing we just did on this forefoot, lateral forefoot on that press. I would work this, probably would work this entire area bigger, and I'd probably punch in here 50 or 100 times. Yeah. But on this press, that only takes a minute. Yeah. It's just, yep.
You know, my old ski school boss had to do, do the same thing when I got these. I went out skiing in this boot and, and because it started out 92, really narrow, and my foot is over 105, 106 millimeters wide. He had to do that whole massage thing along here because my foot was put into a supinated position, like I had a super high footbed or something, all along here. And I was tripping over on the pinky toe edge because I couldn't pronate and get the side of my foot up against here. So yeah, that's right, this whole section has been expanded out. And then on top of it, I've got some little pockets for the, um, the medial malleols and, and the navicular.
This this press lets a ski shop work in a completely different way than, than you can with it with a press that doesn't have, doesn't have ball bearings in there. I've closed my store and I'm retired now. We're making this press and I'm working in Sun Valley Ski School.
And so if people are interested in this tool, I'll leave, I'll leave a link in the bottom of how they can get in contact with you about getting one. Lou, while I've got you here, I know some people also have the issue of volume around the calf. So the lower leg area. Yeah. So, so a lady, maybe she's a great skier, she's sized down, the forefoot area is all feeling good, but it's quite choked up around the top of her calf.
What can you do? It's more of a problem for women, um, mostly because their leg is just shorter. And, and we don't make boots proportionately shorter. So shorter tibia gets calf muscle inside the boot, which is just painful, right? Really painful. So halfway down a run, massive muscle cramps. Yeah. And, and the way we fix it now is we cut the top of the boot off and just, you know, get a hacksaw and cut it off and lower it or, or notch the boot where it's appropriate, or we try and expand the boot where it's appropriate. And in terms of what looks professional, the nicest way to do it is to expand it, but we don't really have a proper tool to do that. So people use wine bottles and baseballs and softballs, whatever you can find. Yeah. Whatever you can find to stuff in there. But I'm working on— this is a prototype tool. I think you can see it's funnel-shaped, so I can stuff it down in the top of a boot. And the further I stick it into the shell, the wider it gets, the more it will expand the boot. And you can also see, I think, that it— here's the power we need it— is that it's oblong shape. So it's flat here. And it's high over here. Yeah. So as I rotate this, it changes where it applies pressure to the boot and it changes where it will expand the boot. So if I need to just expand the boot on the lateral side at the very top, I just stuff this down in there. I rotate it until the high side here is exactly on the side of the boot. I heat only this part of the boot. And I get an expansion only in that part of the boot. Yeah. Right now this is in prototype.
We're close. Okay.
Yeah.
That's a very neat, neat design.
Maybe there'll be some interest.
I'll leave a link and you can email Lou if you're maybe interested in something like that. But the, the, the good thing is that problem can be solved for people just like we've talked about in, in, in these other areas? Because, yeah, I think it's an important one. And I didn't— I also think sometimes people don't realize, maybe they don't feel any discomfort, but I see, like, again, thinking this season, there was a young lady doing her Level 3, uh, ski instructor certificate, and she kept being told, like, you're, you're crushing the front of the boot, your ankle's overflexed, your ankles— stop flexing the front of the, the boot. She's like, I'm trying, did everything in her power. And it was because the volume was pushing her so far forward she couldn't even get her, right, like ankle in the right ideal position. So yeah, she had to—
her calf is way inside the back of the boot and it's jamming her forward and it just jams her forward and there's nothing she can do.
Yeah. So if you're listening and you find that you've seen video, you're overflexed or you can't really feel the whole, like the tail of the ski is hard to sort of feel just naturally. You have to lean really far back to get it. Could be a sign that, that, that calf area just needs a, yeah, chopping down or expanding out a little bit.
One of the other things, same thing, but just really tired quads, you know, because it gets you so bent knee that you cannot ever relax when you're standing in lift line, you're half bent and you never get to relax your quad muscles and you just get wasted after a few runs. Yes, absolutely. For the same exact reason, your calf muscle's in the boot and you can't stand up straight, so you never get to relax.
Great. Yeah, Lou. So in summary, the message here is if you're really into your skiing and especially you're wanting to look for a bit more performance but comfort all day long, don't be afraid of going into a slightly more snug shell and boot because there are ways boot fitters can work as you've just demonstrated in all the different areas. Basically everything's fair game to customize that boot to be perfect for, for your foot.
Exactly, exactly. Most people, to be comfortable, need to have a customized boot.
That's right.
Yeah, very few people get to just buy a boot out of a box.
Yeah, yeah. And yeah, and so if that is you, maybe just check you're not buying the size up that's too big to get around your problem, because you could be leaving a few bucks on the table without you could be skiing. For sure. So, Lou, thanks so much again for your expertise. Before we go, I think you got some exciting stuff coming up. Um, if people don't realize, Lou and I have chatted back sort of in the COVID period about Lou's research on binding angles and its effect on ski performance. And, and people love that episode. And if you haven't listened to it, it's really good. You have to go back into the archives, the Big Picture Skiing podcast, but search Lou Rosenfeld, and you'll be able to, you gotta find that one. So check that out. But I think you're also, some more people have been interested in that and you're doing more talks about it.
You, I'm doing a talk. I don't know, you probably are aware of IERSKI and the International Association for Education and Science and Skiing, I think is what it's called. And I hadn't been aware of the organization, but a friend of mine, One of your clients actually, Jay Park, made me aware of it this year and I've called them and great organization with lots of presentations about science and skiing at a very high level. And I'll be doing a presentation for them on November 1st.
I'll put in the link if someone's interested in that and, and they're, it's not, but this, they're watching it before that date. They can, they can check it out.
And on November 1st, I'm doing the presentation on binding position for them. Awesome.
That's great. I think that's, that's cool. It is. Yeah. Very cool. People are recognizing how important that is. And just because I think a lot of people— no, not a lot of people. People have a lot of— who have a lot of experience realize that, but the general public have no idea. Yeah, you can make your skiing feel easier and better just with getting that right. Lou, thank you so much again for your time. We'll look forward to catching up, and good luck on November 1st with that presentation.
Thank you.
More from Tom


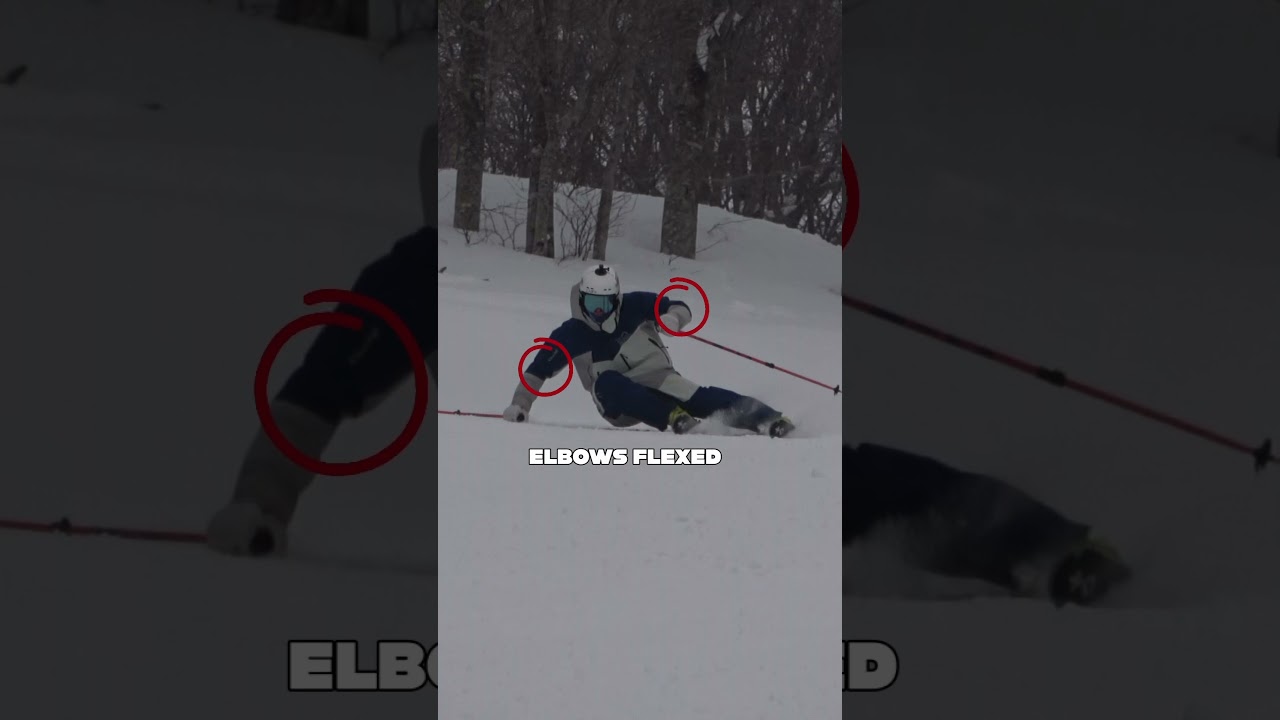
Most skiers overlook how they use their poles. Try these five pointers next time you’re skiing.