What is the best type of ski footbed for you?
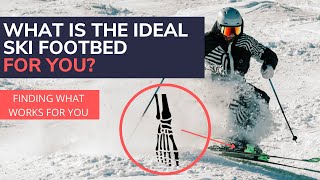
In this conversational webinar, host Tom Gellie and boot‑fitter/coach Brent walk listeners through a hands‑on, iterative approach to discovering the optimal ski footbed. They introduce the concept of a "test bed" – a temporary prototype built from stock insoles, varus/valgus wedges, scaphoid (arch) pads, and metatarsal pads – that lets skiers feel how small material changes affect heel alignment, arch contact, fore‑foot pressure, and overall balance. The discussion covers how to assess rear‑foot posture (heel verticality), how to incrementally add or remove material to achieve a neutral heel, how to use arch and metatarsal pads for proprioceptive feedback, and how to fine‑tune the fore‑foot tripod (heel, ball, fifth). They stress the importance of asymmetrical adjustments, video documentation, and a collaborative relationship with a knowledgeable boot fitter, including respectful communication and willingness to pay for expertise. Practical tips on materials (soft stockers, rubber wedges, tape, glue, sanding) and timing (off‑season experimentation) are provided, culminating in advice to start small, be patient, and iterate until a balanced, responsive feel is achieved.
Chapters
Okay, we've got a great little webinar episode here lined up with the goal of getting you to feel a little bit more about what's going on with your feet and how that affects the whole structure of your body, how that affects your ability to ski well, with something we're going to term a test bed. Not a footbed, not insole, nothing.
We, we would—
Brent and I would like to help you discover what influences different things happen to have wedges, so forth, on your foot posture, on your ability to balance, so you can then find your ideal footbed. Brandon, anything more you'd say with the intro, what people can expect in this, in this, uh, podcast, vlogcast?
So in your previous podcast You've talked about footbeds, and then you've talked about how footbeds can affect your balance positively or negatively. And then you've also talked about what happens when you take the footbed away as a way to find the full dynamic range of the foot, right? How far can I invert it onto that uphill ski, and how far can I pronate it onto the downhill ski? Ski. And I think what's going to be good here is that we're going to talk about how we find the balance, the balance and support, and also the full dynamic range of your foot and blend those two together using a test bed concept where we take different pads and wedges and build sort of a prototype of what you could then introduce to your boot fitter to really hit the target for a final product that's going to work best for you.
Yeah, that's right. And we should— like, we're trying to get here that everyone's individual. What works for me may not work for you. Everyone's going to find their, their own ideal setup, and that's what this is about. And I should also say, like, I've been on an 8-year kind of journey towards where I like my footbeds currently, and that could change completely again in another 8 years. And so this spectrum where it's like the, the custom, really supported sort of, uh, idea of the foot, which I began with, to then say almost minimal to none— there was a whole bunch of stuff I did in between there, playing with wedges, all the stuff we're going to talk about here, before I got to figuring out what I wanted. So I think you also wanted to really fill in that void of like the two ends of the spectrum. Because I, I'm definitely not saying like one's better or bad. Like, like you said, there's just effects. This, this is about helping you feel that and then having a much better relationship with your boot fitter. Because we don't want— the worst thing is going in there and telling someone, you know, you're right and they're wrong and this is what you want. You want to have a discussion and, uh, and share each other's thoughts to try and get to the ideal endpoint.
Exactly. Knowledge is power here. So the more you know about yourself and how you operate better through your own experimentation gives you a lot more, um, ability to, to, to progress, right, and get what you get you want out of your own skiing. There's a lot of good boot fitters out there with good training, with good anatomy and biomechanics training, but there are also fitters out there that may not be able to hit the target, should we say, on the first go-around. And if you go in there knowing, hey, I tried this, I did this, and I did experiment with this, and I got some really good results with these, you know, test pieces that I did, these, these test wedges and these test beds, You know, that really helps the boot fitter. That goes, wow, okay, you know what you want, I can produce that for you. I can make a really elegant footbed that really embodies what you know works best for you. And it's really an efficiency thing, and it's also just a lot more productive.
Yeah. So do you want to show us a test bed and then— yeah, the kind of maybe a— your fully finished product that maybe took months of—
yeah, so these are things like, for instance, if I want to, um, you know, build up, um, something that, that I use just as a prototype. Let's say I've got a brand new race boot and I'm trying to figure out how it skis. Uh, yeah, I might go out and actually ski it with the stock bed, but for me personally, I'm not going to last very long in that. I need a different level of support. I know my feet well enough And so I'm going to build, you know, something with a little rear varus wedge because I'm a pronator. My foot likes to, you know, the arch likes to collapse. And then I like, you know, some contact underneath the arch, a little proprioceptive arch contact. So I'm going to build this, right? You can kind of see the thickness there. And this is just the stock bed. You know, this just comes with the boot. You know, for yourself, you might try something a little different. Right. This might be for a little bit more higher arch, somebody who doesn't pronate at all. You got that nice, solid, neutral foot. There's no wedging in the rear foot. We're not trying to pronate or supinate. You know, you got a pretty good tripod, but you're just looking for a little bit more contact through the sensation, through the foot.
So you want to feel—
so you feel more balanced on it. Again, this is soft stuff. And let me show you some of the parts and pieces that you would need for this process. Yeah, for this process. What would you need to build your own testbeds, right? Yeah. Important here to understand that we are not especially building a footbed here, okay?
This isn't a footbed.
This is a prototype. This is strictly going to be a test vehicle for you to understand how you balance better. And so the first thing you need is some stockers, right? Now, if you don't have the stock ones that came with your boots, like you can get them out of your shoes, right? You can go ahead and pull something out of some shoes that'll help you do this, but they should be soft and pliable and fairly flat and soft because when you, when you add something like a varus wedge here or valgus wedge, they're the same, right? Wherever you, if you put it on the inside of the heel, the medial side of the heel, it becomes a varus wedge. If you put it on the outside, it becomes a valgus wedge, but it's just really just these little wedges that you apply to help do some correcting of the heel. If you're a pronator, you're going to put it on the inside. Okay. And I always use various wedges for myself because I'm a pronator.
My heel basically, which would be the opposite to what that, that image is showing.
Exactly. Yeah, that's a, that's a supinator position right there. That's on the outside. But these are nice hard rubber wedges and you can find those on, on Amazon or other foot care sites. You can order those up in, in like a small, medium, and large. So if you've got small feet, get the smalls. If you got, you know, 8 to 9, 10, you get mediums. And if you're You know, like 11, 12, 13, you'd probably want a large. Then you've got scaphoid pads or arch pads, and these are just soft arch cookies. They could be made of felt, they can be made of soft foam, but these are going to help you with that arch contact, that proprioceptive arch contact, and you're going to use these to wedge in to a certain point where you feel that contact underneath the arch. And then finally, metatarsal pads. This is strictly a clear optional thing. You may be experiencing some some pretty good ball of foot pain when you're skiing. If you do, this might be a really good tool to have to play with in terms of getting a little offloading for the ball of the foot. You know, I don't use them much myself. They do take up some room, but like you could, you could, you could, there's a, there's an, there's our test bed. You could put add in underneath there, just behind the ball of your foot, just tape it down and then go ski on it. And you can feel like, oh, the, the ball of my foot's getting a little less loading, and I can actually feel like I can put more pressure on my first metatarsal, more pressure on my fifth, because my ball of my foot isn't getting so quite so squished. Yeah, um, this is really—
I'm gonna— so a quick summary there. What you're gonna need is, is just a stock sort of insole flat thing that you can get Sometimes maybe your local ski shop, often there's just got a bunch of spare ones, you might be able to get one and come from your shoes.
Um, it just—
you just wanted to be flexible and, um, and sort of cheap at this point to stick some of these other things on, which are the varus valgus wedges, which can influence the angle of your heel, also the angle of your, your forefoot, the contact of the first metatarsal and the fifth metatarsal. Some scaphoid pads, which is just to fill in a bit of volume space if, if you want to feel more of your arch against something, you want sensation there for those, and they're quite soft. And then the, the met pads, which is kind of like a bit of a soft sort of dome to, uh, influence how the pressure is distributed over the forefoot. And I remembered one other thing with the— if you, if you don't have the stock insole that came with your boot, I think it's important people check that when you— that it's the right size. Because what you want to avoid is when you put that inside the, the liner or the shell, it's not going to dish up.
Correct.
And create—
that should be—
yeah, you want a bit of tolerance around the whole entire thing. If you put it in the boot, you don't want it being dished up because it's wider, which you got it from a shoe, probably is going to be a bit wider than a ski boot.
And the only thing that I'd like to add is, of course, I mean, you're going to need maybe some glue or some masking tape to put these down. If you want a more permanent, I would use a little sandpaper to rough the surface and then some contact cement. Okay, that would be kind of the pro way to do it. If you just want to make it real temporary, you don't want to play with glue or toxic glues. You can use some masking tape just to hold them in position, tape it all down, and then some nice sharp scissors to cut away the excess, right? Yeah, it won't look super pretty, but it doesn't have to be, right? It just has to be able to fit inside the liner, not get dished up, not get curled up, and just keep trimming until it fits in there really nice. And if you really want to, again, go pro with it, you might have a nice belt sander in your garage used for just some basic carpentry work. You could then kind of grind around the edges and put some bevels and kind of knock some excess down, and, and then you're, you're good to go. There are no perfect rules about how you do this, but you want it so that it does fit inside your boot, inside your liner, and then can go in the boot. It doesn't feel like, again, it's curled up or, or bound up on any one way or the the other.
Now, Brandon, tell us about— yeah, oh, or I was going to say, tell us about when, when a customer goes in, or when someone goes into a shop and a boot fitter is looking at their foot, they'll often first place look is, is the heel. And when your, your body weight is on that foot, how is that heel aligned? Do you want to start there? Tell us a bit about that, what they're thinking, and then what you might do to just see yourself how Things change when you put those wedges in.
Right. And what we're— what a boot fitter is looking for is if we look at you from behind when you're standing in your rested position, right, you're just standing on your feet. Is your heel bone essentially vertical, right, or close to vertical? Or do when you put weight on it, that bottom kicks out quite a bit and we see that ankle rolling in and then we see the arch collapsing, right? You know, is your foot just —medially deviated? Is it all kind of rolling to the inside, or does it seem to kind of just settle in and hold all that weight, or does it roll out the opposite direction? Does it— does that heel bone kick inward and roll out? So the key thing for skiing is that we find that the heel bone sits in a more vertical position. It doesn't have to be 100% vertical, Some of us, we can never get there. But if you're starting super everted and pronated, we want to put some wedging up on the inside to get it out, you know, get rid of 60 or 70% of that so that we're in a more vertical position. Because the end result will be, if I want to tip that to the outside under that uphill edge, it's going to take a lot less effort to do so. If I want to roll to that inside edge, I can roll to that lightly pronated position and feel like I can easily generate pressure on the inside edge.
So much better to start from, from kind of balanced on that heel in the middle. So you have the option to go to either edge, right?
As opposed to, hey, I'm stuck one and I'm just kind of completely pronated, kind of collapsed in my boot, the medial side. Yeah, you can ski it that way, but, but you're going to find it's really tough to get all that effort to roll up past that vertical point and back over to that inverted position to hold that uphill edge. I mean, a lot of people struggle with that, and it's all because their foot's just not very balanced inside the boot. And the same, the same way goes the other direction. You know, you're really rolled out and you just have a hell of a time getting to that inside edge because you've got maybe this high-arched inverted foot, and you're just, you're not balanced inside your boot. So, building something like this, right, where we can play with some, with some wedging and stuff really goes a long way to helping you find that balance point. And even if you're not like one extreme or the other, building with some few wedges and some tape can really help you find that microbalance, right, that little fine bit between the difference between feeling like you can really gently roll and generate dynamic pressure and the difference between like abruptness, roughness, not really feeling like you could ever get there, or when you do, it's too much and you got to back way off. And so this is where it really, really helps is finding sort of micro-tuning.
That's it. So yeah, starting in the heel, Yeah, that's what, that's what you're going to be sort of assessed by when the boot fitter looks at you, and they're going to be making decisions, probably talking to you about that. And then when they build that footbed, eventual one, they're going to be trying to influence it ideally to sit sort of somewhere in the middle. So you have this option, you're, you're in the middle, that you can go either way with, with complete control. You're the pilot, you've got control of where you want that, that foot to go. Yeah.
Yeah, rear foot control is where we, where we start first as a boot fitter, as a biomechanics understanding, as an anatomy understanding and how that all comes together. We start with the rear foot, always start with the rear foot and get that under control first to the best of our ability before we start going into that forefoot area and trying to find how we best balance that forefoot.
Yep, so you may start just there and, and with your test bed, put that in wherever it is and try and influence that angle of the heel and go for a ski without doing anything else and just see if you can notice like what is— what happens. Is, uh, yeah, is edging harder, easier? Is balance harder, easier? What, what, what are the outcomes here? And then after that, after you maybe play with it Would you say next spot would be— should we discuss, uh, the contact under the arch? We'll just move along the length of the, of the, the insole here. Yeah, I mean, and why, why you'd be going into here.
Yeah, once we've got the rear foot, uh, better balanced, right? We've taken some of the pronation out, or we've been able to kind of neutralize the tendency to supinate, or maybe you just don't have, uh, that type of foot altogether, you're fairly neutral. We're looking for just kind of some wedging, some of the scaphoid in underneath your arch just to get some proprioceptive contact. You shouldn't really feel— when you're playing with this stuff, you should not feel like it's punching up inside the arch. It should feel like you're making blocking, punching. Yeah, no blocking, no punching. It should feel like you're making contact when you start to roll from edge to edge. Not like when you're standing static. You shouldn't really feel it. You should feel like, oh, I rolled in, ah, there's, there's some contact there, and I can feel them more and more as I generate more edge angle. And same thing to the outside edge, you should feel it as you're rolling onto it, not statically. So if you're, you're packing in these wedges, uh, you know, one on top of the other to try to fill the void, that's not what we're looking for. What we're looking for is to feel it when you're already starting to generate some edge angle on it. Then you should feel that contact with that.
Again, you're going to get a far better influence on the, on the shape and the posture of the foot through the rear foot and the forefoot, not through the arch. Um, and, and, you know, I think great skiing is all about feeling it, right? So if you've never really noticed that like dimmer switch of, you know, you just roll your ankle and it's just bang on instead of dimmering on and off, this kind of thing could help that person actually feel the progressiveness instead of an on-off switch, correct? Would you say that that might be it? Absolutely.
It's definitely more of a controlled feel, um, as opposed to, oh, I just feel completely braced in the bottom of my foot just standing in the lift line. I feel like there's just like completely bracing me in one position.
Um, that could be a real— or not feeling the actual movement, the actual, like, everything in between endpoint pronation and starting neutral. Because I think that's, that's also a problem in skiing. It's, it's like on-off. Like, great skiers, they have that, like, fine control of just a little, a lot, when they want it, backing off. And, um, and finally, there you'd say Probably people with, with higher arched feet might be going and experiment this stuff because you already have a lower arch, a flatter type foot. You're probably going to be feeling your arch when you roll already, so your, your brain is going to be feeling that. That's not going to be a new sensation. You might be blocking it so that the higher arched people might benefit from, um, this sensation effect from the, uh, higher people for sure.
When Lower arch people were probably going to benefit more from achieving better rear foot control, right? You know, not having, having some type of Varus Wedge in there, or even doubling it up to get more and more rear foot control before they even add any sort of arch contact in there. You know, get that rear foot under control, get it so that you, you, you can tip it, you know, inverted or everted, supinated, or pronated, right? You can tip that thing kind of and feel like you can balance back and forth on it as you're rolling from edge to edge. Yep.
So then we move a little bit further along up to the, to the forefoot. We can use the same wedges again, right?
We can, we can add some contact. This is my test bed and it's, let's say, I'm not feeling a lot of contact on the outside of the foot, I can use just a little bit of it in there, just tape that in there. And you're just using very, very small amounts. Or you feel like you're not getting enough contact under the first metatarsal, underneath just the head of the ball of the foot, you can just put a tiny little bit in there, snip it away, and tape it down, and go ski that and try that. We're talking really small amounts. Good point. 2 millimeters of this material at a time. Nothing like you just take the whole darn pad and slap it on there. Just use a little bit of that edge and just use a tiny amount. You could even use duct tape to layer it. That's right. Right. And put 2 or 3 layers of duct tape just to get maybe that 1 millimeter, 1.5 millimeters. Mm of just fill in that area. Yeah. And go ski it and try it.
Yeah, because that, that our feet sort of a sort of playing this balance between, you know, the heel, ball, the fifth. So heel, all the fifth, ball the first. And so you're sort of playing with these three points of that tripod for the most part to, to influence how that posture is and when pressure is side? Is it felt earlier in the range, later in the range? Those sorts of things is what we're trying to do. And then how that influences, um, up the chain, because, because the whole body follows what the foot does. More pronation, you're going to start getting more internal rotation of your, your tibia, of your femur. Your body up above is going to start following it, especially if you've got more pronation on one side than, than the other. And so if you're already you know, if you're already stuck in pronated, internally rotated land, you don't know, and someone's telling you go further, like, you'll never feel it because you're already living there. But if you come back out to neutral land, you now might actually feel that journey into that space, and then also that journey to the other end of, um, you know, the range where it's going to pull things outwards. And that's, uh, yeah, in that range. And that's what we're really trying to Yeah, give people—
finding that balance point in the foot, right? Can I, can I be on the, in the center of the teeter-totter and then be able to say, oh, I want to go inside edge, I want to go outside edge? If you're living on your inside edge all the time, you can never find your inside edge because you're like, you said, you're living there. If you're always on your outside edge, you're never going to find the inside edge, right?
Because you're always living out there, right? And even the outside one, you're like, you can't— I can't go further.
Yeah, yeah, because I live in an outside right? Yeah. So, uh, yeah, when you're out of balance on your feet, you're going to definitely feel out of balance in your skiing, just flat out. And if you're refining, you do feel fairly balanced in your skiing, you can actually maybe even fine-tune it and become even more balanced, right? You can get even more precise, um, movement patterns.
Shall I share just, uh, like maybe a visual example of what I was playing with before. These are wedges that I have in, uh, in, in my practice here. You can see them there. They're much more aggressive than what, what you're going to be using in, in the footbed, but these are for therapeutic purposes. And so if I go back here, so I've got no wedge under my, uh, left foot here. You can zoom in, there's nothing there. If you watch the angle here when the, uh, the heel wedge is added. Okay, so we're tilting that heel out. You can see my whole entire posture changes and adapts. Okay, so you're sort of looking for this. Do I, do I want this on my left foot, or do I want more of this? And so you're going out and, and, uh, and, and testing that sort of thing. And even so, I was playing it with on the, on the outside and what happens there, and And then here I've got one under the heel and under the first met, and, uh, and just comparing how that feels to without. And so really, you're trying to do this again to get to a point of when you go in and get a more finally finished, really nice product from, from the boot fitter, you, uh, yeah, you, you've already done a lot of like fixed many of the bugs and you, you know more of where that target is.
One of the things what I saw with your wedging there is that when people— when you play with wedges like that and you play with contact on your— underneath your feet, try to think about it as, do I feel more tension through my body or less tension? If you feel more tension as you're wedging, you're probably going in the wrong direction. If you feel like you can stand and relax and all of a sudden the tension in the muscular system kind of goes away and melts away, you're going in the right direction. It's a little hard sometimes to kind of figure that out, but if you play with wedges enough, you'll start picking it up with your body and you go, ooh, my hip feels a little tight. Ooh. Oh, it doesn't feel so tight now. Oh, my knee feels more like it's rock solid there, not like it wants to kind of twist and rotate. So, you know, pick up what does your hip feel, what does your knee feel, what does your ankle feel now in terms of tension? Are we increasing tension or decreasing tension?
And that's a good point too. That was, yeah, that was a pretty static example too. I was just looking at balance without any kind of much bend in the joints. Great to also do some skiing movements with those things under there. And again, notice the— do I feel it's tension not in a good way, like, I think I can't really move? Or is it like, oh, like, I feel like I can move and the tension is building up more as like support going into a position, as opposed to it sort of, yeah, jamming, jamming things up, or really tight in, tightening in not such a good way? Because yeah, that's a good point. That's hard to maybe describe too, like the tension thing. Like, there's a good amount of tension because if you have nothing, you're kind of like a bag of bones. Too much, right? So it's like that, that word— just to clarify on that, it's like, it's like, you know, like you said, you feel really balanced, really solid, you know, muscles are on but they're lightly on to hold you there.
It's not, not an effort. Correct. Yeah, agreed. And when you're doing these test beds, you also want to treat each foot individually, right? Yes. Meaning a lot of people are asymmetric. A lot of the people I see and I work with, their left foot and their right foot do not balance the same. A lot of people are asymmetric. And if you're building these, these little test beds and go, oh, I built my right one, I'll just do the same for the left one— no, no, treat your feet differently in terms of when you're playing with the wedges. You know, just to show like a little evolution of mine, these are my minimalist beds, but when I flip them over, right, they look different. You know, the, the right foot and the left foot have different amounts of test, you know, materials that I've built up underneath them to feel really balanced between these two. And then as I've evolved Great. Another generation of beds. Again, the right one here, um, you know, again, I had to go back and add some more filler underneath that right arch because that right arch just is a little taller. It likes some more contact. It just likes to feel more, a little more pressure there. The left one doesn't. Um, it's hard to see it, but I've actually taken the material away from the left arch, um, and given more to the right. So again, here we're progressing. We're getting to like, hey, how do I get something more elegant than this. And then finally, you know, the current pair is this, where, um, the, the, the left and right look fairly similar to each other, but this is all came from me casting, meaning how I position my foot in the mold to get what I wanted. And so this is now the, this is the, the 2022 beds, right, that I'm skiing on now. Because if they've evolved over 4 or 5 years of previous beds where I've been doing that test bed concept and then building up to what I feel works best for me.
Yeah, so, so if you're out there and you're going to go through this process and you do some experimenting and you come to the point like you're ready to maybe make something a little more elegant and refined that really fits in there and is ideal and also get some insight from the boot fitter, then at this point I think I really— like, we both emphasize, like, like, there needs to be a good relationship here. You need to come in with respect for your boot fitter. I think that respect gets respect. You come in there, but also share what you, what you feel. You know, all this testing is done so you have that knowledge, as you said, to share with them, and then you'll be able to work back and forth. Like, if I'm working on someone's body on, on the table over here and I'm just working away and they're giving me no feedback, I could be pressing too hard, too lightly. It's so much better when I get feedback and then I, you know, change things. So as they're maybe molding your feet on, on that, um, on the machine, you can say, look, I know that it's— that it feels a little better when I don't have as much sort of contact under here. Can we just reduce that a little bit. That's going to be much better than you walking out frustrated, or they're frustrated because that you haven't talked to them. Um, yeah, did you want to speak to any— anything there about the relationship when you come in?
Clients of mine have come in basically doing this. It may not look as pretty, but they have essentially come in with pads, maybe even a cut-up soft Dr. Scholz thingy, neoprene or whatever. And they've come in and they've said, you know, I put this here and I put this here and it looks lumpy, but they said this is really where, um, it's been really good. I've gotten the best result. I just don't want it to feel so lumpy, right? But they feel balanced. And, uh, a good fitter is going to take that and go, you know what, that's great. I can, I can put calipers to all this. I can feel the densities of those materials and we can make it like this, but just not going feel lumpy anymore. It's just going to feel balanced. And a good fitter is going to, you know, he might smile a little bit and chuckle because of your artwork. You know, don't take that the wrong way. We just, we just like to see that. But a good fitter is of course going to embrace what you're doing and guide you from that point onward and help you get what you want out of it and meet that balance properly.
Yeah, because I mean, you You know, like boot fitters, good boot fitters have a lot of experience. Maybe you could even talk about the gentleman we were discussing just before we recorded. He'd gone about, you know, addressing what his issue was in one foot, but, but you suggested, I don't think you're addressing it in the right spot on the tripod. Maybe, uh, like that's how you can utilize that relationship to your advantage.
Yeah, I mean, we— there are people who do experiment on their own and they sometimes guide themselves in a more difficult direction and not realize it. And that's what we had— I had a discussion with an instructor today was, hey, you know, yet you, you're kind of on the right path. You're trying to resolve it on your own, which is cool. But we, we're gonna, we're gonna change the approach. We're gonna try from a different direction. And we started playing with wedges and we started playing with different things and he immediately starts to felt like, oh, that's where I need to go. And so it, it, that exchange was the important thing that he had. Hey, I went down this pathway, wasn't getting what I wanted out of it. Matter of fact, it was actually getting worse. What was missing here? And, and that helped me go, oh, okay, we don't want— you've already been down that pathway. And I know, yeah, that's where I need to go down. I already knew it, but we, we validated that we needed a completely different pathway. Yeah. And that pathway, when we started playing and testing this on a bench, was the light went off and went, aha, okay, I get it. I get where we need to go now. And so, uh, we're both excited now that we're gonna get, uh, a result that he's looking for that is that's eluded him now for a year to two years. And so that's, that's great. If he just kind of come in and said, Matt, this is me, I messed up, I have no idea, um, then it's all on me, right? But the fact that he's been playing with his own mechanics and giving me the, the, the pros and the cons, and a lot of con, really helped become a more efficient and more valuable, uh, conversation to get to where he wants Absolutely.
So any final, final words here of wisdom with people going through the process, or even, you know, precautions?
Um, yeah, the main thing is a little goes a long way. Um, don't hurt yourself in this process, um, by kind of overstuffing, overjacking, or, you know, more is better. Start with a little bit, right? And be patient. A little bit, tape it, glue it, whatever, and then go try it. A little bit goes a long way as opposed to, oh, that felt really good, let's put more. No, just a little bit, go ski it, see if it is feeling really good, then maybe add a little bit more with tape and just a little bit at a time and take the patience to do this because the results will be magnified. Once you start skiing on it, that little bit will actually show up in a big way.
Yeah, I mean, the proprioception, the sensitivity we have in our feet— like that Princess and the Pea story is what comes to mind. It's, it's amazing what your foot can feel, like it is millimeters. And the density of materials, all that stuff, your body will react completely different to. Could be the same height, you know, you put under there, but the material you change slightly different, you get a different result. So, so I think that's what you're trying to say there, like go a little bit, because there's really— yeah, we, we can feel a lot. Um, I, I would say— you go ahead. Yeah, yeah. I would say like the, the final thing too that's really helped me is, is take video or photos of what's going on. So, so you're not just sort of feeling it, you're actually looking because it'll also help guide you, like when you maybe overstep something, you know. If you're putting these things in, you start getting some weird angles and things going on, you know, good, good sign. So, so utilize the fact, you know, everyone's got a phone, they can record themselves. Have a look at yourself. It's amazing the difference in what you think you're doing to what is actually happening. So, so I'd recommend that.
Yep, that's about it, Ben. Just give it a shot.
Try it. Yep, yep. And, and, you know, final parting thing, I think I really hope boot fitters out there— what we've, what we've done here, the, the end goal would be a much better relationship, because I know, uh, at times there can be, um, sort of a bit of, you know, butting heads between coaches, instructors, and boot fitters. And I just don't think that really needs to, to be present because everyone really wants the best result at the end of the day. And so having a conversation, being respectful of each other is, is how that's going to happen. And so hopefully this podcast and talking about it, like this, this spectrum of things and then what you can do in between, really helps, you know, fix that and makes a better boot-ski relationship for people all around the world.
Absolutely. Uh, you know, during the process, don't be afraid to knock on your boot fitter's door and say, hey, this is what I'm trying, um, do you think I'm kind of going in the right direction? Get a little consult with them, and, and the boot fitter can be kind of helping you guide this, this test model as you go. Um, might give you a little direction of where maybe you're you're falling off the path a little bit and then kind of bounce you back onto the path, maybe give you some different suggestions of where you want to move these materials and play with different densities and things like that. Yeah, yeah. Don't expect to pay.
Expect to pay too. I think that really helps it. Like, I really believe every time I've wanted information, I found, you know, if you pay for it, you believe in it, there's a lot more value behind it. And, you know, it's an exchange. This person spent many years and so their time is very valuable. I think often that's not thought of. And so I really encourage people to be respectful of that time and just go in and, yeah, offer something, money, those sorts of things.
I think it's, yeah. This is a good time also. Yeah. I know that you're down under, you're going into your busy season now. But the summer season is a good time for a lot of professional skiers, elite level, or people who are really passionate about it to take the time to start playing with it now. You really want to hit the ground running going into the winter. I have, by the time I hit December and January, February, I have no time, not even for the drop-in. But like right now, you can drop in, say hi, say hello, show me what you're doing. I'm more than happy to give you my time with, even without an appointment. Um, you know, that off-season is, if your boot fitter is available in that off-season, it's a good time to, to go in. Uh, it's a good value time. We may charge you, we may not. Uh, but certainly, uh, playing with this or kind of, kind of doing this stuff at the peak of the season could be more troublesome than if you start early, right? Start early, figure out your balance points, playing with your boots in the summer and then into the fall, and so you got a really good direction going into the winter.
Agreed. That's it. Well, thanks everyone for, for taking the time to watch and listen. Be careful, good luck with it, and let's hopefully this leads to you having a much better skiing experience and boot experience.
More from Tom


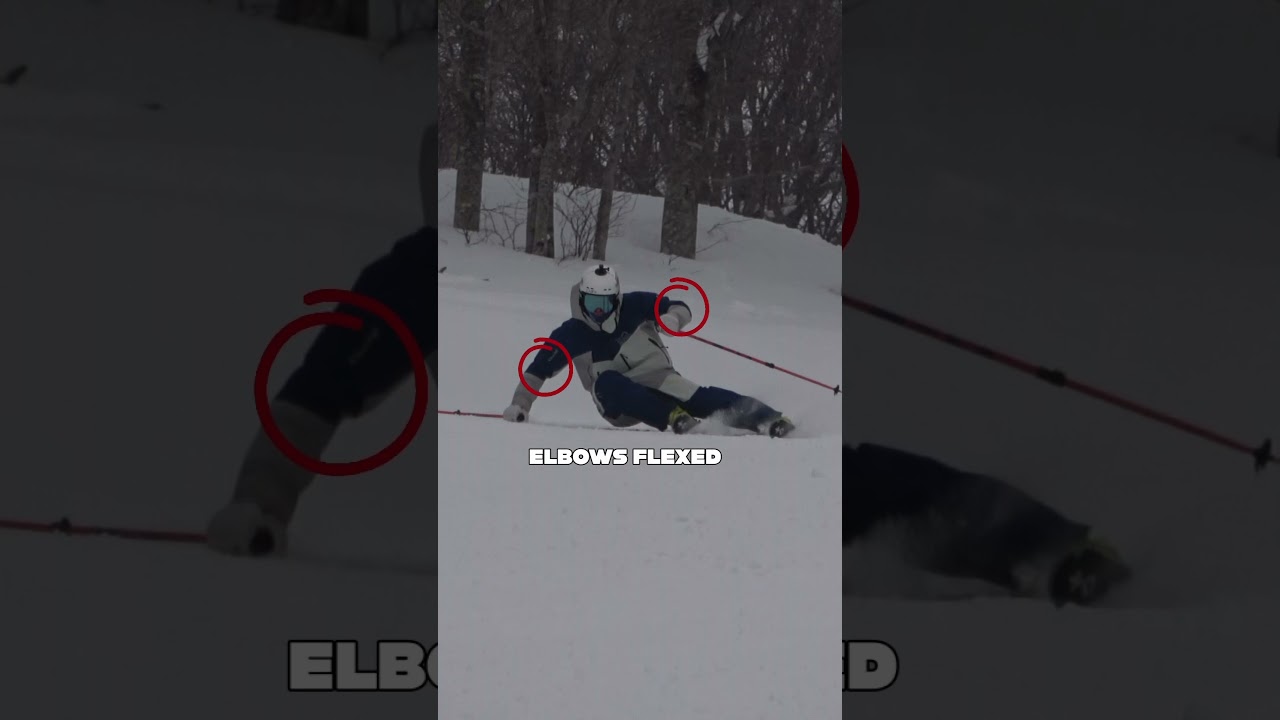
Most skiers overlook how they use their poles. Try these five pointers next time you’re skiing.