How to Sell your wholesale deals Fast w/ TwnSqr | Wholesaling Real Estate
The video series walks viewers through the TownSquare (TwnSqr) software, a marketplace for off‑market real‑estate deals. It shows how a seller creates a post, adds property details, photos, and disclosures, sets a duration, and publishes it to the marketplace where institutional buyers with matching "buy boxes" are notified. The seller can market the post to their own contact lists, configure list sharing settings, and send the post via email. The demo then introduces a middle‑man (Kevin) who has uploaded his own contact list, shares the seller’s post with his list, and communicates with the seller through TownSquare’s built‑in "room" chat. The middle‑man can request and collect documents, use the integrated HelloSign e‑signature tool, and control whether buyer information is redacted or released to the seller. The platform tracks attribution so the first user who emails a buyer owns that lead, preventing duplicate outreach. Membership tiers (Pro, Elite, Ultra) affect list size limits and sharing permissions. Pricing is $150 with a 20 % discount code “MAX”. The demo emphasizes full control for middle‑men over their contacts, seamless document handling, and the end‑to‑end flow from posting to offer submission and buyer release.
Chapters
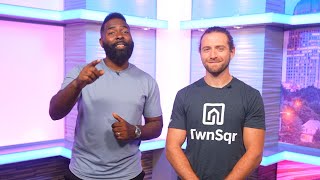
Hey, what's up everyone?
My name is Max, and I'm Paul.
Paul is the founder of an awesome new software.
Townsquare is the best way for you to disposition any off-market properties. We're trying to revolutionize the industry.
They're not trying, they're actually doing it, and that's why we want to show you the inside of the software before you actually go spend your hard-earned money and buy it. For less than $150— no, actually $150— you get to change the way you actually dispose of properties. Before you spend the money, Paul created videos to show you exactly how you can utilize Townsquare. So take the time, go through these videos, and don't forget, when you're done, at the end, use the code Max so you can save 20% on your purchase. I'll see you guys later.
All right, hello everyone and welcome to part 1 of our Townsquare demo. I'm super excited to get started and tell everyone about what we've created. So getting right to it, uh, as I go through this demo, please keep in mind, uh, that this area down here is where you can see the user's information, and you can see that we're under an account right now named Seller Paul. So we're under my account, and I am acting as the seller. Second thing is we're looking at our development site right now. The development site is an exact mirror of our live site, so if you see that there's like a lack of information or a lack of posts for any reason, it's just because we're looking at the development site. So getting right down to it, we're looking here at the My Posts section of the platform, and this is where you as a seller can upload your properties to be posted on Townsquare and do all of the other stuff with. So we can see that I've created this post already, and we can click in and see the details of it by double-clicking. And then you can see there's a title. I've given it a duration of 7 days, and it can go up to 1 year, 1 year, 3 days, 7 days, 14 and 30 days. I gave it an address by typing in the beginning of the address here and then selecting the address from the list. In order for this to process properly, you will have to select the address from this list. And then I added a bunch of other information, a quick description of the property, and uploaded 6 photos just for the purposes of the demo. Um, down here, this is our additional details section, also called our seller's disclosure section, where you can upload upload and add information about many different parts of the property. And we're going to be creating some things here to incentivize you to add as much information as possible so that the people looking at your posts can gather as much information about the property as possible and maybe even purchase the property sight unseen because you've uploaded and added so much information. Next thing here on the edit post screen is I want to point out this matching contacts and matching buy boxes section. The matching contacts is pretty straightforward. This is the number of contacts held by other users that you could reach via sharing, and we'll get deep into that in the next parts of this demo, but we, we're showing you essentially how many other contacts that other users of Townsquare own that have been identified as interested in properties like the one that is shown here with the information that you've uploaded. And then next is matching buy boxes. So this is also pretty self-explanatory. It's the number of buy boxes held by other users that this post will match when live. So as you may or may not know, one of our big things here at Townsquare is that we want to bring access to these off-market properties to the large institutional buyers, and we prompt the institutional buyers to make buy boxes, kind of like big filters, to be notified whenever properties properties and posts that are sent to Townsquare that match their purchase criteria whenever they're posted so that they get notified. So this is the number of buy boxes that have been created by buyer users that this post matches. And then next is Preview. This is where you can see a preview of the property. This is exactly what your buyers and anybody else that has access to this post— this is what they'll see whenever they come to Townsquare. Heading back over into the My Posts section, we can now click Publish. Now that I have added enough information for this to go out to the marketplace where anybody who has Buy Boxes set up will be notified of this property, the buyers that you have uploaded, the contacts as we call them, that you've uploaded, and the contacts of other people that you can leverage via Townsquare, they will not be notified whenever you click Publish. That's the next step. So this is just sending it out to the marketplace. Anybody who has buy boxes set up, and again, if those people have email notifications activated for those buy boxes, they'll receive an email notification as soon as this property is posted. So we'll click publish to post the property. And then you know that it has been sent live whenever this button changes from publish to unpublish. This is your ability to remove it from the marketplace. One last thing I want to point out before we go into marketing, where you can send this post to your contacts that you've uploaded under my contacts, is any information that you change about the post once it's live will be automatically updated on the live post. So if we were to change the bedroom bathroom count, whenever we click view here, the bedroom bathroom count would automatically be updated on the live post. As such, if we click into property showings, this is where you can set up a showing of your property. Now this showing, as we'll see, is for this specific property and this specific property alone. Inside the post, I'll point this out, inside the post you can have multiple properties and you can set a global asking price for the 1, 2, 3, 10 properties, whatever it might be that you're uploading into one post. So if you wanted to have a package deal, you can add multiple properties to a single post. So whenever we go into property showings and we create a property showing by double-clicking, you'll notice here— we'll get into the start and end time and date in just a second— but you'll notice here that I have to select the property within this post that this showing pertains to. That way, if you have multiple properties with different showings on different days, you can set up showings on this calendar view for each property at whatever day and time that you'd like. So we'll select that property, and then we'll change this to 12 PM, and you can add a quick note about this showing. Save that and it will appear here. There it is. And then if we go back to Edit Post, we can click View, and then here under Showing, you can see that this was added. So the post was already live, it was already accessible, and then under Showings, you can see that this has been added for Friday at noon until 1 PM, and then it says please RSVP for the showing by clicking this button here. Alrighty, heading back into the post. Now let's start sending the post to our contacts. So you do that by clicking the marketing tab, and you can see that this list is here and available. It's called My Very Best List, and for the purposes of this demo, I've just added 2 people to this list, and I'll show you exactly what that list looks like in a later part of this demo. To get this list to appear in the marketing settings, you do that by going to My Contacts. This is where your list management is done. What I did to get this list here is click New List, and then it will appear as a draft. You click into it. First things first, whenever you're inside a list, is to click Add Contacts. This will take you through a process of uploading your contacts via a CSV, the email addresses of your contacts, uh, directly into the Townsquare platform. Next thing to do after those contacts are uploaded is to add the name of your list for organization purposes. So I've just called this one My Very Best List. Next, we're not going to look at this just yet. Whenever you create a draft post, this will be automatically checked as no. That's your open to sharing/JVing settings. This is essentially asking you, are you open to sharing this list with other users on Townsquare? Again, we'll dive real deep into that in the next parts. But none of this is available, this open to sharing, until you have told the Townsquare platform where these buyers or where these contacts you're uploading are interested. You have to at least identify where the buyers on this list are interested in purchasing properties. Without identifying this region by drawing a polygon using this button, you are not able to check this as yes. So getting to this, what is this open to sharing/JVing? Inside of your Townsquare account, you have this shared with me. This is where other users are able to share their post with you. Those other users aren't able to share their posts with you unless this buyers list, this contact list, has this checked and the post that they are sending to you meets the criteria that you've set here. In this list. So we've added the contacts, we've added the title, we've checked this as yes after adding geographic criteria. And then down here, if we know that these contacts that I've uploaded are primarily interested in only single-family homes, we can just check this single-family residence box and we can check the townhome box. There's quite a bit of other information down here that you can fill out to get really granular on the lists that you're uploading. One last thing on the My Contacts section. You don't have to have this marked as yes to take advantage of Townsquare. As a Pro, Elite, or Ultra member of Townsquare, you don't have to allow anybody to share their post with your list. So if I just wanted to send my post that 225 Ruxton and the other posts that I create with my list, and I don't want anybody else to know about me, and I don't want anybody on Townsquare to try and share their post with me. You do that by just making sure that any list you upload is checked as no. If you want to see deals, see posts from other users, you have to make sure that this yes is checked. So we'll go back over to My Posts, and we'll go into this post. You can see that it's now no longer set as a draft, it's set as live. And then to send this post to our list, all you have to do is go to Marketing. You can select this and then click Send Selected, or you can just click this paper airplane button to send it out. So we'll click that, and then we'll see that it's successfully launched whenever we see the time update here. And there we go. So now we know that this post with this information has been sent to the contacts, these 2 contacts. It could be 20,000 if you have an Ultra account. Um, has been sent to those contacts via Townsquare. Now what I'll show you is what this email looks like to a buyer who has received the email from you about this post from Townsquare. So we'll head over there and I'll show you the email. So here we are over in our buyer's account. This is a buyer whose email was on that contact list. You can see that this account— again, the account is named Seller Paul. We're just using this as a seller's account. It's really my Townsquare account, but Seller Paul on Townsquare is sending you this Great Investment Property. This is the title that we added, and then we can see all of the details of the post here, and we can click on any of these buttons to see the post in Townsquare. And then like we saw before, this post looks exactly like it did whenever we were previewing it. You can see all the information about when it expires and what the price is, and then this buyer can click Contact Seller to submit their offer directly to the other account that we were looking at. So we'll do that now. Let's add a phone number first to our profile. And we'll go back to the marketplace. Alrighty, and then we can click submit. Once this is done loading, we'll know that the proposal offer submitted by this person was submitted to the seller. Now let's go see what it looks like from the seller's page. Okay, here we are back on the seller's account and we're inside the notifications. The way that our notifications work is each post will be in a line here on the left side, and then when you click on each post, the notifications that are related to that post will populate on the right. So click on this, and then here we can see that this says a proposal has been received, and then it says you've received a proposal from Buyer Number 2. This is where the the buyer's information would be. And then if you click details, you'll notice that it'll take us back over to my posts inside this post and under the interested buyers section. Here under interested buyers, you can see information about this person who has submitted the offer to you. We'll get into this a bit more, but you can click on this button to go to the room with that buyer that has been created. A room is a communication mechanism that we have created to make the communication between you, other users, and other users on Townsquare seamless. You can exchange documents, sign documents, exchange contact information, and chat directly inside the room. We'll get into that in the next part of the demo. One last thing I want to point out is you can expand this to see what this person has said to you, and then again this Go to Room button is here where you can communicate directly with them and they'll be notified if you communicate with them there. Yeah, and I think that about sums it up for this part 1. The next part that I'll show you is this sharing and what happens whenever we go into the post sharing mechanism and we share the post that we've just created, sent to our contacts, sent to the marketplace, but now we want to send it to the third marketing mechanism that we have on Townsquare, and that is other users who have made their contact lists open to sharing. So I'll show you what that looks like in the next part. Alrighty, welcome back to Townsquare's demo. This is part 2. As you can see, we're now inside of this account called Middleman, and we're looking at the My Contacts section. This is so that I can point out that this person, this account that we're using, has uploaded this buyers list, this list of contacts that has a list size of 3. If you haven't watched part 1 yet, you can see how this uploading process takes place. One thing I do want to point out is that this list has geographic criteria selected. That's why it's possible for it to be shared. Plus, this list is checked as yes under the open to sharing/JV settings. If this wasn't checked, checked as yes, then the other account, the seller account, which we'll transition back to here in a couple minutes, that account would not be able to see this Middleman (Kevin) account whenever they're sharing their post with other users under their sharing settings. One other thing that I want to point out is that the contacts on this person's list, these 3 contacts, I purposefully made this so that there is an overlap where one contact on this person's list is identical to a contact on the seller's list, and I'll go show you that right now. So here we're looking at the two different lists that have been uploaded. Here on this tab, we see— we can see the seller's list that was uploaded, and here is the middleman's list that was uploaded. We can see that this info@townsquare.com occurs on both lists. And we do some really cool stuff on the back end of Townsquare to ensure that because the seller sent an email to info@townsquare.com about 225 Ruxton first, then whenever the middleman sends out the email, this person, info@townsquare.com, will not receive the email about 225 Ruxton. And I'll show you exactly how that works here in just a second. Here on the seller's account, we can see we're in my posts under this post title, and we're here in the sharing settings, and we can see that this account that we were just in, the Middleman Kevin account, is available to share to, and it has 3 contacts. To initiate this sharing, we can do this, we can select the account, or we can just click this button here. Usually there will be multiple people here for you to share your post with who have uploaded their contact lists and have made them open to sharing, but for right now we just have this one and we'll share to The Middleman. Once it's done being shared, this "shared at" will populate and we'll see that in just a second. There it goes, successfully shared, and we can see that it has now shared and that it's populating there. We can also see that it's in the status of reviewing. So as you share your post with multiple different middlemen, you can see who has accepted, who has declined, um, and who is reviewing, uh, the post that you have sent them. Now that it's successfully been shared, I'm going to go back over to the middleman's account and show you what that looks like and show you what the notification what the notifications look like that have come through because the seller has shared a post with that account. Over here in the middleman's account, we can click on notifications, click on the property, and we can see post share received, and we can click on details. So now we're over here in the shared with me section. We can see the title of the post that has been shared, and we can see the seller's information here. The seller's name, the seller's email address. We can click on this here to go directly to the post. We can send a chat directly to the seller, and we can accept or decline based on the interaction that we have here in the chat and based on, uh, what we think of the property, think of the post as we review it. Um, over here on the left side, we can see the marketing. This is where this middleman is able to select their list to send the post to. But let's head back over to marketing right now, and I'll show you how the chat works. It's pretty self-explanatory. And now let's head back over so you can see what it looks like whenever the seller receives a chat from this middleman. Back in the seller's account, notifications, we'll click on this chat received, and we can see the message that has been sent over. Clicking details, we go back over into the room that has been created between the middleman and the seller, and we can see the message that has been received by the middleman as well as all the information about the middleman here. And we'll send a message back real quick. Back in the middleman's account, we can see the chat that the seller just sent has been received. And I want to point out this very key detail: this post is not able to be marketed to this middleman's list of contacts until this accept has been clicked. So you can chat back and forth, you can contact this seller who's sending you the property before you even accept it, and hitting accept does nothing more than notifying the seller that you have accepted their post. In their sharing settings of the post, they'll see that it has gone from reviewed to accepted once this is accepted. But again, the key is that in order for us to send this post to our list that has been uploaded to My Contacts, we must accept the post first. So we'll do that, and you know that has been accepted once you can see this button that says Upload Files. So real quick, we call this screen with the chat and the ability to go and click to see the whole post, all of the user's information, and this next steps and signatures. We call this a room in Townsquare, and it's our primary communication feature for you to talk to users on Townsquare. Just like you can talk to buyers on Townsquare via rooms, you can talk to other users that you're sharing your post with via Townsquare rooms. And you can upload and sign documents directly in Townsquare as well, which which we're really excited about being able to offer to you. And speaking of which, let me show you exactly what that looks like for somebody to upload documents to this room. So let's say that this middleman, Kevin, is asking the seller for some documents about the property, just some more information, and they say, "Let's upload some documents to this room so that I can verify that this is a property I want to send out to my contacts. I'm going to head back over to the seller's side and upload some documents to the room and show you how this middleman is able to see those documents, which will populate down here. Back here on the seller's side, again, we're saying that the middleman is requesting the seller upload some documents for them to review. So all the seller has to do is click upload files. Choose a local file or drag and drop. So we'll just drag this PDF that I have ready, and now we can click Add. And what this is doing is it's uploading this file into the room, and the middleman on their account can now see this PDF that I've just uploaded. From here, the middleman can quickly download this and open it up in their browser and then review it and then decide what they'd like to do. So let's say everything checks out. The middleman can send a message over to the seller saying as much. I just typed out a quick message from the middleman to the seller. We'll send it over. It says, okay, this checks out. I'll share this to my contacts now. I'll let you know if anyone shows some interest, and the seller will receive that on their side just like the other messages. So for the middleman to share this post, we had to accept it, which was down here. After we clicked accept, we were able to upload the files by— the seller was able to upload those files. The middleman here on his account could also upload the files, and now we'll go to marketing. From here, that little notification message that said you must accept the post is gone. And if there were multiple lists, you could select which lists you'd like to send this post to. But for this, we're just going to send to this one list. Again, remember that this list has the same buyer, that info@townsquare, on the list. So we'll just click Send Campaign, and just like on the seller side in part 1, we'll see this populate whenever it has successfully launched. And there we go, it's successfully launched. And I think that about wraps it up for part 2. In part 3, we'll get into what it looks like for a contact, a buyer from this middleman's list showing interest in a property that has been shared with them, and how it looks whenever that person doesn't have an account, and how it looks from the seller's side. I'll see you over there on the next one. Thanks so much. All right, everybody, welcome back. This is part 3 of our Townsquare demo. Here, what we're looking at is the email of our sales@townsquare.com that was a buyer only on the Middleman's buyers list, contact list from the last video, part 2. And you can see that this post has been sent to him. From Contact Middleman Kevin. That is the other account that we were using that sent out the post on behalf of the seller to their list of contacts. So what I really want to point out here is that this post is coming from not the person who originally uploaded it. Rather, it's coming from the middleman who received it from the person who originally uploaded it and has been sent to a contact on their contact list. So all they have to do from here to see the post in Town Square is click on the contact button. And notice that this person is not signed into Townsquare. Once this loads, they can check out the property, they can RSVP, see any additional information that was put down here, click through the photos, just like any other buyer. What we'll do from here is now we'll have this person submit an offer. And there we have it. Information's typed in, and we'll have this Buyer, submit the offer. Okay, now we'll head back over to the middleman's account and the seller's account to show you what it looks like whenever this offer is successfully submitted by a person who, one, came from the middleman, not from the seller, and two, is not signed in. In other words, they're just a random person on a contact list who has received this property. So here we are back in the seller's account, and I'll show you what it looks like whenever a person that is provided by the middleman who's interested in the property submits an offer on this person's post, on the seller's post. It's pretty cool. So we'll click on interested, interested buyers, and we can see that this is the original buyer that we showed in part 1 submitting an offer, but this is the buyer that we just showed submitting an offer on the sales@townsquare.com account that was only on the middleman's contact list. You can see that because the middleman has not released the information of this, this buyer to the seller, that the information is redacted and not available for the seller to see. And we did that very intentionally. I'll show you now what that looks like from the middleman's side, because he'll be able to see all this information, because we want to give the middleman the control over the contacts they upload to Townsquare. Back here on the middleman's account, we can see that there's one pending notification for this property, and we can click on details. Here we're back in the room, and then we can click on interested buyers, and now we can see the person that was from that contact list who expressed interest in the property that was shared with them, and we can see all the contact information for that person. Because they are a guest, a room is not possible to be opened. However, as the middleman, you could always reach out to this person and say, "Hey, I do all of my communication about these posts on Townsquare. Please sign up for a free Townsquare account," and then all of this information will be transferred over into their account, and they can chat inside of a room with you if you're acting as the middleman. But again, the big thing I want to point out here is that the person's name and the phone number and the email address that is exclusive to the person who owns that contact in this transaction is only visible to the middleman. On the seller's account, we saw that it wasn't accessible. That's because this middleman has not clicked this button yet, this Release to Seller button, and I'll explain exactly why that is. So we go back over into Overview. And now let's say that this middleman goes back to the seller and says, hey, I have a buyer that's interested. I'm sure that you just saw that. We have to sign an agreement before I'm willing to release this person to you so that they can come in and purchase the property for their offer price of $245,000. So I'll show you now how that works, where a file is uploaded and signatures are requested by this middleman of the seller. Really quick before I show you what the signing process looks like, just to play this out, I wrote up this message and sent it over to the seller. It says, "I brought a really strong buyer who's interested in this property. I'm going to upload my standard JV agreement to this room and request that you sign it. Please review and sign it, then I'll release the buyer to you." So now let's go in and upload some files. OK, now the file has been uploaded, and now as the middleman, we will request signatures within the Townsquare room of the seller. So we just have to click on "Request Signatures" and then select this JV agreement. Just let the HelloSign modal pop up, and here we are. So here we'll add the email address of the seller, which is Okay, now that the seller's information has been added, we could add other signers, but right now it's just us, the middleman, and this— the seller of this property. And then here we can add signature fields anywhere that we'd like. Just like you would with any other type of agreement. Whoops, let's do initials. Me now to have us and we'll do date signed. And the great thing is that this is all included with your Townsquare membership. You don't have to pay extra for HelloSign. It's all included directly inside of your Pro, Elite, or Ultra Townsquare membership. And the best part is that this will all be saved inside this room so you can collect and organize all of the necessary documents for each transaction you do. So we'll click Send for Signatures, and on doing that, the Paul at Townsquare that we just requested signatures of will receive an email where they will fill out all of the information here via a HelloSign plugin in their email. Okay, now let's go back over and I'll show you exactly how that looks from the seller's perspective. Alright, here we are in my email, the seller's email, seeing that the middleman, Kevin at Townsquare, is requesting that you sign some documents. We'll open this up just like you would with any other HelloSign document sent to you. And then this is not legally binding because we're doing a demo. Alright, once we've clicked through that it's all been agreed to. And if we head back over to Townsquare, I'll show you inside this room that the document is now available for us to see. And down here under documents, we can see that this signed packet, that is the completed document, has been uploaded directly to this room. So we'll download that and we'll open it up. We can review the document and keep it on our computer or just keep it inside this room. Again, the room is specific to the interaction that the seller is having with the middleman on this post. All right, I think that's it for part 3. In part 4, I'll show you what it's like for the middleman to release that buyer who showed interest in the property to the seller.
Seller.
Pretty self-explanatory, but I'll show you how it works in the next video. Thanks. All right, welcome back to the fourth and final part of our demo. What we see here is the middleman's account, and we can see that this button is available for us to release this buyer that we have provided to the seller— release them to the seller by clicking this button. And again, what that What that does is it removes the redaction that we will see on the seller's side that prevents the seller from seeing the buyer's name, phone number, and email address. I'll switch over and show you what that looks like real quick one last time. And real quick here on the seller side, we can see that because this hasn't been released yet, the information about the buyer is redacted. So if we go back over to the middleman's account and we click that release button, this will become visible for the seller to then have access to and contact this buyer. So because the middleman and the seller signed those documents that we saw that were uploaded to the room in part 3, now the middleman is ready to release this buyer to the seller. And we can see this message pops up that says, "Releasing to seller will make their contact info of this buyer immediately available to the seller." So release that to the seller, and I'll show you what it looks like on the seller side with that contact information now available. And there it is. The seller can now see this person who came from the middleman's contact list and was shared after the document was signed in their room with the seller. So the seller can now reach out to this person with their first name, last name, phone number, and email address and say, maybe sign up for Townsquare, create a free account, and exchange information with me about this property through Townsquare. That way all of your stuff is in one place. Couple more things before we finish up the demo here is I hope that it's super clear that the reason why we've done things this way is to give that middleman full control over the contacts they're bringing to Townsquare. We don't want there to be any sharing of information that isn't knowingly done by the users of Townsquare. In other words, we want to give them full control control over their contacts that they're bringing to our platform. And we're doing that through a bunch of different ways, through the rooms and through this redacted information and the releasing of that information to the seller whenever this middleman feels like they're ready to do so. It should also be noted that the middleman never actually has to do this. They could have signed a document with the seller and then said, okay, I'm going to act as liaison in this whole situation and never release the buyer's information. If they wanted to. They could go to the closing and handle things exactly as they'd like without the seller ever having to receive the buyer's information. Now, we all know that's not 100% possible with the county records showing the information of the company or of the person who ends up purchasing the property, but at the very least on Townsquare, we want to make sure that the middleman has the full control over who receives information about the contacts that they're bringing to our platform. And then finally, last but not least, one thing I want to point out that I really think is interesting that we've created here at Townsquare is, if you remember, the info@townsquare submitted an offer organically because it was a buyer on the seller's contact list. It was also an email. On the middleman's contact list, but because info@townsquare received the email from the seller first about this post, this info@townsquare never received any information about the post from that middleman. We've done some really cool stuff on the backend to make that possible, and we hope that you're as excited about it as we are. Essentially, what it does is it says whoever sends sends the post to each email first gets to own that buyer. If that buyer has received information about that post, they get to own that buyer before everybody else, even if everybody else tries to send information to that buyer about that post. That way we eliminate any duplicate emails being sent to info@townsquare, and we're able to assign what we call attribution to the person who originally sent the post to that buyer. So I think that about sums it up. That's the end of part 4. That's the end of our demo here. We hope that you really enjoyed it and enjoy using our platform. If you have any questions at all, you can contact us at either of these two emails. Info is a good way to ask us questions, and sales is a good way to talk to our sales team about signing up and our different options of memberships. We have the Pro membership, Elite, and Ultra that afford you different things. You can check out all that information on our homepage at twnsqr.com. Thanks again for watching this. We hope to see you on the platform.
Alright everyone, so now that you reached the end of these videos, it's time to use that code MAX so you can save some money.
And if you guys have any questions at all, my team and I are standing by to help with anything we possibly can. Don't hesitate to reach out to us via email or via intercom We have a bunch of other demos set up. Anything you have questions about, we're here to help.
Alright guys, welcome to the Townsquare family. I'll see you inside.
More from Paul
EP 85 - Creating A Wholesale Real Estate Marketplace with Paul Wakim of TwnSqr